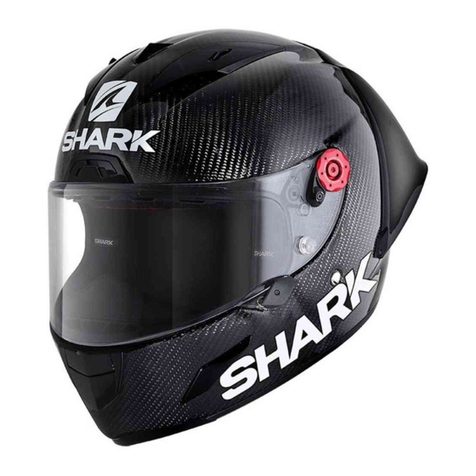
Shark Spartan GT Carbon User manual

Spartan GT Carbon - Spartan GT
Spartan GT Carbon - Spartan GT - V1.6 - 121519
OWNER’S MANUAL - MANUEL D’UTILISATION - BENUTZERHANDBUCH - LIBRETTO ISTRUZIONI - MANUAL DEL USUARIO
WARNING!
Carefully read, understand and follow the instructions
provided in this manual, and keep it in a safe place for
future reference. If you have any doubt whatsoever regarding
the use or care of your helmet, please see your retailer for
assistance or advice. Failure to follow the warnings and
instructions provided herein can result in the failure of the
helmet to protect you in an accident, resulting in a head
injury or death.
ATTENTION !
Veuillez lire avec attention, comprendre et suivre les
instructions fournies dans ce manuel, et veuillez le garder en
lieu sûr pour vous en servir ultérieurement. En cas de doute
concernant l’utilisation ou l’entretien du casque, veuillez
demander l’aide ou l’avis de votre revendeur. Tout non
respect des précautions et recommandations fournies dans
ce manuel peut entraîner une défaillance dans l’efficacité du
casque à vous protéger en cas d’accident, provoquant une
blessure grâve ou la mort.
WARNUNG!
Lesen Sie diese Anleitung aufmerksam durch und bewahren
Sie sie sorgfältig auf. Bei Fragen zur Verwendung oder Pflege
Ihres Helms wenden Sie sich an Ihren Einzelhändler. Falls Sie
die Warnungen und Hinweise dieser Anleitung nicht befolgen,
kann das die Schutzwirkung des Helms im Falle eines Unfalls
beeinträchtigen, was zu einer schweren oder tödlichen
Kopfverletzung führen kann.
ATTENZIONE!
Leggere con attenzione, capire e seguire le istruzioni fornite
in questo libretto e conservarlo in luogo sicuro per potersene
servire ulteriormente. In caso di dubbio riguardo l’utilizzo
o la manutenzione del casco, chiedere l’aiuto o l’avviso
del proprio rivenditore. Il non rispetto delle precauzioni e
raccomandazioni fornite in questo libretto può provocare
una mancanza dell’efficacità del casco a proteggere in caso
d’incidente, provocando una ferita grave o la morte.
ATENCIÓN!
Lea atentamente, siga las instrucciones de este manual y
guárdelo en lugar seguro para futuras referencias. Si tuviera
cualquier duda sobre la utilización o cuidado de su casco por
favor diríjase a su establecimiento habitual. No seguir los
avisos y consejos de utilización presentes en este manuscrito
podría disminuir la protección para la cual este casco esta
diseñado, pudiendo causar traumatismos craneales o incluso
la muerte en caso de accidente.
“This user’s manual and its images can not be considered as
contractual. SHARK reserves the right to improve the quality of pro-
duction. The images contained in this document are SHARK’s exclu-
sive property. Any reproduction is forbidden“.
“Ce manuel d’utilisation ainsi que les images contenues ne
peuvent être considérés comme contractuels. SHARK se réserve le
droit d’améliorer la qualité de la production. Les images contenues
dans ce document sont la propriété exclusive de SHARK. Toute re-
production est interdite“.
“Diese Bedienungsanleitung und seine Bilder sind nicht
Vertragsbestandteil. SHARK behält sich das Recht vor, die Qualität der
Herstellung zu verbessern. Die in diesem Dokument enthaltenen Bilder
sind der alleinige Besitz von SHARK. JedeVervielfältigung ist untersagt“.
“Questo manuale d’uso e le immagini in esso contenute non
possono essere considerati come contrattuali. SHARK si riserva il
diritto di ottimizzare la qualità della produzione. Le immagini ripor-
tate nel presente documento sono di proprietà esclusiva di SHARK.
Riproduzione vietata“.
“Este manual del usuario y sus imágenes no pueden ser conside-
rados como contractuales. SHARK se reserva el derecho de mejorar la
calidad de la producción. Las imágenes contenidas en este documento
son propiedad exclusiva de SHARK. Prohibida toda reproducción».

2
WARNINGS and INSTRUCTIONS
1. Always be careful when riding. Even though
this helmet meets or exceeds global standards
applicable to helmet manufacturing, still it
cannot fully protect the user from all possible
shocks at both high and low speeds. Every type
of safety gear has its limitations, and a head
injury is indeed possible in an accident even
when a helmet is being worn. Nonetheless, in
order to be protected from a fatal accident or
permanent disability due to a head injury, the
helmet size must absolutely correspond to the
size of your head; moreover, the chin strap
must be adequately tightened, as indicated in
this manual.
2. This helmet has been designed so as to absorb
the impact by the partial destruction of the
shell and/or internal damper. This damage may
not in fact be visible. Consequently, should the
helmet be subjected to an impact, even in the
event of simply being dropped on the ground, it
must be returned for verification, replacement or
disposal, regardless of whether any deterioration
is apparent. In case of doubt and if you’re not
sure whether this rule applies to the shock
in question, contact your retailer prior to any
subsequent use of the helmet.
3. Like all products, a helmet can become
deteriorated over time under normal use
conditions. Before each use, be sure to inspect
the helmet for any sign of deterioration or
damage. The helmet size must always correspond
to your head size. If such is no longer the case,
then the helmet has expanded and you’ll need to
replace it. Never wear a damaged helmet. Even if
the helmet is not damaged or deteriorated, it is
recommended to buy a new one every five years.
4. No modification is ever to be made to the
helmet. Never drill or cut any helmet component.
Even the slightest modification can degrade the
helmet and, as a result, reduce its protective
capacity in the event of an impact.
5. Handle the helmet with the utmost precaution.
Never sit on it or throw it on the ground. Never
ride with the helmet dangling on any part of
the bike.
6. Never use gasoline, petroleum products,
chemicals or any solvent when cleaning the
helmet, the shell or the visor. Moreover, never
expose your helmet to the vapours of these
solvents (e.g. by leaving it on the plug of
your motorcycle gas tank). The helmet may
become seriously damaged by these chemical
agents, without being readily noticeable, thus
compromising your protection. Only use mild
soap, warm water and a soft cloth to clean and
wipe both the helmet and visor.
7. Never apply paint,decals or adhesive tape onto
your shell or visor. These items may damage your
helmet, without being readily noticeable, thus
reducing your helmet’s level of protection.
8. When wearing the helmet, your hearing will
be less acute, and both your field of vision and
head movements will be constrained. Be sure
to adapt your riding to account for this sensory
impairment.
9. Dry your helmet at room temperature. Never
expose it to a temperature above around
160°F/70°C, which could occur for example if
your helmet is left on the passenger seat or in
the boot of a car.
Always keep the helmet far from heat sources,
such as the bike’s exhaust pipe or the top case.
10. For any question or comment regarding your
helmet, please contact the SHARK Company or
your nearest retailer.
We do not guarantee the capacity of this
product to fully protect its user against all
possible shocks at either high or low speed, or
against all potentially fatal injuries. The helmet
user hereby acknowledges and recognises
the presence of risks inherent in riding a
motorcycle, which are not strictly restricted to
shocks, regardless of their magnitude, at high
or low speed. By purchasing and using this
product, the user is expressly assuming and
accepting, willingly and knowingly, these risks
and moreover discharges the SHARK Company
of all liability, up to the maximum limit allowable
under the law, for any damage that may occur.
ANATOMY OF THE HELMET

3
6 A
XS 53/54
S 55/56
M 57/58
L 59/60
XL 61/62
XXL 63/64
6 B
6
2
7
3
89
5
1
4
• Warning and instructions ............................ 2
• Anatomy of helmet ............................... 3
• A helmet in your size ............................ 4 - 5
• The chin strap ............................... 6 - 7
• Emergency system ............................. 8 - 9
• Textile parts ............................... 10 - 14
• Visor screen ................................. 15
• Air stream .................................. 16
•Ventilations - Sun visor ............................ 17
• Easy Fit /Sharktooth .............................. 18
• Legal information ............................... 19
1) VZ300 visor
2) Sun visor
3) Sun visor activation button
4) Upper ventilation
5) Lower ventilation
6) Chin strap buckle:
6a) Double-ring
6b) «Precise Lock»
7) Visor grip and air stream
8) Emergency system
9) Retractable breath guard
WARNING! When riding on French roads, the
national driving code requires that safety re-
flectors (supplied separately in a pouch) are affixed
as shown in the enclosed drawing.
WARNING! Since the United States has
adopted its own specific regulatory
framework, helmets awarded only the ECE certifi-
cation cannot be worn on American roads without
the complementary DOTFMVSS 218 certification.
ANATOMY OF THE HELMET
4
B
WARNING! No helmet can fully
protect users against all possible
high or low-speed shocks.To ensure an
efficient level of protection however, the
helmet must be sized appropriately and
the chin strap adequately tightened, as
indicated in the manual. It is hazardous
not to use a correctly sized helmet or
not to sufficiently tighten the chin strap
closing system since the helmet may
become detached from the head in the
event of an accident, thereby causing
serious or even fatal injuries.
CHOOSE YOUR SIZE
Each helmet, sized from XS to XXL,
has been designed for a given head
shape. To accurately measure your head
circumference, unroll a tape measure
horizontally at a 2.5-cm distance above
your eyebrows. If the measurement ob-
tained lies between two sizes, start by
trying the smaller helmet. Keep in mind
that due to the wide variation in skull
shapes, these references merely serve
to guide you to the size best adapted to
your particular head. To ensure efficient
protection, you’ll need to verify that
the helmet fits your head snugly. When
choosing a new helmet, be sure to verify
that your head slides all the way into the
helmet, with the top line of the field of
vision being positioned above your eye-
brows. Also ensure that the chin strap is
sufficiently tightened, as shown on the
following page.
1. The head must be fully enveloped by
the helmet and the cheek pads must pro-
vide adequate support. Should this not
be the case, the helmet you selected is
too big, so try the next smaller size (see
Figure A).
2. With the chin strap appropriately
tightened, make sure the helmet does not
shift too much from left to right and from
top to bottom. You should feel your skin
stretch around the head and face when
A HELMET IN YOUR SIZE A HELMET IN YOUR SIZE

5
CD
adjusting the helmet. Should this not be
the case, the selected helmet is too big,
try the next smaller size (see Figure B).
3. With the chin strap fastened, grab the
back of the helmet by its base and try
to remove it from your head by a rota-
tional movement. Next, try to remove
the helmet by grabbing it at the base of
the chin guard. You must perform these
movements in expending a sufficient
amount of effort. If the helmet starts to
loosen, then the selected helmet is too
big, hence try the next smaller size.
4. Lean your head forward as much as
possible.The base of the chin guard must
not touch your chest (see Figure C).
5. Now lean your head backward as
much as possible.The base of the helmet
must not touch your back (see Figure D).
Avoid bunching or attaching your hair in-
side the helmet.
Do not place anything in or on your hair
inside the helmet. Avoid adding anything
inside the helmet to adjust its position on
your head.
For questions regarding choosing the
right helmet size, please seek advice
from your retailer.
Each of these steps needs to be repeated
throughout the helmet use life since
the cushiony foam may alter over time.
Should the foam no longer be sufficient-
ly thick when wearing the helmet, it will
need to be replaced.
WARNING! Never lend your
helmet without first verifying, in
accordance with instructions laid out in
this manual, that it fits the other person
snugly.
WARNING! If in following these
instructions, the helmet you iden-
tify is not perfectly suitable, DO NOT
WEAR IT. Instead, choose a different size
or model.
A HELMET IN YOUR SIZE

6
ABC
DEF
CHIN STRAP
Depending on the various versions and the
country concerned, your Spartan GT Carbon -
Spartan GT is equipped with a chin strap with
a “Precise Lock” rapid buckle with a snap lock
or one with a double-D ring. Proper use of the
chin strap is critical for proper performance of
the helmet. Never alter your chin strap in any
way. For example, never cut it or add holes, or
apply buttons, studs or other items to your chin
strap. During the life of your helmet, be sure that
the chin strap never suffers any type of abrasion
or cut, and that its total length does not change.
If it does, replace your helmet.
PRECISE LOCK
The «Precise Lock» system with ratchets
enables making fine and accurate adjustments
to the helmet fit, thanks to the extended length
of its notched part.
At the time of purchase however, it is essential
to adapt the chin strap length to your head
shape. Modify the strap length using the adjust-
ment buckle (see Figs. A through D).
Slip on your Spartan GT Carbon - Spartan GT
helmet and activate the locking system. When
the «Precise Lock» is set in intermediate posi-
tion, the chin strap must be tight enough under
the chin to provide firm support of the helmet,
yet without causing any discomfort or pain.
To lock the chin strap in place, simply insert
the tab into the designated slot on the buckle
until reaching the preferred level of tension
(see Fig. E). The tab automatically engages and
locks in place.
To unlock the chin strap, the lever arm needs to
be pulled (Fig. F) and the tab released from the
buckle. Even though the notched tab allows for
fine-tuning upon each use, it is still important
to frequently verify the correct strap length
setting.
WARNING! Never ride with the chin strap
unfastened or insufficiently tensioned,
even if the inside padding provides you with
a feeling of support: the helmet may come off
during a fall.
Never apply lubricants, acid, grease or solvents on
any chin strap buckle component.
CHIN STRAP

7
B
C
D
WARNING! Never use the loop as the sole
means for closing the chin strap. To ensure
adequate tightening, the chin strap must be
inserted into the double-D buckles in strict
accordance with the instructions. Any misuse of
the chin strap may result in your helmet coming
off during an accident, thereby leaving your
head exposed without any protection. Try pulling
on the chin strap with your fingers. If the strap
loosens even to the slightest extent, you haven’t
properly closed the chin strap in the double-D
buckles. If so, repeat the steps described opposite.
Never ride with the chin strap open, inadequately
closed or poorly positioned. Even if the cheek
pads give the impression that the helmet
is providing secure support, it would still
come off during an accident, thus leaving
your head exposed without any protection.
Should you have any doubts concerning
the helmet closing system, don’t use
the helmet. Ask your retailer for advice.
DOUBLE-D RING
1. Slide the longest part of the chin strap through the two
rings, while verifying that the comfort pad is correctly
positioned between the strap and your neck (see Figure A).
2. Form a loop with the end of the chin strap around the
outer ring and reinsert it into the inner ring (see Figure B).
3. Pull on the strap end until the chin strap is taut. The chin
strap must be positioned against the neck and not under
the chin. It must be as tight as possible without causing
pain or obstructing breathing (see Figure C).
4. Slide the free end of the strap into the plastic loop in
order to prevent any flapping of the strap in the wind
(see Figure D).
CHIN STRAP

8
EMERGENCY SYSTEM
REMOVE THE HELMET IN THE EVENT OF AN ACCIDENT
Your Spartan GT Carbon / Spartan GT model has
been equipped with a system that allows effort-
lessly removing the helmet in the event of an
accident so as to avoid exacerbating any injuries.
1- Remove the anti-fog breath guard(s).
2- Grasp the central «Emergency» tab and pull it
toward the bottom of the helmet to begin releasing
the wrap-around neck roll.
3- Separate the 2 ends of the neck roll by unfaste-
ning the plastic parts; next, spread apart each
side to provide access to the cheek pads and chin
strap.

9
EMERGENCY SYSTEM
4- Release the chin strap.
5- Locate the cheek pad’s «Emergency» tabs.
Remove the cheek pads by pulling forward in a
diagonal motion.
6- Remove the cheek pads. At this point, the pro-
fessional will complete the operation and extract
the helmet.

10
CLEANING THE INTERIOR
All interior fabric materials are washable; to avoid
their deterioration, it is necessary to strictly adhere
to the following guidelines:
The cheek pads and peak must be hand-washed
in warm soapy water (at approx. 30°C). Avoid
using harsh detergents, but rather a small dose
of detergent specifically designated for delicate
fabrics or else a very mild soap.
Prior to helmet use, it is essential to ensure that
the fabrics and foams have completely dried. This
drying step must be carried out at room tem-
perature. Never iron any of the fabric materials.
For parts with a leather finish or fabrics bonded
to safety components, use a sponge or slightly
dampened cloth with just a bit of mild soap and
then rinse in clean water.
Avoid using too much water on components made
of polystyrene.
You must fully ensure that all interior parts are
perfectly dry before using the helmet.
WARNING! Damaging the internal foam
will alter your actual helmet size. If no
longer adjusted to fit your head, the helmet may
come off, thus leaving your head exposed without
protection and potentially causing serious, or even
fatal, injuries.
THE TEXTILE PARTS
The Spartan GT Carbon - Spartan GT comfort
fabrics and foams will help you better appre-
ciate your helmet’s performance. The parts in
contact with your skin are made with a fabric
guaranteed to be pleasant to the touch, in
addition to offering a high level of perspiration
absorption and good resistance to ageing. By
relying on our surface treatment, we have
successfully limited the risks of mould and
bacteria build-up.
WARNING! Despite being rigorously selec-
ted for their strength and durability over
time, all parts of the interior lining are subjected
to normal wear, depending on: the level of care
and maintenance, the time in use, and the acidity
properties of your perspiration. Should you observe
wear-induced ageing, we advise replacing the
interior fabric and foam in order to extend the
lifetime of a perfectly clean helmet capable of pro-
viding the requisite level of comfort. Your retailer
may be able to propose replacements and, as an
option, cheek pads of different thicknesses and
densities should the standard choices not match
the morphology of your face.
WARNING! Each time you put on your
helmet, check the fit as discussed in
“Choose your size“.
TEXTILE PARTS

11
TEXTILE PARTS TEXTILE PARTS
DISASSEMBLING THE HELMET INTERIOR
1- Separate the 2 parts of the chin strap.
Remove the anti-fog breath guard(s).
2-
Extract the wrap-around neck roll starting
from the front by using the «Emergency»
tab. Keep removing the plastic parts on each
side and then fully remove the neck roll.
3-
Detach the cheek pads by pulling on the
«Emergency» tabs diagonally toward the
front and bottom of the helmet.

12
4 - Unfasten the snaps at the back of the
peak and then withdraw the front plastic
part from its slot. Remove the peak.
REASSEMBLING THE HELMET INTERIOR
1 - Reposition the peak. Begin by sliding
the front part into its slot. All 3 clips must
be firmly inserted into their guide.
2 - Refasten the snaps on the back part and
return the peak to its proper position.
TEXTILES PARTS

13
3 - Put the cheeks back on by placing the
studs at the beginning of their slots, taking
care not to jam the «Emergency» tab, then
lock by sliding them backwards. Begin with
the front part. Rescratch the velcro.
4 -Begin by locking the centre.
5 - Then reinstall the sides.
6 - Complete repositioning of the wrap-
around neck roll by fastening the back part.
Slide the plastic part between the shell and
the polystyrene.
TEXTILES PARTS

14
7- Next, place the main anti-fog breath
guard into its rightful place by sliding the
plastic parts between the shell and the
wrap-around neck roll.
8 - Refasten the snaps and reposition the
breath guard extension Velcro.
WARNING! The interior padding is cri-
tical to maintain the correct fit of the
helmet on your head. If you have any doubt
whatsoever regarding the removal or repla-
cement of the interior padding, DO NOT USE
YOUR HELMET. Contact your retailer for assis-
tance or advice. NEVER use your helmet with
any part of the interior padding removed. The
helmet will not protect you in an accident.
WARNING! The polystyrene lining and
interior padding are critical to properly
fit your helmet on your head. An impro-
per fit could cause your helmet to become
dislodged in an accident, leaving your head
unprotected and resulting in severe head
injury or death. If you are not sure that
you properly replaced the comfort padding,
DO NOT USE YOUR HELMET. Contact your
retailer for assistance or advise.
TEXTILES PARTS

15
VISOR SCREEN
REMOVAL OF THE SCREEN
1- Slightly open the visor by pressing the
button, then lift.The circle on the visor must
be aligned with the circle on the shell.
2- Next, pivot the locking pin toward the
front. Repeat this same step on the other
side.
3- Remove the visor by proceeding with a
pulling motion toward the front.
WARNING! If you are not sure that you
properly replaced the visor, do not use the
helmet. The visor could suddenly and without
warning become detached from the helmet while
riding, causing you to lose control of your motor-
cycle, resulting in an accident, personal injury, or
death. Contact your retailer for any assistance or
advice.
WARNING! While riding at highway speeds,
do not ride with an open visor and do not
try to open the visor. The visor could become
dislodged, leaving your eyes and face unprotec-
ted. In addition, your head could be pulled to the
side. These events could cause you to lose control
of your motorcycle, resulting in an accident,
personal injury or death.
WARNING! Tinted or dark visors should
never be used at night or under poor visibi-
lity conditions as they reduce your ability to see.
Never ride with a fogged visor.
WARNING! If your visor no longer provides
you with clear visibility after a period of
service, you must immediately replace it. Never
ride with your vision obscured in any way. Always
ride with perfect visibility.

16
VISOR SCREEN
INSTALLATION OF THE SCREEN
1- Introduce the visor into its slot in a slight-
ly inclined position. Fully insert the visor into
its slot and keep pushing until it «clicks».
2- Realign the circle on the visor with that
on the shell, just like during removal. Now
press and pivot the locking pin backward in
order to lock the visor. Repeat this step on
the other side. Close the visor.
To adjust visor hardness and friction, use
an Allen wrench. Screw tighter to harden,
unscrew to relax.
WARNING! If you are not sure that
you properly replaced the visor, do not use the
helmet. The visor could suddenly and without
warning become detached from the helmet
while riding, causing you to lose control of your
motorcycle, resulting in an accident, personal
injury, or death.Contact your retailer for any as-
sistance or advice. Do not ride with an open
visor and do not try to open or adjust the visor
while riding. The visor could suddenly and wit-
hout warning become detached from the helmet,
leaving your eyes and face unprotected. In ad-
dition, your head could be pulled to the side,
causing you to lose control of your motorcycle.
These events could cause you to lose control of
your motorcycle, resulting in an accident, personal
injury or death.
SUN VISOR
1 - Your helmet has been equipped with an
internal sun visor. To use this accessory, redirect
the arrow toward the front. To cover the sun visor,
reposition the arrow toward the back.
NEVER ride with the sun shield as eye protection.
You must always ride with the visor in the lowered
position, as described in the previous section.

17
A
B
C
D
E
SUN VISOR
WARNING! Do not try to raise lower or adjust your sun
shield while riding. You could lose control of your motorcycle,
resulting in a accident, personal injury or death. Even if the
manipulation of the sunshield is easy, never operate while riding.
Tinted or dark visors should never be used at night or under poor
visibility conditions as they reduce your ability to see. Never ride
with a fogged visor
The sun shield is operated using the button in the upper ventilation.
When the sun shield is lowered, the button is in a forward position;
to raise it, move the button toward the back.To ensure its protection
and lengthen its lifespan, the external surface of the Spartan GT
Carbon / Spartan GT sun shield has been given an anti-scratch treat-
ment. To maintain and clean it, please follow the same instructions
as for the external surface of the visor.
WARNING! If your visor and/or sun shield no longer provide
you with excellent visibility after a period of service, it is absolutely
essential for you to replace them. We advise you always to ride with
perfect visibility. Never use sunshield as unique protection, without
the main visor. You must always ride with visor down as described
in previous section.
REMOVAL
- Place the sun visor in its low position.
- Move the sun visor as indicated by the arrow to release
the hook (Fig. A).
- Gently pull the sun visor downward (Fig. B).
- Detach the sun visor by the side (Fig. C).
REPLACEMENT
Carry out the above operation in reverse order:
- Move the handling button to the low position;
- Clip the sun shield on at one side and then the other (Fig. D).
- Using a screwdriver or similar pointed instrument,
apply pressure to the central fixing button and then clip the sun shield
back on by lifting it slightly (Fig. E).
WARNING! If you are not sure that you properly replaced
the sun shield, do not use the helmet. The sun shield could
suddenly and without warning become detached from the helmet
while riding, causing you to lose control of your motorcycle, resulting
in an accident, personal injury, or death. Contact your retailer for any
assistance or advice. NEVER ride with the sun shield as eye protection.
You must always ride with the visor in the lowered position, as
described in the previous section.

18
AIR STREAM
AIR STREAM
1- Slightly open the visor by pressing the
locking button to release it.
2- Lower the visor once again in placing
it against the button without applying any
force.
3- To completely close the visor, lower it
until reaching the locking position.
LOWER VENTILATION
1 - To use the lower ventilation, place the
arrow in the low position.
Reposition the arrow in the high position to
close this ventilation.

19
VENTILATIONS
UPPER VENTILATION
1 - To use the upper ventilation, shift the
button toward the front (closed) or back
(open).
Warning! Do not open or close any vents
while operating your motorcycle. You
could lose control of your motorcycle, resulting
in an accident, personal injury or death.
SPOILER
1 - To extract hot air, open the vent by
shifting the arrow toward the bottom. Close
the vent by placing the arrow once again in
the upper position.
VENTILATIONS

20
EASY FIT - SHARKTOOTH
Your SHARK Spartan GT Carbon - Spartan
GT has been designed to provide additional
«comfort» to riders wearing glasses thanks to
the SHARK EASY FIT system.
The two cheek pads are made of a comfort
foam material in order to accommodate the
temples on a pair of glasses.
SHARKTOOTH
Your Spartan GT Carbon - Spartan GT
helmet is SHARKTOOTH-ready, meaning
it has been preassembled to host the
SHARKTOOTH feature.
As such, you’ll find a slot specially added
to house the battery at the back of the
helmet, underneath the wrap-around neck
roll, along with a space for the microphone
in front of the helmet. As for the earbuds, a
cavity has been reserved inside the cheek
pads.
The battery is easily rechargeable since
it remains accessible from the exterior wi-
thout having to disassemble the neck roll.
The SHARKTOOTH system allows you to
communicate via Bluetooth as simply and
easily as possible.
For riders on city streets, highways or
the open road who’d like to communicate
while enjoying their ride, the hands-free
SHARKTOOTH Bluetooth kit for mobile
phones and Smartphones is a top priority
accessory.
It proposes a bike-to-bike intercommu-
nication system with other SHARKTOOTH
devices, quickly connecting with most mo-
bile phones and Smartphones; moreover, it
is both voice-activated and water-resistant.
Bluetooth audio connection to GPS navi-
gation. Music by A2DP Bluetooth stereo.
Reduces background noise, automatically
controls volume.
To access these functionalities, you’ll
need to connect your SHARKTOOTH to an
appropriate Bluetooth device.
This manual suits for next models
3
Table of contents
Languages:
Other Shark Motorcycle Accessories manuals

Shark
Shark RSR2 User manual

Shark
Shark SX 2 User manual

Shark
Shark S 800 User manual

Shark
Shark RIDILL User manual

Shark
Shark ATV-DRAK User manual

Shark
Shark Evoline 3 Series User manual

Shark
Shark SKWAL User manual

Shark
Shark Vancore User manual

Shark
Shark S 700 User manual

Shark
Shark RSF 2 RACE User manual

Shark
Shark Evo-One User manual

Shark
Shark Evoline 3 Series User manual

Shark
Shark SKWAL 2 User manual

Shark
Shark Vancore 2 User manual

Shark
Shark VARIAL User manual

Shark
Shark Race-R PRO User manual

Shark
Shark SPARTAN RS User manual

Shark
Shark Evo-One User manual

Shark
Shark RSJ User manual

Shark
Shark Micro User manual