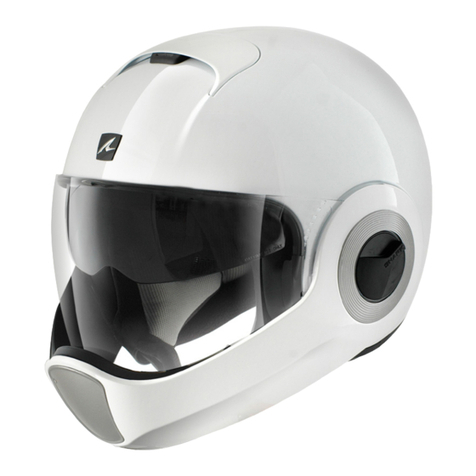
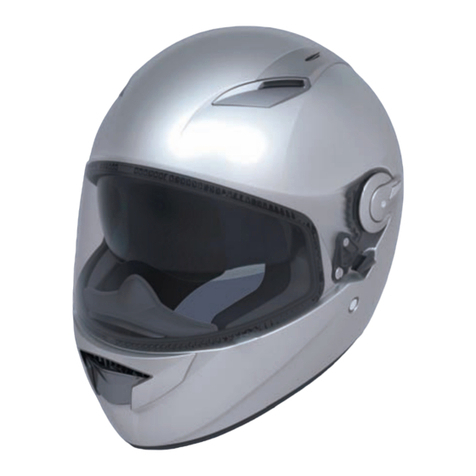
Shark Evoline 3 Series User manual

EvoLine series3
EvoLine series3 V03 - 30012012

32
Anatomie du casque ................................................................................................. 4 - 5
Un casque à votre taille ............................................................................................ 8 - 11
Conseils d’utilisation ................................................................................................ 12 - 13
Un casque évolutif ................................................................................................... 14 - 15
Intégral/Jet .............................................................................................................. 16 - 17
Jet/Intégral .............................................................................................................. 18 - 19
Aérodynamique et acoustique .................................................................................. 20 - 21
Réglage de la jugulaire ............................................................................................ 22 - 23
Jugulaire ................................................................................................................. 24 - 27
Ecran ....................................................................................................................... 30 - 35
Pare-soleil ............................................................................................................... 36 - 39
Textiles .................................................................................................................... 40 - 45
Nettoyage ................................................................................................................ 46 - 47
Ventilations .............................................................................................................. 48 - 51
Garantie 5 ans ......................................................................................................... 52 - 58
Mentions légales ..................................................................................................... 59 - 60
• Anatomy of the helmet .............................................................................................. 4 - 5
• A helmet in your size ................................................................................................ 8 - 11
• Advice for use .......................................................................................................... 12 - 13
• A helmet that can change its use ............................................................................. 14 - 15
• Integral/Jet .............................................................................................................. 16 - 17
• Jet/Integral .............................................................................................................. 18 - 19
•
Aerodynamics and acoustics .................................................................................... 20 - 21
• Adjustment of the chin strap .................................................................................... 22 - 23
• The chin strap........................................................................................................... 24 - 27
• The visor .................................................................................................................. 30 - 35
• The sun shield ......................................................................................................... 36 - 39
• Textile parts ............................................................................................................. 40 - 45
• Cleaning .................................................................................................................. 46 - 47
• Ventilations .............................................................................................................. 48 - 51
• 5 year guarantee ..................................................................................................... 52 - 58
• Legally required information .................................................................................... 59 - 60
Anatomie des Helms ................................................................................................. 4 - 5
Ein Helm in Ihrer Größe ............................................................................................. 8 - 11
Benutzungshinweise ................................................................................................ 12 - 13
Ein evolutionärer Helm ............................................................................................. 14 - 15
Integral/Jet .............................................................................................................. 16 - 17
Jet/Integral .............................................................................................................. 18 - 19
Aerodynamik und Akustik ........................................................................................ 20 - 21
Einstellung des Kinnriemens .................................................................................... 22 - 23
Kinnriemen .............................................................................................................. 24 - 27
Visier ....................................................................................................................... 30 - 35
Sonnenblende .......................................................................................................... 36 - 39
Textilien ................................................................................................................... 40 - 45
Reinigung ................................................................................................................ 46 - 47
Belüftungen ............................................................................................................. 48 - 51
5-Jahres-Garantie ................................................................................................... 52 - 58
Rechtliche Hinweise ................................................................................................ 59 - 60
• Anatomia del casco ................................................................................................... 4 - 5
• Un casco su misura .................................................................................................. 8 - 11
• Consigli d’uso .......................................................................................................... 12 - 13
• Un casco evolutivo ................................................................................................... 14 - 15
• Integrale/Jet ............................................................................................................ 16 - 17
• Jet/Integrale ............................................................................................................. 18 - 19
• Aerodinamica e acustica .......................................................................................... 20 - 21
• Regolazione del cinturino ......................................................................................... 22 - 23
• Cinturino .................................................................................................................. 24 - 27
• Visiera ..................................................................................................................... 30 - 35
• Parasole .................................................................................................................. 36 - 39
• Tessuti ..................................................................................................................... 40 - 45
• Pulizia ...................................................................................................................... 46 - 47
• Ventilazioni .............................................................................................................. 48 - 51
• Garanzia 5 anni ....................................................................................................... 52 - 58
• Diciture legali .......................................................................................................... 59 - 60
Anatomía del casco .................................................................................................. 4 - 5
Un casco a su medida .............................................................................................. 8 - 11
Consejos de utilización ............................................................................................. 12 - 13
Un casco evolutivo ................................................................................................... 14 - 15
Integral / Jet ............................................................................................................ 16 - 17
Jet / Intégral ............................................................................................................ 18 - 19
Aerodinámica y acústica .......................................................................................... 20 - 21
Reglaje de la correa ................................................................................................. 22 - 23
Correa ..................................................................................................................... 24 - 27
Pantalla .................................................................................................................... 30 - 35
Parasol ..................................................................................................................... 36 - 39
Textiles .................................................................................................................... 40 - 45
Limpieza .................................................................................................................. 46 - 47
Ventilaciones ........................................................................................................... 48 - 51
Garantía 5 años ....................................................................................................... 52 - 58
Menciones legales ................................................................................................... 59 - 60

54
1
2
4
5
7
8
9
Ecran
Pare-soleil
Bouton de mécanisme de pare-soleil
Ventilation supérieure
Ventilation inférieure
Boucle de jugulaire selon versions et pays
Joint d’embase
Joint d’écran
Mécanisme de mentonnière
1) Visor
2) Sun shield
3) Sun shield mechanism button
4) Upper ventilation
5) Lower ventilation
6) Chin strap buckle according to versions
and countries
7) Base seal
8) Visor seal
9) Chin section mechanism
1) Visier
2) Sonnenblende
3) Knopf für den Sonnenblendemechanismus
4) Obere Lüftung
5) Untere Lüftung
6) Kinnriemenverschluss je nach Version
und Land
7) Abschlusskantendichtung
8) Visierdichtung
9) Kinnteilmechanismus
1) Visiera
2) Parasole
3) Pulsante del meccanismo del parasole
4) Ventilazione superiore
5) Ventilazione inferiore
6) Gancio del cinturino in base
alle versioni e ai Paesi
7) Guarnizione di base
8) Guarnizione della visiera
9) Meccanismo del sottogola
1) Pantalla
2) Parasol
3) Botón de mecanismo del parasol
4) Ventilación superior
5) Ventilación inferior
6) Hebilla de correa según versiones y países
7) Junta de la base
8) Junta de la pantalla
9) Mecanismo de la mentonera
Boucle de jugulaire « Precise Lock »
6) “Precise Lock” chin strap buckle
Kinnriemenverschluss „Precise Lock“
6) Gancio del cinturino «Precise Lock»
Hebilla de correa «Precise Lock»
Boucle de jugulaire double anneaux
6) Double D ring chin strap buckle
Kinnriemenverschluss mit Doppelring
6) Boucle de jugulaire double anneaux
Hebilla de correa, doble anilla
3
6 6

76
Nous vous remercions d’avoir choisi
un SHARK. L’EvoLine series3 est un casque de
qualité, parfaitement adapté à une utilisation,
sur circuit, et sur route.
L’EvoLine series3 bénéficie de toute l’expé-
rience de SHARK dans le domaine de la
sécurité,il a été conçu uniquement pour une
utilisation sur un 2 roues motorisé. Conforme
aux normes internationales, ce casque ne peut
toutefois protéger son
utilisateur en toutes circonstances. Avant
utilisation veuillez prendre connaissance
de toutes les recommandations ci-après.
Le port de ce casque ne doit pas vous
faire oublier de rester prudent
Ce casque SHARK EvoLine series3 est
homologué et conforme au règlement
ECE R 22/05. Ce casque est donc confor-
me aux exigences imposées dans tous
les pays reconnaissants cette norme sur
leur territoire. Cette norme vous permet
également d’utiliser ce casque en com-
pétition dans les pays qui reconnaissent
la norme 22-05.
pour la circulation en France, le
code de la route exige que les réfléchissants
de sécurité (fournis à part dans une pochette)
soient apposés conformément au plan joint. Les
Etats-Unis et le Canada, ayant une réglementa-
tion spécifique, les casques uniquement homo-
logués ECE ne doivent pas être utilisés sur ces
territoires sans l’homologation complémentaire
DOTFMVSS 218
Thank you for choosing a EvoLine series3
helmet. The EvoLine series3 is a top-quality
helmet that is ideal for use on racing track,
urban and extra urban area.
The helmet complies with international stan-
dards but does not purport to guarantee total
protection in all circumstances.
Make sure you carefully read all of the following
recommendations before using the helmet. Just
because you are wearing a helmet does not
mean you should neglect driving carefully.
This SHARK EvoLine series3 hel-
met has been approved and conforms to the
ECE R 22/05 standard. It therefore meets the
requirements imposed on all the countries that
recognise this standard in their territory and for
racing.
for French traffic, the Highway Code
requires safety reflectors (supplied separately
in a packet) to be fitted in accordance with the
enclosed plan. In the United States and Cana-
da, specific regulations require that helmets
that only have ECE approval cannot be used
in these territories unless they have acquired
additional DOT FMVSS 218 approval.
Vielen Dank, dass Sie sich für den EvoLine
series3 entschieden haben.
Der EvoLine series3 ist ein Qualitätshelm, und
als solcher für Stadt- oder Überlandfahrten
bestens geeignet. Der EvoLine series3 profitiert
vom reichen Erfahrungsschatz von SHARK auf
dem Gebiet der Sicherheit. Er ist ausschlie-lich
für den Gebrauch mit motorisierten Zweirädern
gedacht. Trotz Einhaltung der internationalen
Normen kann der Helm seinen Träger nicht in
allen Situationen zu 100% schützen.
Bevor Sie den Helm benutzen, sollten Sie unbe-
dingt die folgenden Empfehlungen studieren.
Fahren Sie auch mit Helm stets vorsichtig.
Der SHARK-EvoLine series3-Helm ist
Zugelassen und mit der Norm ECE R
22/05 konform. Der Helm entspricht
somit den Anforderungen, die in allen Ländern
auferlegt sind, die diese Norm auf ihrem Gebiet
anerkennen.
Für den Verkehr in Frankreich
fordert die Straßenverkehrsordnung,
dass die Sicherheitsreflektoren (getrennt
in einer Hülle geliefert) gemäß beige-
fügtem Plan angebracht werden. In den
Vereinigten Staaten und Kanada, in denen eine
besondere Regelung herrscht, dürfen Helme,
die nur ECE-anerkannt sind, dort nicht ohne die
zusätzliche Zulassung DOT FMVSS 218 benutzt
werden.
Grazie di avere scelto un EvoLine series3.
EvoLine series3 è un casco di qualità, per-
fettamente adatto all’uso Stradole e sportivo
cioe, in pista. Il casco EvoLine series3 sfrutta
l’esperienza globale della SHARK
nell’ambito della sicurezza, è stato
ideato per un uso esclusivo sul 2 ruote
motorizzato. Questo casco è conforme
alle norme internazionali, però non è in
grado di proteggere l’utente da qual-
siasi evenienza. Prima dell’uso, siete pre-
gati di seguire attentamente le seguenti
raccomandazioni. Portare questo casco
non vuol dire dimenticare di essere
prudenti.
Il casco SHARK EvoLine series3
è omologato e conforme alla normativa ECE R
22/05 ed è quindi conforme ai requisiti imposti
in tutti i Paesi in cui tale normativa è in vigore.
per quanto riguarda la
circolazione in Francia, il codice stradale ri-
chiede l’apposizione dei catarifrangenti di sicu-
rezza (forniti in una custodia separata), secondo
quanto indicato sul disegno allegato. Negli Stati
Uniti e in Canada, in cui vige una normativa spe-
cifica,non è possibile utilizzare caschi omologati
solamente ECE, ma solo caschi omologati
anche DOT FMVSS 218.
Muchas gracias por haber elegido un Evo-
Line series3. El EvoLine series3 es un casco de
calidad, perfectamente adaptado para
uso sobre circuito. El EvoLine series3
contiene toda la experiencia de SHARK
en el campo de la seguridad, ha sido
diseñado exclusivamente para ser
utilizado en vehículos motorizados de
dos ruedas. De acuerdo con las normas
internacionales, este casco no puede pro-
teger a su usuario en todas las circuns-
tancias. Antes de utilizarlo no olvide leer
todas las recomendaciones que se
exponen más adelante. Llevar puesto
este casco no debe hacerle olvidar la
necesidad de ser prudente.
Este casco SHARK EvoLine series3 está homo-
logado y conforme con la norma ECE R 22/05.
Este casco está conforme con las exigencias
impuestas en todos los países que reconocen
esta norma en su territorio.
para la circulación en Francia, el
código de la circulación exige que los reflec-
tores de seguridad (incluidos aparte en una bol-
sita), se coloquen respetando el plano adjunto.
En los Estados Unidos y en Canadá, países
que poseen una reglamentación específica,
no deben utilizarse los cascos homologados
únicamente ECE sin la homologación comple-
mentaria DOT FMVSS 218.
98
Pour que le casque protège efficace-
ment tout en étant confortable, il doit être
parfaitement adapté à son utilisateur.
Le choix de la bonne taille est essentiel.
Mesurez votre tour de tête à l’aide d’un mètre
ruban en le positionnant environ à 2 cm au-
dessus des sourcils, c’est à ce point que votre
tour de tête est le plus grand. Une fois la mesure
relevée, comparez-la avec le tableau des tailles.
Essayez la taille du casque EvoLine series3 la
plus proche de la mesure obtenue, commencez
vos essais par la taille inférieure de votre tour de
tête. Si vous ressentez un point de contact trop
dur, essayez la taille supérieure. Vous devez être
maintenu assez fermement mais sans ressentir
de douleurs.
Les essais de taille doivent être
effectués jugulaire serrée (merci de vous
reporter au paragraphe en page 12-15 pour le
verrouillage de la jugulaire). Vérifiez que vous
ayez une bonne visibilité verticale et horizontale.
Vérifiez que votre tête puisse effectuer tous ces
mouvements sans gêne particulière.
Vérifiez que jugulaire serrée, le casque ne
puisse pas se «déchausser» de votre tête
lorsque vous essayez de le faire basculer avec
vos mains sur l’avant en forçant. Si le casque
sort ou est à la limite de sortir, il est soit trop
grand, soit la jugulaire n’est pas bien serrée.
Renouveler l’essai jusqu’à trouver la taille idéale.
même pour un parcours très court,
ne prêtez pas votre casque si la taille n’est pas
parfaitement adaptée.
Il est absolument indispensable que lors de
toute utilisation votre casque soit bien posi-
tionné (page 12-15).
Vérifiez que la tension de la jugulaire soit cor-
rectement ajustée selon instructions (page
12-15)
For a helmet to provide effective protection
while remaining comfortable, it has to be per-
fectly suited to its user. Choosing the correct
size is essential.
Measure the circumference of your head with
a tape measure, positioning it about 2 cm above
your eyebrows : this is
where your head is the largest. Once you
have taken this measurement, compare
it to the table of sizes. Try the size of
EvoLine series3 helmet closest to the measu-
rement obtained, starting with the size smaller
than your head measurement. If you feel that
the contact is too hard, try the size larger.
Your head should be held quite firmly but
you should feel no discomfort.
Tests for size must be carried out with
the chin strap tightened (please refer to
the section on page 12-15 for instruc-
Sizing (cm)
XS 53/54
S55/56
M57/58
L59/60
XL 61
tions on tightening the chin strap). Check
that you have good vertical and horizontal
visibility.
Check that your head can carry out all of
these movements without any particular dis-
comfort.
Check that when the chin strap is
tightened, the helmet cannot be removed from
your head when you try to move it forward by
force.
If the helmet comes off or nearly comes
off, it is too big or else the chin strap
is not correctly tightened. Keep trying
on helmets until you find the ideal size.
do not lend your helmet, even for
a short journey, if its size is not perfectly sui-
table. For each use of your helmet, it is abso-
lutely necessary to make sure that the helmet
is well positioned on your head, and that the
chin strap is properly adjusted, following the
instructions of this manual
(see page 12-15).
Damit der Helm richtig funktionieren kann, muss
er seinem Benutzer perfekt angepasst sein. Die
Wahl der richtigen Größe ist dabei wesentlich.
Messen Sie Ihren Kopfumfang mit
einem - Maßband, indem sie es ungefähr
2 cm über den Augenbrauen positionieren.
An dieser Stelle ist Ihr Kopfumfang am
größten. Vergleichen Sie das Messergeb-
nis mit der Größentabelle. Probieren Sie
die EvoLine series3 aus, die dem Messer-
gebnis am nächsten liegt. Beginnen Sie
Ihre Tests mit der unteren Größe für Ihren
Kopfumfang.
Wenn Sie einen zu harten Druck spüren,
versuchen Sie die nächste Größe. Ihr Kopf muss
recht fest gehalten werden, darf jedoch nicht
schmerzen.
Die Größentests müssen mit dem
festgezogenen Kinnriemen erfolgen (siehe Seite
12-15). Überprüfen Sie, ob Sie eine einwand-
freie vertikale und horizontale Sicht haben.
Überprüfen Sie, ob Ihr Kopf alle Bewegungen
ohne besondere Beeinträchtigung machen
kann. Stellen Sie sicher, dass sich der Helm
bei festgezogenem Kinnriemen nicht von Ihrem
Kopf «abstreifen lässt», wenn Sie versuchen, ihn
mit Ihren Händen heftig nach vorne zu kippen.
Wenn sich der Helm löst oder fast löst, ist er
entweder zu groß oder der Kinnriemen wurde
nicht richtig fest-gezogenem. Probieren Sie
so lange, bis Sie die optimale Größe gefunden
haben.
Leihen Sie Ihren Helm auch nicht
für eine sehr kurze Strecke aus, wenn die Größe
nicht perfekt angepasst wurde. Bei jedem Ga-
brauch Ihres Helmes ist es unbedingt nötig sei-
nen richtigen Sitz auf Ihrem Kopf sicherzustellen
und dass der Kinnriemen entsprechend der

1110
inclinarlo con le mani in avanti forzando.
Se il casco fuoriesce o rischi di fuorius-
cire, significa che la misura è troppo
grande o che il cinturino non è stato chiuso
accuratamente. Continuare a provare fino a tro-
vare la misura idonea.
Anche se per tragitti brevi, non
imprestare il proprio caso qualora la taglia
non sia perfettamente adatta all’utente. Per
utilizzare correttamente il casco è necessario
assicurarsi che lo stesso sia correttamento
posizionato sulla vostra testa e che il cin-
turino sia correttamente regolato così come
indicato nelle istruzioni del presente manuale
(vedi pagina 12-15).
Para que el casco proteja eficazmente,
y sea confortable, debe estar perfectamente
adaptado a su usuario. La elección de la talla
correcta es esencial.
Mida el contorno de su cabeza con ayuda de
una cinta métrica, situándola aproximadamente
a 2 cm por encima de las cejas, ya que es en ese
punto donde el contorno de la cabeza es mayor.
Una vez efectuada la medida, compárela con la
tabla de tallas.
Pruebe la talla del casco EvoLine series3 más
próxima a la medida obtenida, comenzando las
pruebas por la talla inferior de su contorno de
Beschreibung in dieser Bedienungsanleitung
richtig angepasst wurde (siehe Seite 12-15).
Affinché il casco possa garantire una
protezione efficace, pur rimanendo
confortevole, è necessario adattarlo
perfettamente al proprio utente.
È essenziale scegliere la misura corretta.
Misurare la circonferenza della propria testa
utilizzando un metro a nastro posizionato a circa
2 cm sopra le soppraciglia, punto in cui la cir-
conferenza della testa è maggiore.
Effettuata la misurazione, confrontarla con la
tabella delle misure.
Provare la misura di casco EvoLine series3
più vicina alla misura rilevata, partendo dalla
misure inferiore alla circonferenza della testa.
Qualora si percepisca un punto di contatto ec-
cessivo, provare la misura superiore. Si dovrà
percepire una certa pressione, senza tuttavia
sentire dolore.
Provare le varie misure tenendo il cintu-
rino chiuso (per la chiusura del cinturino, fare
riferimento al paragrafo a pagina 12-15).
Verificare la corretta visibilità verticale e orizzon-
tale. Verificare che la testa possa muoversi re-
golarmente, senza particolari problemi. Tenendo
il cinturino chiuso, verificare che il casco non
possa «scalzarsi» dalla testa mentre si tenta di
Sizing (cm)
XS 53/54
S55/56
M57/58
L59/60
XL 61
cabeza. Si nota un punto de contacto dema-
siado duro, pruebe la talla superior. Debe estar
sujeto bastante firmemente pero sin notar
molestia.
Las pruebas de talla deben reali-
zarse con la correa apretada (ver página
12-15). Compruebe que goza de una buena
visibilidad vertical y horizontal.
Verifique que su cabeza pueda efectuar todos
estos movimientos sin molestia particular.
Verifique que, con la correa apretada,
el casco no pueda «descalzarse» de su
cabeza al intentar hacerlo bascular con las
manos forzando hacia adelante.
Si el casco se sale o está al límite de
salirse, bien es demasiado grande o que la cor-
rea no está bien apretada. Haga otras pruebas
hasta encontrar la talla ideal.
incluso para un recorrido muy
corto, no use su casco si la talla no está per-
fectamente adaptada. Cada vez que utilice su
casco, es necesario asegurarse de que le haya
quedado bien sujeto a la cabeza y de ajustar
la correa de la barbilla, siguiendo las instruc-
ciones de este manual (ver página 12-15).

1312
Pour chausser, vous devez le saisir au niveau
des attaches de jugulaires et les écarter légère-
ment vers l’extérieur pour vous faciliter le pas-
sage de la tête (jugulaire défaite). Il est conseil-
lé, dans le même mouvement, de maintenir
avec les pouces les 2 parties de jugulaire vers
l’extérieur afin qu’elles soient bien positionnées.
Positionnez correctement les protections de la
jugulaire et serrer la jugulaire en vous reportant
aux conseils préconisés (voir page 12-15).
Vérifiez que la tension de serrage de la jugu-
laire, donc le maintien du casque, soit correcte.
Détachez la jugulaire, écartez légèrement cha-
cun des côtés, prenez votre casque de la même
manière que pour l’enfilage, retirez le casque.
Advice for use
Once the chin strap is released, you have
to take hold of the two sections by the
buckles and hold them slightly apart to
facilitate the passage of your head. While
carrying out this movement, you are
advised to keep the two sections of the chin
strap apart with your thumbs so that they are
properly positioned.
Position the protective parts of the chin strap
buckle correctly and fasten it in accordance
with the recommendations that are appropriate
to the versions and country (see page 12-15).
Check that the tension and therefore the posi-
tioning of the helmet are correct for all positions.
Release the chin strap ; hold the two sections
slightly apart as for putting the helmet on and
remove the helmet.
Greifen Sie in beiden Fällen den offenen Kinn-
riemenverschluss auf Höhe der Kinnriemen und
ziehen ihn leicht nach Außen.
Es wird empfohlen, in der gleichen
Bewegung mit den Daumen die 2 Teile des
Kinnriemens nach Außen zu halten, damit sie
richtig positioniert werden.
Positionieren Sie die Schutzteile des Kinnrie-
menverschlusses richtig und schließen Sie den
Kinnriemenverschluss durch Einfädelung der
Lasche in die für diesen Zweck vorgesehene
Öffnung auf dem Verschluss (siehe Seite 12-15).
Überprüfen Sie, ob die Spannung, also der Halt
des Helms in allen Positionen, einwandfrei ist.
Wenn dies nicht der Fall ist, müssen Sie unbe-
dingt die Länge neu einstellen, indem sie durch
den Eingriff im Stoff des Metallschiebers greifen
bis der optimale Halt erreicht ist.
2/
Ziehen Sie die Lasche des Kinnriemens heraus,
indem Sie den Hebel des Verschlusses nach
unten drücken. Halten Sie Ihren Helm auf die
gleiche Weise wie für das Aufsetzen, schieben
Sie beide Seiten leicht auseinander, nehmen
Sie den Helm ab. Um sicher zu gehen, kön-
nen Sie den Kinnriemenverschluss wieder
verschließen, um zu vermeiden, dass die
2 Teile lose sind.
1/I
Dopo aver aperto il gancio del cinturino, per
indossarlo, è necessario afferrarlo a livello degli
attacchi del cinturino e spostarlo leggermente
verso l’esterno, in modo da semplificare il pas-
saggio della testa. Si raccomanda, durante lo
stesso movimento, di mantenere, con i pollici, le
2 parti del cinturino verso l’esterno per garan-
tirne un corretto posizionamento.
Posizionare correttamente le parti di protezione
del gancio del cinturino e chiuderlo facendo
riferimento ai consigli (vedere pagine 12-15).
Verificare che la tensione, e quindi il mante-
nimento in posizione del casco, sia corretta in
tutte le posizioni. In caso contrario, è tassativo
ripetere la regolazione della lunghezza fino a
ottenere un mantenimento in posizione otti-
male.
Slacciare il cinturino, spostare leggermente
ogni lato, afferrare il casco procedendo come
quando è stato indossato, quindi toglierlo.
Una vez abierta la hebilla de la cor-
rea, para ponérselo debe coger el casco
a nivel de las fijaciones de las correas y
separar ligeramente hacia el exterior cada uno
de sus lados para facilitar el paso de la cabeza.
Se aconseja, en el mismo movimiento, mante-
ner con los pulgares las 2 partes de la correa
hacia el exterior, a fin de que queden bien
colocadas. Coloque correctamente las partes
de protección de la hebilla de la correa y cierre
la hebilla introduciendo la lengüeta en el orificio
previsto con este fin en la hebilla (ver página
12-15).
Verifique que la tensión, y por consiguiente, la suje-
ción del casco, sea correcta en todas
las posiciones. Si no es el caso, debe impe-
rativamente ajustar de nuevo la longitud
actuando en el paso del textil en la corredera
metálica hasta obtener la fijación ideal.
Libere la lengüeta de la correa tirando de ella
y de la palanca de la hebilla hacia abajo, coja
el casco de la misma forma que para ponérselo,
separe ligeramente cada uno de sus lados, retire
el casco. Para mayor precaución, debe cerrar la
hebilla de la correa, a fin de evitar que las 2 partes
sean solidarias.

1514
-
The EvoLine series3 is the first helmet that
can truly change its use; it enables you to
have an integral helmet that provides you with
all aspects of protection, safety and a water-
proof visor while being able to change to the
Jet position with a chin section that fits in
perfectly with the profile of the helmet. In this
configuration, the chin section causes no aero-
dynamic problems and no instability of weight,
and when in the Jet position it passes all the
approval tests, in particular the test of rotating
acceleration.
Even though it is easy to effect the movement,
we advise that you transform your helmet from
the Integral to the Jet position or vice versa
only when you are stationary.
-
-
-
-
-
-
L’EvoLine series3 è il primo vero casco Evo-
lutivo che vi consente di avere un casco Inte-
grale con tutte le relative qualità di protezione,
di sicurezza e d’impermeabilità della visiera,
potendo quindi passare in posizione Jet con un
sottogola che s’integra perfettamente al profilo
del casco. In questa configurazione, il sottogola
non causa alcun problema aerodinamico e di
peso instabile, la posizione Jet ha superato tut-
ti i test d’omologazione e in particolare quello
d’accelerazione rotazionale.
Nonostante la manipolazione sia semplice, a
garanzia di una maggiore sicurezza, vi consi-
gliamo di trasformare il casco da Integrale a
Jet o da Jet a Integrale esclusivamente da
fermi.
-
-
-
-
-

1716
BC D
-
-
-
-
-
Switch your helmet from a full face to an open
face configuration, in a simple way, by keeping
the helmet on your head :
Press the red button on the chin protection
(Pic.A) and the screen will slightly go up auto-
matically (AUTO-UP). Once done, push the chin
protection forward and lift it up.
If you guide it well, the chin protection will
push the screen until the top position and will
move until the back of the helmet (Pics. B,C,D)
Put your screen in lower position, now you
have an open face helmet with a protection
screen.
-
-
Per commutare il vostro casco dalla confi-
gurazione integrale a quella jet, effettuate in
maniera semplice il seguente movimento,
mantenendo il Casco sulla testa
Con movimenti ben definiti, premete a fondo
sul bottone rosso del sottogola (figura A): la vi-
siera si solleverà leggermente da sola ( AUTO-
UP). Spostate quindi in avanti la mentoniera e
sollevatela.
Perfettamente guidata, essa accompagnerà la
visiera in configurazione jet, dopodiché scom-
parirà sul retro del casco (Fig. B, C,D)
Abbassate quindi la vostra visiera : avrete così
un casco Jet con una visiera di protezione.
-
A

1918
B C
A
-
This transformation is equally easy. If your
visor is in the lower position, lift your visor
(Fig A) by pushing its central catch upwards.
Then, take hold of the chin bar on the left side
(Fig B) with the thumb and forefinger and tilt it
forward (Fig C-D). Caution: DO NOT PUSH THE
RED BUTTON ON CHIN BAR when operating; it
might damage the surface of the helmet. Once
the chin section is in the low position, push it
slightly backward until it locks with a “click”
(Fig E).
Anche in questo caso le operazioni da ese-
guire sono semplici. Se la visiera è in posizione
abassata, sollevare la visiere (Fig A) agendo sul
punto di presa centrale. Prendete poi la men-
toniera sul lato sinistro (Fig.B) tra il pollice e
l’indice e fatela rotare verso la parte frontale
(Fig. C-D). ATTENZIONE : realizzando questa
operazione NON PREMERE IL BOTTONE ROSSO
della mentoniera in quanto potreste danneg-
giare la superficie del casco. Dopo aver abbas-
sato il sottogola, ripremerlo leggermente verso
la parte posteriore fino a udire dei « clic » di
chiusura (Fig E).
-
-
-
D E
clic!

2120
-
-
-
-
AERODYNAMICS AND ACOUSTICS
The EvoLine series3 has been carefully desig-
ned to offer you the greatest pleasure in use.
The profile of the helmet, its impermeability
and the quality of the materials used enable air
noise on the crown of the head and aerodyna-
mic turbulence to be filtered as far as possible.
In order for the use of your helmet to be as
pleasant as possible, it is important for tur-
bulence or air eddies created by the fairings
not to impair the aerodynamic qualities of your
EvoLine series3 helmet. The shape of the
fairings of your motorcycle and/or your size
should not cause air eddies to reach the lower
part of your helmet.
-
-
-
AERODINAMICA E ACUSTICA
EvoLine series3 è stato studiato con cura
affinché gli utenti ne siano completamente
soddisfatti.
Il profilo del casco, la tenuta e la qualità dei
materiali utilizzati permettono di filtrare al
meglio i rumori dell’aria sulla calotta, nonché
le turbolenze aerodinamiche.
Affinché l’uso del casco sia quanto più grade-
vole possibile, è importante che le turbolenze
od i vortici d’aria creati dalla carenatura non
influenzino negativamente le qualità aerodina-
miche del casco EvoLine series3. In virtù della
forma della carenatura della moto e/o della vo-
stra taglia, i rumori generati dall’aria si perce-
piscono nella parte inferiore del casco.
-
-
-
-
-
-

2322
-
-
-
-
-
-
-
-
-
HOLDING SYSTEM
Depending on the various versions and the country
concerned, your EvoLine series3 SHARK helmet is equip-
ped with a chin strap with a “Precise Lock” rapid buckle
with a snap lock or one with a double D ring.
The “Precise Lock” snap lock system gives you precise
and accurate adjustment because of the considerable
length of its notched section.
However, it is essential on purchase to adapt the length
of the chin strap to your measurements. Adjust the
length of the strap using the adjusting buckle (Figs. A,
B, C and D). Choose your EvoLine series3 helmet and
attach the holding system. When the “Precise Lock” is
adjusted to the medium position, the chin strap must be
correctly tensioned under the chin to hold the helmet fir-
mly without causing you any discomfort or pain.
To fasten the chin strap, all you have to do is to thread
the tongue into its place on the buckle until tension is
perfect (Fig. E). The tongue connects and is automati-
cally blocked.
To release the chin strap, you have to pull on the lever
(Fig. F) and remove the tongue from the buckle. Although
the notched tongue enables you to change the adjust-
ment precisely on each use, it is important to check
frequently that the adjustment of the strap length is
correct. Warning: never ride with the chin strap loose or
insufficiently tightened. Even though the interior padding
gives you the impression of being held, your helmet risks
coming off in a fall.
Never apply lubricating or acid products or grease or
solvents to the chin strap buckle parts.
Additional safety system
Your EvoLine series3 helmet has a specific additional
holding system that minimises the risk of coming off.
This is an additional guarantee of safety that avoids
the loss of the helmet by limiting its rotation in case of
shock. However, this system should not override the
fastening and proper adjustment of the chin strap.
A
B
C
D
E
F
Boucle "Precise lock" • “Precise lock” Buckle • Verschluss „Precise
lock“ • FiBBia “Precise lock” • cierre “Precise lock”
Boucle "Precise lock" • “Precise lock” Buckle • Verschluss „Precise
lock“ • FiBBia “Precise lock” • cierre “Precise lock”

2524
-
-
-
-
-
-
-
-
-
-
-
-
SISTEMA DI TENUTA
Il casco SHArK EvoLine series3 è provvisto, in base alle
versioni e ai Paesi, di un cinturino a chiusura rapida
«Precise Lock» con nottolino o di un gancio del cinturino
a doppio anello.
Il sistema «Precise Lock» con nottolino vi permette di
effettuare regolazioni accurate e precise, grazie alla
notevole lunghezza della parte dentellata.
È tuttavia indispensabile, al momento dell’acquisto,
adattare la lunghezza del cinturino alla propria morfo-
logia. Regolare la lunghezza della cinghia agendo sul
gancio di regolazione (Fig. A, B, C, D). Indossare il casco
EvoLine series3 e collegare il sistema di tenuta. Quando
il «Precise Lock» si trova in posizione intermedia, il
cinturino deve essere correttamente teso sul mento in
modo tale da garantire una tenuta ottimale del casco in
A
B
C
Boucle "Precise lock" • “Precise lock” Buckle • Verschluss „Precise
lock“ • FiBBia “Precise lock” • cierre “Precise lock”
D
E
F
Boucle "Precise lock" • “Precise lock” Buckle • Verschluss „Precise
lock“ • FiBBia “Precise lock” • cierre “Precise lock”

2726
D
E
F
Boucle "Precise lock" • “Precise lock” Buckle • Verschluss „Precise
lock“ • FiBBia “Precise lock” • cierre “Precise lock”
posizione, senza causare problemi o dolori. Per bloccare
il cinturino, è sufficiente infilare la linguetta nel punto
previsto sull’anello fino a ottenere una tensione perfetta
(Fig. E). La linguetta s’inserisce e si blocca automatica-
mente.
Per sbloccare il cinturino, tirare la leva (Fig. F) e rimuo-
vere la linguetta dall’anello. Nonostante la linguetta
dentellata consenta di ottimizzare la regolazione ad ogni
utilizzo, è importante verificare frequentemente la cor-
rettezza della regolazione della lunghezza della cinghia.
Attenzione: non utilizzare mai il casco con il cinturino
slacciato o non sufficientemente teso. Anche qualora
il rivestimento interno vi procuri una sensazione di
mantenimento in posizione, in caso di caduta, il casco
potrebbe scalzarsi.
Non applicare mai prodotti lubrificanti o acidi, né grasso
o solvente, sugli elementi del gancio del cinturino.
Sistema di sicurezza complementare
Il casco EvoLine series3 prevede un sistema di tenuta
complementare specifico che riduce il rischio di scal-
zature. Si tratta di un’ulteriore garanzia di sicurezza
che evita di perdere il casco, limitandone la rotazione
in caso d’urto. Tuttavia, questo sistema non sostituisce
la chiusura e la corretta regolazione della tensione del
cinturino.
-
-
-
-
-
-
-
-
A
B
C
Boucle "Precise lock" • “Precise lock” Buckle • Verschluss „Precise
lock“ • FiBBia “Precise lock” • cierre “Precise lock”

2928
-
C - Pull the strap until you feel resistance
from the strap and it is held in place under your
chin without being too tight, so that you have
no difficulty in breathing.
-
C - Tirate il cinturino fino a quando non
lo sentite serrato e fermo, evitate di stringere
troppo, onde evitare problemi respiratori.
-
A - Slide the long part of the chin strap
through the two D rings, positioning the com-
fort pad correctly between the chin strap and
your neck.
A - Fate scivolare la parte più lunga del
cinturino attraverso i due anelli, assicuran-
dovi che l’imbottitura si trovi tra il cinturino
ed il vostro collo.
-
-
B - Then bring the end of the chin strap
back through the lower of the two D rings as
shown in the diagram.
B -Ora prendete l’estremitá del cinturino
e fatele ripassare attraverso i due anelli come
mostrato nel disegno.
A

3130
A
B
-
-
-
-
-
-
-
-
-
THE VISOR
The visor on your helmet is injected using a
specific polycarbonate material developed for
the excellence of its optical qualities and its
high quality performance in resisting shocks.
Your visor is certified Total Vision. Its external
surface is treated to give high resistance to
scratches. The specific treatment applied to
its internal surface limits as far as possible the
risk of misting.
In order to prolong the life of these two treat-
ments as far as possible, you have to look after
your visor carefully.
When you clean your visor, leave it to soak in
tepid water (less than 40 degrees) and use a
soft cloth (100% cotton that does not pill) to dry
it. A little “neutral” soap (like household soap)
may help you to clean it.
Warning: do not use window cleaning type
products (based on alcohol or other types of
solvent) as these products may damage the
visor’s treatments.
The anti-scratch and antifog treatments are
active and their action may vary under atmos-
pheric conditions and under heavy rain. Under
difficult conditions, surface treatments take
time to recover their effectiveness; we there-
fore advise you to put your helmet or the visor
in a dry, well ventilated place so that it recovers
its effectiveness.
In either the Integral or Jet position, the visor is
adjusted using the catch on the upper central
part of the visor.
In the Integral configuration, you have the
possibility of riding with the visor slightly open
(Figs. A – B);
Because of its original axis of rotation, the
visor remains close to the crown, thus avoiding
excessive aerodynamic resistance in the open
position.
-
-
-
-
-
-
-
-
-
-
-
-
-
Visiera
La visiera del casco è iniettata con un mate-
riale di policarbonato specifico, sviluppato per
l’eccellenza delle sue qualità ottiche e per le
elevate qualità di resistenza agli urti.
La visiera è identificata come Total Vision. La
sua superficie esterna è stata sottoposta a un
trattamento che garantisce un’elevata resisten-
za ai graffi. Il trattamento specifico applicato
alla sua superficie interna riduce al massimo i
rischi di formazione di condensa.
Per garantire una durata utile massima di
questi 2 trattamenti di superficie, è necessario

3332
A
B
mantenere con cura le condizioni ottimali della
visiera.
Per pulire la visiera, lasciatela a bagno in acqua
tiepida (meno di 40 gradi), quindi asciugatela
con un panno morbido (100% cotone, non pe-
loso).
Per la pulizia, è anche possibile utilizzare un
po’ di sapone neutro «tipo sapone di Marsiglia».
Attenzione: non utilizzare mai prodotti tipo
detergenti per vetri (a base di alcol o altri tipi
di solventi) poiché potrebbero danneggiare i
trattamenti effettuati sulla visiera.
I trattamenti antigraffio e anticondensa sono
attivi e la loro azione può variare in base alle
condizioni atmosferiche e ad eventuali piogge
intense. In condizioni difficili, i trattamenti di
superficie tardano a recuperare la loro effica-
cia, vi consigliamo quindi di porre il casco o la
visiera in un ambiente asciutto e ventilato in
modo tale che la visiera possa recuperare le
sue caratteristiche.
In posizione integrale o Jet, la visiera si afferra
dall’aletta di presa posto sulla parte centrale
superiore della visiera stessa.
In configurazione integrale, è possibile usu-
fruire il casco su strada tenendo la visiera leg-
germente socchiusa (Figg. A-B).
Grazie al suo asse di rotazione originale, la
visiera rimane livellata alla calotta, evitando
quindi una resistenza aerodinamica eccessiva
in posizione d’apertura.
-
-
-
-
-
-
-
-
-
-
-

3534
Montage • asseMBlY • Montage • Montaggio • Montaje
déMontage • reMoVal • loesen • riMozione • desMontaje
A B
-
REMOVAL
We have designed your helmet to make this ope-
ration very easy:
- Move the visor to the high position (Fig. A);
- Apply pressure to the catches using a screwdriver
or similar pointed instrument;
- Pivot the visor (Fig. C); it will come out of its sup-
port without any difficulty (Fig. D).
-
RIMOZIONE
Il casco è stato pensato a garanzia di una rimo-
zione molto semplice:
- Sollevare la visiera (Fig. A);
- Esercitare una pressione sui clic (Fig. B)
utilizzando un cacciavite o una qualsiasi punta;
- Far ruotare la visiera (Fig.C) che fuoriuscirà senza
sforzo alcuno dai suoi supporti (Fig.D).
-
-
REPLACEMENT
- Both of the visor supports must be in the high
position;
- Position the visor, starting with the upper fixing
lug (Fig. A);
- Rotate the visor on its supports until a “click” is
heard, blocking it on both side; your visor is then in
place: before you use it, check that it is properly in
place and functioning perfectly.
RIMONTAGGIO
- I 2 supporti della visiera devono essere in posi-
zione elevata;
- Posizionare la visiera partendo dall’aletta di fis-
saggio superiore (Fig. A);
- Far ruotare la visiera sui suoi supporti fino a
udire un «clic» (Fig. B) di bloccaggio su ogni lato,
la visiera è ora in posizione, verificarne, prima di
utilizzare il casco, la perfetta tenuta e il corretto
funzionamento.
-
BC D
clic!
A

3736
-
-
THE SUN SHIELD
The EvoLine series3 SHARK is equipped with an Inte-
gral sun shield with external controls.
Warning: this sun shield can be used only in bright
glare and when you are not riding in an area in which
you risk having a sudden change in visibility (a tun-
nel, for example). In all situations of reduced visibili-
ty, at the beginning or end of the day, at night, when it
is raining or foggy, etc. the sun shield must be kept in
the high position so that your vision is not impaired.
The sun shield is operated using the button in the
upper ventilation.
When the sun shield is lowered, the button is in a
forward position; to raise it, move the button toward
the back.
To ensure its protection and lengthen its lifespan, the
external surface of the EvoLine series3 sun shield
has been given an anti-scratch treatment. To main-
tain and clean it, please follow the same instructions
as for the external surface of the visor.
WARNING: if your visor and/or sun shield no longer
provide you with excellent visibility after a period of
service, it is absolutely essential for you to replace
them. We advise you always to ride with perfect visi-
bility. Never use sunshield as unique protection, wit-
hout the main visor. You must always ride with visor
down as described in previous section.
-
-
-
-
-
-
-
PARASOLE
Il casco SHARK EvoLine series3 è provvisto di para-
sole integrato a comando esterno.
ATTENZIONE: questo parasole può essere utilizzato
solamente in caso di luce intensa e non deve essere
attivato qualora ci sposti in zone in cui non sussista
il rischio di cambio repentino di visibilità (ad es. nei
tunnel). In tutti i casi di visibilità ridotta, a inizio o fine
giornata, di notte, in caso di pioggia o di nebbia…
il parasole deve rimanere in posizione sollevata in
modo tale da non ridurre la visibilità.
Il parasole si aziona premendo il pulsante integrato
alla ventilazione superiore.
Il parasole è abbassato, il pulsante è spostato in
avanti, sollevare il pulsante verso la parte posteriore.
Per garantirne la protezione e ottimizzare la durata
utile, la superficie esterna del parasole del casco
EvoLine series3 è stata sottoposta a trattamento
antigraffi. Per la relativa manutenzione e pulizia,
attenersi a quanto indicato per la pulizia della visiera
esterna.
Attenzione: qualora la visiera e/o il parasole, dopo
un certo tempo d’utilizzo, non garantiscano più una
visibilità eccellente, è assolutamente necessario
sostituirla/o. Vi consigliamo di verificare sempre che
la visibilità sia ottimale.
Non utilizzate mai il visierino solare da solo, come
protezione utilizzate anche la visiera principale.
Dovete sempre condurre con la visiera principale
abbassata come scritto nella sezione precedente.
-
-
-
-
-
-

3938
REMOVAL
A/ Removal
- Move the sun shield to the lower position
- Apply pressure to the central fixing button using
a screwdriver or similar pointed instrument (Fig. A);
- Pull the sun shield delicately downward (Fig. B);
- Unclip the sun shield at the sides (Fig. C).
RIMOZIONE
- Abbassare il parasole;
- Premere il nasello di fissaggio centrale con un
cacciavite o una qualsiasi punta (Fig. A);
- Tirare il parasole delicatamente verso il basso
(Fig.B);
- Sganciare il parasole lateralmente (Fig. C).
A B
C
A
-
à-
-
REPLACEMENT
Carry out the above operation in reverse order:
- Move the handling button to the low position;
- Clip the sun shield on at one side and then the
other (Figs. A – B);
- Using a screwdriver or similar pointed instrument,
apply pressure to the central fixing button and then
clip the sun shield back on by lifting it slightly.
-
-
RIMONTAGGIO
Eseguire cronologicamente l’operazione in senso
inverso:
- Abbassare il pulsante di manipolazione;
- Agganciare il parasole lateralmente da un lato,
quindi dall’altro;
- Utilizzando un cacciavite o una qualsiasi punta,
premere il nasello di fissaggio centrale, quindi riag-
ganciare il parasole sollevandolo leggermente.
B
Montage • asseMBlY • Montage • Montaggio • Montaje
déMontage • reMoVal • loesen • riMozione • desMontaje
Other manuals for Evoline 3 Series
1
Table of contents
Other Shark Motorcycle Accessories manuals

Shark
Shark Race-R PRO User manual

Shark
Shark RIDILL User manual

Shark
Shark Raw User manual

Shark
Shark Explore-R User manual

Shark
Shark S 700 User manual

Shark
Shark EvoLine User manual

Shark
Shark Vision - R User manual

Shark
Shark Spartan GT Carbon User manual

Shark
Shark Evoline 3 Series User manual

Shark
Shark SPARTAN RS User manual