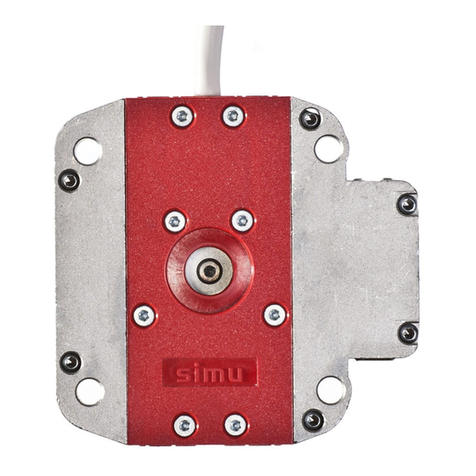
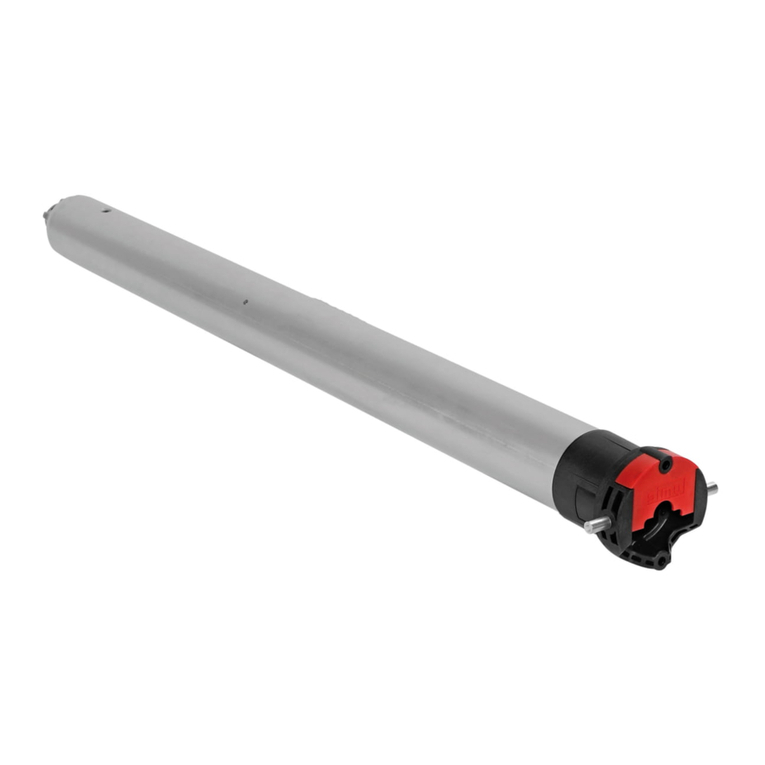
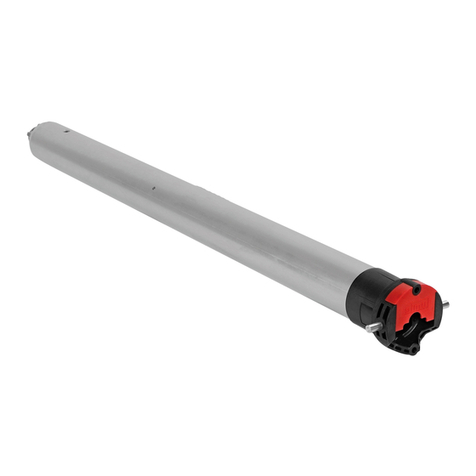
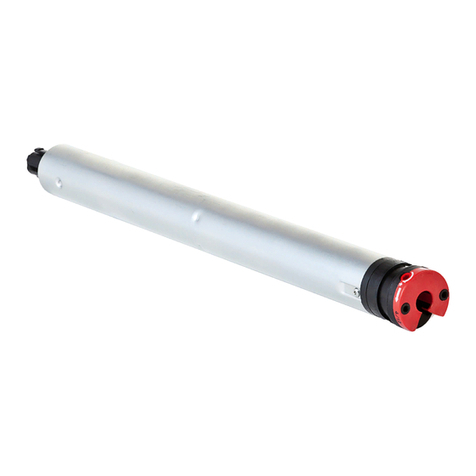
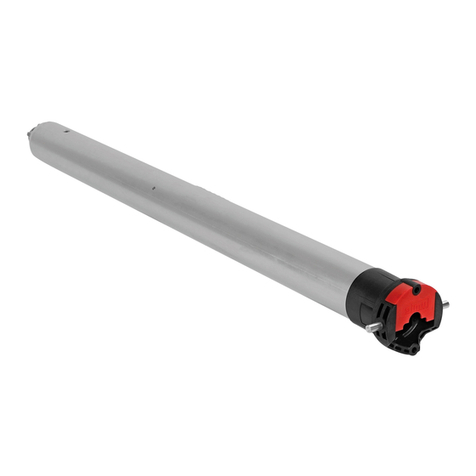
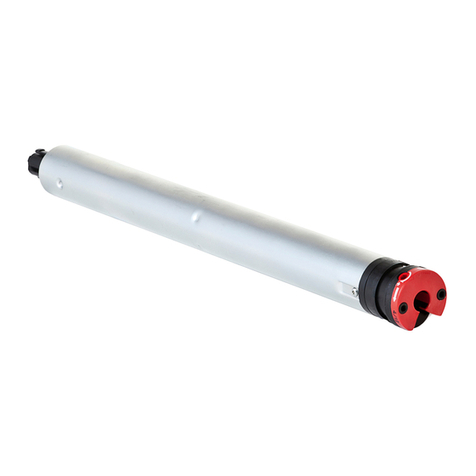
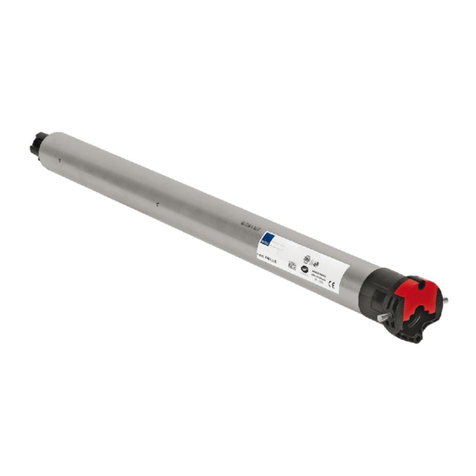
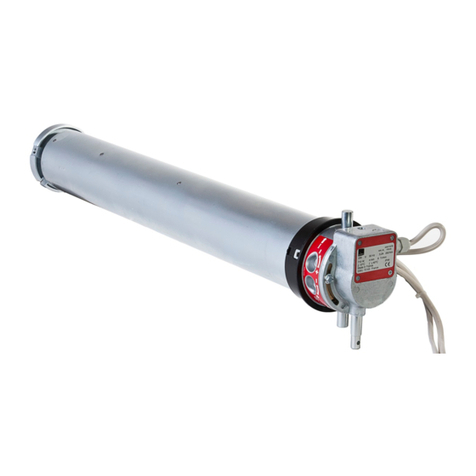
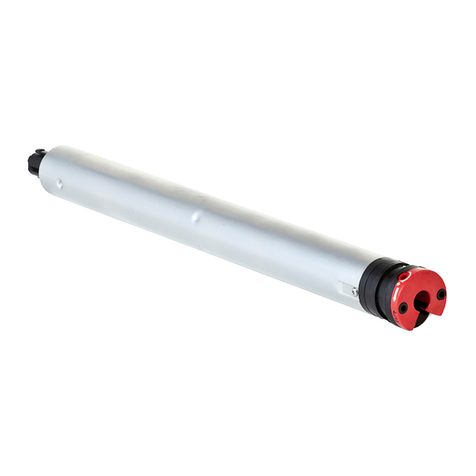
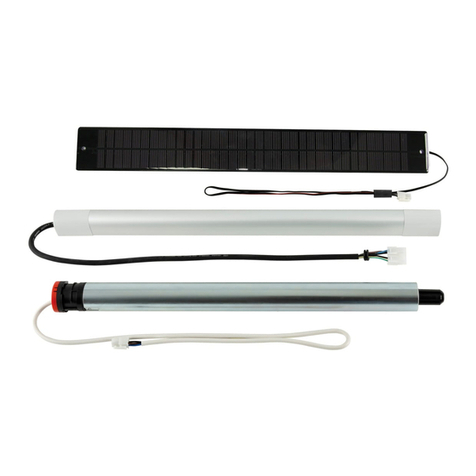
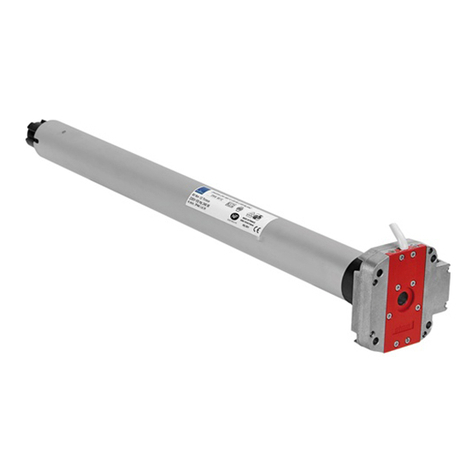
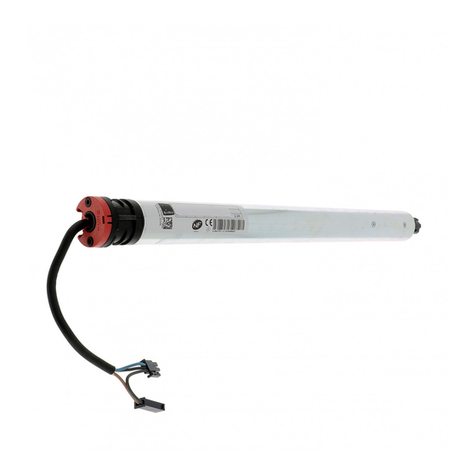
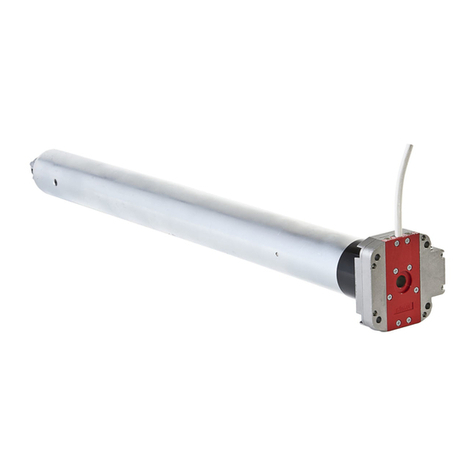
Simu T3.5 E Hz.02 DC User manual

FR T3.5 E Hz.02 DC
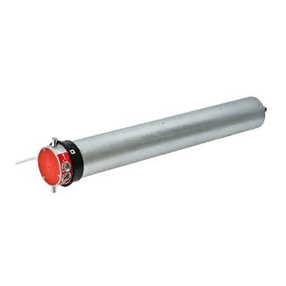
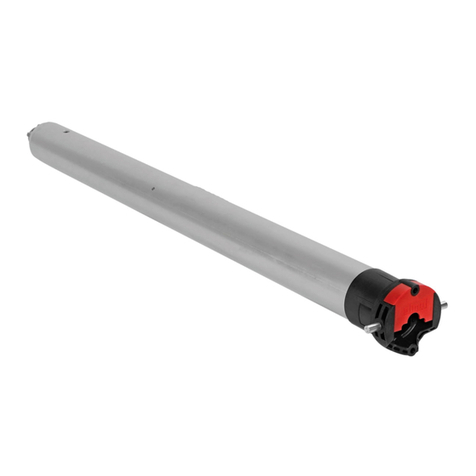
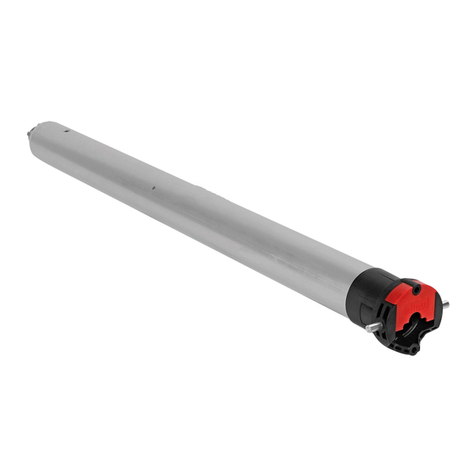
moteuR tubulaiRe avec Radio intégRée pouR volets Roulants
S.A.S. au capital de 5 000 000 !- Z.I. Les Giranaux - BP71 - 70103 Arc-Les-Gray CEDEX - FRANCE - RCS VESOUL B 425 650 090 - SIRET 425 650 090 00011 - n° T.V.A CEE FR 87 425 650 090
5117569A
Lire attentivement cette notice avant
toute utilisation.
1/4
Préconisations :
- Respecter une distance minimum de 0,2 m entre deux moteurs.
- Respecter une distance minimum de 0,3 m entre un moteur et un émetteur Hz.
- L’utilisation d’un appareil radio utilisant la même fréquence (433,42MHz) peut dégrader les performances de ce
produit (ex.: casque radio Hi-Fi).
- Perçage du tube :
- Montage :
Ømin.
(mm)
A
(mm)
ØB
(mm)
C
(mm)
D
(mm)
L1
(mm)
L2
(mm)
AØB ØB
A
C
D
L2
L1
29
Ø38,2
T3.5 EHz.02 DC
12 VDC
6Nm 37 433 4,285,5 457 470
1
23
4
PLASTITE FXS N7 \ 7X12 ZING
(5005970A)
1,2
Ø4 x 10
ACIER
40
9016635
=
Par la présente SIMU déclare que l’appareil “T3.5 EHz.02 DC” est conforme aux exigences essentielles et autres dispositions pertinentes de la
directive 2006/42/CE. Une déclaration de conformité est mise à votre disposition à l’adresse internet : www.simu.fr - Utilisable en UE, CH.
Emetteurs compatibles
2
Installation
1
1 : Emetteur Hz COLOR+ mural
2 : Emetteur Hz COLOR mobile 1 / 5 canaux
3 : Emetteur Hz Color Multi 16 canaux / Timer Multi / Timer Easy
2 31
- Portée des émetteurs Hz : 20 m à travers 2 murs de béton armé.
- 12 émetteurs max. par moteur.
Eloigner les émetteurs de toute surface ou structure métallique qui
pourraient nuire à leur bon fonctionnement (perte de portée).
2 31
Emplacement de la touche PROG sur les
émetteurs Hz :

2/4
Réglage des ns de course
3
Durant les opérations de ce chapître (§3), ne pas travailler sur plusieurs moteurs simultanément.
Si vous souhaitez programmer un autre émetteur que celui utilisé jusqu’à présent comme point de commande du moteur :
- couper l’alimentation du moteur (2 secondes minimum).
- reprendre l’opération 3.1* avec un nouvel émetteur avant de passer au chapitre §4.
* A la mise sous tension le moteur effectue une courte rotation dans un sens puis dans l’autre, ce qui indique que
les ns de courses sont déja congurés.
3.1
a- Connecter la batterie au moteur.
Connecter ensuite le panneau solaire au moteur.
b- Appuyer simultanément sur les touches “montée” et “descente” d’un émetteur Hz.
Le moteur effectue une rotation de 0,5 seconde dans un sens puis dans l’autre. Cet
émetteur commande maintenant le moteur en mode instable. Passer à l’étape 3.2.
Alimentation par batterie :
- La tension aux bornes du moteur doit être comprise entre 10,2 et 15 V. En aucun cas elle ne doit être supérieure à
15 V (risque de destruction du moteur).
- La tension aux bornes du moteur ne doit pas descendre au dessous de 9,3 V pendant le fonctionnement.
- L’intensité délivrée sur l’entrée du panneau solaire ne doit pas dépasser 130mA. (risque de destruction du moteur)
3.2 - Réglage des ns de course : Le réglage des ns de course du moteur peut être réalisé de deux façons :
- Mémorisation en premier du point d’arrêt bas (a) et ensuite du point d’arrêt haut (b).
- Mémorisation en premier du point d’arrêt haut (b) et ensuite du point d’arrêt bas (a).
Batterie12V LI-ION
12V panneau solaire
Fusible 3.15 AT
Panneau solaire
Noir&
Batterie
Connecteurs : se référer au
document Simu : DOC 115935
T3.5 E Hz.02 DC
➀
➀
–
➂
–
➁
+
➃
+
➀
Marron
➁
Bleu
➃
➂
➁➂
➃
1 2 3 1 2 3
1- Positionner le moteur sur le point d’arrêt bas souhaité
à l’aide des touches “descente” et “montée”.
2- Appuyer simultanément sur les touches “stop” et
“montée” pour mémoriser le point d’arrêt bas. Le moteur
se met automatiquement en rotation en montée.
3- Appuyer sur “stop”pour immobiliser le moteur.
1- Positionner le moteur sur le point d’arrêt haut souhaité
à l’aide des touches “montée” et “descente”.
2- Appuyer simultanément sur les touches “stop” et
“descente” pour mémoriser le point d’arrêt haut. Le
moteur se met automatiquement en rotation en descente.
3- Appuyer sur “stop”pour immobiliser le moteur.
a- b-
2s
4- Après avoir mémorisé les point d’arrêt bas (a) et haut (b), procéder à la validation des
réglages : - Appuyer 2s sur la touche “stop”. Le moteur effectue une rotation de 0,5 s dans
un sens puis dans l’autre. Passer à l’étape suivante.
4-

3/4
Programmation du premier point de commande individuelle
4
- Appuyer environ 1 seconde sur la touche “PROG” de l’émetteur. Le
moteur effectue une rotation de 0,5 seconde dans un sens puis dans
l’autre. Votre émetteur est maintenant programmé et commande le
moteur en mode stable. Toutes les fonctions décrites §6 sont actives.
5.1 - Ouvrir la mémoire du moteur depuis l’émetteur de commande
individuelle :
- Appuyer environ 3 secondes sur la touche “PROG” de l’émetteur de
commande individuelle. Le moteur effectue une rotation de 0,5 seconde
dans un sens puis dans l’autre.
5.2 - Valider l’opération depuis le nouvel émetteur à programmer :
- Appuyer environ 1 seconde sur la touche “PROG” du nouvel émetteur.
Le moteur effectue une rotation de 0,5 seconde dans un sens puis dans
l’autre.
1
Programmation d’un nouveau point de commande (individuelle, groupe ou générale)
5
- Si votre nouveau point de commande est une commande de groupe : Répéter les opérations 5.1 et 5.2 pour chaque
moteur du groupe.
- Si votre nouveau point de commande est une commande générale : Répéter les opérations 5.1 et 5.2 pour chaque
moteur de l’installation.
- Pour supprimer un émetteur de la mémoire du moteur : Effectuer les opérations 5.1 depuis l’émetteur de commande
individuelle et l’opération 5.2 depuis l’émetteur à supprimer.
Cette opération ne peut être effectuée que depuis l’émetteur ayant effectué l’opération 3.1b.
Fonctionnement du moteur T3.5 EHz.02 DC
6
6.1 - Avec une batterie en bon état de charge, les commandes possibles sont : Montée, stop et descente. Il est également
possible de commander une position intermédiaire (voir §7).
6.2 - Fonction détection du gel : Un blocage du volet en présence de gel à la montée provoque l’arrêt du moteur.
6.3 - Fonction détection d’obstacle : Un blocage du volet en présence d’un obstacle à la descente provoque l’arrêt du
moteur, puis une inversion du mouvement.
- Si la tension est inférieure à 10,2V : Le moteur marquera un temps d’arrêt au début de chaque ordre de montée.
La descente n’est possible qu’en donnant plusieurs impulsions sur la touche “descente”.
- Si la tension est inférieure à 9,3V : Le récepteur n’acceptera aucun ordre de commande.
Le fonctionnnement du moteur redeviendra normal uniquement si la tension de la batterie remonte au dessus
de 10,5V.
Enregistrement / commande / suppression de la position intermédiaire
7
5s
>>
0.5s
Enregistrement :
- Positionner le moteur sur la position intermédiaire désirée.
- Appuyer 5s sur la touche “stop”. Le moteur effectue une rotation de
0,5 s dans un sens puis dans l’autre.
Commande :
- Appuyer sur la touche “stop” pendant 0,5s. Le moteur rejoint la
position intermédiaire.
Suppression : Positionner le moteur sur la position intermédiaire. Appuyer 5s sur la touche stop. la position
intermédiaire est supprimée.

Annulation de la programmation
9
Ré-ajustement des ns de course
8
9.1 - Couper l’alimentation 12V du moteur pendant 2 secondes.
- Mettre le moteur sous tension pendant 7 secondes.
- Couper l’alimentation 12V du moteur pendant 2 secondes.
- Rétablir l’alimentation du moteur. Celui-ci effectue une rotation dans un sens quelconque pendant 5 secondes.
Le moteur se trouve maintenant en mode annulation de la programmation.
9.2- Ensuite, valider l’annulation de la programmation du moteur concerné depuis l’émetteur de commande individuelle
ou depuis un nouvel émetteur :
1- Positionner le moteur sur le point d’arrêt haut réglé en §3.2 à l’aide de la touche “montée”.
2- Appuyer simultanément sur les touches “montée” et “descente” pendant 5 secondes. Le moteur effectue une rotation
de 0,5 s dans un sens puis dans l’autre.
3- Afner le réglage à l’aide des touches “descente” et “montée” pour obtenir la position de n de course souhaitée.
4- Appuyer 2 secondes sur la touche “stop”. Le moteur effectue une rotation de 0,5 seconde dans un sens puis dans l’autre,
la nouvelle position de n de course est mémorisée.
1- Positionner le moteur sur le point d’arrêt bas réglé en §3.2 à l’aide de la touche “descente”.
2- Appuyer simultanément sur les touches “montée” et “descente” pendant 5 secondes. Le moteur effectue une rotation
de 0,5 s dans un sens puis dans l’autre.
3- Afner le réglage à l’aide des touches “descente” et “montée” pour obtenir la position de n de course souhaitée.
4- Appuyer 2 secondes sur la touche “stop”. Le moteur effectue une rotation de 0,5 seconde dans un sens puis dans l’autre,
la nouvelle position de n de course est mémorisée.
8.1 - Ré-ajustement des positions de ns de course haut
8.2 - Ré-ajustement des positions de ns de course bas
- Appuyer plus de 7 secondes sur la touche “PROG” de l’émetteur.
Maintenir l’appui jusqu’à ce que le moteur effectue une première rotation
de 0,5 seconde dans un sens puis dans l’autre, puis quelques secondes
plus tard une seconde rotation de 0,5 seconde dans les deux sens.
La mémoire du moteur est maintenant complètement vidée.
Effectuer de nouveau la programmation complète du moteur (§3).
4/4
5s 2s
12 3 4
5s 2s
12 3 4

DE T3.5 E Hz.02 DC
RohRmotoR mit integRieRteR funksteueRung füR Rolläden
S.A.S. au capital de 5 000 000 !- Z.I. Les Giranaux - BP71 - 70103 Arc-Les-Gray CEDEX - FRANCE - RCS VESOUL B 425 650 090 - SIRET 425 650 090 00011 - n° T.V.A CEE FR 87 425 650 090
5117569A
Bitte gründlich vor dem Einbau lesen.
Hiermit erklärt SIMU, dass sich dieses Produkt “T3.5 EHz.02 DC” in Übereinstimmung mit den grundlegenden Anforderungen
und den anderen relevanten Vorschriften der Richtlinie
2006/42/EG
bendet. Eine Erklärung der Konformität kann auf der
Webseite: www.simu.com abgerufen werden. Verwendbar in EU, CH.
1/4
Empfehlungen :
- Halten Sie eine Mindestdistanz von 0,2m zwischen zwei Motoren T3.5 EHz.02 DC ein.
- Halten Sie eine Mindestdistanz von 0,3m zwischen Motoren und Hz-Funksendern ein.
- Ein Radiogerät, das die gleiche Frequenz nutzt (433,42 MHz), könnte die Leistung des Produkts stören (z.B. Hi-Fi
Radio-Kopfhörer).
- Bohrungen in der Welle:
- Montage :
Ømin.
(mm)
A
(mm)
ØB
(mm)
C
(mm)
D
(mm)
L1
(mm)
L2
(mm)
AØB ØB
A
C
D
L2
L1
29
Ø38,2
T3.5 EHz.02 DC
12 VDC
6Nm 37 433 4,285,5 457 470
1
23
4
PLASTITE FXS N7 \ 7X12 ZING
(5005970A)
1,2
Ø4 x 10
STAHL
40
9016635
=
Kompatible Sender
2
Installation
1
1 : COLOR+ Hz Wandsender
2 : COLOR Hz 1 und 5 Kanal-Sender
3 : Color Multi - 16 Kanal Sender / Timer Multi / Timer Easy
2 31
- Senderreichweiten: 20m durch 2 Stahlbetonwände.
- Maximal 12 Sender (1 Kanal) pro Motor.
- Bewahren Sie den Sender nicht in der Nähe metallischer Objekte
auf, diese könnten die Senderleistung beeinussen (geringere
Reichweite).
2 31
Anordnung der “PROG” Taste
am Hz-Sender:

2/4
Einstellung Endbegrenzung
3
Immer nur einen Motor in Empfangsbereitschaft setzen.
Wenn Sie diesen Sender nicht als Einzelbedienung benutzen wollen:
- Unterbrechen Sie die Stromversorgung des Motors (min. 2 Sekunden).
- Wiederholen Sie Schritt 3.1* mit einem neuen Sender und gehen Sie direkt zu §4.
* In diesem Fall fährt der Motor je eine halbe Sekunde in beide Richtungen. Das bedeutet, dass die Endlagen
bereits gespeichert sind.
3.1
a- Verbinden Sie den Motor mit dem Batteriepaket.
Solarpanel an den Motor anschließen.
b- Drücken Sie gleichzeitig die AUF- und AB-Taste eines Hz Senders. Der Motor läuft
0,5 Sekunden in die eine, dann in die andere Richtung. Der Sender steuert nun den
Motor im Totmannbetrieb. Siehe Schritt 3.2.
Akku-Leistung:
- Die Spannung am Motor muss zwischen 10,2 und 15V betragen. In keinem Fall sollte höher werden als 15 V (Gefahr
der Zerstörung des Motors).
- Während des Betriebes darf die Spannung an den Klemmen nicht unter 9,3V fallen.
- Der maximale Ladestrom am Eingang für das Solarpanel darf 130mA nicht überschreiten.
3.2 - Einstellung der Endbegrenzung: Es gibt zwei Möglichkeiten, die Endbegrenzung zu speichern:
- Sie können zuerst die ABWÄRTS (a)- und dann die AUFWÄRTS (b)-Position speichern.
- Sie können zuerst die AUFWÄRTS (b)- und dann die ABWÄRTS (a)-Position speichern.
1- Positionieren Sie den Motor mit den AUFWÄRTS- oder
ABWÄRTS- Tasten an der Endbegrenzung UNTEN.
2- Zur Speicherung der Endbegrenzung UNTEN drücken
Sie gleichzeitig die Tasten STOP & NACH OBEN. Der
Motor läuft automatisch aufwärts.
3- Wenn der Motor die Endbegrenzung OBEN erreicht,
drücken Sie die Taste STOP.
1. Positionieren Sie den Motor mit den AUFWÄRTS- oder
ABWÄRTS- Tasten an der Endbegrenzung OBEN.
2. Zur Speicherung der Endbegrenzung OBEN drücken Sie
gleichzeitig die Tasten STOP & NACH UNTEN. Der Motor
läuft automatisch abwärts.
3. Wenn der Motor die Endbegrenzung UNTEN erreicht,
drücken Sie die Taste STOP.
4- Nach Einstellen der unteren (a) und oberen (b) Endlage müssen die Einstellungen noch
bestätigt werden:
- Halten Sie die Taste “STOP” des Senders ca. 2 Sekunden lang gedrückt. Der Motor läuft
eine halbe Sekunde in die eine, dann in die andere Richtung. Gehen Sie zum nächsten
Punkt.
1 2 3 1 2 3
a- b-
2s
4-
Akku 12V LI-ION
12V Solarpanel
Sicherung 3.15 AT
Solarpanel
Schwarz&
Akku
Steckverbinder : In Übereinstimmung
mit dem Dokument DOC 115935
T3.5 E Hz.02 DC
➀
➀
–
➂
–
➁
+
➃
+
➀
Braun
➁
Blau
➃
➂
➁➂
➃

3/4
Programmierung des ersten individuellen Steuerpunkts.
4
- Halten Sie die Taste “PROG” ca. 1 Sekunde lang gedrückt. Der Motor läuft
0,5 Sekunden in die eine, dann in die andere Richtung. Ihr Sender ist nun
so programmiert, dass er den Motor zuverlässig steuert. Es sind alle
in §6 beschriebenen Funktionen aktiv.
5.1 - Öffnen Sie den Speicher des Empfängers mit dem vorhandenen
Steuersender:
- Halten Sie die Taste “PROG” des Senders ca. 3 Sekunden lang gedrückt.
Der Motor läuft eine halbe Sekunde in die eine, dann in die andere
Richtung.
5.2 - Bestätigen Sie die Eingaben an dem neu zu programmierenden
Sender:
- Halten Sie die Taste “PROG” des Senders ca. 1 Sekunde lang gedrückt.
Der Motor läuft eine halbe Sekunde in die eine, dann in die andere
Richtung.
1
Programmierung eines neuen (Individuellen, Gruppen- oder Haupt-) Steuersender
5
- Für Gruppensteuerungen wiederholen Sie die Schritte 5.1 und 5.2 für jeden Motor der Gruppe.
- Für die Hauptsteuerung wiederholen Sie di e Schritte 5.1 und 5.2 für jeden Motor der Installation.
- Um einen Sender aus dem Speicher des Motors zu löschen, wiederholen Sie Schritt 5.1 mit einem programmierten Sen-
der und dann Schritt 5.2 mit dem zu löschenden Sender.
Diese Einstellung kann nur für den unter Punkt 3.1b verwendeten Sender vorgenommen werden.
Betriebsweise vom Motor T3.5 EHz.02 DC
6
6.1 - Bei einer ordentlich geladenen Batterie, sind die möglichen Befehle: Aufwärts, Halt und Abwärts. Es kann auch eine
Zwischenposition angesteuert werden (siehe §7).
6.2 - Funktion Frosterfassung: Eine Sperrung des Rollladens wegen Frost führt zum Motorstillstand.
6.3 - Funktion Hinderniserfassung: Eine Sperrung des Rollladens wegen Vorhandensein eines Hindernisses in der
Abwärtsbewegung führt zum Motorstillstand, und dann zu einer Bewegungsumkehr.
- Bei einer Spannung unter 10,2V: hält der Motor bei Beginn jedes Aufwärtsbefehls kurz an. Die Abwärtsbewegung ist
nur durch mehrere Impulse auf die Taste Abwärts möglich.
- Bei einer Spannung unter 9,3V: Nimmt der Empfänger keinen Steuerbefehl an.
Der Motorbetrieb wird erst wieder normal, nachdem die Batteriespannung über 10,5V gestiegen ist.
Speichern, Kontrolle und Löschen der Zwischenpositionen
7
5s
>>
0.5s
Speichern:
- Fahren Sie den Motor in die gewünschte Position.
- Halten Sie 5 Sekunden die STOP Taste gedrückt. Der Motor fährt
0,5 Sekunden in die eine, dann in die andere Richtung.
Kontrolle:
- Halten Sie 0,5 Sekunde die STOP Taste gedrückt. Der Motor fährt an
die gespeicherte Zwischenposition.
Löschen einer Zwischenposition: Den Motor in die zu löschende Zwischenposition fahren. Drücken Sie die
STOPP-Taste 5 Sekunden lang, die Zwischenposition ist gelöscht.

Löschen der Programmierung und der Endbegrenzung
9
Neueinstellung der Endbegrenzung
8
9.1 - Schalten Sie die Stromversorgung 12V des Motors 2 Sekunden lang ab.
- Schalten Sie die Stromversorgung 12V des Motors 7 Sekunden lang ein.
- Schalten Sie die Stromversorgung 12V des Motors 2 Sekunden lang ab.
- Schalten Sie den Motor wieder ein. Der Motor läuft 5 Sekunden lang.
Der Motor ist im Modus Löschen.
9.2 - Bestätigen Sie dann das Löschen des entsprechendes Motors an der Einzelsteuerung oder mit einem neuen
Sender:
1- Fahren Sie den Motor in die obere Endlage.
2- Halten Sie die AUF und AB Tasten 5 Sekunden lang gleichzeitig gedrückt. Der Motor läuft 0,5 Sekunden lang in die eine,
dann in die andere Richtung.
3- Stellen Sie die neue Position mit den AUF oder AB Tasten ein.
4- Bestätigen Sie die neue Position, indem Sie die STOP Taste 2 Sekunden lang gedrückt halten. Der Motor läuft
0,5 Sekunden lang in die eine, dann in die andere Richtung.
1- Fahren Sie den Motor in die untere Endlage.
2- Halten Sie die AUF und AB Tasten 5 Sekunden lang gleichzeitig gedrückt. Der Motor läuft eine 0,5 Sekunde lang in die
eine, dann in die andere Richtung.
3- Stellen Sie die neue Position mit den AUF oder AB Tasten ein.
4- Bestätigen Sie die neue Position, indem Sie die STOP Taste zwei Sekunden lang gedrückt halten. Der Motor läuft eine
halbe Sekunde lang in die eine, dann in die andere Richtung.
8.1 - Neueinstellung der Endbegrenzung OBEN:
8.2 - Neueinstellung der Endbegrenzung UNTEN
- Halten Sie die Taste “PROG” des Senders mindestens 7 Sekunden lang
gedrückt. Halten Sie die Taste so lange gedrückt, bis der Motor zuerst
eine halbe Sekunde lang in die eine Richtung läuft. Einige Sekunden
später wird er wieder in beide Richtungen laufen.
Nun ist der Motor auf die Werkseinstellungen zurückgesetzt. Es sind
keine Sender und Einstellungen mehr im Speicher programmiert. Der
Motor kann jetzt neu programmiert werden (§3).
4/4
5s 2s
12 3 4
5s 2s
12 3 4

EN T3.5 E Hz.02 DC
tubulaR motoRs with integRated Radio foR RolleR shutteRs
S.A.S. au capital de 5 000 000 !- Z.I. Les Giranaux - BP71 - 70103 Arc-Les-Gray CEDEX - FRANCE - RCS VESOUL B 425 650 090 - SIRET 425 650 090 00011 - n° T.V.A CEE FR 87 425 650 090
5117569A
Read carefully these instructions
before any use.
Hereby, SIMU, declares that this equipment “T3.5 EHz.02 DC” is in compliance with the essential requirements and other relevant
provision of Directive
2006/42/EC
. A declaration of Conformity is available at the web address: www.simu.com - Usable in EU, CH.
1/4
Recommendations:
- Keep a minimum distance of 20 cm between two T3.5 EHz.02 motors.
- Keep a minimum distance of 30 cm between T3.5 EHz.02 motors and Hz transmitters.
- A radio appliance using the same frequency (433,42MHz) may deteriorate our product’s performance (ex. : hi-
radio headphones).
- Drilling of the tube:
- Assembly:
Ømin.
(mm)
A
(mm)
ØB
(mm)
C
(mm)
D
(mm)
L1
(mm)
L2
(mm)
AØB ØB
A
C
D
L2
L1
29
Ø38,2
T3.5 EHz.02 DC
12 VDC
6Nm 37 433 4,285,5 457 470
1
23
4
PLASTITE FXS N7 \ 7X12 ZING
(5005970A)
1,2
Ø4 x 10
STEEL
40
9016635
=
Compatible transmitters
2
Installation
1
1 : COLOR+ Wall Hz transmitter
2 : COLOR 1/5 channels Hz transmitter
3 : Color Multi 16 channels transmitter / Timer Multi / Timer Easy
2 31
- Transmitters range: 20 m through 2 concrete walls.
- 12 transmitters (1 channel) max. for one motor.
- Do not position the transmitter near metal in order to avoid range
losses.
2 31
Location of the “PROG” key
on Hz transmitters:

2/4
End limits adjustment
3
During the operations in this section (§3), do not work on several motors at the same time.
If you do not want to use this transmitter as the individual control:
- cut the power supply (2 seconds minimum).
- repeat the opération 3.1* with a new transmitter and then go to step §4.
* In this case, the motor will run for 0,5 second in both directions, that means the limits setting is already done.
3.1
a- Connect the battery to the motor.
Then, connect the solar panel to the motor.
b- Press simultaneously on the UP and DOWN buttons of a Hz transmitter. The motor
turns 0.5 second in one direction, then in the other. This transmitter now controls
the motor in unstable mode. Go to step 3.2
Power supply by batteries :
- The voltage across the motor must be between 10,2 and 15 V. In any case should it be over 15 V (risk of destruction of
the motor).
- The voltage at the motor must not drop below 9,3 V during operation.
- The current delivered on the Solar panel input should not exceed 130mA. (risk of destruction of the motor)
3.2- Adjustement of the end-limits: memorizing the end points: The end-limit adjustement can be done in two ways:
- First you can memorize the DOWN position (a) and then the UP position (b).
- First you can memorize the UP position (b) and then the DOWN position (a).
1- Position the motor on the DOWN end limit using the
“DOWN” and “UP” keys.
2- To memorize the DOWN end limit position, press simul-
taneously the “STOP” and “UP” keys. The motor will run
automatically in the “UP” direction.
3- Before the motor reaches the UP end limit, press
the“STOP” key.
1- Position the motor on the UP end limit using the “UP” and
“DOWN” keys.
2- To memorize the UP end limit position, press simulta-
neously the “STOP” and “DOWN” keys. The motor will
run automatically in the “DOWN” direction.
3- Before the motor reaches the DOWN end limit, press the
“STOP” key.
4- After the adjustment of the DOWN (a) and the UP (b) end limits, conrm the settings:
- Press 2s on the “STOP” key to validate the settings. The motor will stop and will run for 0,5
second in one direction and then in the other. Go to next step.
1 2 3 1 2 3
a b
2s
4-
battery 12V LI-ION
12V solar panel
Fuse 3.15 AT
Solar panel
Black&
Battery
Connector: in accordance
with document SIMU : DOC115935
T3.5 E Hz.02 DC
➀
➀
–
➂
–
➁
+
➃
+
➀
Brown
➁
Blue
➃
➂
➁➂
➃

3/4
Programming the rst individual point of control
4
- Press the transmitter “PROG” Key for approximately 1 second. The
motor will run for 0,5 second in one direction and then in the other. Your
transmitter is now programmed to control the motor in stable mode,
all the functions described in §6 are active.
5.1 - Open the memory of the motor from the control transmitter:
- Press the “PROG” key of the transmitter for about 3 seconds. The motor
will run for 0.5 second in one direction and then in the other.
5.2 - Validate the operation from the new transmitter you want to
programm:
- Press the “PROG” key of the transmitter for about 1 second. The motor
will run for 0.5 second in one direction and then in the other.
1
Programming a new (individual, group or main) control point:
5
- For group controls, repeat operations 5.1 and 5.2 for each motor in the group.
- For main controls, repeat operations 5.1 and 5.2 for each motor in the installation.
- To delete an transmitter from the memory of a motor, perform operations 5.1 with a programmed transmitter, then perform
the operation 5.2 with the transmitter to be deleted.
This operation can only be performed from the transmitter that was used for operation
3.1b.
T3.5 EHz.02 DC motor functions
6
6.1 - With a well charged battery, the possible commands are: UP, STOP and DOWN. It is also possible to set an interme-
diate position (see §7).
6.2 - Frost detection function: The motor stops if the shutter is jammed by ice during opening.
6.3 - Detection of obstructions function: Jamming of the shutter due to the presence of an obstruction when closing the
shutter causes the motor to stop and then run in the reverse direction.
- If the voltage is below 10,2V: The motor will pause at the beginning of each command to lift the shutter. The shutter can
only be closed by pressing several times on the down button.
- If the voltage is below 9,3V: The motor won’t accept any commands.
Operation of the motor will return to normal only if the battery voltage goes above 10,5V.
Recording / controling / deleting intermediate position
7
5s
>>
0.5s
Recording:
- Position the motor on the wanted position.
- Press 5 seconds on the “stop” key. The motor will run for 0,5 second
in one direction and then in the other.
Controling:
- Press on the “stop” key for 0.5 s. the motor goes to the intermediate
position.
Deleting : Position the motor on the intermediate position. Press 5 seconds on the Stop key, the intermediate
position is deleted.

Cancelling programming
9
Re-adjustement of end limits
8
9.1 - Switch off the 12V power supply to the motor for 2 seconds.
- Switch on the 12V power supply to the motor for 7 seconds.
- Switch off the 12V power supply to the motor for 2 seconds.
- Switch the power to the motor back on.
The motor will run for 5 seconds in random direction and is now in the cancelling mode.
9.2- Then, validate the cancelling of the affected motor from the individual control or from a new transmitter
1- Position the motor on the UP end limit previously set in §3.2 with the UP key.
2- Press simultaneously for 5 seconds the UP and DOWN keys, the motor will run for 0.5 second in one direction and then
in the other direction.
3- Adjust the new position with the UP and DOWN keys.
4- Validate the new position by pressing 2 seconds the STOP key. The motor will run for 0.5 second in one direction and
then in the other direction. The new end limits setting is memorized.
1- Position the motor on the DOWN end limit previously set in §3.2 with the DOWN key.
2- Press simultaneously for 5 secondes the UP and DOWN keys, the motor will run for 0.5 second in one direction and
then in the other direction.
3- Adjust the new position with the UP and DOWN keys.
4- Validate the new position by pressing 2 seconds the STOP key. The motor will run for 0.5 second in one direction and
then in the other direction. The new end limits setting is memorized.
8.1 - Re-adjustement of UP end limit:
8.2 -
Re-adjustement of DOWN end limit:
- Press the “PROG” key of the transmitter more than 7 seconds. Maintain
the pressure until the motor will rst run for 0,5 second in one direction
and then the other, and a few second later, it will run again in both
direction.
The motor is now as it was originally congured, and no transmitter
and no settings is saved in its memory and is ready for a new programming
(§3).
4/4
5s 2s
12 3 4
5s 2s
12 3 4
Table of contents
Languages:
Other Simu Engine manuals
Popular Engine manuals by other brands
Greenheck
Greenheck MP-310 Installation, operation and maintenance manual

AL-KO
AL-KO Pro 700 V2 Translation of the original instructions for use
BRP
BRP Rotax 4-TEC 150 user guide
Hyster
Hyster C236 Service & repair manual

O.S. engine
O.S. engine MAX-25LA Owner's instruction manual
Dabi Atlante
Dabi Atlante MICROMOTOR INTRA 32 MM-C SPRAY TB owner's manual
