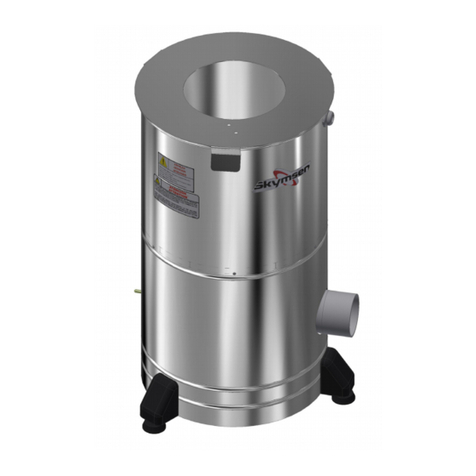
Skymsen CA-300L-HD User manual

- BEYOND THESE MACHINES, WE MANUFACTURE A COMPLETE LINE OF EQUIPAMENTS. CONSULT YOUR VENDOR.
- DUE TO CONSTANT EVOLUTION OF OUR PRODUCTS, THE INFORMATION HEREBY CONTAINED CAN BE MODIFIED WITHOUT PREVIOUS
ADVISING.
WWW.SIEMSEN.COM.BR
Data de Correção: 11/12/2015
56300.5 - INGLÊS
METALÚRGICA SIEMSEN LTDA.
CNPJ: 82.983.032/0001-19
Rodovia Ivo Silveira - km 12, nº 9525, Galpão 1 - Bairro: Bateas - CEP: 88355-202
Brusque - Santa Catarina - Brasil
Fone: +55 47 3211 6000 - Fax: +55 47 3211 6020
INSTRUCTIONS MANUAL
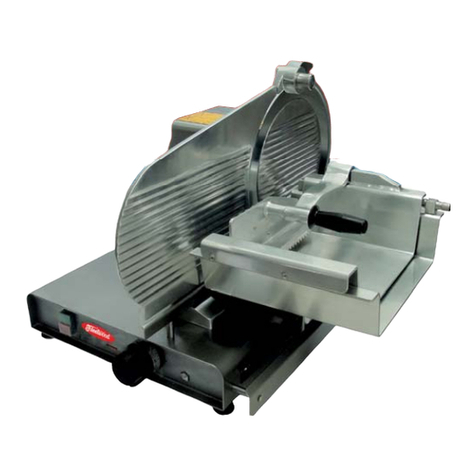
AUTOMATIC LINE SLICER. STAINLESS STEEL. 300mm BLADE
MODEL
CA-300L-HD

2
SUMMARY
1. Introducon ...................................................................................... 3
1.1 Safety .................................................................................................................... 3
1.2 Main Components ................................................................................................. 7
1.3 Technical Features ................................................................................................. 9
2. Installaon and Pre-Operaon......................................................... 10
2.1 Installaon ...........................................................................................................10
2.2 Pre-Operaon.......................................................................................................11
3. Operaon ........................................................................................ 11
3.1 Acvaon .............................................................................................................11
3.2 Operaonal Procedure..........................................................................................13
3.3 Safety System .......................................................................................................18
3.4 Cleaning and Sanitaon ........................................................................................18
3.5 Stainless Steel Care Facts ......................................................................................24
4. General Safety Noons .................................................................... 25
4.1 Basic Operaonal Pracces ...................................................................................25
4.2 Observaons and Care Before Turning the Equipment On .....................................26
4.3 Roune Inspecons ..............................................................................................27
4.4 Operaon .............................................................................................................27
4.5 Aer Finishing The Work.......................................................................................27
4.6 Maintenance ........................................................................................................28
4.7 Warnings ..............................................................................................................28
5. Problems Analysis and Soluons...................................................... 29
5.1 Problems, Causes and Soluons ...........................................................................29
6. Observed Norms ............................................................................. 31
7. Maintenance ................................................................................... 31
8. Electric Diagram .............................................................................. 33
35
___________________________________________________________
___________________________________________________________
___________________________________________________________
___________________________________________________________
___________________________________________________________
___________________________________________________________
___________________________________________________________
___________________________________________________________
___________________________________________________________
___________________________________________________________
___________________________________________________________
___________________________________________________________
___________________________________________________________
___________________________________________________________
___________________________________________________________
___________________________________________________________
___________________________________________________________
___________________________________________________________
___________________________________________________________
___________________________________________________________
___________________________________________________________
___________________________________________________________
___________________________________________________________
___________________________________________________________
___________________________________________________________
___________________________________________________________
___________________________________________________________
___________________________________________________________
___________________________________________________________
___________________________________________________________
___________________________________________________________
___________________________________________________________
___________________________________________________________
___________________________________________________________
___________________________________________________________
___________________________________________________________
___________________________________________________________

34
___________________________________________________________
___________________________________________________________
___________________________________________________________

___________________________________________________________
___________________________________________________________
___________________________________________________________

___________________________________________________________
___________________________________________________________

___________________________________________________________

___________________________________________________________

___________________________________________________________
___________________________________________________________
___________________________________________________________
___________________________________________________________
___________________________________________________________
___________________________________________________________
___________________________________________________________
___________________________________________________________

___________________________________________________________

___________________________________________________________
___________________________________________________________
___________________________________________________________
___________________________________________________________
___________________________________________________________
___________________________________________________________
___________________________________________________________
___________________________________________________________
___________________________________________________________
___________________________________________________________
___________________________________________________________
___________________________________________________________
___________________________________________________________
___________________________________________________________
___________________________________________________________
___________________________________________________________
___________________________________________________________
___________________________________________________________
3
1. Introducon
1.1 Safety
This Equipment is potenally DANGEROUS if misused. Maintenance, sanitaon and/or any
services applied to the Equipment must be carried out by a qualified person and with the
Equipment completely disconnected from the electric grid.
The instrucons presented below must be thoroughly followed to avoid accidents:
1.1.1 Read all the instrucons.
1.1.2 To avoid electric shock and damage, never handle or operate the Equipment with
wet feet or clothes and/or on a humid or wet surface. Do not place the Equipment in water
or any other liquid and do not use water jets/sprays directly on the equipment.
1.1.3 All Equipment operaon must be supervised at all mes, especially when it is used
nearby children.
1.1.4 Disconnect the Equipment from the electric grid, always when: It is not being used,
before cleaning, removal or aachment of accessories, maintenance or any other kind of
service.
1.1.5 Do not use the Equipment if the cord or plug are damaged. Make sure that the
energy cord is not placed at the edge of a desk or workstaon and that it does not touch
any heated surfaces.
1.1.6 Always aer the Equipment suffers a fall, is damaged in any way o is not working it
is necessary to take it to a qualified technical service for repair, revision and/or mechanical
or electric adjustment.
1.1.7 The use of accessories not recommended by the manufacturer may cause body
injuries.
1.1.8 Keep your hands and any hand and/or kitchen hard ware far from the moving
parts of the Equipment while it is operang to avoid body injuries and damages to the
Equipment.
1.1.9 Never wear clothes with long sleeves, especially on the wrists, while you are
operang the equipment.
1.1.10 Make sure that the voltage of the Equipment and of the electrical grid match, and
that the Equipment is grounded.

4
1.1.11 Never use any hand and/or kitchen hardware and accessories that are not a part of
the Equipment to aid its operaon.
1.1.12 Before turning the Equipment on, make sure that the Frontal Blade Protecon (Item
14 Pic. 2) is firm and holding its posion.
1.1.13 Never use water jets/sprays directly on the Equipment.
1.1.14 Always keep your hands far from the moving parts.
1.1.15 This Equipment is designed for use in commercial kitchens. It is used, for example,
in restaurants, canteens, hospitals, bakeries, meat shops and similar places.
1.1.16 The use of this Equipment is not recommended when:
- The producon process is done in a connuous industrial scale manner;
- The work environment in which the Equipment is to be used has a corrosive,
explosive, or contaminated with vapor, dust or gas atmosphere.
1.1.17 Equipotenal Symbology Label.
The figure shown below indicates the external equipotenal connecon terminal.
This terminal must be used to make sure that there are no potenal diferences between
Equipment connected to the electric grid, lowering the risks of electric shocks.
The respecve Equipment must be connected to each other through their respecve
terminals of equipotenal connecon.
45006.5
33
8. Electric Diagram
BLADE MOTOR
M3~
P1,P2
ELETRIC GRID
220V/50-60Hz
GENERAL
KEY
1
0
GROUNDING
T3,T5T1,T6
T2,T4
WHITE WIRES
MOVABLE TABLE MOTOR
M3~
P1,P2
T3,T5T1,T6
T2,T4
YELLOW WIRES
1
2
NF
NC
3
4
NA
NO
ON/OFF
DIGITAL PANEL
SAFETY UNIT
PLUG
1
2
NF
NC
EMERGENCY
1
2
NF
NC
RESET
3
4
NA
NO

32
* 2 - Items to verify or execute at each 3 months:
- Verify electrical components such as ON/OFF switch, emergency buon, reset buon and
electronic circuits such as signals of overheang, deficient isolaon or mechanical damage.
- Verify possible looseness on the bearings and roller bearings.
- Verify retainers, o’rings, v’rings and other sealing systems.
5
1.1.18 Aenon/Care Label.
Symbology used to idenfy accident risk zones to the operator of the Equipment.
1.1.19 Instrucon Manual Label.
Symbology that requires the Reading of the manual from the operator of the Equipment.
1.1.20 Maintenance and Cleaning Care Label.
Symbology used to alert the operator of the Equipment about the necessary procedures that need
to be carried out before Maintenance and Cleaning.

6
IMPORTANT
To grant a higher level of safety to the operator this equipment presents a safety
system that will block the equipment’s self-acvaon aer an eventual energy
failure.
IMPORTANT
Make sure that the Energy feeding Cord is in perfect use condions. In case that
any kind of imperfecons or damages are visualized, contact a qualified technical
service to perform the changing of the cord, respecng all the local safety rules
and regulaons. The new cord must comply with all the technical safety norms and
regulaons.
IMPORTANT
This equipment must not be used by people (Children included) with reduced
mental, sensorial and physical capacies. People that lack experience and
knowledge regarding the use of such a machine must not operate it unless
they receive proper training and operaonal instrucons, or are operang the
equipment under the supervision of an experienced, trained, knowledgeable and
capable person.
IMPORTANT
If the equipment’s work place is nearby a place which has Children (not
recommended), the work place must be out of their reach and the equipment
always disconnected when not in use. Also, Children must be watched at all mes
to make sure they are not trying to reach the equipment and/or use it as a toy.
IMPORTANT
If any emergency arises immediately disconnect the equipment from the electric
grid.
IMPORTANT
This Equipment has a safety system to grant the operator’s integrity. Equipment
must be operated in accordance with the “Operaon” item presented in this
manual. Any other procedures are deemed unsafe and must not be used. Under
any unsafe circumstances, the equipment must not be used.
31
6. Observed Norms
ABNT NBR NM 60335-1 IEC 60335-2-64
NR-12 AS PER OFFICIAL COMMUNICATION Nº 197, DECEMBER 2010.
*Items below, among others informed on the NR-12 Norm as per official communicaon
Nº 197, December 2010, must be observed concerning safety.
- Physical Arrangements
- Permanent Access Means
- Maintenance, Inspecon, Preparaon, Adjustments and Repairs
- Symbology
- Work and Safety Procedures
- Trainning
7. Maintenance
The maintenance must be considered a set of procedures that has a purpose maintaining
the equipment in the best funconing condions, making possible the enlargement of its
useful life and safety.
* Cleaning – Verify the item 3.4 Cleaning on this manual.
* Wiring – Check all cables as for deterioraon and all electrical contacts (terminals) as for
ghtening and corrosion.
* Contacts – ON/OFF switch, emergency bu!on, reset bu!on, electronic circuits, etc. Verify
the equipment so that all components are funconing correctly and that its operaon is
normal.
* Installaon – Verify the installaon of your equipment according to item 2.1 Installaon
on this manual.
* Product useful life – 2 years, for a normal work shi".
* 1 - Items to verify and execute monthly:
- Verify the electrical installaon;
- Measure the tension of the electrical socket;
- Measure the funconing current and compare with the nominal current;
- Verify the ghtening of all electrical terminals of the equipment, to avoid possible bad
contacts;
- Verify possible looseness of the electrical motor axle;
- Check the wiring and electrical cables as for signals of overheang, deficient isolaon or
mechanical damage.

30
TABLE 02
PROBLEMS CAUSES SOLUTIONS
- Equipment does not turn on.
- Energy supply interrupted.
-Emergency buon pressed.
- Problem in the equipment’s
internal or external electric
circuit.
- Verify the supply of electric
energy.
- Proceed as per item 3.
- Call qualified technical
service.
- Burn and/or smoke smell.
- Problem on internal or
external electrical circuit of the
equipment;
- Call qualified technical
service.
- The equipment turns on, but
when product is processed
in the equipment, it stops or
turns in low rotaon.
- Problem on internal or
external electrical circuit of the
equipment;
- Call qualified technical
service.
- Damaged electrical cord.
- Damage during
product transportaon
and/or handling
- Call qualified technical
service.
- Irregular Slicing - Blade lost its cung edge. - Proceed as per item 3.2.1
- When the equipment is
turned on only the Blade spins
- The Sharpening command is
acvated.. - Proceed as per item 3.1
7
1.2 Main Components
All the components used in this equipment are made of and constructed with thoroughly
selected materials for each funcon, in accordance with test standards and Siemsen’s
experience.
PICTURE 01
01 - Feeding Cord
02 - Equip. Terminal
03 - General key
04 - Side Regulator
05 - Pusher
06 - Movable Table
07 - Regulang Handle
08 - Control Panel
09 - On/Off Key
10 - Emergency Buon
11 - Foot
12 - Cut Regulang Table
04
010302
06
05
12
08 09 10 07 11

8
PICTURE 02
03
04 01 02
01 - Sharpener
02 - Frontal Blade Protecon
03 - Safety Unit
04 - Blade
29
5.Problems Analysis and Solu!ons
5.1 Problems, Causes and Solu!ons.
This equipment was designed to need minimum maintenance. However, some irregularies
in its funconing may happen, due to natural wear caused by its usage.
In case there is any problem with your equipment, verify the following table, where there
are described some possible recommended soluons.
When the soluon requires the aid of a technical service it is mandatory to use a qualified
technical service that is familiar with this type of equipment.

28
IMPORTANT
Always turn off the General Switch and take out the plug from the electrical socket
at any emergency case.
4.7 Warnings
The electrical and/or mechanical maintenance must be done by people qualified to
perform the work.
The person in charge of maintenance must make sure that the equipment works under
total safety condions.
Replace all equipment’s components back in their posion, before turning it on again.
Verify the fluids levels.
When verifying the tension of belt(s) and chain(s), DO NOT put the fingers between the
belt(s), chain(s) nor the gear(s).
4.6 Maintenance
4.6.1 Dangers
With the equipment turned on, any maintenance operaon is dangerous.
TURN OFF THE EQUIPMENT PHYSICALLY FROM THE ELECTRICITY OUTPUT, DURING ALL
MAINTENANCE OPERATION.
9
TABLE 01
FEATURES UNIT CA-300L-HD
Average Producon kg/h Variable
Voltage V 220
Frequency Hz 50 or 60
Power Rang CV 2X 0,5
Height mm 760
Width mm 590
Depth mm 750
Net Weight kg 77,3
Gross Weight kg 104
Maximum Thickness mm 5
Blade Diameter mm 300
Slices per Minute Faas 30, 35, 40 e 45
Cu!ng Height mm 190
Cu!ng Width mm 220
1.3 Technical Features
The Line Slicer is a tabletop equipment capable of slicing different products, such as:
Cheese, Bologna and Ham.

10
2. Installaon and Pre-Operaon
2.1 Installaon
2.1.1 Placement
Your equipment must be placed and levelled on a dry and firm surface with, preferably,
850mm of Height.
850 mm
2.1.2 Electric Installa!on
This equipment is designed to work in 220 Volts (50Hz). Please verify the voltage informed
on the label a"ached to the cord when you unpack it. (Item 01 Pic. 04).
The feeding cord has 3 pins, the central pin is for grounding. It is mandatory that all 3 pins
are correctly connected before turning the equipment on.
PICTURE 03
PICTURE 04
01
27
4.2.3 Cares
The electrical energy cable, responsible for feeding the equipment, must have enough
sec!on to handle the consumed power ra!ng.
The electrical cables that remain on the floor or together with the equipment need to be
protected to avoid short circuit.
4.3 Roune Inspecons
4.3.1 Warning
When verifying the tension of belt (s) / chain(s), DO NOT put the fingers between the
belt(s), chain(s) nor the gear(s).
4.3.2 Cares
Verify the motor(s) and slipping and turning parts of the equipment, when there are
abnormal noises.
Verify the tension on the belt(s), chain(s) and replace the set in case any belt, chain or gear
presents wear.
When verifying the tension of belt(s) and chain(s), DO NOT put the fingers between the
belt(s), chain(s) nor the gear(s). Verify the protec!ons and devices so that they always
func!on properly.
4.4 Operaon
4.4.1 Warnings
Do not work with loose long hair that may touch any part of the equipment, as it can cause
serious accidents. Tie it up and behind, or cover it with a scarf.
- Only trained and qualified users can operate the equipment.
- NEVER operate the machine without any of its safety accessories.
4.5 A!er Finishing Work
4.5.1 Cares
Clean the equipment always a$er usage. For that, turn it off from the electricity output.
Only start cleaning a$er the equipment completely stops its func!oning.

26
Water or oil may turn the floor slippery and dangerous. To avoid accidents, the floor must
be dry and clean.
If the work needs to be done for two or more people, coordinaon signals must be given
at each step of the operaon. The following step must not be iniated unless a signal is
given and responded.
4.1.3 Warnings
In case of lack of electrical energy, turn off immediately the ON/OFF Switch.
- Use only recommended or equivalent oils or lubricants.
- Avoid mechanical shocks, as they can cause failures or bad funconing.
- Avoid that the water, dirt or dust go inside the mechanic and electric components of the
equipment.
- Never change the original characteriscs of the equipment.
- Do not dirty, rip or remove any safety or idenficaon label. In case any label is unreadable
or missing, request another label to the Authorized Technical Assistance (ATA).
4.2 Observaons and Care Before Turning On the Machine
IMPORTANT
Read a!envely the INSTRUCTIONS contained on this manual before turning on
the equipment. Make sure that all informaon is comprehended. In case of doubt,
consult Siemsen’s Customer Service.
4.2.1 Danger
A cable or electric wire which isolaon is damaged can produce electrical current leakage
and provoke electrical shocks. Before using the equipment, verify its condions.
4.2.2 Warnings
Make sure that all INSTRUCTIONS contained in this manual are completely comprehended.
Each funcon or operaon and maintenance procedure must be enrely clear.
The starng of a manual command (bu!ons, keys, electric switches, levers, etc.) must be
done always when being sure that it is the correct command.
11
2.2 Pre-Operaon
Before using the equipment, all parts that will be in touch with the processed products
must be washed with water and neutral soap (See item 3.4 Cleaning).
Make sure the equipment is firm and levelled in its working place, in case it is not, adjust
the feet by spinning them manually unl the desired stability is achieved.
IMPORTANT
Make sure that the voltage informed on the label a!ached to the cord matches the
voltage of the electric grid.
3. Operaon
3.1 Acvaon
To turn the equipment on proceed as shown below:
1 – Connect the equipment to the electric grid;
2 – Put the General Key (Nº01 Picture 06) in the “I” posion (On).
3 – Make sure that the Frontal Blade Protecon (Item 02 Picture 06) is in place and locked
by the Lock Handle;
PICTURE 05
PICTURE 06
01 02

12
4 – Make sure that the Movable Table (Item 01 Picture 07) is in place and locked;
5 – Make sure the Emergency Buon (Nº01 Picture 08) is not acvated
6 – Make sure the display is off
7 – Press and release the reset buon (N°02 Picture 08);
8 – Select the cung speed at the Control Panel, opons as shown below:
TIP: The cung speed can be changed even though the equipment is operang. This
allows a beer control of the processing by the operator, to retrieve the slices.
9 – Press and release the ON/OFF key (N°03 Picture 08) in the “I” posion to turn the
machine on.
130 slices per minute;
235 slices per minute;
340 slices per minute;
445 slices per minute;
PICTURE 07
PICTURE 08
01
010203
IMPORTANT
If the display shows the “A” le!er, press and release the SHARPENING bu!on un"l
the numbers are displayed to allow the Cu#ng Speed selec"on.
25
4.1 Basic Opera"onal Prac"ces
4.1.1 Dangers
Some parts of the electric starng present points or terminals with presence of high
tension. These when touched, can cause severe electrical shocks or even DEATH of the
user.
Never touch any manual command (buons, keys, electric switches, etc.) with wet hands,
shoes or clothes. The non-compliance with this recommendaon can cause severe
electrical shocks or even DEATH of the user.
4.1.2 Warnings
The user must have knowledge of the locaon of the ON/OFF Switch, in order to use it at
any me without needing to look for that. Before any type of maintenance, turn off the
equipment from the electricity output (take out the plug from the electrical socket).
Make use of the equipment in a place where there is enough physical space for handling
the machine with safety, therefore avoiding dangerous falls.
IMPORTANT
In case any item of GENERAL SAFETY NOTIONS does not apply to your product,
please disregard it.
4. General Safety No"ons
IMPORTANT
The modifica"on of protec"ve and safety devices of the equipment will imply
on serious risks of the physical integrity of people during its opera"on, cleaning,
maintenance and transporta"on, according to ABNT NBR ISO 12100 standards.
The safety noons were elaborated to orientate and instruct properly the users of the
equipments and ones who will be responsible for its maintenance.
The equipment must only be delivered to user in good condions of usage, being him
orientated as for its usage and safety by the vendor. The user must only use the equipment
aer complete knowledge of the care that must be taken, READING ATTENTIVELY ALL THIS
MANUAL.

24
3.5 Stainless Steel Care Facts
Stainless steel can present points of “rusng” that ARE ALWAYS PROVOKED BY EXTERNAL
AGENTS, especially when care with cleaning and sanizing is not adequate.
Resistance to corrosion of stainless steel is due especially to the presence of chrome,
which, when in contact with oxygen, allows the formaon of a very thin protecve layer.
This layer is formed upon the enre steel surface, blocking the acng of the external
agents that provoke corrosion. When the protecve layer is broken, the corrosion process
is iniated, which can be avoided by constant and adequate cleaning.
Immediately aer using the equipment, cleaning must be done, using water, neutral soap
or detergent, applied with a so cloth and/or nylon sponge.
Following, with flowing water only, rinsing and drying must be immediately done, with
a so cloth, avoiding the remaining of humidity on the surfaces and especially on the
fissures. The rinsing and drying are extremely important to avoid the formaon of stains
and corrosion.
IMPORTANTE
Soluções ácidas, soluções salinas, desinfetantes e certas soluções esterilizantes
(hipocloritos, sais de amônia tetravalente, compostos de iodo, acido nítrico e
outros), devem ser EVITADAS por não poder permanecer muito tempo em contato
com o aço inoxidável.
For usually possessing CHLORINE in its composion, such substances a!ack the stainless
steel, causing corrosion points (pi"ng). Even detergents used in domesc cleaning, must
not remain in contact with stainless steel beyond necessary, also having the need to
remove them with water and dry the surface completely.
Use of abrasives:
Sponges or steel wool and carbon steel brushes, beyond scratching the surface and
compromising the stainless steel protecon, also leave parcles that rust and react
contaminang the stainless steel. For this way, such products must not be used during
cleaning and sanizing. Scrapings done with sharp instruments or similar must also be
avoided.
Main substances that cause corrosion of stainless steel:
Dusts, greases, acid soluons such as vinegar, fruit juices and other acids, saline soluons,
(brine), blood, detergents (except neutral ones), parcles of common acids, residues of
common sponges or steel wool, as well as other types of abrasives.
13
3.2 Opera!onal Procedure
This equipment’s operaon is simple, just follow the sequence below:
1 – Make sure the Movable Table (Item 01 Pic.09) is in place and locked;
2 – Place the product to be processed on the Movable Table;
3 – Pull the pusher using its handle, placing it as shown below:
PICTURE 09
PICTURE 10
01
IMPORTANT
Wait for the display to erase your indica!on before rese"ng the system.

14
Picture 11
4 – Place the product to be processed on the Movable Table;
5 – Adjust the side regulator (N°01 Picture 11) using its handle, unl the regulator has a
minimum space of 5mm from the product to be processed;
ATENTTION
Leave a minimum space of 5 mm between the Side Regulator (Item 01 Pic. 11) and
the product to be sliced.
ATENTTION
NEVER press or handle the product to be processed with your hands while the
equipment is turned on or in opera!on.
Place the Pusher (N°02 Picture 11) at the rear of the product to be processed;
6 – Use the Cut Regulator Handle to choose the desired thickness;
7 – Do all the procedure described on item 3.1 to begin the slicing operaon;
TIP: You can adjust the slice thickness and the cung speed during the operaon.
01
02
23
5 – Use a so cloth humidified with water and neutral soap to clean the sharpeners. To
return to the work posion proceed contrary to the sequence informed above.
- Cleaning the Equipment:
IMPORTANT
Do not use water jets/sprays directly on the Equipment.
Do not use water jets/sprays directly on the equipment, especially on the Control Panel
and the Safety Unit.
The equipment must be sanized with a so cloth humidified with water and neutral soap.
Aer cleaning the equipment, it must be throughly dried with a thin flannel for beer
results. To avoid scratches and marks do not use any kind of abrasive products, such as
sponges and thick cloths while performing the cleaning.

22
2 – Spin the Sharpener Base (Item 01 Pic.: 23) in the an-clock direcon.
PICTURE 23
3 – Spin the Thinning Sharpener upwards and push the Sharpener Bearing to clean behind
the grindstone.
4 - Spin the Finishing Sharpener upwards and push the Sharpener Bearing to clean behind
the grindstone.
01
15
ATTENTION
DO NOT ATTEMPT TO SLICE PARMESAN CHEESE, OR SIMILAR HARD CHEESES.
ATTENTION
SHOULD ANY EMERGENCY ARISE, PRESS THE EMERGENCY BUTTON N°01 (Pic.08).
A!er using the emergency bu"on, to unlock it pull it in the contrary direc#on to
the locked posi#on and repeat the opera#on of item 3.1.
8 – Wait the necessary operaon me to retrieve the slices, picking them up manually;
9 – Turn the machine off by pressing and releasing the ON/OFF key (N°03 Picture 08) in the
“O” posion;
10 – Collect the processed product;
11- Proced in accordance with item 3.2 to reload the Movable table with new product to
be sliced.
3.2.1 Blade Sharpening
This Equipment has an efficient sharpening system linked to its structure. This system is
divided in the THINNING SHARPENER (item 02 Pic. 13) and the FINISHING SHARPENER
(item 03 Pic. 13).
To sharpen the blade, please proceed as shown below:
1 – Place the Cut Regulator Handle in the SHARPEN/CLEAN posion;
PICTURE 12

16
PICTURE 14
2 - Para posicionar o afiador de DESBASTE e ACABAMENTO na posição correta para a
afiação da Lâmina, basta seguir as orientações abaixo:
3 - Afrouxe o Manípulo do Afiador (Item 01 Fig.: 13).
PICTURE 13
4 – Spin the Sharpener Base (Item 01 Pic.: 14) clock wise.
5 – Tighten the Sharpener Handle (Item 01 Pic.: 13)
6 – Press and release the SHARPENING op!on (N°02 Picture 15) on the Control Panel. The
le"er “A” must be visible on the display (N°03 Picture 15).
In this condi!on, only the BLADE will be ac!vated.
01
01
02
03
21
PICTURE 22
Remove the Blade Cover holding firmly on the pushers;
PICTURE 21
The Movable Table and the Blade Cover can be washed in running water with neutral soap
aer their removal. Aer the washing, they must be thoroughly dried with a thin flannel
for be"er results. To avoid scratches and marks do not use any abrasive material, such as
sponges or thick/abrasive cloths when washing and/or drying the product.
- Cleaning the sharpeners:
IMPORTANT
Sharpeners cannot be removed. This is imposed by the Safety Norm that does
not allow the cu!ng edge to be exposed during the cleaning and sharpening
procedures.
To clean the sharpeners please follow the instruc!ons below:
01 – Loosen the Sharpener Handle (Item 01 Pic.: 22).
01

20
PICTURE 19
PICTURE 20
- Blade Cover:
Remove the Lock Handle (N°01 Picture 20), spinning it in the an-clock direcon unl its
complete removal.;
01
17
PICTURE 15
7 - Press and release the ON/OFF key (N°01 Picture 15) in the“I” posion to turn the
machine on.
8 – With the blade moving, press the bu!on (Item 01 Pic.16), unl the grindstone is in
contact with the blade, keep it pressed for 2 or 3 seconds. Repeat this proceedure 3 mes.
9 – To conclude the sharpening operaon, press the bu!on (Item 02 Pic.16), to clean any
remainning burrs in the blade. Do this for 1 second maximum.
PICTURE 16
A"er the thinning and finishing sharpening procedure is concluded, clean the Equipment
and realize a test by cu$ng a few slices. If the quality of the slices is not sasfactory (Slices
with burrs, irregular shape and excess of residual bits), repeat the procedure up to 3 mes
maximum. If even a"er that the slices are sll not sasfactory, please call the technical
service.
01 02
01
02
03

18
3.3 Safety System
This Equipment has a Safety System that prevents its automac acvaon when the
electric energy is restored aer a temporary interrupon in the supplying.
The machine has a Safety Stop that is acvated every me the Emergency Buon is pressed.
- It has a monitoring system that uses a double channel safety relay.
- Control Panel with maximum voltage of 25 V.
- It has 2 (two) contactors.
IMPORTANT
This Equipment has a safety system to grant the operator’s integrity. Equipment
must be operated in accordance with the “Opera!on” item presented in this
manual. Any other procedures are deemed unsafe and must not be used. Under
any unsafe circumstances, the equipment must not be used.
IMPORTANT
Disconnect the plug from the electric grid before star!ng the cleaning procedure.
3.4 Cleaning and Sani!zing
The machine must be always thoroughly cleaned and sanized in the events below:
- It is going to be used for the first me;
- Aer its daily use;
- When it has not been in use for a prolonged period of me;
- Before pu"ng it back to operaon aer a prolonged period of inacvity.
Some parts can be removed for cleaning purposes as described below. In order to do this
it is mandatory to place the Cut Regulang Handle in the SHARPEN/CLEAN posion first.;
PICTURE 17
19
IMPORTANT
The Cut Regula!ng Handle must be placed and kept in the“0” (zero) or SHARPEN/
CLEAN posi!on before star!ng and throughout the en!re cleaning procedure.
In this posion the cung area of the blade will be protected (covered), avoiding any
accidental contact with the cung edge.
- The following components can be removed for cleaning purposes: Movable Table;
Blade Cover;
- Movable Table:
The Movable Table can be lted or removed.
1 – To lt the Movable Table place the Cut Regulang Handle in the SHARPEN/CLEAN
posion;
2 – Place the Lock Handle (N°01 Picture 18) in the OPEN posion;
3 – Pull the Movable Table moving it away from the Cut Regulang Table.
PICTURE 18
To remove the Movable Table, perform the lng procedure and then pull the Movable
Table up in the vercal direcon unl its complete removal.
01
Table of contents
Other Skymsen Kitchen Appliance manuals

Skymsen
Skymsen FLP-400A User manual

Skymsen
Skymsen PSP-98M User manual

Skymsen
Skymsen EX User manual

Skymsen
Skymsen JB35 User manual

Skymsen
Skymsen HS-98 User manual

Skymsen
Skymsen FC-350 User manual

Skymsen
Skymsen CLM-300 User manual

Skymsen
Skymsen Fleetwood FAT-120 User manual

Skymsen
Skymsen TG User manual

Skymsen
Skymsen DB-06 User manual

Skymsen
Skymsen FC-350 User manual

Skymsen
Skymsen PS-22 User manual

Skymsen
Skymsen RQ-150 User manual

Skymsen
Skymsen PS-22 User manual

Skymsen
Skymsen ABS-HD User manual

Skymsen
Skymsen ESB-N User manual

Skymsen
Skymsen ESB-N User manual

Skymsen
Skymsen DB-10 User manual

Skymsen
Skymsen FLP-400A User manual

Skymsen
Skymsen DAL-06S User manual