Snom D305 User manual

1
snom D305, D315, D345, D375, D385 manual
A. General Information
1. Introduction
Welcome!
This manual helps you to optimize the usage of the IP telephone in combination with the PBX. Please
use this manual at initial operation. Some features differ from the features described in the
manufacturer's documentation.
The following pages describe the snom D305, D315, D345, D375 and D385 system telephones.
D305 D315
D345 D375
D385
We wish you success and joy in working with your new telephone and this manual!
2
Subject to alternations
Version 2
/ 08.2019 (EN)
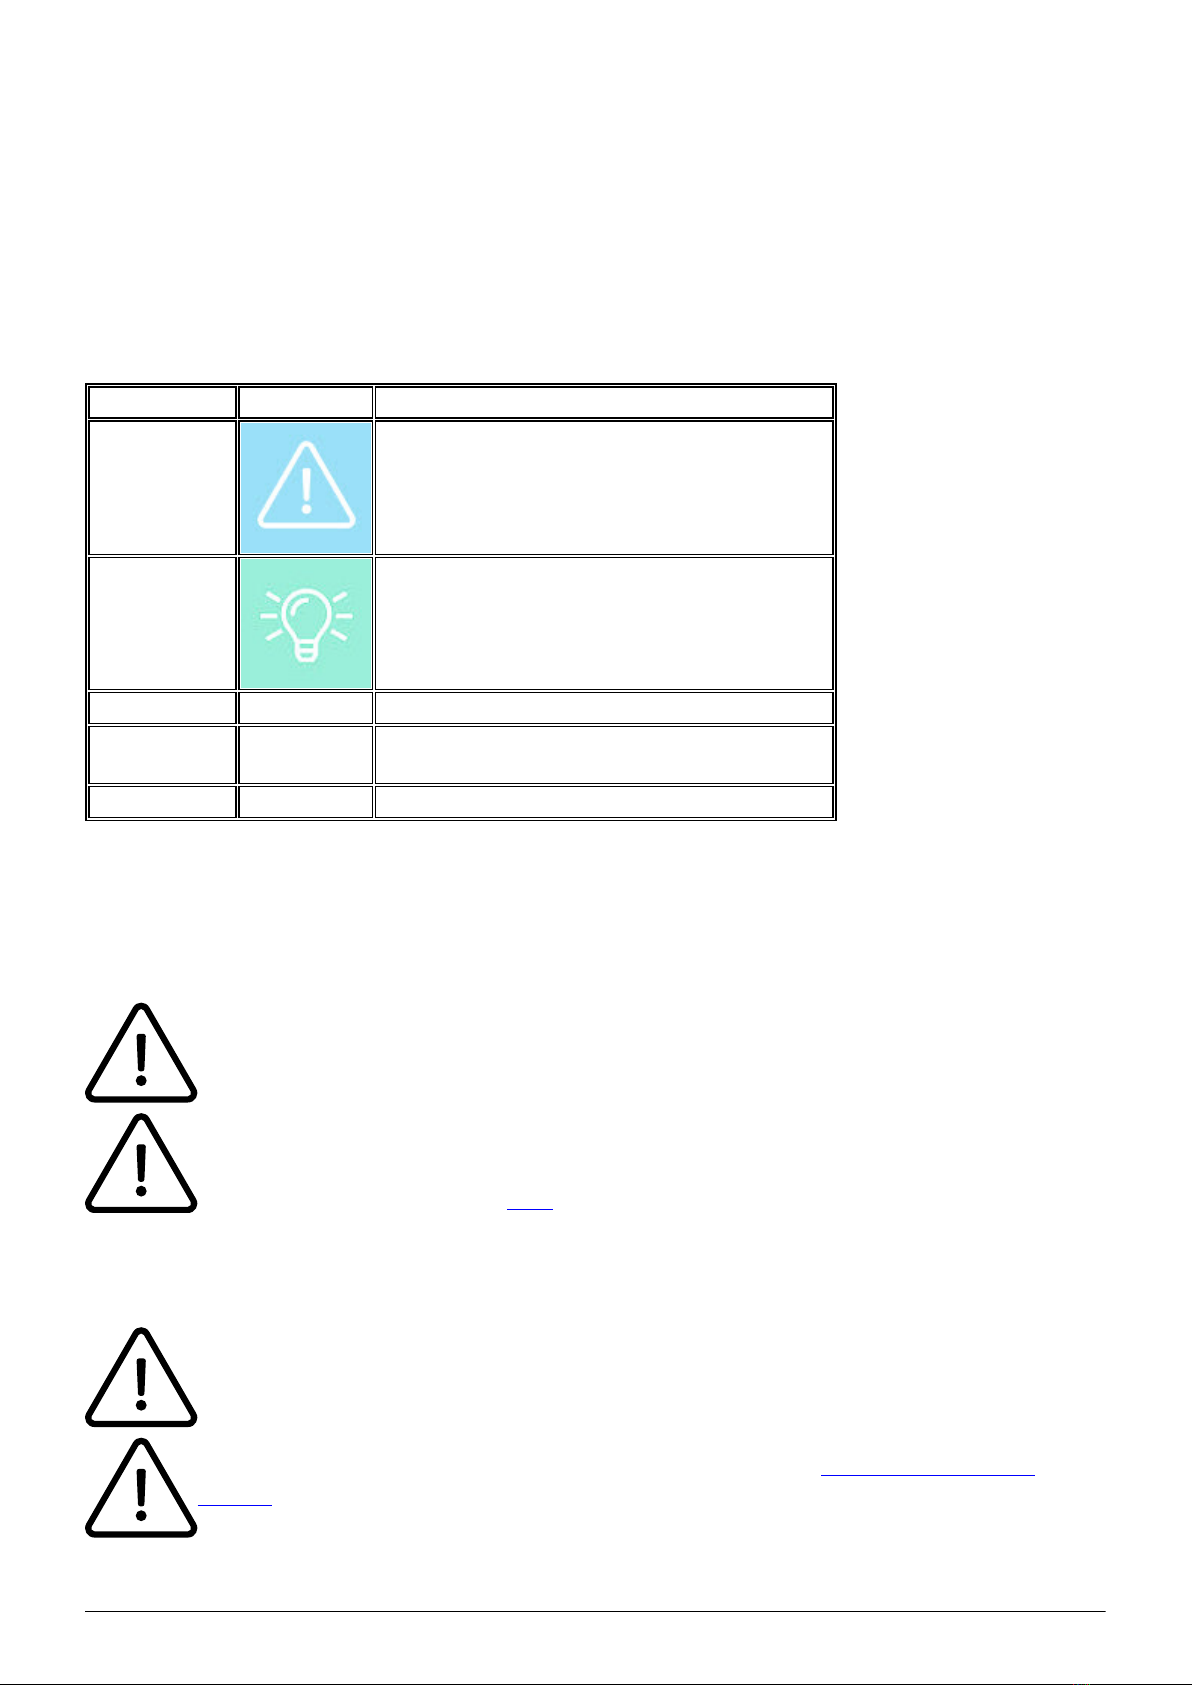
2. Used symbols
Type Icon Description
Notice Important information and notices that you
have to pay attention to.
Hint Useful hints that provide additional
information.
Action – is marked with a dash
Result of an
action ⇒ is marked with an arrow
List • is marked with a bullet point
B. Initial Operation
1. Requirements and Information
Using this snom IP telephone with your nfon telephone system merely requires a sound
broadband connection.
Please note: Telephones with the firmware 8.9.3.x should not be downgraded to a
firmware lower than 8.7.5.44, otherwise problems may occur if you try to upgrade again.
See the manufacturer's notice here.
2. Adding an extension
All telephones you receive are preconfigured and connected to the telephone system.
Find further information on how to install an extension in the administration portal
manual.

3
C. Notices
1. Encryption
You have the option of voice encrypting (SRTP) your telephone calls. You can activate this function
for your customer account via the administration portal at any time.
Activation of this function is subject to fees.
You can activate the function Voice Traffic encryption (SRTP) on the administration
portal under ADMINISTRATION / Profile.
- Activate the function on the administration portal.
- Restart all telephones. Restarting may take a few minutes. During a conversation a lock icon on
the telephone display indicates encryption is activated.
⇒ The active call is now encrypted.
2. Call forwarding
You can configure various call forwarding scenarios. For this purpose you can use the call
forwarding profiles.
Under the telephone menu you can only edit the default profle (catch all / always) to be found under
the call forwarding profiles. You can edit the remaining call forwarding profiles via Ncontrol or via
the administration portal. For more information, refer to the administration portal manual and the
Ncontrol manual.
The following call forwarding options are available. You can activate or deactivate call forwardings
via the telephone menu's call settings.

4
Permanent call forwarding (always)
All incoming calls will be forwarded directly to the predefined telephone number.
Forward if busy (busy)
New calls will be forwarded immediately, when coming in during an active call. This call forwarding
option functions only, if the Call Waiting function is deactivated.
Delayed call forwarding (no answer)
Call forwarding condition: You do not answer the incoming call within a defined time period
(timeout). The timeout can be set to 5, 10, 15 or 20 seconds. Where should the incoming call be
forwarded after the specified time has elapsed? The caller receives a call waiting signal and is then
forwarded to the defined destination.
If unavailable (not registered)
The option functions only if the end device is not registered to the telephone system:
When the Internet connection fails or there is no LAN connection.
and
If “call forwarding …if unavailable” is programmed for a direct extension (e.g. extension 123 -
John Doe) and a caller calls the direct dial number for the extension directly, call forwarding
applies. If the extension is a member of a queue or a group and the queue or group receives a
call, call forwarding for the individual extension no longer applies! In general, the destination
should always be an available destination number. I.e., make sure that no voicemail or
announcement comes on.
The display on your telephone indicates whether or not call forwarding is active.
Call forwardings can alternatively be activated through * codes:
*10 Activation of the call forwarding profile
*11 + destination Permanent call forwarding to telephone number
**11 Cancel permanent call forwarding
*12 + destination If no answer after a specific time, delayed call forward
to telephone number
**12 Cancel delayed call forwarding
*13 + destination If busy, forward to telephone number

5
**13 Cancel call forwarding if busy
*14 + destination Call forwarding if unavailable
**14 Cancel call forwarding if unavailable
3. “Hot desking”
The basic function of “Hot desking” allows cancelling the registration of existing users and
registering new users to your end device. This is useful when employees frequently change their
work station without taking along their end devices. After completing the registration process your
configuration is automatically transferred to the new telephone.
Cancelling the registration of the current extension
- Proceed as follows when in menu:
Menu -> Telephone settings -> Cancelling an extension -> Confirm
⇒ The extension is now cancelled and the telephone is restarted. This may take some time.
Registering the new extension
- Proceed as follows when in menu:
Menu -> Enter the extension number -> Confirm -> Enter voice mail PIN -> Confirm
⇒ The new extension is now registered. This may take some time.
D. Operation
1. Basic functions
1.1. Overview of keys
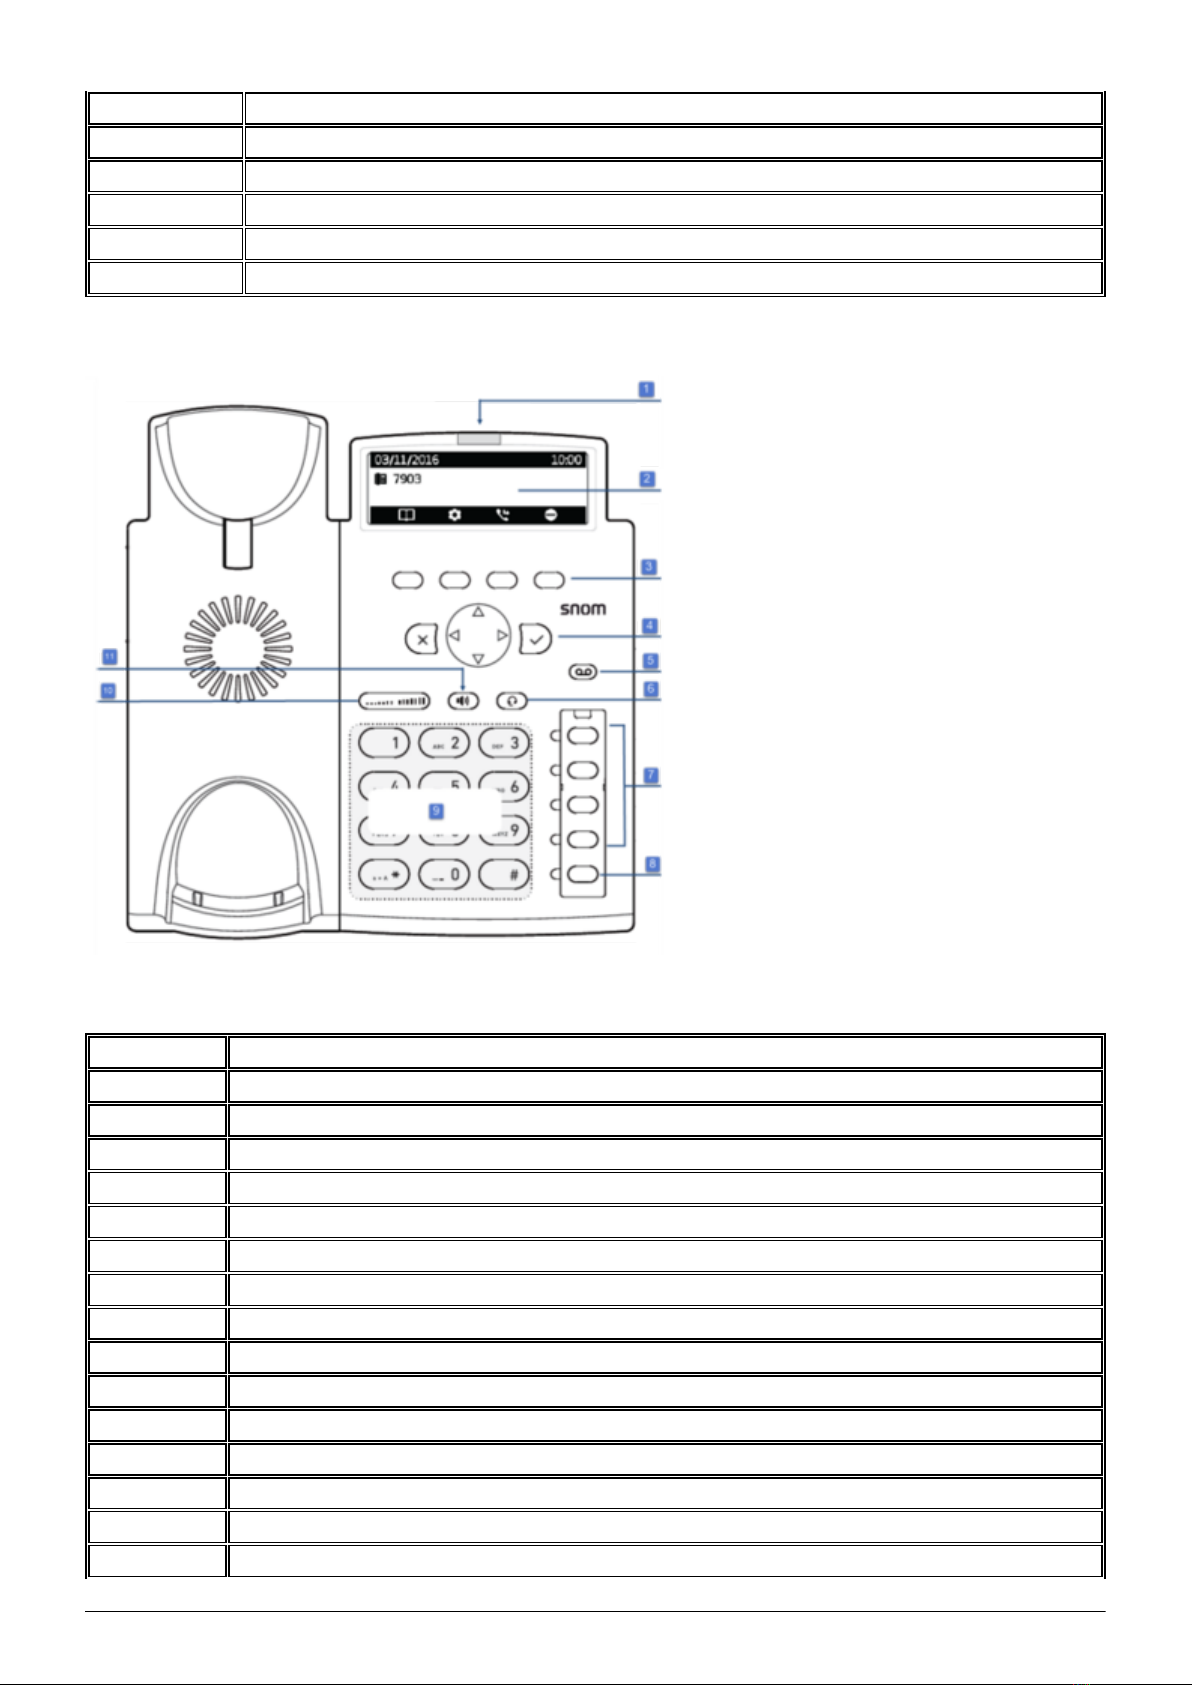
snom D305/D315
No. Description
1 LED call indicator
2 Display
3 Soft keys
4 Navigation keys
5 MWI key
6
6 Headset modus
7 BLF keys
8 Mute key
9 Alphanumeric keypad
10 Volume key
11 Handsfree mode
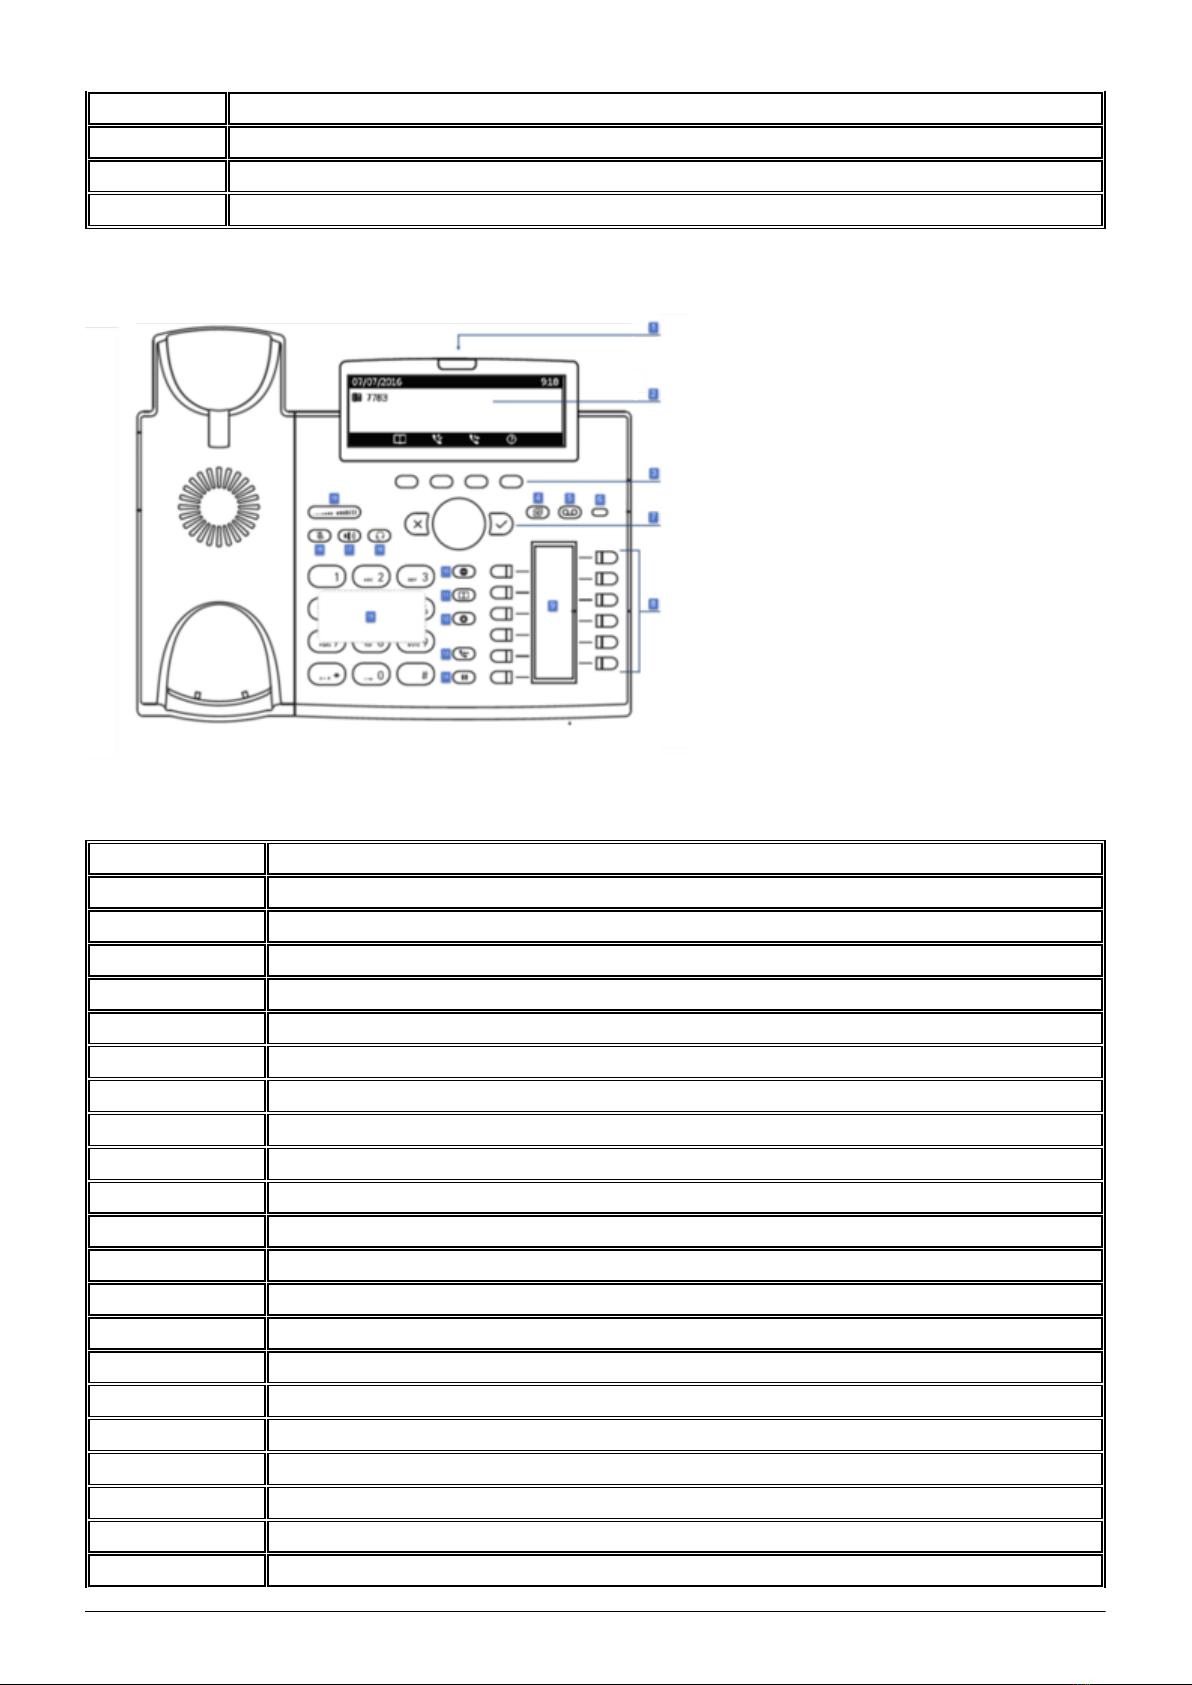
snom D345
No. Description
1 LED call indicator
2 Display
3 Soft keys
4 Page key for four function key screens
5 MWI key
6 MWI LED
7 Navigation keys
8 BLF keys
9 Function key screen
10 DND
11 Directory
12 Settings menu
13 Transfer
14 Hold
15 Alphanumeric keypad
7
16 Mute key
17 Handsfree mode
18 Headset mode
19 Volume key
snom D375
No. Description
1 LED call indicator
2 Display
3 Soft keys
4 Record
5 MWI key
6 MWI LED
7 Navigation keys
8 BLF keys
9 Label field for function keys
10 Redial
11 Directory
12 Queue
13 Conference
14 Hold
15 Settings
16 Help
17 NFON menu
18 Transfer
19 DND
20 Alphanumeric keypad
21 Mute

8
22 Handsfree mode
23 Headset mode
24 Volume key
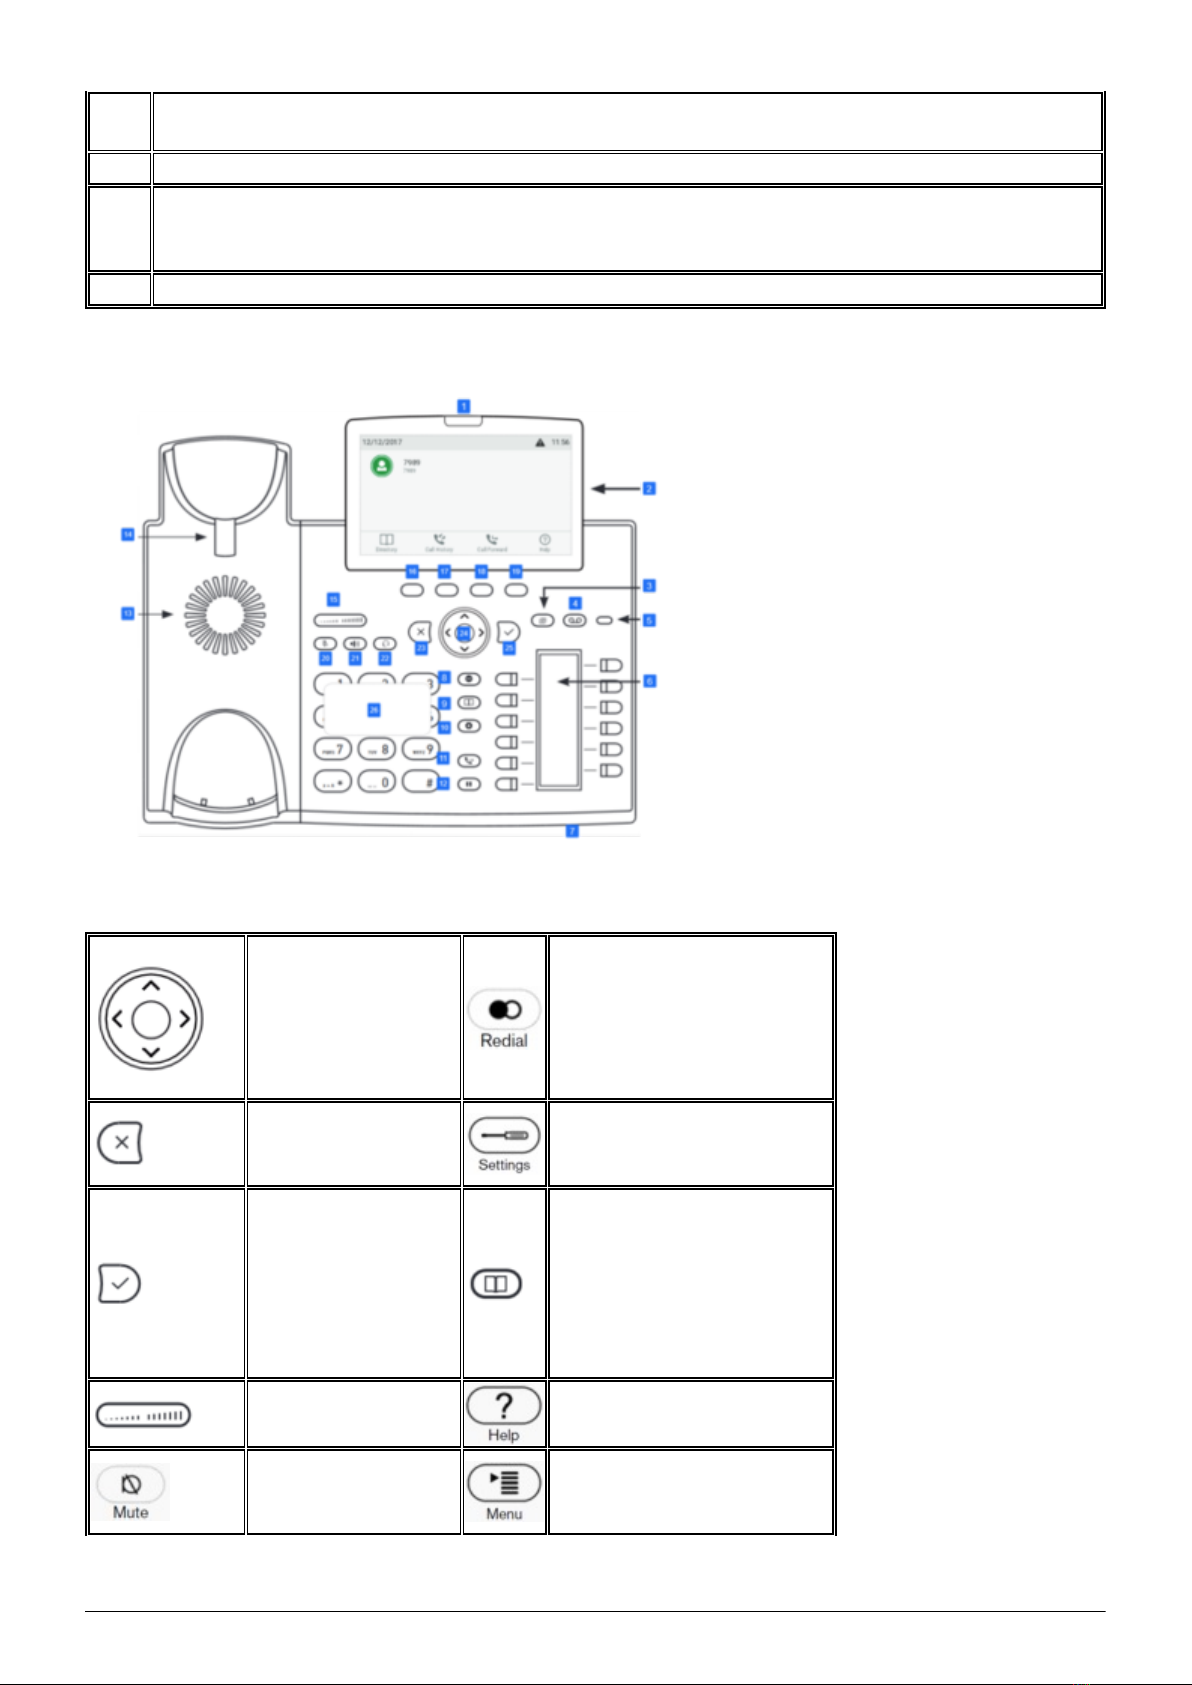
snom D385
No. Description
1 LED call indicator
2 Display
3 Page key - fkey screen
4 MWI key
5 MWI LED
6 Function key screen and function keys
7 Casing microphone
8 DND
9 Directory
10 Settings menu
11 Transfer
12 Hold
13 Casing speaker
14 Handset rest tab
15 Volume keys
16-19 Soft keys
20 Mute/unmute microphone
21 Toggling between handsfree and handset mode. Press to dial number and accept calls on
speakerphone.
22 Headset mode on/off
9
23 Navigation key: Canceling actions & input, and returning to previous screen / Terminating
calls on speakerphone and in headset & handset modes
24 Navigation key: toggle key
25
Navigation key: Confirming, saving actions & input, and returning to previous screen /
Accepting calls on speakerphone and in headset mode / From idle screen: Dialed calls
(redial)
26 Alphanumeric keypad
1.2. Keys in detail
You can use the
“toggle key” to
scroll in the display.
On the start screen:
Down: Settings
Up: Call lists
Redialing
Cancels an action or
entr
Maintenance menu: The
functions are visible but
not activated*
Confirms an action,
selection or entry
After pressing this key you
can enter a name to select
a party. The phone book
must first be set up on the
administration portal – see
administration portal
manual
Adjusts the receiver
or ringer volume.
Shows device SIP, IP and
MAC address*
Switches the
microphone off
during a call
Enables queues to be
enabled or disabled*

10
Hands-free mode
(able to answer)
Enables queues to be
enabled or disabled*
Headset mode (able
to answer)* starts a 3-way call*
Record call
(inactive)* Transferring calls
Access voicemail* Hold call*
Voicemail message
LED
Do Not Disturb mode
on/off. The telephone won’t
ring, same as for "call
forwarding... delayed” to
the caller
On the snom 300, please
press the mute key to
switch to DND
*) key
available not
on all snom
D3x5 models
1.3. Outgoing call
When dialing an internal telephone number, only the extension needs to be entered.
When dialing external telephone numbers, you must first dial ‘0’, then enter the external
number.
- To complete the dialing process, press the confirm key in either case or pick up the receiver.
If the receiver is not lifted the call will be placed in hands-free mode.
- To end the call, return the receiver to the cradle (for calls in hands-free mode), simply press the
cancel key .
- If you made an incorrect entry while dialing the number, you can correct the entry with the “C←”
key (softkey function).
Or delete the entire entry by pressing the cancel key .
Other manuals for D305
1
This manual suits for next models
4
Table of contents
Other Snom IP Phone manuals


