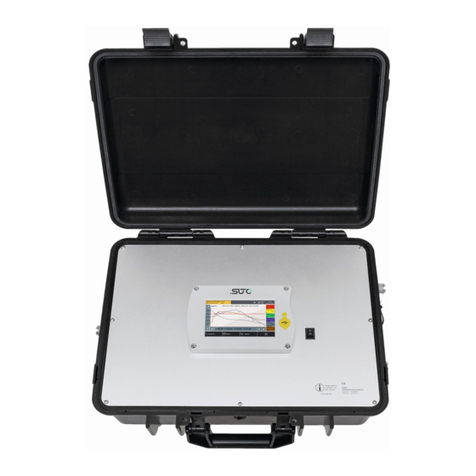
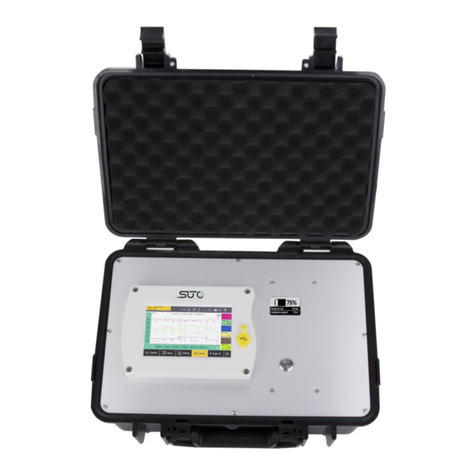
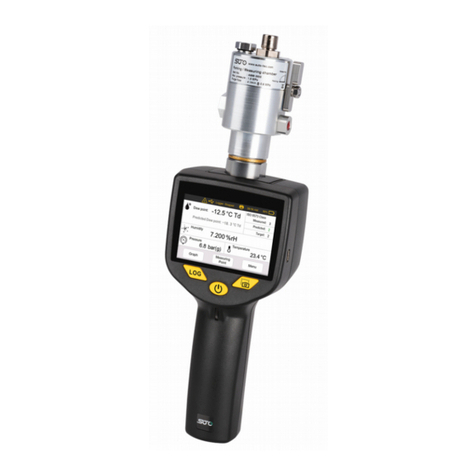
SUTO S605 Manual

English
Instruction and Operation Manual
S605
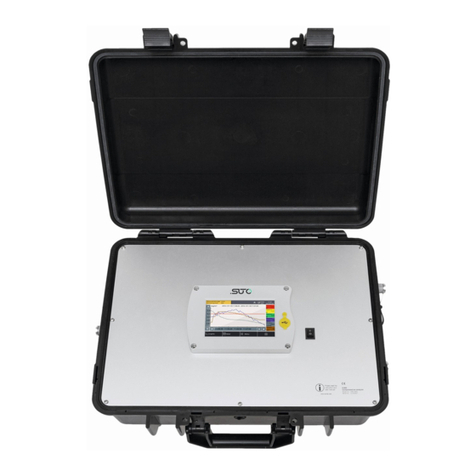
Portable Breathing Air Quality Analyzer

Dear Customer,
Thank you for choosing our product.
Before starting up the device, please read the manual in full and observe
the operating instructions stated. The manufacturer cannot be held liable
for any damage which occurs as a result of non-observance or non-
compliance with this manual.
Should the device be tampered with in any manner other than a
procedure which is described and specified in the manual, the warranty
is void and the manufacturer is e empt from liability.
The device is designed e clusively for the described application.
We offer no guarantee for the suitability for any other purpose. We are
also not liable for consequential damage resulting from the delivery,
capability or use of this device.
2 S605

Table o Contents
1 Safety Instructions......................................................................5
2 Registered Trademarks................................................................8
3 Application.................................................................................8
4 Features....................................................................................8
5 Technical Data............................................................................9
5.1 General Data........................................................................9
5.2 Operating Conditions.............................................................9
5.3 Measurement Data..............................................................10
6 Dimensional Drawings................................................................12
7 Installation on Site....................................................................13
7.1 Compressed Air Inlet...........................................................14
7.2 Compressed Air Connections.................................................15
7.2.1 Installation Requirements...............................................15
7.2.2 Installation...................................................................16
7.3 Electrical Connectors............................................................17
7.4 Electrical Connections..........................................................17
7.4.1 RS-485 Networking (Modbus/RTU)...................................17
7.4.2 TCP/IP Networking (Modbus/TCP)....................................18
7.4.3 Connect with a PC or an OTG USB Stick............................18
7.5 Water Filling Connector........................................................18
7.6 Calibration Connector ..........................................................19
8 Setup and Configuration.............................................................20
9 Operation.................................................................................21
9.1 Main Screen........................................................................23
9.1.1 Quick Buttons and Icons.................................................23
9.1.2 Icons in the Status Bar...................................................23
9.2 Value View..........................................................................24
9.3 Graphic View......................................................................24
9.4 Menu.................................................................................25
9.5 Configure S4A Remote Connection.........................................27
9.6 SIM Card Requirement for 4G/LTE Option...............................27
9.6.1 Data Traffic...................................................................27
9.6.2 PIN Code Protection.......................................................27
10 Guided Measurement...............................................................28
10.1 Steps for Guided Measurement............................................30
10.2 Reports for Guided Measurements.......................................32
S605 3

11 Firmware Updates...................................................................33
12 Calibration..............................................................................35
12.1 Calibration for DP Sensor and Oil Sensor...............................35
12.2 Calibration for O2, CO, CO2 Sensor......................................35
12.2.1 Calibration Gases.........................................................36
12.2.2 Calibration Procedure...................................................36
13 Optional Accessories................................................................42
14 Maintenance...........................................................................42
15 Disposal or Waste....................................................................42
16 Warranty................................................................................42
17 Appendi - Modbus Holding Register Table..................................43
17.1 Modbus Interface...............................................................43
17.2 Modbus Register Table........................................................44
4 S605

1 Safety Instructions
1 Sa ety Instructions
Please check i this instruction manual matches the
product type.
Please observe all notes and instructions indicated in this
manual. It contains essential information which must be
observed before and during installation, operation and
maintenance. Therefore this instruction manual must be read carefully
by the technician as well as by the responsible user / qualified
personnel.
This instruction manual must be available at the operation site of the
flow sensor at any time. In case of any obscurities or questions,
regarding this manual or the product, please contact the manufacturer.
WARNING!
Compressed air!
Any contact with quickly escaping air or bursting
parts o the compressed air system can lead to
serious injuries or even death!
•Do not e ceed the ma imum permitted pressure range (see
sensors label and/or the specifications written in this manual).
•Only use pressure tight installation material.
•Avoid that persons get hit by escaping air or bursting parts of the
instrument.
•The system must be pressure less during maintenance work.
WARNING!
Voltage used or supply!
Any contact with energized parts o the product
may lead to an electrical shock which can lead to
serious injuries or even death!
•Consider all regulations for electrical installations.
•The system must be disconnected from any power supply during
maintenance work.
•Do not e ceed the permitted operating parameters as specified in
the data sheet, this manual or written on the instrument.
•Make sure the product is operated in its permitted limitations.
S605 5

1 Safety Instructions
•Do not e ceed or undercut the permitted storage and operation
temperature, pressure and humidity.
•The product should be maintained and calibrated frequently, at
least annually. For more information, please contact the customer
support.
General sa ety instructions
•It is not allowed to use the product in e plosive areas.
•Please observe the national regulations before/during installation
and operation.
Remarks
•It is not allowed to disassemble the product.
•Always check the compressed air connectors in terms of stability
and tightness before any operation.
ATTENTION!
Measurement values can be a ected by mal unction!
The product must be installed properly and requently
maintained, otherwise it may lead to wrong
measurements, which can lead to wrong results.
•The instrument must be operated within or better than
compressed air quality Class 4.4.4 according to the ISO8573-1. If
the air quality cannot reach the specified class, the device may
show wrong measurement values or even may get damaged.
•Do not e ceed the ma imum operation temperature or pressure.
•Avoid condensation inside the instrument caused by the supplied
air or gas because it harms the instrument and affects the
accuracy.
•It is recommended that before any operation you e amine the
instrument in terms of the measurement accuracy and deviations.
To do this, you may use high efficiency filters for oil vapor and
particle, and the instrument should show low values close to zero.
Additionally, it is recommended you e amine the dew point
measurement to ensure it is working correctly. To do this, you may
use a dry gas with a defined dew point value which should be
reached within several minutes. Or you may use any reference
meter. Only after doing these e aminations, you can rely on the
measurement results after the instrument have been used for
other measurement cycles.
6 S605

1 Safety Instructions
•Always perform a visual inspection in prior to every measurement
before connecting compressed air. If any loose objects are found,
do not connect the compressed air because it may lead to a
damage or injuries.
Storage and transportation
•Make sure that the transportation temperature is between
-10... 50°C.
•For transportation it is recommended to use the packaging which
comes with the sensor.
•Please make sure that the storage temperature of the sensor is
between -10... 50°C.
•Avoid direct UV and solar radiation during storage.
•For the storage the humidity must be < 90%, no condensation.
ATTENTION!
Equipment may get damaged!
Please make sure, that your measuring point is
ree o excessive contamination/dirt. This should
maintained be ore every measurement.
•Observe the measuring point always before measurement if it is
free of contamination like water drops, oil drops or other rough
contaminants.
•Should water hit the inner electronics, the senors could be
seriously damaged.
•Any rough contamination of particles, water, oil or other impurities
may damage the instrument or affect the accuracy.
•Check your measurement point with the enclosed test kit, by
purging air in prior to the use of the instrument through the test
kit. A clean tissue may help to identify oil, water or any other
lubricants in the air.
S605 7

2 Registered Trademarks
SUTO®Registered trademark of SUTO iTEC
MODBUS®Registered trademark of the Modbus Organization,
Hopkinton, USA
3 Application
The S605 Portable Breathing Air Quality Analyzer measures the content
of O2, CO, CO2, H2O and Oil vapor according to the breathing air purity
standards. It monitors the contaminant concentration to ensure that the
breathing air quality complies with international standards such as
EN 12021 or CFSR 1910.134(d).
The S605 is mainly used in an industrial environment. It can not be used
in hazardous or e plosive environment and it not suited for permanent
outside applications.
4 Features
•All-in-one device measures O2, CO, CO2, H2O, Oil, and pressure.
•Portable design makes it to be carried with one hand.
•The device has a DC power supply and additionally a battery which
can bridge power failures.
•High resolution 5” color touchscreen display.
•Software guided measurement.
•USB port for transferring data to a USB-OTG memory.
•Modbus/TCP and Modbus/RTU interfaces for communication.
•Data logger with the capacity of 30-million values.
•Only one gas inlet for all parameters.
•0.4...1.5 MPa(g) pressure at inlet; higher pressure is available
with e ternal pressure reducer.
•With optional 4G modem feature (P/N: A1670) and dedicated S4A
software, you can check the online measurement values, read out
the logging files remotely.
8 S605

5 Technical Data
5 Technical Data
5.1 General Data
Display Touchscreen, Size: 5“,
Resolution: 800 480 pi
Power supply Mains supply adapter (AC/DC)
Input: 100 ... 240 VAC, 50/60 Hz, 1.8 A
Output: 20 VDC, 3.25 A, 65 W ma
Internal battery 7500 mAh
Rechargeable for nearly 3.5 hours operation
Charging time about 1.5 hours
Process connection Micro quick connector, full pass through,
male (1.5 m hose with coupling included)
Interface USB
M12 (Modbus/RTU)
Ethernet (Modbus/TCP)
USB-A for 4G/LTE modem (optional)
Data logger Internal, 30-million values
Housing material PC + ABS, Aluminum
Protection class IP54 (cover closed)
Dimension 470 365 181 mm
Approvals FCC, EC
Weight 11 kg
5.2 Operating Conditions
Measuring medium Compressed breathing air
Humidity of the medium < 40%, non condensation
Temperature of the medium 0°C ... +45°C
Operation pressure 0.4 ... 1.5 MPa(g)
Higher pressure needs an e ternal
pressure reducer.
Storage & Transport temperature -10°C ... + 50°C
Ambient temperature 0°C ... +50°C
S605 9

5 Technical Data
Ambient humidity 0 ... 90% rH
Sampling flow rate 6 LPM@4 MPa(g), depends on input
pressure
Sampling rate 1 sample/sec
5.3 Measurement Data
Oil Vapor Sensor (only or S605-I version)
Measuring range 0.001... 5.000 mg/m³
(Based on 1000 hPa(a), 20°C, 0%
relative humidity)
Accuracy 5% of reading ± 0.003 mg/m³
Resolution 0.001 mg/m³
Sensor principle Photo ionization detector
UV lamp lifetime 6,000 working hours or 1 year,
whichever comes first
Oil Mist and Particle Sensor (only or S605-C version)
Measuring range 0.0 ... 5.0 mg/m³
(Based on 1000 hPa(a), 20°C, 0%
relative humidity)
Accuracy 15% of reading ± 0.1 mg/m³
Resolution 0.1 mg/m³
Sensor principle Oil mist and particle sensor
O2 Sensor
Measuring range 0 … 25%
Accuracy ±(1% of reading +0.05%)
Resolution 0.1%
Sensor principle Optical o ygen sensor
CO Sensor
Measuring range 0 … 20 ppm
Accuracy ±(5% of reading +1 ppm)
Resolution 0.1 ppm
Sensor principle Electrochemical sensor
CO2 Sensor
10 S605

5 Technical Data
Measuring range 0 … 1000 ppm
Accuracy ±(1% of reading +25 ppm)
Resolution 1 ppm
Sensor principle NDIR sensor
H2O
Measuring range -100 … +20 °C Td / 0 … 17458.6
mg/m³
Accuracy ±1 °C Td (0… 20 °C Td)
±2 °C Td (-70...0 °C Td)
±3 °C Td (-100… -70 °C Td)
Resolution 0.1 °C Td
Sensor principle QCM + Polymer
Pressure Sensor
Measuring range 0... 16 bar(g)
Accuracy 0.5% FS
Resolution 0.01 bar
Sensor principle Piezzo resistive pressure sensor
S605 11

7 Installation on Site
Please make sure that all components listed below are included in your
package.
Qty. Description Item No.
1 S605 Portable Breathing Air Quality Analyzer,
in a hand carrying case with handle and
shoulder belt
S605-I version:
P560 0605 (with
oil vapor sensor)
S605-C version:
P560 1605 (with
oil mist and
particle sensor)
1 USB OTG memory stick
1 Purge filter for pre-measurement (test kit)
1 Power adapter
Input:100 ... 240 VAC,50/60 Hz,1.8A
Output:20 VDC, 3.25 A, 65 W ma
1 1.5 m Teflon hose with a quick connector and
a compressed air coupling at each end
1 Water filling bottle
1 Operation and instruction manual
1 Certificate of calibration
1 M12 connector
1 USB 4G/LTE modem, including S4A software
(option) A1670
To replace the items in the preceding list or buy accessories, contact
the manufacturer or your local distributor.
S605 13

7 Installation on Site
7.1 Compressed Air Inlet
The compressed air inlet is located on the right side of the S605
housing.
S605-I right view
ATTENTION!
Permissible pressure!
Please observe the maximum permissible inlet
pressure. I the pressure exceeds the range, the
device will be damaged. I the pressure is too low,
the volumetric low will not be high enough, which
leads to wrong results.
14 S605

7 Installation on Site
7.2 Compressed Air Connections
7.2.1 Installation Requirements
Make sure that the installation meets the following requirements:
•The device must be set up ne t to the measuring point. Make sure
that the device is put on a flat place.
•The tubes should be not bended heavily and should be installed
with a big curve radius to avoid turbulence in the air flow.
•Connect the S605 to the power during the measurement, and
make sure that the device is not turned off or plugged off during
the measurement because data will then be lost.
ATTENTION!
I the device is not installed properly it may lead to
wrong measurement results.
•The device is designed to be operated indoors only. To use the
device outdoors, protect the device from direct sunlight and rain.
•Before you start the measurement, check your point of
measurement for contaminants.
ATTENTION!
Be ore you connect the device to your point o
measurement, make sure that there is no rough
contamination like water/oil drops or heavy dust.
This may damage the sensor units. For this please
use the purge ilter test kit.
S605 15

7 Installation on Site
Before each measurement, the measuring point should be checked for
coarse contamination. Follow the steps below:
1. Connect the purge filter test kit onto your measuring point first.
Turn on the purge valve on the test kit and purge air for a short
period.
2. Check the filter in the test kit to identify whether it shows high
contamination of water, oil or dust.
3. If the filter is contaminated severely, stop using the S605 for
measurement because this may lead to serious damage to the
device. In case you are not sure, please contact the manufacturer.
7.2.2 Installation
1. Remove the protection cap from the air inlet of the S605.
2. Connect your compressed air system to the air inlet of the S605 by
using the supplied Teflon hose.
Notes:
•Make sure you are using clean and oil-free components when
connecting the instrument.
•The compressed air supply must always be applied carefully. If you
are using ball valves, turn on them carefully and slowly. If you
observe any une pected noise or air leakage, shut down the
compressed air supply immediately and disconnect the instrument.
16 S605

7 Installation on Site
7.3 Electrical Connectors
Three connectors are available on the right side of the S605.
S605-I right view
Type Description
RJ-45 Modbus/TCP
M12 Modbus/RTU
Type-C USB Power supply connector /Battery charger interface
ATTENTION!
Please connect the power correctly! I wrong
supply is used such as AC power, the instrument
may get damaged.
7.4 Electrical Connections
7.4.1 RS-485 Networking (Modbus/RTU)
Through the M12 connector, the S605 can be connected to the RS-485
network over the Modbus/RTU protocol.
The RS-485 networking uses the following 3 pins in the M12 connector.
The pin functions are described below.
Pin No. Assignment Function
4 Data + Data + signal
5 Data - Data - signal
1 GND RS-485 Ground of RS-485
S605 17

7 Installation on Site
7.4.2 TCP/IP Networking (Modbus/TCP)
Through the RJ-45 connector, the S605 can be connected to the TCP/IP
network over the Modbus/TCP protocol.
Remove the protection cap and plug in the network cable (RJ-45).
For more information about the data attributes of measurement
channels, see Appendi - Modbus Holding Register Table.
7.4.3 Connect with a PC or an OTG USB Stick
Through the USB port on the front panel, the S605 can be connected
with:
•An OTG memory stick: To import firmware for upgrade and to
e port data.
•A PC where data analysis software such as S4A or S4M is
installed: To e port data to the PC for analysis.
7.5 Water Filling Connector
To ensure that the measured gas is in a reasonable humidity, a
humidifier is integrated in the S605, thus the CO sensor will not be
damaged because the measured gas is too dry.
The water filling connector of the humidifier is on the front side of the
S605. The water draining connector (i.e., air outlet) is on the right of
the S605.
S605-I right view
When the water level is too low, the low water level indication in the
status bar blinks, which reminds to fill water for the humidifier.
A water filling bottle is supplied in the package. To fill water, remove the
18 S605

7 Installation on Site
protection caps from the water inlet and air outlet first, plug bottle
nozzle into the water filling connector, then squeeze the bottle and the
water is filled in. This process may take 1-2 minutes. Obersve the water
level indication in the status bar. When the high water level icon
appears on the status bar, stop to fill. Then put on the two protection
caps.
ATTENTION!
Please ill with water be ore the irst use!
A ter the S605 is unctional, re ill water in time.
The humidi ier li etime is nearly 18 days (base on
the general condition). I the water level is too low,
it will greatly reduce the li etime o the CO sensor or
even damage the sensor!
For the injected water, it is recommended to use
pure/demineralized water. Unclean water can cause
scaling and even contaminate sensors.
7.6 Calibration Connector
The calibration connector is located on the right side of the S605. When
the sensors need to be calibrated, remove the connector cap, then
connect the calibration hose. When the calibration is finished, put on the
cap to avoid the dust or other substance entering. For more
information on calibration procedure, see section 12 Calibration.
S605-I right view
S605 19

8 Setu and Configuration
8 Setup and Con iguration
The S605 is configured e -works and ready to work when you get it.
The S605 provides a guided measurement procedure to take you
through device setup for each measurement parameter. All these setup
settings are automatically saved into the device even on a power
failure.
For more information about the guided measurement procedure, see
section 10 Guided Measurement.
ATTENTION
I you are acing problems setting up your device,
contact the manu acturer or your local dealer or
assistance.
I power outage occurs during the measurement,
the measurement data will not be saved!
20 S605
Table of contents
Other SUTO Measuring Instrument manuals
Popular Measuring Instrument manuals by other brands

Nic
Nic EMP-2 Simplified manual

Meters UK
Meters UK EM606 M-Bus user manual

HYDAC International
HYDAC International AquaSensor AS 8000 Series operating manual

GREISINGER
GREISINGER G 1110 Quick reference guide

Sekonic
Sekonic STUDIO DELUXE? L-398A Startup guide

Industrial Scientific
Industrial Scientific Tango TX1 reference guide

YOKOGAWA
YOKOGAWA AQ7277 user manual

ALTHEN
ALTHEN NM1-2L-420-ATEX manual

Procentec
Procentec ATLAS user manual

DRUCK & TEMPERATUR Leitenberger
DRUCK & TEMPERATUR Leitenberger LR-Cal Pyros Basic 375 operating manual

KAESER KOMPRESSOREN
KAESER KOMPRESSOREN ADA 2 operating manual

Ravaglioli
Ravaglioli RAVTD5040WD Series Service manual