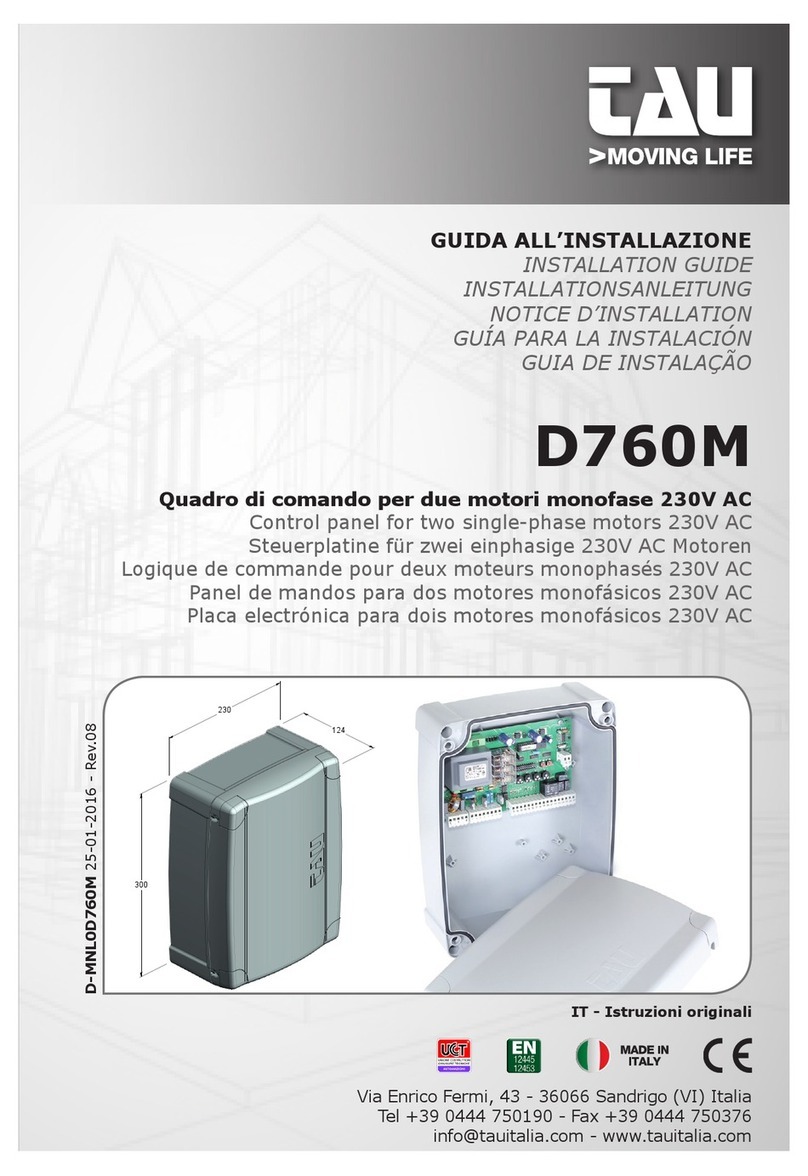
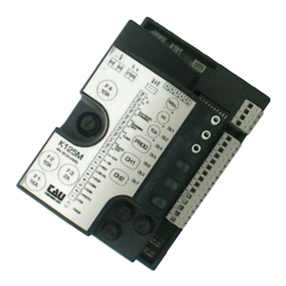
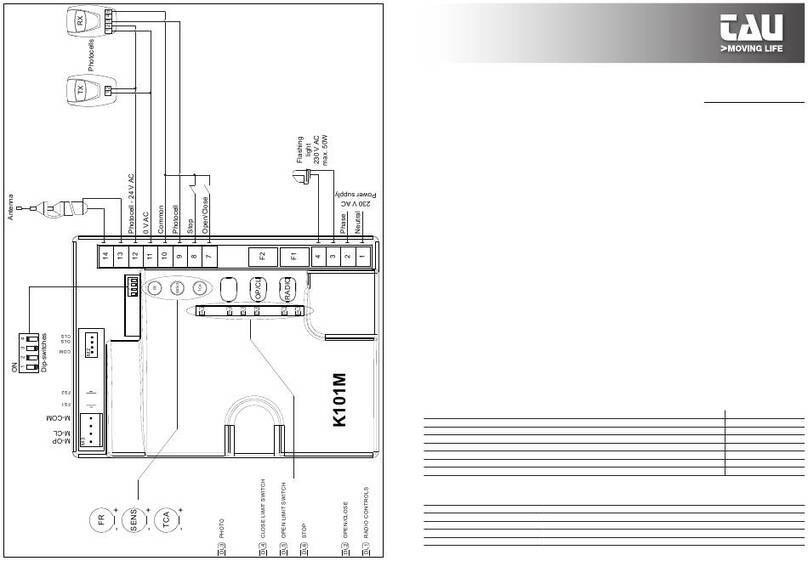
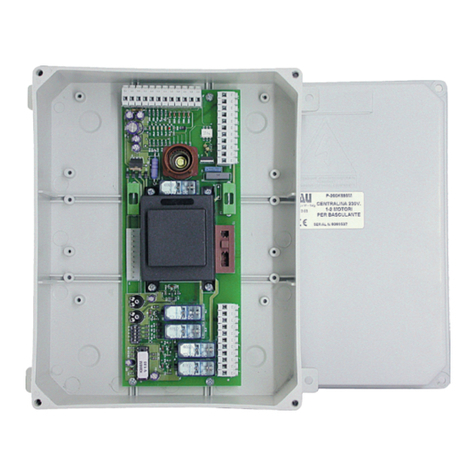
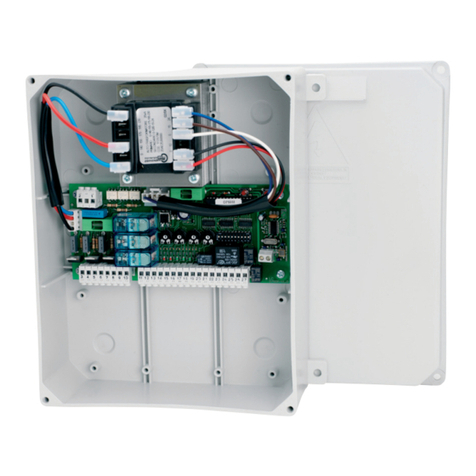
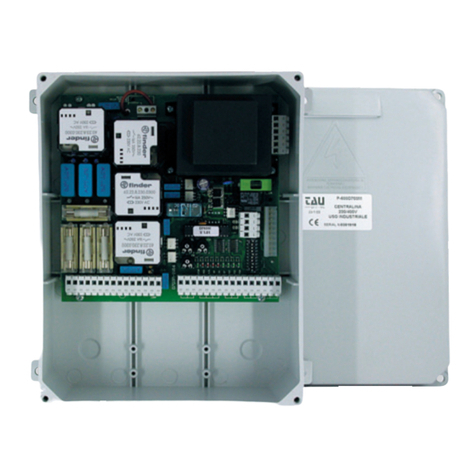
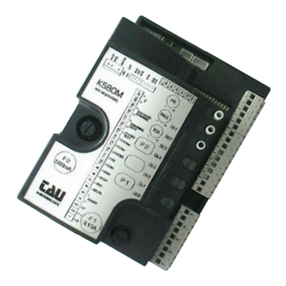
tau D705M User manual

GUIDA ALL’INSTALLAZIONE
INSTALLATION GUIDE
INSTALLATIONSANLEITUNG
NOTICE D’INSTALLATION
GUÍA PARA LA INSTALACIÓN
GUIA DE INSTALAÇÃO
IT - Istruzioni originali
D705M
+
+
+
-
-
-
D705M
D-MNL0D705M 12-03-2020 - Rev.11

2
+
+
STOP PED P. P. CH CF FCC FCAFOT
TF.PRIM
TF. SEC
F1
D705M-1V0
F2
GND
ENC
+5V
GND
GND
FCC
FCA
24V
12V
80V
0V
(230V)
230V
1 2 4 5 6 7 8
M2
M3M4
9 11 12 13 14 15 16 17 18
1920212224252627
2829
23
10
0V
(24V)
0V
(80V)
0V
(12V)
TCA
TL
+
-
-
-
FR
AP
P2
P1
G2
G1
G3
J1
U1A
C4
VR2
VR1
U11
U10
U9
U8
U5
U4
U2
U1
T2
T1
PR1
K6
K4
K3
K2
K1
F2
F1
C43
C38
C13
C5
C3
C45
K5
DL1
DL9
DL10
DL8
DL7
DL6
DL5
DL4
DL3
DL2
M1
230Vac
Power supply
Flashing
light
230Vac
max. 20W
Cap
12,5µF
Common
Phase
Neutral
Close
0 Vac
230 Vac
Common
Fixed safety edge
Common
Photocell
Photocell TX
Photocell RX - 24 Vac
0 Vac
0 Vac
Close
Open
Common
O/C
Ped
Stop
Open
Photocells
RX
1 2 3 4 5
TX
1 2
Gate open
warning light
max. 3W
Antenna
2nd radio
channel
+
+
STOP PED P. P. CH CF FCC FCAFOT
TF.PRIM
TF. SEC
F1
D705M-1V0
F2
GND
ENC
+5V
GND
GND
FCC
FCA
24V
12V
80V
0V
(230V)
230V
1 2 4 5 6 7 8
M2
M3M4
9 11 12 13 14 15 16 17 18
1920212224252627
2829
23
10
0V
(24V)
0V
(80V)
0V
(12V)
TCA
TL
+
-
-
-
FR
AP
P2
P1
G2
G1
G3
J1
U1A
C4
VR2
VR1
U11
U10
U9
U8
U5
U4
U2
U1
T2
T1
PR1
K6
K4
K3
K2
K1
F2
F1
C43
C38
C13
C5
C3
C45
K5
DL1
DL9
DL10
DL8
DL7
DL6
DL5
DL4
DL3
DL2
M1
230Vac
Power supply
Flashing
light
230Vac
max. 20W
Cap
12,5µF
Common
Phase
Neutral
Close
0 Vac
230 Vac
Common
Fixed safety edge
Common
Photocell
Photocell TX
Photocell RX - 24 Vac
0 Vac
0 Vac
Close
Open
Common
O/C
Ped
Stop
Open
Photocells
RX
1 2 3 4 5
TX
1 2
Gate open
warning light
max. 3W
Antenna
2nd radio
channel

3
+
+
STOP PED P. P. CH CF FCC FCAFOT
TF.PRIM
TF. SEC
F1
D705M-1V0
F2
GND
ENC
+5V
GND
GND
FCC
FCA
24V
12V
80V
0V
(230V)
230V
1 2 4 5 6 7 8
M2
M3M4
9 11 12 13 14 15 16 17 18
1920212224252627
2829
23
10
0V
(24V)
0V
(80V)
0V
(12V)
TCA
TL
+
-
-
-
FR
AP
P2
P1
G2
G1
G3
J1
U1A
C4
VR2
VR1
U11
U10
U9
U8
U5
U4
U2
U1
T2
T1
PR1
K6
K4
K3
K2
K1
F2
F1
C43
C38
C13
C5
C3
C45
K5
DL1
DL9
DL10
DL8
DL7
DL6
DL5
DL4
DL3
DL2
M1
230Vac
Power supply
Flashing
light
230Vac
max. 20W
Cap
12,5µF
Common
Phase
Neutral
Close
0 Vac
230 Vac
Common
Fixed safety edge
Common
Photocell
Photocell TX
Photocell RX - 24 Vac
0 Vac
0 Vac
Close
Open
Common
O/C
Ped
Stop
Open
Photocells
RX
1 2 3 4 5
TX
1 2
Gate open
warning light
max. 3W
Antenna
2nd radio
channel

4
AVVERTENZE
Il presente manuale è destinato solamente al personale tecnico qualicato per l’installazione. Nessuna
informazione contenuta nel presente fascicolo può essere considerata d’interesse per l’utilizzatore
nale. Questo manuale è allegato alla centralina D705M montata sul motoriduttore MASTER20Q, non
deve pertanto essere utilizzato per prodotti diversi!
Avvertenze importanti:
Togliere l’alimentazione di rete alla scheda prima di accedervi.
La centralina D705M è destinata al comando di un motoriduttore elettromeccanico per l’automazione
di cancelli, porte e portoni.
Ogni altro uso è improprio e, quindi, vietato dalle normative vigenti.
È nostro dovere ricordare che l’automazione che state per eseguire, è classicata come “costruzione di
una macchina” e quindi ricade nel campo di applicazione della direttiva europea 2006/42/CE (Direttiva
Macchine).
Questa, nei punti essenziali, prevede che:
- l’installazione deve essere eseguita solo da personale qualicato ed esperto;
- chi esegue l’installazione dovrà preventivamente eseguire “l’analisi dei rischi” della macchina;
- l’installazione dovrà essere fatta a “regola d’arte”, applicando cioè le norme;
- inne dovrà essere rilasciata al proprietario della macchina la”dichiarazione di conformità”.
Risulta chiaro quindi che l’installazione ed eventuali interventi di manutenzione devono essere ef-
fettuati solo da personale professionalmente qualicato, in conformità a quanto previsto dalle leggi,
norme o direttive vigenti.
Nella progettazione delle proprie apparecchiture, TAU rispetta le normative applicabili al prodotto
(vedere la dichiarazione di conformità allegata); è fondamentale che anche l’installatore, nel realizzare
gli impianti, prosegua nel rispetto scrupoloso delle norme.
Personale non qualicato o non a conoscenza delle normative applicabili alla categoria dei “cancelli e
porte automatiche” deve assolutamente astenersi dall’eseguire installazioni ed impianti.
Chi non rispetta le normative è responsabile dei danni che l’impianto potrà causare!
Si consiglia di leggere attentamente tutte le istruzioni prima di procedere con l’installazione.
INSTALLAZIONE
L’installazione dovrà essere fatta a regola d’arte da personale qualicato. La Casa Costruttrice declina ogni re-
sponsabilità per danni provocati da imperizia o inosservanza.
In particolare ricordiamo di:
1. scegliere la sezione dei cavi di potenza (alimentazione, motori, massa e lampeggiante) di almeno 1.5 mm² e
comunque in ragione degli assorbimenti e della lunghezza dei conduttori. Ciò detto vale per la rimanenza
dei cavi usati da dispositivi di comando e ausiliari con la sola dierenza della sezione minima che è ridotta
a 0.5 mm²;
2. collegarsi alla morsettiera in modo da non alterare il grado di protezione oerto dal contenitore, che deve
essere posto in luogo asciutto e protetto;
3. tenere separati i cavi di potenza dai cavi dei circuiti ausiliari e di comando, specialmente per percorsi lunghi;
4. cortocircuitare i contatti Normalmente Chiusi che non si dovessero utilizzare.
Si ricorda l’obbligo di mettere a massa l’impianto nonché di rispettare le normative sulla
sicurezza in vigore in ciascun paese.
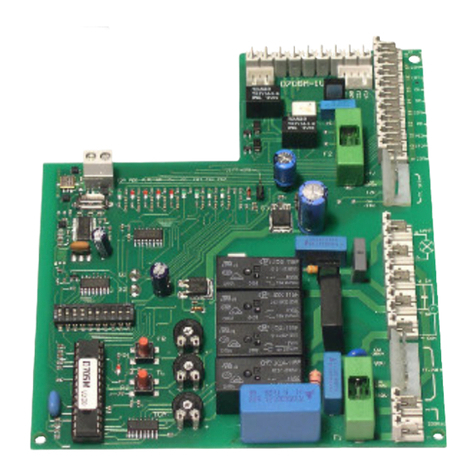
1. SCHEDA COMANDO PER MOTORE MONOFASE 230V AC
• LOGICA CON MICROPROCESSORE
• STATO DEGLI INGRESSI VISUALIZZATO DA LEDs
• PROTEZIONE INGRESSO LINEA CON FUSIBILE
• CIRCUITO DI LAMPEGGIO INCORPORATO
• FUNZIONE “UOMO PRESENTE”
• FRENATURA ELETTRICA
• INGRESSO PER TIMER SETTIMANALE
ITALIANO

5
•
CONTROLLO DELLA COPPIA MOTORE E RILEVAMENTO OSTACOLI TRAMITE ENCODER
•RADIO RICEVITORE 433,92 MHz INTEGRATO A 2 CANALI (CH)
•CONTROLLO DEL BORDO SENSIBILE DI SICUREZZA
ATTENZIONE:
- nonutilizzarecaviunilari(aconduttoreunico),es.quellicitofonici,alnedievitareinter-
ruzionisullalineaefalsicontatti.
- non riutilizzare vecchi cavi preesistenti.
- Incasodilunghitrattidicavi(>20m)pericomandiN.A./N.C.(es:APRE/CHIUDE,STOP,
PEDONALE,ecc),alnedievitaremalfunzionamentidelcancellosirenderànecessariodisac-
coppiare i vari comandi mediante RELAYS oppure utilizzando il nostro dispositivo 750T-RELE.
2. COLLAUDO
A collegamento ultimato:
• I Leds verdi devono essere tutti accesi (corrispondono ciascuno ad un ingresso Normalmente Chiuso).
• Si spengono solo quando sono attivi i comandi ai quali sono associati.
• I Leds rossi devono essere tutti spenti (corrispondono ciascuno ad un ingresso Normalmente Aperto)
si accendono solo quando sono attivi i comandi ai quali sono associati.
3. CARATTERISTICHE TECNICHE
Alimentazione scheda 230V AC - 50÷60Hz
Potenza nominale. 600 W ca.
Fusibile rapido protezione linea (F1 - 5x20) F3,15A - 250V AC
Tensione circuiti alimentazione motore 230V AC
Tensione alimentazione circuiti dispositivi ausiliari 24V AC
Fusibile rapido protezione linea 24 V ac (F2 - 5x20) F1,6A - 250V AC
Tensioni alimentazioni circuiti logici 5V DC
Temperatura di funzionamento -20°C ÷ + 55 °C
Grado di protezione del contenitore IP43
4. COLLEGAMENTI ALLA MORSETTIERA
Morsetti Funzione Descrizione
1 - 2 ALIMENTAZIONE ingresso ALIMENTAZIONE 230V AC 50÷60 Hz monofase;
M1 TRASFORMATORE connettore primario trasformatore [2 li bianchi (230V) + 2 li rossi (80V)];
M2 TRASFORMATORE connettore secondario trasformatore [2 li neri (24V) + 2 li blu (12V)];
4 - 5 - 6 MOTORE uscita MOTORE monofase 230 V ac, 600 W, comune=4, fase apertura=5,
fase chiusura=6, collegare il condensatore tra i morsetti 5 e 6;
7 - 8 LAMPEGGIANTE uscita LAMPEGGIANTE 230 V ac, 20 W max. Il segnale fornito è già op-
portunamente modulato per l’uso diretto. La frequenza di lampeggio è
doppia in fase di chiusura; 7= 230 Vac, 8= 0 V
9 - 10 STOP ingresso pulsante STOP (contatto normalmente chiuso); il suo interven-
to provoca l’arresto dell’automazione. Al successivo comando l’automa-
zione esegue una manovra opposta alla precedente (comune= 9);
9 - 11 PEDONALE ingresso pulsante PEDONALE (contatto normalmente aperto); consente
l’apertura parziale (1 mt. ca.) dell’automazione per consentire il passag-
gio pedonale (comune= 9);
9 - 12 APRE/CHIUDE ingresso pulsante APRE/CHIUDE (contatto normalmente aperto); per le
modalità d’uso vedi le funzioni dei dip-switches 2 - 4 e 10 (comune= 9);
13 - 14 APRE ingresso pulsante APRE (contatto normalmente aperto); per le modalità
d’uso vedi le funzioni dei dip-switches 2 e 10 (comune= 13);
ITALIANO

6
13 - 15 CHIUDE ingresso pulsante CHIUDE (contatto normalmente aperto); per le moda-
lità d’uso vedi le funzioni dei dip-switches 2 e 10 (comune= 13);
13 - 16 FOTOCELLULE
ingresso FOTOCELLULE O DISPOSITIVI DI SICUREZZA attivi in chiusura (con-
tatto Normalmente Chiuso); il loro intervento, in fase di chiusura provoca
l’arresto seguito dalla totale riapertura del cancello, in fase di apertura pro-
voca la fermata temporanea del cancello no a rimozione dell’ostacolo rile-
vato (solo se programmato dip switch nr. 3 in ON), (13= Comune). Nel caso
di più dispositivi di sicurezza, collegare tutti i contatti NC IN SERIE.
17 - 18 BORDO
SENSIBILE
ingresso BORDO SENSIBILE (Bordo sensibile resistivo o costa ssa);
Funziona solo durante la fase di apertura e provoca la fermata temporanea del
cancello e una parziale richiusura dello stesso per circa 20 cm. liberando così
l’eventuale ostacolo (17= Comune).
Nota: se si collega un bordo sensibile resistivo cortocircuitare il ponticello J1;
SesicollegaunacostassaconcontattoNClasciareilponticelloJ1aperto;
19 - 20 non connessi;
21 - 22 2° CH RADIO
uscita 2° CANALE RADIO (il suo funzionamente dipende dai dip-switch nr 7 - 8)
da utilizzarsi per aprire/chiudere un altro cancello o per comandare le luci del
giardino, o per la funzione “ILLUMINAZIONE DI ZONA”;
Nota:perilcollegamentodialtridispositivial2°canaleradio,qualiac-
censione luci, comando pompe o carichi importanti, utilizzare un relè
ausiliariodipotenzaconportataadeguataaidispositividacollegare,al-
trimentisipotrebberoaveremalfunzionamentidovutiadisturbiindotti.
23 - 24 TX
FOTOCELLULE
uscita 24 Vac 10 W per l’ALIMENTAZIONE DEL TX DELLE FOTO-CELLULE
(solo quello che eettua il Fototest) max. nr. 1 trasmettitore fotocellule.
23= 24 Vac, 24= 0 V;
Nota: il trasmettittore della fotocellula deve sempre essere ali-
mentatodaimorsettinr23-24,inquantosudiessosieettuala
vericadelsistemadisicurezza(Fototest).Pereliminarelaverica
delsistemadisicurezza,oquandononsiusanolefotocellule,porre
ildip-switchnr6inOFF.Seilfototestnonvaabuonne,lacentra-
linanonfunziona;
25 - 26 FOTOCELLULE uscita 24 Vac 10 W per l’ALIMENTAZIONE DELLE RX ED EVENTUALI ALTRI
TX DELLE FOTOCELLULE, RICEVITORI ESTERNI, etc; collegare max. n° 3
coppie di fotocellule. 25= 0 V, 26= 24 Vac;
25 - 27 SPIA CANCELLO
APERTO
uscita per SPIA CANCELLO APERTO 24 Vac - max. 3 W; durante l’aper-
tura del cancello la spia lampeggia lentamente, a cancello aperto resta
accesa e durante la chiusura lampeggia a velocità doppia. Si spegne al
raggiungimento del FINE CORSA CHIUSURA (CLS). 25= 0 V, 27= 24 Vac;
28 - 29 ANTENNA ingresso ANTENNA (massa=28, segnale=29);
M3 FCC - FCA
ingresso FINE CORSA CHIUSURA (contatto normalmente chiuso);
ingresso FINE CORSA APERTURA (contatto normalmente chiuso);
ingresso MICRO DI SICUREZZA (contatto normalmente chiuso), alla ri-
mozione del carter il motore si arresta.
ATTENZIONE: la scheda resta in tensione!
M4 ENCODER innesto rapido per connessione ENCODER.
Blu= 0 Vcc (GND), marrone= 5 Vcc (+5V), bianco= SEGNALE ENCODER (ENC);
5.REGOLAZIONI LOGICHE
TRIMMER
T.L. regolazione Tempo di Lavoro: da 5 a 240 secondi ca.;
T.C.A.
regolazione Tempo di Chiusura Automatica: da 5 a 120 secondi ca. (vedi dip-
switch nr. 1);
FR. regolazione sensibilità rilevamento ostacoli (solo per motori provvisti di En-
coder).
Nota:ruotandoiTRIMMERinsensoorariosiaumentanoleregolazioni,viceversa,
ruotandoliinsensoantiorario,diminuiscono.
ITALIANO

7
Dip switch
1CHIUSURA
AUTOMATICA
On ad apertura completata, la chiusura del cancello è automatica trascorso
un tempo impostato sul trimmer T.C.A.;
O la chiusura necessita di un comando manuale;
22 / 4 TEMPI
On ad automazione funzionante, una sequenza di comandi di apertura/
chiusura induce il cancello ad una APERTURA-CHIUSURA-APERTURA-
CHIUSURA, etc. (vedi anche dip switch 4);
O nelle stesse condizioni, la stessa sequenza di comandi di apertura/
chiusura induce il cancello ad una APERTURA-STOP-CHIUSURA-STOP-
APERTURA-STOP, etc. (funzione passo-passo);
3INTERVENTO
FOTOCELLULE IN
APERTURA
On durante la fase di apertura la fotocellula interviene arrestando il cancello
no a rimozione dell’ostacolo rilevato. Alla rimozione dell’ostacolo il
cancello riprende l’apertura;
O durante la fase di apertura la fotocellula non interviene;
4NO REVERSE
On funzione NO-REVERSE attiva; il cancello ignora i comandi di chiusura du-
rante l’apertura e l’inversione di marcia avviene solo in fase di chiusura;
O azionando il pulsante apre/chiude avremo una inversione di marcia
anche in fase di apertura;
5ENCODER On ENCODER inserito: funzione rilevamento ostacoli tramite encoder attiva
(agire sul trimmer FR per regolare la sensibilità sull’ostacolo);
O ENCODER escluso;
6PRELAMP. E
FOTOTEST
On la funzione prelampeggio e “verica delle fotocellule” è inserita;
O la funzione prelampeggio e “verica delle fotocellule” è disinserita; N.B.:
da utilizzare quando non si usano le fotocellule;
7 - 8 funzionamento 2° CANALE RADIO (morsetti nr 18 - 19);
Dip 7 Dip 8 Funzione
Off Off
Contatto cancello aperto: il contatto si attiva all’apertura del cancello, rimane
attivo durante il tempo di apertura, durante il TCA e durante la richiusura. Si
disattiva una volta che il cancello ha completato la chiusura.
Off On Funzione bistabile attiva: all’ impulso del radiocomado il contatto si attiva e
rimane tale no al successivo impulso.
On Off Funzione monostabile attiva 2 sec.: all’ impulso del radiocomado il contatto si
attiva e rimane tale per 2 sec.
On On Funzione monostabile attiva 180 sec.: all’ impulso del radiocomado il contatto
si attiva e rimane tale per 180 sec.
9FRENATA On attiva frenata;
O escludi frenata;
Nota:ilsistemadifrenatasiazionaogniqualvoltailmotoredevefermasi(CLS-OLS-STOP-in-
versionedimarcia)eattenual’inerziaaccumulatadalcancellodurantelacorsa.
10 UOMO
PRESENTE
On
Uomo Presente; l’automazione continuerà ad aprire o a chiudere no
a quando si manterrà premuto il pulsante APRI o il pulsante CHIUDI. Al
rilascio dello stesso si otterrà l’arresto del motoriduttore;
O normale (o impulsivo); ad un comando sul pulsante APRI, CHIUDI o PP,
l’automazione eettuerà un’apertura o una chiusura completa;
Nota:inmodalitàUomoPresentel’ingressoPP(n°12)vieneescluso,cosìcomelaradioricevente.
J1 ponticellato: bordo sensibile resistivo;
non ponticellato: costa ssa con contatto NC.
6. FUNZIONI AVANZATE
Funzione orologio: è possibile utilizzare un timer (esempio settimanale) collegato all’ingresso del pul-
sante apre-chiude o ingresso passo-passo per mantenere aperto il cancello in determinate fascie ora-
rie e permetterne poi la richiusura automatica.
ITALIANO

8
Ilcancellorimaneapertonchèl’ingressoAp/Chopasso-passorimaneimpegnato.
Funzione “contatto cancello aperto”: ponendo il dip 7 ed il dip 8 in OFF, il 2° ch radio (morsetti nr 21
- 22) funzionerà da contatto pulito che indica quando il cancello è aperto. È possibile utilizzare questa
funzione per collegare una “ILLUMINAZIONE DI ZONA” o come segnalazione di cancello aperto.
Funzione “Pedonale con 2° ch radio”: chiudendo i contatti delle gocce G1 e G2 e ponendo dip 7 (ON) e
dip 8 (OFF), si può utilizzare il 2° ch radio per eettuare l’apertura pedonale.
7.RADIORICEVITORE433,92MHzINTEGRATO
Il radio ricevitore può apprendere no ad un max di 30 codici a dip-switches (TXD2, TXD4, BUG2, BUG4,
K-SLIM, K-SLIM-C, T-4, T-4C) o rolling code (BUG2R, BUG4R, K-SLIM-RP, T-4RP) da impostare liberamente
su due canali.
Il primo canale comanda direttamente la scheda di comando per l’apertura dell’automazione; il secondo
canale comanda un relè per un contatto pulito N.A. in uscita (morsetti 21 - 22, max 24 Vac, 1 A).
La modalità di apprendimento (dip-switches o rolling code) viene determinata dal primo radiocomando
e rimarrà la stessa no alla cancellazione totale di tutti i codici di entrambi i canali.
APPRENDIMENTO RADIOCOMANDI
P1 = APRE/CHIUDE P2 = 2° canale
1_ premere brevemente il tasto P1 se si desidera associare un radiocomando alla funzione APRE/CHIUDE;
2_ il led DL10 si spegne per indicare la modalità di apprendimento dei codici (se non viene immesso
nessun codice entro 10 secondi, la scheda esce dalla modalità di programmazione);
3_ premere il tasto del radiocomando che si desidera utilizzare;
4_ il led DL10 si riaccende per segnalare l’avvenuta memorizzazione (se ciò non accade, attendere 10
secondi e riprendere dal punto 1);
5_ se si desidera memorizzare altri radiocomandi, ripetere la procedura dal punto 1 no ad un massimo di 30
trasmettitori;
6_ se si desidera eettuare la memorizzazione sul 2° canale, ripetere la procedura dal punto 1 utilizzando il
tasto P2 anzichè il tasto P1;
7_ se si desidera uscire dalla modalità di apprendimento senza memorizzare un codice, premere brevemente
il tasto P1 o il tasto P2.
Nelcasodiraggiungimentodelnrmassimodiradiocomandi(nr30),illedDL10inizierà
a lampeggiare velocemente per circa 3 secondi senza però eseguire la memorizzazione.
PROGRAMMAZIONE REMOTA TRAMITE T-4RP e K-SLIM-RP (V 4.X)
Con la versione di software V 4.X è possibile eseguire l’apprendimento remoto con i radiocomandi T-4RP e K-
SLIM-RP (V 4.X), ossia senza agire direttamente sui tasti di programmazione della ricevente.
Sarà suciente disporre di un radiocomando già programmato nella ricevente per poter aprire la procedura
di programmazione remota dei nuovi radiocomandi. Seguire la procedura riportata sulle istruzioni del radioco-
mando T-4RP e K-SLIM-RP (V 4.X).
CANCELLAZIONE RADIOCOMANDI
1_ tenere premuto per 3 secondi ca. il tasto P1 al ne di cancellare tutti i radiocomandi ad esso associati;
2_ il led DL10 inizia a lampeggiare lentamente per indicare che la modalità di cancellazione è attivata;
3_ tenere premuto nuovamente il tasto P1 per 3 secondi;
4_ il led DL10 si spegne per 3 secondi ca. per poi riaccendersi sso ad indicare l’avvenuta cancellazione;
5_ riprendere la procedura dal punto 1 utilizzando il tasto P2 per cancellare tutti i radiocomandi ad esso associati;
6_ se si desidera uscire dalla modalità di cancellazione senza memorizzare un codice, premere brevemente il
tasto P1 o il tasto P2.
ATTENZIONE:Sesidesideramemorizzareunnuovotipoditelecomando(es:dadip-switches
arollingcodeoviceversa)ènecessariocancellareentrambiicanali.
8. LED DI DIAGNOSI
ITALIANO

9
DL1(STOP) led verde di segnalazione pulsante STOP
DL2(PEDESTRIAN) led rosso di segnalazione pulsante PEDONALE
DL3(STEPBYSTEP) led rosso di segnalazione pulsante PASSO-PASSO
DL4(OPEN) led rosso di segnalazione pulsante APRE
DL5(CLOSE) led rosso di segnalazione pulsante CHIUDE
DL6(SENSITIVEEDGE) led verde di segnalazione BORDO SENSIBILE
DL7(PHOTOCELL) led verde di segnalazione FOTOCELLULA
DL8(CLOSELIMITSWITCH) led verde di segnalazione FINECORSA IN CHIUSURA
DL9(OPENLIMITSWITCH) led verde di segnalazione FINECORSA IN APERTURA
DL10(RADIOCONTROLS) led rosso di segnalazione PROGRAMMAZIONE RADIOCOMANDI ed ERRORI
LED - DL10
Il led DL10, oltre alle normali segnalazioni di programmazione di radiocomandi, segnala eventuali errori
con una serie di lampeggi predeniti:
2 lampeggi: errore fototest;
Disabilitare fototest (dip-switch 6 in OFF), vericare funzionamento fotocellule e loro collegamento;
5 lampeggi: assenza segnale encoder;
Controllare cablaggio, vericare encoder tramite TEST-ENCODER (opzionale);
6 lampeggi: presenza ostacolo (dopo 5 tentativi di chiusura falliti);
Controllare l’assenza di ostacoli lungo la corsa del cancello e la scorrevolezza dello stesso;
L’indicazione di più errori viene eseguita con una pausa di 2 sec. tra una segnalazione e l’altra. L’in-
dicazione degli errori persiste no all’esecuzione di una manovra completa (apertura e chiusura)
dell’automazione.
Nel caso di 5 interventi consecutivi (durante la stessa manovra di chiusura) da parte dell’encoder (rile-
vazione ostacolo), la centrale, alla successiva manovra, apre completamente. É necessario che l’auto-
mazione completi un intero ciclo (apertura e successiva chiusura) per resettarsi, altrimenti ripartirà la
fase di ricerca della battuta di ne corsa dopo ogni singolo intervento dell’encoder.
9.MALFUNZIONAMENTI:POSSIBILICAUSEERIMEDI
L’automazione non parte
a_ Vericare con lo strumento (Multimetro) la presenza dell’alimentazione 230Vac;
b_ Vericare che i contatti N.C. della scheda siano eettivamente normalmente chiusi (5 led verdi accesi);
c_ Vericare che il led rosso DL10 sia acceso sso;
d_ Impostare il dip 3 (funzione uomo presente) su OFF, il dip 5 (encoder) su OFF, il dip 6 (fototest) su OFF;
e_ Controllare con lo strumento (Multimetro) che i fusibili siano integri.
Il radiocomando ha poca portata
a_ Controllare che il collegamento della massa e del segnale dell’antenna non sia invertito;
b_ Non eseguire giunzioni per allungare il cavo dell’antenna;
c_ Non installare l’antenna in posizioni basse o in posizioni nascoste dalla muratura o dal pilastro;
d_ Controllare lo stato delle pile del radiocomando.
Il cancello si apre al contrario
a_ Invertire (tra di loro) i cablaggi delle fasi del motore (morsetti 5 - 6) e quelli dei necorsa (li
rosso e arancione).
GARANZIA: CONDIZIONI GENERALI
La garanzia della TAU ha durata di 24 mesi dalla data di acquisto dei prodotti (fa fede il documento
scale di vendita, scontrino o fattura).
La garanzia comprende la riparazione con sostituzione gratuita (franco sede TAU: spese di imballo e di
ITALIANO

10
trasporto sono a carico del cliente) delle parti che presentano difetti di lavorazione o vizi di materiale
riconosciuti dalla TAU.
In caso di intervento a domicilio, anche nel periodo coperto da garanzia, l’utente è tenuto a corrispon-
dere il “Diritto sso di chiamata” per spese di trasferimento a domicilio, più manodopera.
La garanzia decade nei seguenti casi:
• Qualora il guasto sia determinato da un impianto non eseguito secondo le istruzioni fornite dall’a-
zienda all’interno di ogni confezione.
• Qualora non siano stati impiegati tutti componenti originali TAU per l’installazione dell’automatismo.
• Qualora i danni siano causati da calamità naturali, manomissioni, sovraccarico di tensione, alimenta-
zione non corretta, riparazioni improprie, errata installazione, o altre cause non imputabili alla TAU.
• Qualora non siano state eettuate le manutenzioni periodiche da parte di un tecnico specializzato
secondo le istruzioni fornite dall’azienda all’interno di ogni confezione.
• Usura dei componenti.
La riparazione o la sostituzione dei pezzi durante il periodo di garanzia non comporta un prolungamento
del termine di scadenza della garanzia stessa. In caso di utilizzo industriale o professionale oppure in caso
di impiego simile, tale garanzia ha validità 12 mesi.
DICHIARAZIONE DI INCORPORAZIONE DEL COSTRUTTORE
(ai sensi della Direttiva Europea 2006/42/CE AlI. II.B)
Fabbricante: TAU S.r.l.
Indirizzo: Via E. Fermi, 43 - 36066 Sandrigo (Vi) - ITALIA
Dichiara sotto la propria responsabilità che il prodotto:Centrale di comando
realizzato per il movimento automatico di: Cancelli Scorrevoli
per uso in ambiente: Condominiale / Industriale completo di: Radioricevente
Modello: D705M Tipo:D705M
Numero di serie: vedi etichetta argentata
Denominazione commerciale: Quadro di comando per motoriduttore MASTER20Q
È realizzato per essere incorporato su una chiusura (cancello scorrevole) o per essere assemblato con altri dispositivi
al ne di movimentare una tale chiusura per costituire una macchine ai sensi della Direttiva Macchine 2006/42/CE.
Dichiara inoltre che questo prodotto è conforme ai requisiti essenziali di sicurezza delle seguenti ulteriori direttive
CEE: - 2006/95/CE Direttiva Bassa Tensione -2004/108/CE Direttiva Compatibilità Elettromagnetica
ed, ove richiesto, alla Direttiva: -1999/5/CE Apparecchiature Radio e apparecchiature terminali di telecomunicazione
Dichiara inoltre che non è consentito mettere in servizio il macchinario no a che la macchina in cui sarà
incorporato o di cui diverrà componente sia stata identicata e ne sia stata dichiarata la conformità alle condizioni
della Direttiva 2006/42/CE.
Si impegna a trasmettere, su richiesta adeguatamente motivata delle autorità nazionali, informazioni pertinenti sulle
quasi-macchine.
Sandrigo, 21/11/2014 Il Rappresentante Legale
_________________________________________
Loris Virgilio Danieli
Nome e indirizzo della persona autorizzata a costituire la documentazione tecnica pertinente:
Loris Virgilio Danieli - via E. Fermi, 43 - 36066 Sandrigo (Vi) Italia
ITALIANO

11
WARNINGS
This manual has been especially written for use by qualied tters. No information given in this manual
can be considered as being of interest to end users. This manual is attached to the D705M control unit
mounted on the MASTER20Q gearmotor, therefore it may not be used for dierent products!
Importantinformation:
Disconnectthepanelfromthepowersupplybeforeopeningit.
The D705M control unit has been designed to control an electromechanical gear motor for automating
gates and doors of all kinds.
Any other use is considered improper and is consequently forbidden by current laws.
Please note that the automation system you are going to install is classi ed as “machine construction”
and therefore is included in the application of European directive 2006/42/EC (Machinery Directive).
This directive includes the following prescriptions:
- Only trained and qualied personnel should install the equipment;
- the installer must rst make a “risk analysis” of the machine;
- the equipment must be installed in a correct and workmanlike manner in compliance with all the
standards concerned;
- after installation, the machine owner must be given the “declaration of conformity”.
This product may only be installed and serviced by qualied personnel in compliance with current, laws,
regulations and directives.
When designing its products, TAU observes all applicable standards (please see the attached declaration
of conformity) but it is of paramount importance that installers strictly observe the same standards when
installing the system.
Unqualied personnel or those who are unaware of the standards applicable to the “automatic gates
and doors” category may not install systems under any circumstances.
Whoeverignoressuchstandardsshallbeheldresponsibleforanydamagecausedbythesystem!
Do not install the unit before you have read all the instructions.
INSTALLATION
This product must be correctly installed by a qualied tter. The maker declines all liability for damage
caused by incapacity or neglect.
In particular:
1. make sure the cross-section of the power cables (power input, motors, earth and ashing light) is at
least 1.5 mm² and, in any case, sucient for the absorption and length of the wires. The above also ap-
plies to the other cables used by control and auxiliary devices except that the minimum cross-section
is reduced to 0.5 mm²;
2. make connections to the terminal board so as not to alter the level of protection oered by the con-
tainer which must be installed in a dry and protected place;
3. keep the power circuits separate from the control and auxiliary circuits, especially if the cables are long;
4. short any unused Normally Closed contacts.
Theproductmustbeproperlyearthedandthesafetyregulationsinforceinthecountry
ofinstallationmustbeobserved.
1. CONTROL PANEL FOR 230 Vac SINGLE-PHASE MOTOR
• MICROPROCESSOR-CONTROLLED LOGIC
• INPUT STATUS LED’S
• LINE INPUT FUSE
• BUILT-IN FLASHING LIGHT CIRCUIT
• “MAN PRESENT” FUNCTION
• ELECTRIC BRAKING
• WEEKLY TIMER INPUT
•MOTOR TORQUE CONTROL AND OBSTACLE DETECTION BY MEANS OF ENCODER
•433.92 MHz 2 CHANNEL BUILT-IN RADIO RECEIVER (CH)
•CONTROL OF THE SENSITIVE EDGE
ENGLISH

12
ATTENTION:
- donotusesinglecables(withonesinglewire),ex.telephonecables,inordertoavoidbreak-
downsofthelineandfalsecontacts.
- donotre-useoldpre-existingcables.
- Incaseoflongsectionsofcables(>20m)forN.O./N.C.controls(e.g.OPEN/CLOSE,STOP,
PEDESTRIAN,etc.),inordertoavoidgatemalfunctions,itwillbenecessarytouncouplethe
various controls using RELAYS or using our 750T-RELE device.
2. TESTING
When all connections have been made:
• All the green LED’s must be on (each corresponds to a Normally Closed input).
• They only turn o when the commands they are associated with are active.
• All the red LED’s must be o (each corresponds to a Normally Open input) they only turn on when
the commands they are associated with are active.
3. TECHNICAL CHARACTERISTICS
Power input to board 230V AC - 50÷60Hz
Nominal power 600 W ca.
Primary input line rapid fuse (F1 - 5x20) F3,15A - 250V AC
Input voltage of motor circuits 230V AC
Input voltage of auxiliary circuits 24V AC
24Vac line rapid fuse (F2 - 5x20) F1,6A - 250V AC
Logic circuit input voltage 5V DC
Working temperature -20°C ÷ + 55 °C
Box protected to IP43
4.TERMINALBOARDCONNECTIONS
Terminals Function Description
1 - 2 POWER SUPPLY POWER input 230Vac, 50Hz, single-phase;
M1 TRANSFORMER transformer primary connector [2 white wires (230V) + 2 red wires (80V)];
M2 TRANSFORMER transformer secondary connector [(2 black wires (24V) + 2 blue wires (15V)];
4 - 5 - 6 MOTOR MOTOR output single-phase 230Vac, 600 W, common=4, opening phase=5,
closing phase=6, connect the capacitor between terminals 5 and 6;
7 - 8 FLASHING LIGHT FLASHING LIGHT output 230 Vac 50 W max. The signal is already mod-
ulated for direct use. Flashing frequency during closing is double. 7=
230 Vac, 8= 0 V
9 - 10 STOP STOP button input (normally closed contact); this stops the automatic
system. At the next command, the opposite operation to the previous
one is performed (common=9);
9 - 11 PEDESTRIAN PEDESTRIAN button input (normally open contact); partially opens the auto-
matic system (by about 1 m) to allow pedestrians to pass by (common=9);
9 - 12 OPEN/CLOSE OPEN/CLOSE button input (contact normally open); for operating in-
formation see dip switch 2 - 4 and 10 functions (common=9);
13 - 14 OPEN OPEN button input (contact normally open); for operating information
see dip switch 2 and 10 functions (common=13);
13 - 15 CLOSE CLOSE button input (contact normally open); for operating informa-
tion see dip switch 2 and 10 functions (common=13);
ENGLISH

13
13 - 16 PHOTOCELL
input for PHOTOCELLS OR SAFETY DEVICES active during closure (Nor-
mally Closed contact); They stop the gate during closing and totally
reopen it; they temporarily stop the gate during opening in order to
allow the obstacle to be removed (if dip switch n° 3 set to ON), (13=
Common). If there is more than one safety device, connect all the NC
contacts IN SERIES.
17 - 18 FIXED SAFETY
EDGE
SENSITIVE EDGE input (resistive sensitive edge or xed safety edge);
Works only when the gate is opening; temporarily stops the gate and
partially closes it by about 20 cm in order to allow the obstacle to be
removed. (17=Common);
Note:ifaresistivesensitiveedgeisconnected,shortjumperJ1;
IfaxededgewithNCcontactisconnected,leavejumperJ1open;
19 - 20 not connected;
21 - 22 2nd RADIO CH
2nd RADIO CHANNEL output (its operation depends on dip-switches
nos. 7 - 8) to be used for opening/closing another gate, for controlling
garden lights or for the “ZONE LIGHTING” function;
Warning:toconnectotherdevicestothe2ndRadioChannel(area
lighting,pumps,etc.),useanadditionalauxiliaryrelay.
23 - 24 PHOTOCELL TX
24 Vac 10 W POWER output for PHOTOCELL TX (only the one that performs
the Phototest) max. no. 1 photocell transmitter. 23= 24 Vac, 15= 24 Vac;
Note:thephotocell transmittermust alwaysbesuppliedbytermi-
nalsno.23-24,sincethesafetysystemtest(phototest)iscarriedout
onit.Tooverridethetestingofthesafetysystem,orwhenthephoto-
cellsarenotused,setdip-switchno.6toOFF.Ifthephototestisnot
successful,thecontrolunitwillnotoperate;
25 - 26 PHOTOCELL 24 Vac 10 W output to POWER THE RXs AND ANY OTHER TXs OF PHO-
TOCELLS THAT ARE PRESENT, EXTERNAL RECEIVERS, etc.; connect a
max. of 3 pair of photocells. 25= 0 V, 26= 24 Vac;
25 - 27 GATE OPEN
WARNING LIGHT
GATE OPEN WARNING LIGHT output 24 Vac - max. 3 W; during open-
ing of the gate the warning light ashes slowly, when the gate is open
it remains steadily illuminated and during closure it ashes twice as
fast. Turns o when the CLOSING LIMIT SWITCH (CLS) is reached. 25=
0 V, 27= 24 Vac;
28 - 29 ANTENNA ANTENNA input (earth=28, signal=29);
M3 FCC - FCA
(FCC) CLOSE LIMIT SWITCH input (normally closed contact);
(FCA) OPEN LIMIT SWITCH input (normally closed contact);
SAFETY MICROSWITCH input (normally closed contact), the motor stops
when the guard is removed. WARNING:thecontrolunitisstilllive!
M4 ENCODER quick coupling for ENCODER connection.
Blue= 0 Vdc (GND), brown= 5 Vdc (+5V), white= ENCODER SIGNAL (ENC);
5. LOGIC ADJUSTMENTS
TRIMMER
T.L. Work Time adjustment: from approx. 5 to 240 seconds;
T.C.A.
Automatic Closing Time adjustment: from approx. 5 to 120 seconds (see dip
switch 1);
FR. obstacle detection sensitivity adjustment.
Note:turntheTRIMMERclockwisetoincreaseadjustments;turnitanticlockwiseto
decrease.
Dip switch
ENGLISH

14
1AUTOMATIC
CLOSING
On after opening, the gate automatically closes when the delay set on the
T.C.A. trimmer expires;
O a command is required to close the gate;
22 / 4 STROKE
On with automatic closing enabled, a sequence of open/close commands
causes the gate to OPENCLOSE-OPEN-CLOSE etc (see also dip switch 4).
O in the same conditions, the same command sequence causes the gate
to OPEN-STOP-CLOSESTOP-OPEN-STOP (step-by-step).
3
OPENING
PHOTOCELLS
OPERATION
On during opening, the photocell cuts in to stop the gate until the obstacle
is removed. When the obstacle is removed the gate resumes opening;
O during opening, the photocell does not cut in.
4NO REVERSE
On NO-REVERSE function activated; the gate ignores the closure commands
during opening and reversal of movement occurs only during closure;
O the open-close pushbutton reverses the direction of movement of the
gate even while it is opening.
5ENCODER On ENCODER enabled: encoder obstacle detection function activated (use
the trimmer FR to adjust the sensitivity to obstacles);
O ENCODER disabled;
6PREFLASH. &
FOTOTEST
On pre-ashing and “photocell test” function enabled;
O pre-ashing and “photocell test” function disabled; N.B.: to be used when
the photocells are not used.
7 - 8 2nd RADIO CHANNEL operation (terminals no. 18 - 19)
Dip 7 Dip 8 Function
Off Off
Gate contact open: The contact activates on opening the gate and remains ac-
tive during the open time, during the TCA and during reclosure. It deactivates
once the gate has completed its closure movement.
Off On Bistable function active: the radio control impulse causes the contact to activate
and remain active until the subsequent impulse.
On Off Monostable function active for 2 sec.: the radio control impulse causes the con-
tact to activate and remain active for 2 sec.
On On Monostable function active for 180 sec.: the radio control impulse causes the
contact to activate and remain active for 180 sec.
9BRAKING On braking enabled;
O braking disabled;
Note:thebrakingsystemactivateswheneverthemotormuststop(CLS-OLS-STOP–changeof
direction)andreducestheinertiaaccumulatedbythegearmotorduringmovement.
10 MAN
PRESENT
On
Man Present; the automation system will continue to open or close as
long as the OPEN or CLOSE buttons are held down. The gear motor will
stop when the button is released;
O normal (or pulse); when the OPEN, CLOSE or the PP button is pushed, the
automatic system performs a complete opening or closing manoeuvre;
Note:intheManPresentmode,thePPinput(n°12)isdisabled,asistheradioreceiver.
J1 jumperinserted:resistive sensitive edge;
jumpernotinserted:xed edge with NC contact.
6. ADVANCED FUNCTIONS
Clock function: a timer can be connected to the open-close pushbutton in order to keep the gate open
at certain times during the day, after which it reverts to automatic closing.
ThegateremainsopenaslongastheOp/Clinputcontinuestobeactivated.
ENGLISH

15
“Gate open contact” function: when dipswitch 7 and dipswitch 8 are set to OFF, the second radio
channel (terminals no. 21 - 22) will act as a voltage-free contact to indicate when the gate is open. This
function can be used to connect “ZONE LIGHTING” or as a gate open indicator.
“Pedestrian with 2nd radio ch.” function: when drop contacts G1 and G2 are closed and when dip-
switch 7 is ON and 8 is OFF, the second radio channel can be used to make the pedestrian opening.
7.433.92MHzBUILT-INRADIORECEIVER
The radio receiver can learn up to a maximum of 30 dip-switches (TXD2, TXD4, BUG2, BUG4, K-SLIM, K-SLIM-C,
T-4, T-4C) or rolling codes (BUG2R, BUG4R, K-SLIM-RP, T-4RP) which can be set on the two channels as required.
The rst channel directly commands the control board for opening the automatic device; the second channel
commands a relay for a N.O. no-voltage output contact (terminals 18 and 19, max. 24 Vac, 1 A).
The learning mode (dip-switch or rolling code) is determined by the rst radio control device and remains
unchanged until all the codes have been cancelled.
LEARNING SYSTEM FOR RADIO CONTROL DEVICES
P1 = OPEN/CLOSE P2 = 2nd channel
1_ press button P1 briey to associate a radio control device with the OPEN/CLOSE function;
2_ LED DL8 turns o to indicate that the code learning mode has been activated (if no code is entered within
10 seconds, the board exits the programming mode);
3_ press the button of the relative radio control device;
4_ LED DL8 turns on again to indicate that the code has been memorised (if this does not happen, wait 10
seconds and start again from point 1);
5_ to memorise codes to other radio control devices, repeat the procedure from point 1 up to a maximum
of 30 transmitters;
6_ to memorise codes on the 2nd channel, repeat the procedure from point 1 using button P2 instead of P1;
7_ to exit the learning mode without memorising a code, press button P1 or P2 briey.
Ifthemaximumnumberofradiocontrolsisreached(30),theLEDDL8willbegintoash
rapidlyforaboutasecondsbutwithoutperformingmemorisation.
REMOTE PROGRAMMING BY MEANS OF T-4RP and K-SLIM-RP (V 4.X)
With the new version of software V 4.X it is possible to carry out the remote self-learning of the new version
of transmitters T-4RP and K-SLIM-RP (V 4.X), that is without pressing the receiver’s programming buttons.
It will be sucient to have an already programmed transmitter in the receiver in order to start the procedure
of remote programming of the new transmitters. Follow the procedure written on the instructions of the
transmitter T-4RP and K-SLIM-RP (V 4.X).
CANCELLING CODES FROM RADIO CONTROL DEVICES
1_ keep button P1 pressed for 3 seconds in order to cancel all the associated radio control devices;
2_ LED DL8 ashes slowly to indicate that the cancellation mode has been activated;
3_ press button P1 again for 3 seconds;
4_ LED DL8 turns o for approx. 3 seconds and then remains steady to indicate that the code has been
cancelled;
5_ repeat the procedure from point 1 using button P2 to cancel all the associated radio control devices;
6_ to exit the learning mode without memorising a code, press button P1 or P2 briey.
ATTENTION:TOmemoriseacodeonanewtypeofremotecontrolunit(e.g.:fromdip-
switchtorollingcodeorvice-versa)bothchannelsmustbecancelled.
8. DIAGNOSTICS LED
DL1(STOP) STOP button green LED signal
DL2(PEDESTRIAN) PEDESTRIAN button red LED signal
DL3(STEPBYSTEP) STEP BY STEP button red LED signal
ENGLISH

16
DL4(OPEN) OPEN button red LED signal
DL5(CLOSE) CLOSE button red LED signal
DL6(SENSITIVEEDGE) SENSITIVE EDGE green LED signal
DL7(PHOTOCELL) PHOTOCELL green LED signal
DL8(CLOSELIMITSWITCH) CLOSE LIMIT SWITCH green LED signal
DL9(OPENLIMITSWITCH) OPEN LIMIT SWITCH green LED signal
DL10(RADIOCONTROLS) RECEIVER PROGRAMMING INFORMATION and ERRORS red LED signal
LED - DL10
Led DL10, as well as the normal radio control programming signals, also indicates any errors with a
series of pre-set ashes:
2 ashes: phototest error;
Disable phototest (dip-switch 6 OFF), check operation and connection of photocells;
5 ashes: absence of encoder signal;
Check wiring, check encoder through TEST-ENCODER (optional);
6 ashes: presence of obstacle after 5 failed attempts to close;
Make sure there are no obstacles across the path of the gate and that it slides smoothly;
The display of multiple errors is shown with a pause of 2 seconds between one message and the next.
The error remains on display until a new complete manoeuvre (open and close) is performed by the
automation.
In the event of 5 consecutive activations (during the same closing manoeuvre) of the encoder (obstacle
detection), the control unit opens completely on the next manoeuvre. To reset, the automation must
complete a manoeuvre (opening and then closing); otherwise the end stop search process will be re-
peated after each activation of the encoder.
9. MALFUNCTIONS:POSSIBLECAUSESANDSOLUTION
The automation does not start
a_ Check there is 230Vac power supply with the multimeter;
b_ Check that the NC contacts of the card are actually normally closed (5 green LEDs on);
c_ Check that the red LED DL10 is steadily illuminated;
d_ Set the dip 3 (man present function) to OFF, dip 5 (encoder) to ON, dip 6 (phototest) to OFF;
e_ Check that the fuses are intact with the multimeter.
Theradiocontrolhasverylittlerange
a_ Check that the ground and the aerial signal connections have not been inverted;
b_ Do not make joints to increase the length of the aerial wire;
c_ Do not install the aerial in a low position or behind walls or pillars;
d_ Check the state of the radio control batteries.
Thegateopensthewrongway
a_ Invert the motor phase wires (terminals 5 - 6) and also those of the limit switches (red and
orange wires).
10. GUARANTEE: GENERAL CONDITIONS
TAU guarantees this product for a period of 24 months from the date of purchase (as proved by the
sales document, receipt or invoice).
This guarantee covers the repair or replacement at TAU’s expense (ex-works TAU: packing and trans-
port at the customer’s expense) of parts that TAU recognises as being faulty as regards workmanship
or materials.
For visits to the customer’s facilities, also during the guarantee period, a “Call-out fee” will be charged
for travelling expenses and labour costs.
ENGLISH

17
Theguaranteedoesnotcoverthefollowingcases:
• If the fault was caused by an installation that was not performed according to the instructions
provided by the company inside the product pack.
• If original TAU spare parts were not used to install the product.
• If the damage was caused by an Act of God, tampering, overvoltage, incorrect power supply,
improper repairs, incorrect installation, or other reasons that do not depend on TAU.
• If a specialised maintenance man does not carry out routine maintenance operations accord-
ing to the instructions provided by the company inside the product pack.
• Wear of components.
The repair or replacement of pieces under guarantee does not extend the guarantee period.
In case of industrial, professional or similar use, this warranty is valid for 12 months.
MANUFACTURER’S DECLARATION OF INCORPORATION
(in accordance with European Directive 2006/42/EC App. II.B)
Manufacturer: TAU S.r.l.
Address: Via E. Fermi, 43 - 36066 Sandrigo (Vi) - ITALY
Declares under its sole responsibility, that the product: Electronic control unit
designed for automatic movement of: Sliding Gates
for use in a: Communities / Industrial complete with: Radioreceiver
Model: D705M Type:D705M
Serial number: see silver label Commercial name: Control panel for MASTER20Q gearmotor
Has been produced for incorporation on an access point (sliding gate) of for assembly with other devices used
to move such an access point, to constitute a machine in accordance with the Machinery Directive 2006/42/EC.
Also declares that this product complies with the essential safety requirements of the following EEC directives:
- 2006/95/EC Low Voltage Directive - 2004/108/EC Electromagnetic Compatibility Directive
and, where required, with the Directive:
-1999/5/CE Radio equipment and telecommunications terminal equipment
Also declares that it is not permitted to start up the machine until the machine in which it is incorporated or of
which it will be a component has been identied with the relative declaration of conformity with the provisions of
Directive 2006/42/EC.
The manufacturer undertakes to provide, on sufciently motivated request by national authorities, all information
pertinent to the quasi-machinery.
Sandrigo, 21/11/2014 Legal Representative
_________________________________________
Loris Virgilio Danieli
Name and address of person authorised to draw up all pertinent technical documentation:
Loris Virgilio Danieli - via E. Fermi, 43 - 36066 Sandrigo (Vi) Italy
ENGLISH

18
HINWEISE
Das vorliegende Handbuch ist nur für technisches, zur Installation qualiziertes Personal bestimmt.
Die im vorliegenden Heft enthaltenen Informationen sind für den Endbenutzer nicht interessant. Diese
Anleitung liegt der Steuerung D705M bei, die an den Getriebemotor MASTER20Q montiert ist, und darf
daher nicht für andere Produkte verwendet werden!
WichtigeHinweise:
DieNetzstromversorgungvordemZugrizurSchalt-undSteuertafelabschalten.
Die Steuerung D705M dient zum Steuern eines elektromechanischen Getriebemotors für die Automa-
tisierung von Türen und Toren.
Jeder andere Einsatz ist unsachgemäß und daher laut gültiger Vorschriften verboten.
Unsere Picht ist, Sie daran zu erinnern, dass die Automatisierung, die Sie ausführen werden, als „Ma-
schinenkonstruktion“ klassiert ist und daher zum Anwendungsbereich der Europäischen Richtlinie
2006/42/CE (Maschinenrichtlinie) gehört.
Nach den wichtigsten Punkten dieser Vorschrift:
- darf die Installation ausschließlich von erfahrenem Fachpersonal ausgeführt werden;
- muss jener, der die Installation ausführt, vorher eine „Risikoanalyse“ der Maschine machen;
- muss die Installation “fachgerecht” bzw. unter Anwendung der Vorschriften ausgeführt sein;
- muss dem Besitzer der Maschine die „Konformitätserklärung” ausgehändigt werden.
Es ist daher oensichtlich, dass Installation und eventuelle Wartungseingrie nur von beruich qua-
liziertem Personal in Übereinstimmung mit den Verordnungen der gültigen Gesetze, Normen und
Vorschriften ausgeführt werden dürfen.
Bei der Planung ihrer Apparaturen hält sich TAU an die für das Produkt anwendbaren Vorschriften
(siehe anliegende Konformitätserklärung); von grundlegender Wichtigkeit ist, dass sich auch der Ins-
tallateur bei der Durchführung der Anlage genauestens an die Vorschriften hält.
Personal, das nicht qualiziert ist oder die Vorschriften nicht kennt, die für die Kategorie “automatische
Türen und Tore” anwendbar sind, darf Installationen und Anlagen keinesfalls ausführen.
WersichnichtandieVorschriftenhält,haftetfürdieSchäden,dievonderAnlageverursacht
werdenkönnen.
Vor der Installation bitte alle Anweisungen genau lesen.
INSTALLATION
Die Installation muss fachgerecht durch qualiziertes Personal ausgeführt werden. Der Hersteller über-
nimmt keinerlei Haftung für Schäden aufgrund von Unerfahrenheit oder Nichtbeachtung.
Insbesondere erinnern wir an folgendes:
1. Einen Querschnitt der Leistungskabel (Versorgung, Motoren, Masse und Blinkleuchte) von mindes-
tens 1.5 mm² wählen, immer in Abhängigkeit von den Stromaufnahmen und der Leiterlänge. Dies
gilt auch für die restlichen Kabel, die von Steuer- und Hilfsvorrichtungen benutzt werden, mit dem
Unterschied, dass für diese der Mindestquerschnitt 0.5 mm²sein darf;
2. den Anschluss am Klemmenbrett so ausführen, dass die Schutzart des Gehäuses, das trocken und
geschützt installiert werden muss, nicht geändert wird;
3. die Leistungskabel von den Kabeln der Hilfs- und Steuerkreise getrennt halten, insbesondere wenn
es sich um lange Strecken handelt;
4. gewöhnlich geschlossene Kontakte, die nicht benutzt sind, müssen kurzgeschlossen werden.
Es wird daran erinnert, dass es Picht ist, die Anlage zu ersten und die im jeweiligen
Land gültigen Sicherheitsvorschriften einzuhalten.
1. SCHALT- UND STEUERTAFEL FÜR EINPHASIGEN 230 Vac MOTOR
• MIKROPROZESSORLOGIK
• STATUSANZEIGE DER EINGÄNGE DURCH LEDs
• SCHUTZ DES LINIENEINGANGS MIT SICHERUNG
• EINGEBAUTER BLINKKREISLAUF
DEUTSCH

19
• “TODMANN”-FUNKTION
• ELEKTROBREMSE
• EINGANG FÜR WOCHENTIMER
•KONTROLLE DES DREHMOMENTS DES ANTRIEBS UND ERFASSUNG HINDERNISSE DURCH ENCO-
DER
•433,92 MHz FUNKEMPFÄNGER, EINGEBAUT, 2 KANÄLE (CH)
•ÜBERWACHUNG DER SICHERHEITSSCHALTLEISTE
ACHTUNG
-VerwendenSiekeineLeitungenmiteinzeldrahtwiez.b.beidenSprechanlagen,umunterbre-
chungenaufderLinieundzuvermeiden.
-VerwendenSiekeinealtevorhandeneverkabelung.
-ImFallelangerKabelverläufe(>20m)fürdieSteuerungenN.O./N.S.(z.B.:ÖFFNET/SCHLIESST,
STOPP,FUSSGÄNGERusw.)isteszurVermeidungvonmangelhaftenFunktionennotwendig,
dieverschiedenen Steuerungenüberdie RELAISzutrennen oderunsereVorrichtung 750T
RELE zu nutzen.
2. ENDPRÜFUNG
Nach Beendigung der Anschlüsse:
• müssen alle grünen LEDs leuchten (jede LED entspricht einem gewöhnlich geschlossenen Eingang).
• schalten diese LEDs nur ab, wenn die Steuervorrichtungen aktiviert sind, mit denen sie kombiniert sind.
• müssen alle roten LEDs abgeschaltet sein (jede LED entspricht einem gewöhnlich geönetenen Eingang).
Diese LEDs leuchten nur auf, wenn die Steuervorrichtungen aktiviert sind, mit denen sie kombiniert
sind.
3. TECHNISCHE MERKMALE
Versorgung der Schalt- und Steuertafel 230V AC - 50÷60Hz
Höchstleistung 600 W ca.
Schnellsicherung zum Schutz der Hauptversorgungslinie (F1 - 5x20)
F3,15A - 250V AC
Spannung der Motorversorgungskreise 230V AC
Spannung der Versorgungskreise der Hilfsvorrichtungen 24V AC
Schnellsicherung zum Schutz der 24 Vac Linie (F2 - 5x20) F1,6A - 250V AC
Versorgungsspannungen der logischen Kreisläufe 5V DC
Betriebstemperatur -20°C ÷ + 55 °C
Schutzart des Gehäuses IP43
4.ANSCHLÜSSEAMKLEMMENBRETT
Klemmen Function Beschreibung
1 - 2 VERSORGUNG Eingang der VERSORGUNG 230 Vac 50Hz einphasig;
M1 TRANSFOR-
MATOR
Verbinder für Primärtransformator.
[2 weiße Kabel (230V) + 2 rote Kabel (80V)];
M2 TRANSFOR-
MATOR
Verbinder für Sekundärtransformator.
[2 schwarze Kabel (24V) + 2 blaue Kabel (15V)];
4 - 5 - 6 MOTOR
Ausgang für einphasigen 230 Vac MOTOR, 600 W, gemeinsamer Leiter=4,
Phase für Önung=5, Phase für Schließung=6, für einphasige Motoren,
den Kondensator zwischen den Klemmen 5 und 6 anschließen;
DEUTSCH

20
7 - 8 BLINKLEUCHTE
Ausgang für die BLINKLEUCHTE, max. 230 Vac 50 W. Das gelieferte Signal
ist bereits für den Direktgebrauch moduliert. Die Blinkhäugkeit ist in
der Schließphase doppelt;
7= 230 Vac, 8= 0 V
9 - 10 STOP
Eingang für STOP-Taste (gewöhnlich geschlossener Kontakt);
seine Auslösung verursacht das Anhalten der Automatisierung.
Beim nächsten Steuerbefehl führt die Automatisierung eine Bewegung
aus, die entgegengesetzt zur vorherigen ist.
(gemeinsamer Leiter=9);
9 - 11 GEHFLÜGEL
Eingang für GEHFLÜGEL-Taste
(gewöhnlich geöneter Kontakt);
ermöglicht eine begrenzte Önung (ca. 1 m) der Automatisierung für den
Durchgang von Fußgängern.
(gemeinsamer Leiter=9);
9 - 12 ÖFFNET/
SCHLIEßT
Eingang für Taste ÖFFNET/SCHLIEßT
(gewöhnlich geöneter Kontakt);
für den Gebrauch siehe die Funktionen der Dip-Switches Nr. 2 - und 10.
(gemeinsamer Leiter=9);
13 - 14 ÖFFNET Eingang für Taste ÖFFNET (gewöhnlich geöneter Kontakt); für den Ge-
brauch siehe die Funktionen der Dip-Switches Nr. 2 und 10. (gemeinsa-
mer Leiter=13);
13 - 15 SCHLIEßT Eingang für Taste SCHLIEßT (gewöhnlich geöneter Kontakt); für den Ge-
brauch siehe die Funktionen der Dip-Switches Nr. 2 und 10. (gemeinsa-
mer Leiter=13);
13 - 16 PHOTOZELL
Eingang PHOTOZELLEN ODER SICHERHEITSVORRICHTUNGEN beim
Schließen aktiv.
(Normalerweise Geschlossener Kontakt);
Ihr Ansprechen verursacht in Schließung das Anhalten des Tors, gefolgt
von seiner vollständigen Önung, und in Önung das vorübergehende
Anhalten des Tors, bis das wahrgenommene Hindernis beseitigt ist (falls
Dip-Switch Nr. 3 auf ON gestellt ist); (13= gemeinsamer Leiter).
Im Falle mehrerer Sicherheitsvorrichtungen, müssen alle NC-Kontakte
SERIENGESCHALTET werden.
17 - 18 SCHALTLEISTE
Eingang SCHALTLEISTE (Widerstandsschaltleiste oder feste Schaltleiste);
Funktioniert nur in Önung und verursacht das vorübergehende Anhal-
ten des Tors und ein teilweises Wiederschließen um ca. 20 cm, wodurch
ein eventuelles Hindernis frei wird. (17= gemeinsamer Leiter).
Hinweis:
wenn eine resistive Schaltleiste angeschlossen wird, die
BrückeJ1kurzschließen;
Wenn eine feste Schaltleiste mit NC-Kontakt angeschlossen wird,
dieBrückeJ1oenlassen;
19 - 20 Nicht angeschlossen;
21 - 22 2. FUNKKANAL
Ausgang 2. FUNKKANAL (seine Funktion hängt von den Dip-Switchs 7
und 8 ab), der zur Önung/Schließen eines anderen Tors verwendet wird
oder um die Gartenbeleuchtung oder für die Funktion „ZONENBELEUCH-
TUNG“ zu steuern.
Achtung:fürdieLichtsteuerung(oderandereBelastungen)mitdem
2.Kanal desFunkempfängers entsprechendstärkere Hilfsrelais
unbedingt verwenden.
23 - 24 PHOTOZELL TX
24 Vac 10 W Ausgang für die VERSORGUNG DES FOTOZELLENSENDERS
(nur der, der den Phototest ausführt) max. Nr. 1 Fotozellensender. 23=
24 Vac, 24= 0 V;
Hinweis: der Fotozellensender muss immer von den Klemmen Nr.
23 - 24 gespeist sein, da die Überprüfung des Sicherheitssystems
(Fotozellentest)anihmerfolgt.UmdasSicherheitssystemnichtzu
überprüfenbzw.wennkeineFotozellenbenutztsind,mussderDip-
SwitchNr.6aufOFFgestelltwerden.WennderPhototestnegativ
erfolgt,funktioniertdasSteuergerätnicht;
DEUTSCH
Other manuals for D705M
2
Table of contents
Languages:
Other tau Control Panel manuals
Popular Control Panel manuals by other brands
eKey
eKey home series operating instructions
CLA-VAL
CLA-VAL PC-1 quick start guide

urmet domus
urmet domus 1061/006A Installation and programming manual
Cooper
Cooper Kyle Form 4C installation instructions
Haier
Haier Ampac ZoneSense PLUS Operation instructions

Bosch
Bosch Radionics D8024 Operation and installation guide
doble
doble F6000 user guide

GST
GST GST-M200 Installation and operation manual
INIM Electronics
INIM Electronics SmartLight user manual
Beckhoff
Beckhoff CP7709 Installation and operating instructions

Murphy
Murphy Selectronic Tattletale Annunciator ST8 Installation and operation instructions
Side-Power
Side-Power S-link PJC-212 Installation and user manual

