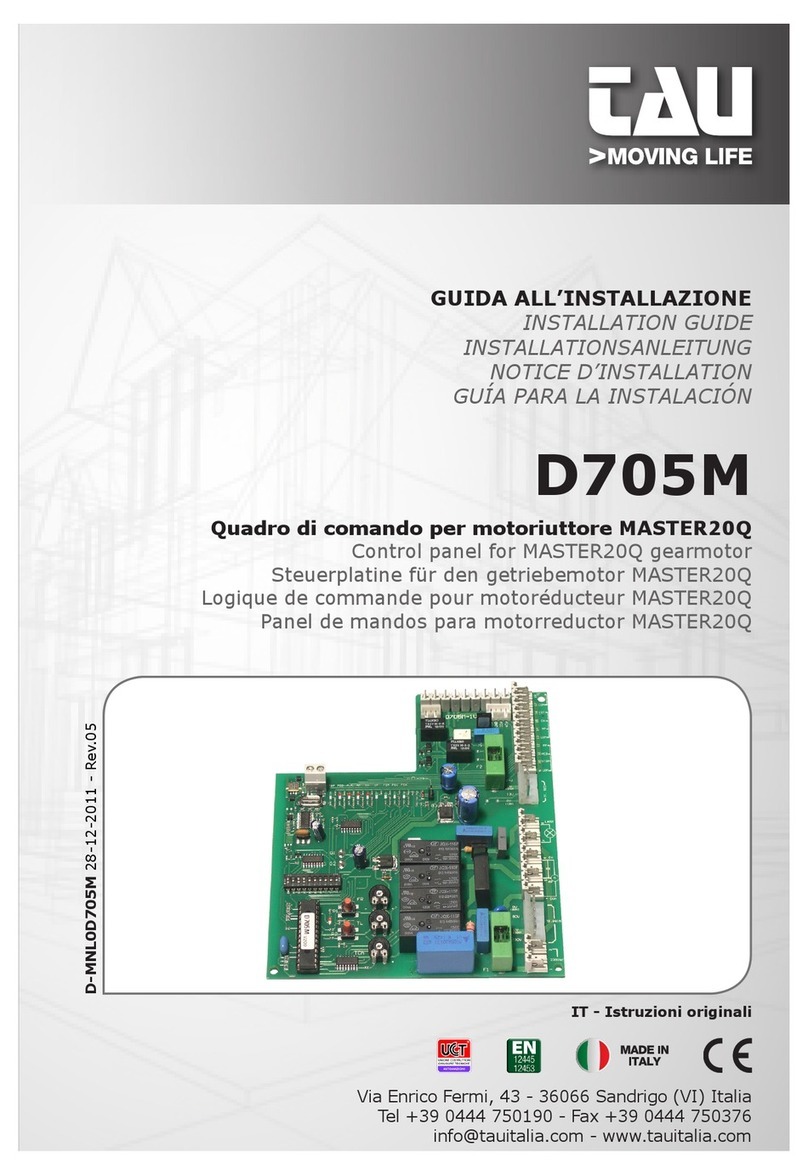
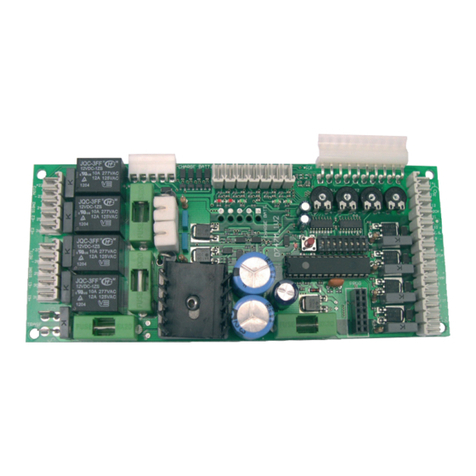
tau D750M User manual

1
D750M
GUIDA ALL’INSTALLAZIONE
INSTALLATION GUIDE
INSTALLATIONSANLEITUNG
NOTICE D’INSTALLATION
GUÍA PARA LA INSTALACIÓN
D750M
Quadro di comando per due motori monofase 230 Vac
Control panel for two single-phase motors 230 Vac
Steuerplatine für zwei einphasige 230 Vac Motoren
Logique de commande pour
deux moteurs monophasés 230 Vac
Panel de mandos para dos motores monofásicos 230 Vac
Via Enrico Fermi, 43 - 36066 Sandrigo (VI) Italia
Tel +39 0444 750190 - Fax +39 0444 750376
info@tauitalia.com - www.tauitalia.com
IT - Istruzioni originali
D-MNL0D750M 20-04-2011 - Rev.12

2
D750M
Introduzione
Il presente manuale è destinato solamente al personale tecnico qualicato per l’installazione. Nessuna
informazione contenuta nel presente fascicolo può essere considerata d’interesse per l’utilizzatore nale.
Questo manuale è allegato alla centralina D750M, non deve pertanto essere utilizzato per prodotti diversi!
Avvertenze importanti:
Togliere l’alimentazione di rete alla scheda prima di accedervi.
La centralina D750M è destinata al comando di un motoriduttore elettromeccanico per l’automazione di
cancelli, porte e portoni.
Ogni altro uso è improprio e, quindi, vietato dalle normative vigenti.
È nostro dovere ricordare che l’automazione che state per eseguire, è classicata come “costruzione
di una macchina” e quindi ricade nel campo di applicazione della direttiva europea 98/37/CE (Direttiva
Macchine).
Questa, nei punti essenziali, prevede che:
- l’installazione deve essere eseguita solo da personale qualicato ed esperto;
- chi esegue l’installazione dovrà preventivamente eseguire “l’analisi dei rischi” della macchina;
- l’installazione dovrà essere fatta a “regola d’arte”, applicando cioè le norme;
- inne dovrà essere rilasciata al proprietario della macchina la”dichiarazione di conformità”.
Risulta chiaro quindi che l’installazione ed eventuali interventi di manutenzione devono essere effettuati solo
da personale professionalmente qualicato, in conformità a quanto previsto dalle leggi, norme o direttive
vigenti.
Nella progettazione delle proprie apparecchiture, TAU rispetta le normative applicabili al prodotto (vedere
la dichiarazione di conformità allegata); è fondamentale che anche l’installatore, nel realizzare gli impianti,
prosegua nel rispetto scrupoloso delle norme.
Personale non qualicato o non a conoscenza delle normative applicabili alla categoria dei “cancelli e
porte automatiche” deve assolutamente astenersi dall’eseguire installazioni ed impianti.
Chi non rispetta le normative è responsabile dei danni che l’impianto potrà causare!
si consiglia di leggere attentamente tutte le istruzioni prima di procedere con l’installazione.
INSTALLAZIONE
Prima di procedere assicurarsi del buon funzionamento della parte meccanica. Vericare inoltre che
il gruppo motoriduttore sia stato installato correttamente seguendo le relative istruzioni.
L’INSTALLAZIONE DELL’APPARECCHIATURA DEVE ESSERE EFFETTUATA “A REGOLA D’ARTE” DA
PERSONALE QUALIFICATO COME DISPOSTO DALLA LEGGE 46/90.
In particolare ricordiamo di:
1. posizionare la scheda verticalmente e il più possibile vicino al motoriduttore, evitando lunghi tratti dei
cavi di collegamento;
2. scegliere la sezione dei cavi di potenza (alimentazione, motori, massa e lampeggiante) di almeno 1.5
mm² e comunque in ragione degli assorbimenti e della lunghezza dei conduttori. Ciò detto vale per la
rimanenza dei cavi usati da dispositivi di comando e ausiliari con la sola differenza della sezione minima
che è ridotta a 0.5 mm²;
3. collegarsi alla morsettiera in modo da non alterare il grado di protezione offerto dal contenitore, che
deve essere posto in luogo asciutto e protetto;
4. tenere separati i cavi di potenza dai cavi dei circuiti ausiliari e di comando, specialmente per percorsi
lunghi;
5. cortocircuitare i contatti Normalmente Chiusi che non si dovessero utilizzare.
NB : si ricorda l’obbligo di mettere a massa l’impianto nonché di rispettare le normative sulla
sicurezza in vigore in ciascun paese.
ATTENZIONE:
- non utilizzare cavi unilari (a conduttore unico), es. quelli citofonici, al ne di evitare interruzioni
sulla linea e falsi contatti;
- non riutilizzare vecchi cavi preesistenti.
LA NON OSSERVANZA DELLE SOPRAELENCATE ISTRUZIONI PUÒ PREGIUDICARE IL BUON
FUNZIONAMENTO DELL’APPARECCHIATURA E CREARE PERICOLO PER LE PERSONE, PERTANTO
LA “CASA COSTRUTTRICE” DECLINA OGNI RESPONSABILITÀ PER EVENTUALI MAL FUNZIONAMENTI
E DANNI DOVUTI ALLA LORO INOSSERVANZA.
Italiano

3
D750M
Introduction
This manual has been especially written for use by qualied tters. No information given in this manual can
be considered as being of interest to end users. This manual is enclosed with control unit D750M and may
therefore not be used for different products!
Important information:
Disconnect the panel from the power supply before opening it.
The D750M control unit has been designed to control an electromechanical gear motor for automating gates
and doors of all kinds.
Any other use is considered improper and is consequently forbidden by current laws.
Please note that the automation system you are going to install is classied as “machine construction” and
therefore is included in the application of European directive 98/37/EC (Machinery Directive).
This directive includes the following prescriptions:
- Only trained and qualied personnel should install the equipment;
- the installer must rst make a “risk analysis” of the machine;
- the equipment must be installed in a correct and workmanlike manner in compliance with all the stand-
ards concerned;
- after installation, the machine owner must be given the “declaration of conformity”.
This product may only be installed and serviced by qualied personnel in compliance with current, laws,
regulations and directives.
When designing its products, TAU observes all applicable standards (please see the attached declaration
of conformity) but it is of paramount importance that installers strictly observe the same standards when
installing the system.
Unqualied personnel or those who are unaware of the standards applicable to the “automatic gates and
doors” category may not install systems under any circumstances.
Whoever ignores such standards shall be held responsible for any damage caused by the system!
Do not install the unit before you have read all the instructions.
INSTALLATION
Before proceeding, make sure the mechanical components work correctly. Also check that the gear
motor assembly has been installed according to the instructions.
THE EQUIPMENT MUST BE INSTALLED “EXPERTLY” BY QUALIFIED PERSONNEL AS REQUIRED BY
LAW.
In particular:
1. position the board vertically and as near as possible to the gear motor, taking care to keep the connec-
tion cables as short as possible;
2. make sure the cross-section of the power cables (power input, motors, earth and ashing light) is at
least 1.5 mm² and, in any case, sufcient for the absorption and length of the wires. The above also ap-
plies to the other cables used by control and auxiliary devices except that the minimum cross-section is
reduced to 0.5 mm²;
3. make connections to the terminal board so as not to alter the level of protection offered by the container
which must be installed in a dry and protected place;
4. keep the power circuits separate from the control and auxiliary circuits, especially if the cables are
long;
5. short any unused Normally Closed contacts.
NB : it is compulsory to earth the system and to observe the safety regulations that are in force in
each country.
ATTENTION:
- do not use single cables (with one single wire), ex. telephone cables, in order to avoid breakdowns
of the line and false contacts;
- do not re-use old pre-existing cables.
IF THESE ABOVE INSTRUCTIONS ARE NOT FOLLOWED IT COULD PREJUDICE THE PROPER
WORKING ORDER OF THE EQUIPMENT AND CREATE HAZARDOUS SITUATIONS FOR PEOPLE. FOR
THIS REASON THE “MANUFACTURER” DECLINES ALL RESPONSIBILITY FOR ANY MALFUNCTIONING
AND DAMAGES THUS RESULTING.
English

4
D750M
Einleitung
Das vorliegende Handbuch ist nur für technisches, zur Installation qualiziertes Personal bestimmt. Die im
vorliegenden Heft enthaltenen Informationen sind für den Endbenutzer nicht interessant. Diese Anleitung
liegt der Steuerung D750M bei und darf daher nicht für andere Produkte verwendet werden!
Wichtige Hinweise:
Die Netzstromversorgung vor dem Zugriff zur Schalt- und Steuertafel abschalten.
Die Steuerung D750M dient zum Steuern eines elektromechanischen Getriebemotors für die Automatisierung
von Türen und Toren.
Jeder andere Einsatz ist unsachgemäß und daher laut gültiger Vorschriften verboten.
Unsere Picht ist, Sie daran zu erinnern, dass die Automatisierung, die Sie ausführen werden, als
„Maschinenkonstruktion” klassiert ist und daher zum Anwendungsbereich der Europäischen Richtlinie 89/392
(Maschinenrichtlinie) gehört.
Nach den wichtigsten Punkten dieser Vorschrift:
- darf die Installation ausschließlich von erfahrenem Fachpersonal ausgeführt werden;
- muss jener, der die Installation ausführt, vorher eine „Risikoanalyse” der Maschine machen;
- muss die Installation “fachgerecht” bzw. unter Anwendung der Vorschriften ausgeführt sein;
- muss dem Besitzer der Maschine die „Konformitätserklärung” ausgehändigt werden.
Es ist daher offensichtlich, dass Installation und eventuelle Wartungseingriffe nur von beruich qualiziertem
Personal in Übereinstimmung mit den Verordnungen der gültigen Gesetze, Normen und Vorschriften ausgeführt
werden dürfen.
Bei der Planung ihrer Apparaturen hält sich TAU an die für das Produkt anwendbaren Vorschriften (siehe
anliegende Konformitätserklärung); von grundlegender Wichtigkeit ist, dass sich auch der Installateur bei
der Durchführung der Anlage genauestens an die Vorschriften hält.
Personal, das nicht qualiziert ist oder die Vorschriften nicht kennt, die für die Kategorie “automatische
Türen und Tore” anwendbar sind, darf Installationen und Anlagen keinesfalls ausführen.
Wer sich nicht an die Vorschriften hält, haftet für die Schäden, die von der Anlage verursacht werden
können.
Vor der Installation bitte alle Anweisungen genau lesen.
INSTALLATION
Bevor man weitermacht, den korrekten Betrieb des mechanischen Teils überprüfen und konrollieren,
ob der Getriebemotoren richtig nach den jeweiligen Anweisungen installiert ist.
DAS GERÄT MUSS GEMÄß GESETZ 46.90 FACHGERECHT VON QUALIFIZIERTEM PERSONAL
INSTALLIERT WERDEN.
Insbesondere erinnern wir an folgendes:
1. die Steuerkarte senkrecht und so nah wie möglich am Getriebemotor anbringen; lange Strecken der
Verbindungskabel sind zu vermeiden;
2. Einen Querschnitt der Leistungskabel (Versorgung, Motoren, Masse und Blinkleuchte) von mindestens
1.5 mm² wählen, immer in Abhängigkeit von den Stromaufnahmen und der Leiterlänge. Dies gilt auch
für die restlichen Kabel, die von Steuer- und Hilfsvorrichtungen benutzt werden, mit dem Unterschied,
dass für diese der Mindestquerschnitt 0.5 mm²sein darf;
3. den Anschluss am Klemmenbrett so ausführen, dass die Schutzart des Gehäuses, das trocken und
geschützt installiert werden muss, nicht geändert wird;
4. die Leistungskabel von den Kabeln der Hilfs- und Steuerkreise getrennt halten, insbesondere wenn es
sich um lange Strecken handelt;
5. gewöhnlich geschlossene Kontakte, die nicht benutzt sind, müssen kurzgeschlossen werden.
N.B.: Bitte beachten Sie, dass die Erdung der Anlage und die Einhaltung der in jedem Land gültigen
Sicherheitsvorschriften Picht ist.
ACHTUNG:
- Verwenden Sie keine Leitungen mit einzeldraht wie z.b. bei den Sprechanlagen, um unterbrechungen
auf der Linie und zu vermeiden;
- Verwenden Sie keine alte vorhandene verkabelung.
DAS NICHTEINHALTEN DER OBEN ANGEFÜHRTEN ANLEITUNGEN KANN DEN EINWANDFREIEN
BETRIEB DES GERÄTS BEEINTRÄCHTIGEN UND GEFAHREN FÜR PERSONEN HERVORRUFEN.
DER HERSTELLER HAFTET DAHER NICHT FÜR BETRIEBSSTÖRUNGEN UND SCHÄDEN, DIE AUF
DAS NICHTEINHALTEN DER ANLEITUNGEN ZURÜCKZUFÜHREN SIND.
Deutsch

5
D750M
Introduction
Le présent manuel est destiné exclusivement au personnel technique qualié pour l’installation. Aucune
information contenue dans ce fascicule ne peut être considérée comme intéressante pour l’utilisateur nal.
Ce manuel est joint à l’armoire de commande D750M, il ne doit donc pas être utilisé pour des produits
différents !
Recommandations importantes :
Couper l’alimentation électrique de l’armoire avant d’y accéder.
L’armoire de commande D750M est destinée à la commande d’un motoréducteur électromécanique pour
l’automatisation de portails et de portes.
Toute autre utilisation est impropre et donc interdite par les normes en vigueur.
Nous nous devons de rappeler que l’automatisation que vous vous apprêtez à exécuter est classée comme
“construction d’une machine” et rentre donc dans le domaine d’application de la Directive Européenne
89/392 CEE (Directive Machines).
Cette directive, dans ses grandes lignes, prévoit que :
- l’installation doit être exécutée exclusivement par du personnel qualié et expert ;
- qui effectue l’installation devra procéder au préalable à “l’analyse des risques” de la machine ;
- l’installation devra être faite dans les “règles de l’art”, c’est-à-dire en appliquant les normes ;
- l’installateur devra remettre au propriétaire de la machine la “déclaration de conformité”.
Il est donc clair que l’installation et les éventuelles interventions de maintenance doivent être effectuées
exclusivement par du personnel professionnellement qualié, conformément aux prescriptions des lois,
normes ou directives en vigueur.
Dans le projet de ses appareils, TAU respecte les normes applicables au produit (voir la déclaration de
conformité jointe) ; il est fondamental que l’installateur lui aussi, lorsque qu’il réalise l’installation, respecte
scrupuleusement les normes.
Tout personnel non qualié ou ne connaissant pas les normes applicables à la catégorie des “portails et
portes automatiques” doit absolument s’abstenir d’effectuer des installations.
Qui ne respecte pas les normes est responsable des dommages que l’installation pourra causer !
Nous conseillons de lire attentivement toutes les instructions avant de procéder à l’installation.
INSTALLATION
Avant de procéder, s’assurer du bon fonctionnement de la partie mécanique. Vérier en outre que le
groupe opérateur a été correctement installé en suivant les instructions correspondantes.
L’INSTALLATION DE L’EQUIPEMENT DOIT ETRE REALISEE “SELON LES REGLES DE L’ART” PAR LE
PERSONNEL COMPETENT AYANT LES QUALITES REQUISES PAR LA LOI.
En particulier, nous rappelons de :
1. positionner la carte verticalement et le plus près possible du motoréducteur, en évitant les longs par-
cours des câbles de connexion ;
2. choisir une section des câbles de puissance (alimentation, moteurs, mise à la terre et clignotant) d’au
moins 1,5 mm² et dans tous les cas, adaptée aux absorptions et à la longueur des conducteurs. Cette
observation est valable également pour le reste des câbles utilisés par les dispositifs de commande et
les auxiliaires à la seule différence que la section minimum est réduite à 0,5 mm² ;
3. se connecter au bornier de manière à ne pas altérer l’indice de protection assuré par l’armoire qui doit
être placée dans un lieu sec et protégé ;
4. maintenir les câbles de puissance séparés des câbles des circuits auxiliaires et de commande, en par-
ticulier sur les longs parcours ;
5. shunter les contacts Normalement Fermés qui ne sont pas utilisés.
N.B.: nous rappelons l’obligation de mettre l’installation à la terre et de respecter les normes de
sécurité en vigueur dans le pays d’installation.
ATTENTION :
- Ne pas utiliser les câbles unilaires (à conducteur unique), par exemple ceux des interphones,
an d’éviter les coupures sur la ligne et les faux contacts ;
- Ne pas réutiliser les anciens câbles préexistants.
LA NON OBSERVATION DES INSTRUCTIONS POURRAIT COMPROMETTRE LE BON FONCTIONNEMENT
DE L’APPAREILLAGE ET CREER UN DANGER POUR LES PERSONNES, PAR CONSEQUENT LA
MAISON DECLINE TOUTE RESPONSABILITE POUR D’EVENTUELLES DETERIORATIONS DUES A
UNE UTILISATION NON APPROPRIEE OU NON CONFORME AU MODE D’EMPLOI.
Français

6
D750M
Introducción
Este manual está destinado sólo al personal técnico cualicado para la instalación. Ninguna información
contenida en este manual puede ser considerada interesante para el usuario nal. Este manual acompaña
a la central D750M; por lo tanto, ¡no debe utilizarse para otro tipo de producto!
Advertencias importantes:
Corte la alimentación de red a la tarjeta antes de acceder a ella.
La central D750M está destinada al accionamiento de un motorreductor electromecánico para la automatización
de cancelas, puertas y portones.
Cualquier otro uso es considerado inadecuado y, por consiguiente, está prohibido por las normativas
vigentes.
Es nuestro deber recordarle que la automatización que está por realizar está clasicada como «construcción
de una máquina» y, por consiguiente, entra dentro del campo de aplicación de la directiva europea 89/392
CEE (Directiva de máquinas).
Dicha normativa, en los puntos fundamentales, prevé que:
- la instalación debe ser efectuada sólo por personal cualicado y experto;
- la persona que efectúe la instalación deberá analizar preventivamente los riesgos de la máquina;
- la instalación deberá ser hecha según las reglas del arte, es decir aplicando las normas;
- por último, habrá que expedir al dueño de la máquina la «declaración de conformidad».
Por consiguiente, es evidente que la instalación y los posibles trabajos de mantenimiento deben ser efectuados
por personal cualicado, de acuerdo con cuanto previsto por las leyes, normas y directivas vigentes.
Durante el diseño de sus equipos, TAU respeta las normativas aplicables al producto (véase la declaración
de conformidad adjunta); también es fundamental que el instalador, al realizar la instalación, respete
escrupulosamente las normas.
Personal no cualicado, o que no conozca las normativas aplicables a la categoría de las «cancelas y
puertas automáticas», debe abstenerse de efectuar instalaciones.
¡Quien no respeta las normativas es responsable de los daños que la instalación podría provocar!
se aconseja leer con atención todas las instrucciones antes de proceder con la instalación.
INSTALACIÓN
Antes de continuar, asegúrese de que la parte mecánica funcione bien. También controle que el
grupo motorreductor esté instalado correctamente siguiendo las instrucciones respectivas.
LA INSTALACIÓN DEL EQUIPO DEBE SER HECHA CORRECTAMENTE POR PERSONAL QUE REÚNA
LOS REQUISITOS DISPUESTOS POR LA LEY 46/90.
En particular, recordamos que:
1. coloque la tarjeta verticalmente y lo más cerca posible del motorreductor, evitando trechos largos de los
cables de conexión;
2. elija la sección de los cables de potencia (alimentación, motores, tierra y luz intermitente) de 1,5 mm²
como mínimo y según las absorciones y la longitud de los conductores. Todo esto es válido para la
remanencia de los cables usados por dispositivos de mando y auxiliares, con la única diferencia de que
la sección mínima es 0,5 mm² más pequeña;
3. conéctese a la regleta de conexiones sin modicar el grado de protección de la caja, la que debe colo-
carse en un lugar seco y protegido;
4. mantenga separados los cables de potencia de los cables de los circuitos auxiliares y de mando, espe-
cialmente en los recorridos largos;
5. cortocircuite los contactos Normalmente Cerrados que no se deban utilizar.
N.B.: se recuerda que es obligatorio conectar a tierra el equipo y respetar las normas de seguridad
vigentes en cada país.
ATENCIÓN:
- no utilizen cables monoconductores (como por ejemplo los del interfono) para evitar interrupciones
en la linea y falsos contactos;
- no utilizen cables viejos preexistentes.
LA INOBSERVANCIA DE LAS INSTRUCCIONES ANTEDICHAS PUEDE PERJUDICAR EL
FUNCIONAMIENTO CORRECTO DEL EQUIPO Y CONSTITUIR UN PELIGRO PARA LAS PERSONAS;
EL “FABRICANTE” NO SE CONSIDERA RESPONSABLE POR POSIBLES PROBLEMAS DE
FUNCIONAMIENTO Y DAÑOS QUE DE ELLOS SE DERIVEN.
Español

7
D750M
Pag. 9 ITALIANO
Pag. 15 ENGLISH
Pag. 21 DEUTSCH
Pag. 27 FRANÇAIS
Pag. 33 ESPAÑOL
Pag. 40 SCHEMA CABLAGGIO D750M / D750M WIRING DIAGRAM / SCHALTPLAN
DER D750M / SCHÉMA CÂBLAGE D750M / ESQUEMA DEL CABLEADO
D750M
Pag. 42 GARANZIA / GARANTIE / GUARANTEE / GARANTIE / GARANTÍA
INDICE
CONTENTS
VERZEICHNIS
INDEX
INDICE
255
202
230
101

8
D750M
230 Vac
Power supply
Flashing
light
230 Vac
max. 50W
Close
Common
Open
Cap
Close
Common
Open
Cap
Common
O/C
Ped
Stop
Electric lock
12 VDC - 15 W
Gate open
warning
light
max. 3 W
Aerial
Sensitive edge
Internal photocell
External photocell
Common
Ext.
photoc.
Int.
photoc.

9
D750M
Italiano
SCHEDA DI COMANDO PER DUE MOTORI MONOFASE 230 Vac
La scheda D750M è provvista di controllo elettronico delle sicurezze (fotocellule); tale verica
viene effettuata sulla fotocellula esterna solamente togliendo e ripristinando l’alimentazione, co-
sicchè il microprocessore della centrale controlli che il relè abbia effettuato uno scambio senza
problemi. Se ciò non avvene, la centrale per sicurezza si blocca.
• LOGICA CON MICROPROCESSORE
• LEDS DI AUTODIAGNOSI
• PROTEZIONE INGRESSO LINEA CON FUSIBILE
• LIMITATORE DI COPPIA ELETTRONICO INCORPORATO
• VERIFICA ELETTRONICA DISPOSITIVI DI SICUREZZA
• FUNZIONE INGRESSO PEDONALE
• CIRCUITO LAMPEGGIO INCORPORATO
• RADIO RICEVITORE 433,92 MHz INTEGRATO A 2 CANALI (CH)
• FUNZIONE “RALLENTAMENTO” IN APERTURA E IN CHIUSURA
COLLAUDO
A collegamento ultimato:
I Leds verdi LS devono essere tutti accesi (corrispondono ciascuno ad un ingresso Normal-
mente Chiuso).
Si spengono solo quando sono interessati i comandi ai quali sono associati.
I Leds rossi LS devono essere tutti spenti (corrispondono ciascuno ad un ingresso Normal-
mente Aperto) si accendono solo quando sono attivi i comandi ai quali sono associati.
CARATTERISTICHE TECNICHE
Alimentazione scheda 230Vac - 50Hz
Potenza nominale max. motori 600 W ca.
Fusibile rapido protezione linea (F1 - 5x20) F 6,3 A
Tensione circuiti alimentazione motore 230 Vac
Tensione alimentazione circuiti dispositivi ausiliari 24 Vac
Fusibile rapido protezione linea 24 V ac (F2 - 5x20) F 1,6 A
Tensioni alimentazioni circuiti logici 5 Vdc
Temperatura di funzionamento -20°C ÷ + 70 °C
Grado di protezione del contenitore IP43
LED DI DIAGNOSI
DL1 led rosso di segnalazione pulsante APRE/CHIUDE
DL2 led rosso di segnalazione pulsante PEDONALE
DL3 led verde di segnalazione pulsante STOP
DL4 led verde di segnalazione BORDO SENSIBILE
DL5 led verde di segnalazione FOTOCELLULE INTERNE
DL6 led verde di segnalazione FOTOCELLULE ESTERNE
DL7 led rosso di segnalazione programmazione RADIOCOMANDI

10
D750M
COLLEGAMENTI ALLA MORSETTIERA
Legenda:
N.C. = Normalmente Chiuso
N.A. = Normalmente Aperto
1 - 2 ingresso ALIMENTAZIONE 230 V ac 50 Hz monofase;
M2 connettore primario trasformatore [n°1 lo blu (230V) + n°1 lo rosso (V_SET) + n°1
lo nero (230V)];
Regolazione potenza motori
Il lo rosso (V_SET) permette di selezionare la tensione di uscita dei motori, quindi
la loro forza di spinta.
M5 connettore secondario trasformatore [n°1 lo blu (0V) + n°1 lo marrone (15V) + n°1
lo bianco (24V) + n°1 lo nero (0V) + n°1 lo rosso (12V)];
3 - 4 uscita LAMPEGGIANTE 230 V ac, 50 W max. Il segnale fornito è già opportunamen-
te modulato per l’uso diretto. La frequenza di lampeggio è leggermente superiore in
fase di chiusura;
5 - 6 - 7 uscita alimentazione MOTORE M1 (motore che apre l’anta del cancello con l’elettro-
serratura), 230 Vac, max 300 W; 5=CHIUDE, 6=COMUNE, 7=APRE.
N.B.: collegare il condensatore fra i morsetti 5 e 7;
8 - 9 -10 uscita alimentazione MOTORE M2, 230 Vac, max 300 W; 8=CHIUDE, 9=COMUNE,
10=APRE.
N.B.: collegare il condensatore fra i morsetti 8 e 10;
11 - 12 ingresso pulsante APRE/CHIUDE (contatto normalmente aperto); per le modalità
d’uso vedi le funzioni del dip-switch nr 2 (11=COMUNE);
11 - 13 ingresso contatto N.A. pulsante PEDONALE - Comanda l’apertura e la chiusura
totale del motore 1 ed è regolato nel funzionamento dal dip-switch 2 (11 = COMUNE);
11 - 14 ingresso pulsante STOP (contatto normalmente chiuso); il suo intervento provoca
l’arresto dell’automazione. Al successivo comando l’automazione esegue una mano-
vra opposta alla precedente (11=COMUNE);
15 - 18 ingresso BORDO SENSIBILE (costa ssa, dip 10 OFF) o BORDO SENSIBILE RESI-
STIVO 8,2 KΩ (dip 10 ON), (contatto normalmente chiuso);
Funziona solo durante la fase di apertura del cancello e provoca la fermata tempo-
ranea del cancello e una parziale richiusura dello stesso per circa 20 cm. liberando
così l’eventuale ostacolo (18=COMUNE).
16 - 18 Ingresso FOTOCELLULE O DISPOSITIVI DI SICUREZZA INTERNI al cancello (con-
tatto Normalmente chiuso); 18=COMUNE.
Il loro intervento, in fase di apertura, provoca l’arresto temporaneo del cancello no
a rimozione dell’ostacolo rilevato; in fase di chiusura provoca l’arresto seguito dalla
totale riapertura del cancello;
17 - 18 Ingresso FOTOCELLULE O DISPOSITIVI DI SICUREZZA ESTERNI al cancello
(contatto Normalmente chiuso); 18=COMUNE. Il loro intervento, efcace solo in fase
di chiusura, provoca l’arresto seguito dalla totale riapertura del cancello.
N.B. Il trasmettittore della fotocellula deve sempre essere alimentato dai mors. 25 - 27
alimentazione, in quanto su questo si effettua la verica del sistema di sicurezza,

11
D750M
quindi senza questo collegamento la centralina non accetterà nessun comando di
apertura. Per eliminare la verica del sistema di sicurezza porre il dip-switch n°6
in posizione OFF.
19 - 20 uscita alimentazione ELETTROSERRATURA 12 Vac max 15 W;
21 - 22 uscita 2° CANALE RADIO; modalità di uscita selezionabile mediante i Dip 7 - 8;
23 - 24 uscita SPIA CANCELLO APERTO; 24 V ac, max 3W; la spia si illumina con la stessa
frequenza del lampeggiante per tutta la corsa in apertura e in chiusura per rimanere,
accesa se il cancello è aperto, spenta a completamento della fase di chiusura;
25 - 27 Uscita alimentazione 24 Vac fotocellula trasmittente esterna per verica dispositivi di
sicurezza. (collegare solo la fotocellula TX esterna) max. nr. 2 trasmettitori fotocellu-
le;
26 - 27 Uscita 24Vac, 10W per l’alimentazione di fotocellule, ricevitori esterni, ecc.
28 - 29 ingresso ANTENNA (28=MASSA, 29=SEGNALE);
REGOLAZIONI LOGICHE
TRIMMER
R. ANTA regolazione ritardo 2° motore.
T. LAV. regolazione tempo di lavoro.
CH. AUTO regolazione tempo di richiusura automatica.
RALLENT. regolazione tempo di rallentamento.
Versione
software
R. ANTA
(Apertura)
R. ANTA
(Chiusura) T.LAV. RALLENT. CH. AUTO
1.00 ÷ 1.04 2 - 4 sec. 2 - 10 sec. 5 - 40 sec. 1/3 T.LAV. 2 - 120 sec.
1.05 ÷ 1.06 2 - 4 sec. 2 - 10 sec. 5 - 60 sec. 1/3 T.LAV. 2 - 120 sec.
2.07 ÷ 2.12 2 - 4 sec. 2 - 10 sec. 5 - 60 sec. 0 - 30 sec. 2 - 120 sec.
3.00 ÷ 3.01 2 - 8 sec. 2 - 16 sec. 5 - 120 sec. 0 - 40 sec. 2 - 120 sec.
3.02 ÷ 3.03 2 - 33 sec.* 2 - 33 sec. 5 - 120 sec. 0 - 40 sec. 2 - 120 sec.
3.04 ÷ 3.05 1,5 - 6 sec.* 2 - 33 sec. 5 - 120 sec. 0 - 40 sec. 2 - 120 sec.
* con dip 9 in ON la soglia di intervento aumenta di 3 sec.
NOTA: ruotando i TRIMMER in senso orario si aumentano le regolazioni, viceversa,
ruotandoli in senso antiorario, diminuiscono.
PROCEDURA DI IMPOSTAZIONE DEL RALLENTAMENTO
- Porre il dip 4 in OFF (rallentamento disabilitato);
- portare le ante in posizione di chiusura;
- tramite il trimmer T.LAV. regolare la “corsa veloce” desiderata delle ante. Vericare l’esatta
impostazione con una manovra di prova.
ATTENZIONE: l’anta non deve aprire completamente, ma deve arrestarsi una volta
trascorso il tempo precedentemente impostato tramite il trimmer T.LAV.
- Dopo aver riportato le ante in posizione di chiusura, abilitare il rall (dip 4 in ON).
- Impostare, tramite il trimmer RALL, un tempo sufciente a completare la manovra di aper-
tura. Al termine vericare l’esatta impostazione dei parametri effettuando una manovra di
prova.

12
D750M
NOTA: con RALL abilitato (dip 4 in ON), la corsa totale
dell’anta è data dalla somma dei tempi impostati sui due
trimmer (T.LAV. + RALLENT.).
T.LAV.
RALL.
DIP SWITCH
1 ON: ad apertura completata, la chiusura del cancello è automatica trascorso un tempo im-
postato sul trimmer T.C.A.;
OFF: la chiusura necessita di un comando manuale;
2 ON: ad automazione funzionante, una sequenza di comandi di apertura/chiusura induce
il cancello ad una APERTURA-CHIUSURA-APERTURA-CHIUSURA, etc. (vedi anche dip
switch 3);
OFF: nelle stesse condizioni, la stessa sequenza di comandi di apertura/chiusura induce il
cancello ad una APERTURA-STOP-CHIUSURA-STOP-APERTURA-STOP, etc. (funzione
passo-passo);
3 ON: il cancello in fase di apertura ignora i comandi di chiusura (NO REVERSE);
OFF: il cancello si comporta secondo la regolazione del dip-switch 2;
4 ON: la funzione rallentamento è inserita e può essere regolata agendo sul trimmer RALL.
(vedi “PROCEDURA DI IMPOSTAZIONE DEL RALLENTAMENTO”);
OFF: la funzione rallentamento è esclusa;
5 ON: la funzione prelampeggio è abilitata;
OFF: la funzione prelampeggio è disabilitata;
6 ON: la funzione “verica delle fotocellule” è inserita;
OFF: la funzione “verica delle fotocellule” è disinserita. N.B.: da utilizzare quando non si
usano le fotocellule;
7 - 8 funzionamento 2° CANALE RADIO (morsetti nr 21 - 22);
Dip 7 Dip 8 Funzione
OFF OFF
Contatto cancello aperto: il contatto si attiva all’apertura del cancello,
rimane attivo durante il tempo di apertura, durante il TCA e durante
la richiusura. Si disattiva una volta che il cancello ha completato la
chiusura.
OFF ON Funzione bistabile attiva: all’ impulso del radiocomando il contatto si attiva
e rimane tale no al successivo impulso.
ON OFF Funzione monostabile attiva 2 sec.: all’ impulso del radiocomando il
contatto si attiva e rimane tale per 2 sec.
ON ON Funzione monostabile attiva 180 sec.: all’ impulso del radiocomando il
contatto si attiva e rimane tale per 180 sec.

13
D750M
9 ON: la funzione “colpo d’ariete” è inserita. Permette lo sgancio dell’elettroserratura (da utiliz-
zarsi solo se è presente l’elettroserratura);
Con versione software 3.02 e successive:
la soglia del tempo di ritardo anta in apertura aumenta di 3 sec. (es: con software vers. 3.02,
da 2 - 33 sec. si passa a 5 - 36 sec.);
OFF: la funzione “colpo d’ariete” è disinserita;
10 ON: BORDO SENSIBILE RESISTIVO (morsetto nr 15)
OFF: BORDO SENSIBILE - costa ssa (morsetto nr 15)
ATTENZIONE:
Per ogni coppia di morsetti facenti capo ad un contatto N.C. non utilizzato, bisogna effettuare un
cortocircuito per poter garantire il normale funzionamento della scheda.
L’impianto di massa a terra del portone deve essere conforme alle norme vigenti. La Casa Co-
struttrice declina ogni responsabilità per i danni derivanti da eventuali inosservanze in materia.
R.ANTA T.LAV. CH.AUTORALL.
R.ANTA T.LAV. CH.AUTORALL.
Dip-switches
CARATTERISTICHE DELLA D750M
LED - DL7
Il led, oltre ad indicare la programmazione dei radiocomandi, segnala eventuali errori con una
serie di lampeggi predeniti:
• sempre acceso: funzionamento regolare;
• 2 lampeggi: errore fototest;
Disabilitare fototest (dip-switch 6 in OFF), vericare funzionamento fotocellule e loro
collegamento;
RADIO RICEVITORE 433,92 MHz INTEGRATO
Il radio ricevitore può apprendere no ad un max di 30 codici a dip-switches (TXD2, TXD4,
BUG2, BUG4, SLIM, SLIM-C, T-4, T-4C) o rolling code (BUG2R, BUG4R, SLIM-RP, T-4RP) da
impostare liberamente su due canali.
Il primo canale comanda direttamente la scheda di comando per l’apertura dell’automazione; il
secondo canale comanda un relè per un contatto pulito N.A. in uscita (morsetti nr 21 e 22, max
24 Vac, 1 A).
La modalità di apprendimento (dip-switches o rolling code) viene determinata dal primo radioco-
mando e rimarrà la stessa no alla cancellazione totale di tutti i codici.
APPRENDIMENTO RADIOCOMANDI
P1 = APRE/CHIUDE
P2 = 2° canale
1_ premere brevemente il tasto P1 se si desidera associare un radiocomando alla funzione
APRE/CHIUDE;

14
D750M
2_ il led DL7 si spegne per indicare la modalità di apprendimento dei codici (se non viene im-
messo nessun codice entro 10 secondi, la scheda esce dalla modalità di programmazione);
3_ premere il tasto del radiocomando che si desidera utilizzare;
4_ il led DL7 si riaccende per segnalare l’avvenuta memorizzazione (se ciò non accade, attendere
10 secondi e riprendere dal punto 1);
5_ se si desidera memorizzare altri radiocomandi, ripetere la procedura dal punto 1 no ad un
massimo di 30 trasmettitori;
6_ se si desidera effettuare la memorizzazione sul 2° canale, ripetere la procedura dal punto 1
utilizzando il tasto P2 anzichè il tasto P1;
7_ se si desidera uscire dalla modalità di apprendimento senza memorizzare un codice, premere
brevemente il tasto P1 o il tasto P2.
N.B.: nel caso di superamento del nr massimo di radiocomandi (nr 30), il led DL7 inizierà
a lampeggiare velocemente per circa 3 secondi senza però eseguire la memorizza-
zione.
Se si dispone di radiocomandi mod. T-4RP, SLIM-RP o BUG-R programmati tramite il TAUPROG,
è possibile memorizzarli senza agire sui tasti P1 e P2 della centrale. In questo caso fare riferimento
alle istruzioni dei singoli radiocomandi per eseguire la procedura di memorizzazione via radio.
PROGRAMMAZIONE REMOTA TRAMITE ROLLING CODE
È possibile eseguire l’apprendimento remoto della versione di radiocomandi rolling code, ossia
senza agire direttamente sul tasto di programmazione della ricevente.
Sarà sufciente disporre di un radiocomando già programmato nella ricevente per poter aprire
la procedura di programmazione remota dei nuovi radiocomandi. Seguire la procedura riportata
sulle istruzioni del radiocomando rolling code.
CANCELLAZIONE RADIOCOMANDI
1_ tenere premuto per 3 secondi ca. il tasto P1 al ne di cancellare tutti i radiocomandi ad esso
associati;
2_ il led DL7 inizia a lampeggiare lentamente per indicare che la modalità di cancellazione è
attivata;
3_ tenere pemuto nuovamente il tasto P1 per 3 secondi;
4_ il led DL7 si spegne per 3 secondi ca. per poi riaccendersi sso ad indicare l’avvenuta can-
cellazione;
5_ riprendere la procedura dal punto 1 utilizzando il tasto P2 per cancellare tutti i radiocomandi
ad esso associati;
6_ se si desidera uscire dalla modalità di cancellazione senza memorizzare un codice, premere
brevemente il tasto P1 o il tasto P2.
ATTENZIONE: Se si desidera memorizzare un nuovo tipo di telecomando (es: da dip-
switches a rolling code o viceversa) è necessario cancellare entrambi i canali.
MALFUNZIONAMENTI: POSSIBILI CAUSE E RIMEDI
1- L’automazione non parte
a- Vericare con lo strumento (Multimetro) la presenza dell’alimentazione 230Vac;
b- Vericare che i contatti N.C. della scheda siano effettivamente normalmente chiusi (4 led
verdi accesi);
c- Impostare il dip 6 (fototest) su OFF;
d- Controllare con lo strumento (Multimetro) che i fusibili siano integri.
2- Il radiocomando ha poca portata
a- Controllare che il collegamento della massa e del segnale dell’antenna non sia invertito;
b- Non eseguire giunzioni per allungare il cavo dell’antenna;
c- Non installare l’antenna in posizioni basse o in posizioni nascoste dalla muratura o dal
pilastro;
d- Controllare lo stato delle pile del radiocomando.
3- Il cancello si apre al contrario
Invertire tra loro i collegamenti dei motori sulla morsettiera (morsetti 5 e 7 per il motore 1;
morsetti 8 e 10 per il motore 2);

15
D750M
DICHIARAZIONE DI INCORPORAZIONE DEL COSTRUTTORE
(ai sensi della Direttiva Europea 2006/42/CE AlI. II.B)
Fabbricante: TAU S.r.l.
Indirizzo: Via E. Fermi, 43
36066 Sandrigo (Vi)
ITALIA
Dichiara sotto la propria responsabilità che il prodotto: Centrale di comando
realizzato per il movimento automatico di: Cancelli a Battente
per uso in ambiente: Residenziale / Condominiale
completo di: Radioricevente
Modello: D750M
Tipo: D750M
Numero di serie: vedi etichetta argentata
Denominazione commerciale: Quadro di comando per due motori monofase
230 Vac
È realizzato per essere incorporato su una chiusura (cancello a battente) o per essere assemblato con altri dispositivi
al ne di movimentare una tale chiusura per costituire una macchine ai sensi della Direttiva Macchine 2006/42/CE.
Dichiara inoltre che questo prodotto è conforme ai requisiti essenziali di sicurezza delle seguenti ulteriori direttive
CEE:
- 2006/95/CE Direttiva Bassa Tensione
- 2004/108/CE Direttiva Compatibilità Elettromagnetica
ed, ove richiesto, alla Direttiva:
- 1999/5/CE Apparecchiature Radio e apparecchiature terminali di telecomunicazione
Dichiara inoltre che non è consentito mettere in servizio il macchinario no a che la macchina in cui sarà
incorporato o di cui diverrà componente sia stata identicata e ne sia stata dichiarata la conformità alle condizioni
della Direttiva 2006/42/CE.
Si impegna a trasmettere, su richiesta adeguatamente motivata delle autorità nazionali, informazioni pertinenti sulle
quasi-macchine.
Sandrigo, 31/03/2010
Il Rappresentante Legale
_________________________________________
Bruno Danieli
Nome e indirizzo della persona autorizzata a costituire la documentazione tecnica pertinente:
Loris Virgilio Danieli - via E. Fermi, 43 - 36066 Sandrigo (Vi) Italia

16
D750M
CONTROL CARD FOR TWO SINGLE-PHASE MOTORS 230 Vac
The D750M panel features an electronic photocell control system which switches the external
photocell transmitter on and off thereby causing the control unit microprocessor to check wheth-
er the relay switches correctly. If this does not happen, the control unit is automatically blocked
• MICROPROCESSOR-CONTROLLED LOGIC
• SELF-DIAGNOSIS LED’s
• LINE INPUT FUSE
• BUILT-IN TORQUE LIMITING DEVICE
• ELECTRONIC CONTROL OF SAFETY DEVICES
• PEDESTRIAN ENTRY FUNCTION
• BUILT-IN FLASHING LIGHT CIRCUIT
• 433.92 MHz 2 CHANNEL BUILT-IN RADIO RECEIVER (CH)
• “SLOW-DOWN” FUNCTION IN OPENING AND IN CLOSING PHASE
TESTING
When all connections have been made:
All the green LS LED’s must be on (each corresponds to a Normally Closed input).
They only turn off when the commands they are associated with are active.
All the red LS LED’s must be off (each corresponds to a Normally Open input) they only turn
on when the commands they are associated with are active.
TECHNICAL CHARACTERISTICS
Power input to board 230Vac - 50Hz
Max motors nominal power 600 W ca.
Primary input line rapid fuse (F1 - 5x20) F 6,3 A
Input voltage of motor circuits 230 Vac
Input voltage of auxiliary circuits 24 Vac
24Vac line rapid fuse (F2 - 5x20) F 1,6 A
Logic circuit input voltage 5 Vdc
Working temperature -20°C ÷ + 70 °C
Box protected to IP43
DIAGNOSTICS LED
DL1 OPEN/CLOSE button red LED signal
DL2 PEDESTRIAN button red LED signal
DL3 STOP button green LED signal
DL4 SENSITIVE EDGE green LED signal
DL5 INTERNAL PHOTOCELL green LED signal
DL6 EXTERNAL PHOTOCELL green LED signal
DL7 RADIO CONTROLS programming red LED signal
English

17
D750M
TERMINAL BOARD CONNECTIONS
Key:
N.C. = Normally Closed
N.O. = Normally Open
1 - 2 POWER input 230Vac, 50Hz, single-phase;
M2 transformer primary connector [1 blue wire (230V) + 1 red wire (V_SET) + 1 black
wire (0V)];
Tuning of the engines power
The red wire (V_SET) allow to select the output-voltage of the engines, consequently
their thrust-forces.
M5 transformer secondary connector [1 blue wire (0V) + 1 brown wire (15V) + 1 white
wire (24V) + 1 black wire (0V) + 1 red wire (12V)];
3 - 4 FLASHING LIGHT output 230Vac, 20W max. The signal is already modulated for
direct use. Flashing frequency increases slightly during closing;
5 - 6 - 7 MOTOR M1 power output (opens the leaf tted with the electric lock), 230 Vac, max.
300 W. 5=CLOSE, 6=COMMON, 7=OPEN.
Note: connect the capacitor between terminals 5 and 7;
8 - 9 -10 MOTOR M2 power output, 230 Vac, max. 300 W. 8=CLOSE, 9=COMMON.,
10=OPEN.
Note: connect the capacitor between terminals 8 and 10;
11 - 12 OPEN/CLOSE button input (contact normally open); for operating information see dip
switch 2 function (COMMON=11);
11 - 13 N.O. PEDESTRIAN button contact input – commands total opening and closing of
motor 1 – governed by dip-switch 2 (COMMON=11);
11 - 14 STOP button input (normally closed contact); this stops the automatic system. At
the next command, the opposite operation to the previous one is performed (COM-
MON=9);
15 - 18 SENSITIVE EDGE input (xed edge, dip 10 OFF) or 8,2 KΩ RESISTIVE SENSITIVE
EDGE (dip 10 ON), (normally closed contact);
Works only when the gate is opening; temporarily stops the gate and partially closes
it by about 20 cm in order to allow the obstacle to be removed. (COMMON=18).
16 - 18 PHOTOCELL OR SAFETY DEVICE input INSIDE the gate (Normally Closed con-
tact); COMMON=18.
When these devices trigger during the opening phase, they temporarily stop the gate
until the obstacle has been removed; during the closing phase they stop the gate and
then totally open it again.
17 - 18 PHOTOCELL OR SAFETY DEVICE input OUTSIDE the gate (Normally Closed con-
tact); COMMON=18.
Then these devices trigger during the closing phase, they stop the gate and then
totally open it again.
NOTE Because the control of the safety system is performed on the photocell’s trans-
mitter, this must always be powered by terminals 25 – 27, therefore if this con-

18
D750M
nection is broken the control unit will not accept any opening command. To
eliminate the safety system control, position dip-switch 6 to OFF.
19 - 20 ELECTRIC LOCK power output 12 Vac max. 15 W;
21 - 22 2nd RADIO CHANNEL output; the output mode can be selected by Dip 7 - 8;
23 - 24 GATE OPEN WARNING LIGHT output; 24 V ac, max 3W; the light lights with the
same frequency as that of the ashing light for the entire opening and closing ma-
noeuvre and remains on if the gate is open and off when the gate has closed;
25 - 27 24 Vac external transmitting photocell power supply output for safety device control
(connect the external TX photocell only) max. of 2 photocell transmitters;
26 - 27 24Vac output, 10W for the power supply of photocells, external receivers, etc.
28 - 29 AERIAL input (EARTH=28, SIGNAL=29);
LOGIC ADJUSTMENTS
TRIMMER
R. ANTA second motor delay adjustment.
T. LAV. Work Time adjustment.
CH.AUTO Automatic closing time adjustment.
RALLENT. adjustment of delay time.
Software
version
R. ANTA
(Opening)
R. ANTA
(Closing) T.LAV. RALLENT. CH. AUTO
1.00 ÷ 1.04 2 - 4 sec. 2 - 10 sec. 5 - 40 sec. 1/3 T.LAV. 2 - 120 sec.
1.05 ÷ 1.06 2 - 4 sec. 2 - 10 sec. 5 - 60 sec. 1/3 T.LAV. 2 - 120 sec.
2.07 ÷ 2.12 2 - 4 sec. 2 - 10 sec. 5 - 60 sec. 0 - 30 sec. 2 - 120 sec.
3.00 ÷ 3.01 2 - 8 sec. 2 - 16 sec. 5 - 120 sec. 0 - 40 sec. 2 - 120 sec.
3.02 ÷ 3.03 2 - 33 sec.* 2 - 33 sec. 5 - 120 sec. 0 - 40 sec. 2 - 120 sec.
3.04 ÷ 3.05 1,5 - 6 sec.* 2 - 33 sec. 5 - 120 sec. 0 - 40 sec. 2 - 120 sec.
* with Dip Switch 9 in ON, the threshold increases by 3 seconds.
N.B.: turn the TRIMMER clockwise to increase adjustments; turn it anticlockwise
to decrease.
DECELERATION SETTING PROCEDURE
- Set dip 4 to OFF (deceleration disabled);
- move the leafs to the closing position;
- use the trimmer T.LAV. to set the leaf “high speed travel” as required. Check the precise set-
ting by means of a test manoeuvre.
CAUTION: the leaf must not open completely, but has to stop on elapse of the time
previously set on trimmer T.LAV.
- After returning the leafs to the closing position, enable decel. (dip 4 set to ON).
- Use the trimmer RALL. to set a time sufcient to complete the opening manoeuvre. At the
end, check the precise setting by means of a test manoeuvre.

19
D750M
DIP SWITCH
1 ON: after opening, the gate automatically closes when the delay set on the T.C.A. trimmer
expires;
OFF: automatic closing disabled;
2 ON: with automatic closing enabled, a sequence of open/close commands causes the gate
to OPENCLOSE-OPEN-CLOSE etc (see also dip switch 3);
OFF: in the same conditions, the same command sequence causes the gate to OPEN-STOP-
CLOSE-STOP-OPEN-STOP (step-by-step);
3 ON: the gate ignores the close command while it is opening (NO REVERSE);
OFF: the gate behaves according to the position of dip-switch n° 2;
4 ON: the deceleration function is on and can be adjusted by means of the RALL trimmer (see
“DECELERATION SETTING PROCEDURE”);
OFF: the deceleration function is off;
5 ON: the pre-ashing function enabled;
OFF: the pre-ashing function disabled;
6 ON: the “photocell test” function is enabled;
OFF: the “photocell test” function is disabled. N.B.: to be used when the photocells are not
used;
7 - 8 2nd RADIO CHANNEL operation (terminals no. 21 - 22)
Dip 7 Dip 8 Function
OFF OFF
Gate contact open: The contact activates on opening the gate and
remains active during the open time, during the TCA and during reclosure.
It deactivates once the gate has completed its closure movement.
OFF ON Bistable function active: the radio control impulse causes the contact to
activate and remain active until the subsequent impulse.
ON OFF Monostable function active for 2 sec.: the radio control impulse causes
the contact to activate and remain active for 2 sec.
ON ON Monostable function active for 180 sec.: the radio control impulse causes
the contact to activate and remain active for 180 sec.
T.LAV.
RALL.
NOTE: with RALL. enabled (dip 4 ON), the total travel of the
leaf is obtained from the total of the times set on the two
trimmers (T.LAV. + RALLENT.).

20
D750M
9 ON: the “opening ram blow” function is on. This permits the release of the electric lock (to be
used only in the presence of an electric lock);
With Software version 3.02 and later:
Wing opening delay increases by 3 seconds (for example, with Software version 3.02 from
2 – 33 seconds to 5 – 36 seconds);
OFF: the “opening ram blow” function is off;
10 ON: RESISTIVE SENSITIVE EDGE (terminal no. 15)
OFF: RESISTIVE EDGE - xed edge (terminal no. 15)
IMPORTANT:
Each pair of terminals attached to an NC contact that is not in use must be short-circuited in
order to ensure the proper operation of the board.
The door’s earthing system must comply with current standards. The manufacturer will accept
no liability for any damage deriving from failure to comply with this requirement.
R.ANTA T.LAV. CH.AUTORALL.
R.ANTA T.LAV. CH.AUTORALL.
Dip-switches
D750M CHARACTERISTICS
LED - DL7
The LED, besides indicating that the radio controls are scheduled, also signals errors with a
series of pre-dened ashes:
• steady light: normal operation;
• 2 ashes: phototest error;
Disable phototest (dip-switch 6 OFF), check operation and connection of photocells;
433.92 MHz BUILT-IN RADIO RECEIVER
The radio receiver can learn up to a maximum of 30 dip-switches (TXD2, TXD4, BUG2, BUG4,
SLIM, SLIM-C, T-4, T-4C) or rolling codes (BUG2R, BUG4R, SLIM-RP, T-4RP) which can be set
on the two channels as required.
The rst channel directly commands the control board for opening the automatic device; the
second channel commands a relay for a N.O. no-voltage output contact (terminals 21 and 22,
max. 24 Vac, 1 A).
The learning mode (dip-switch or rolling code) is determined by the rst radio control device and
remains unchanged until all the codes have been cancelled.
Table of contents
Languages:
Other tau Control Panel manuals
