manuals.online logo
Brands
  1. Home
  2. •
  3. Brands
  4. •
  5. Teknik
  6. •
  7. Indoor Furnishing
  8. •
  9. Teknik Canal Heights 5419231 User manual

Teknik Canal Heights 5419231 User manual

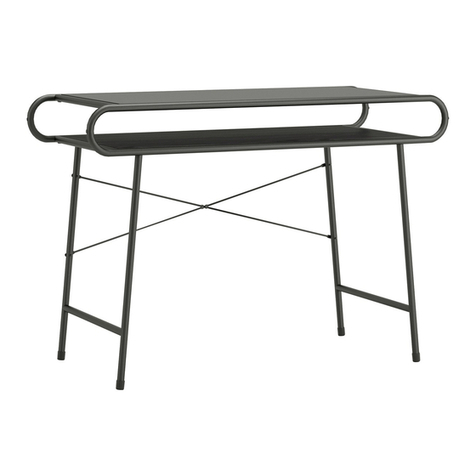
Canal Heights Console Desk
5419231
www.teknikoffice.co.uk
NOTE: THIS INSTRUCTION
BOOKLET CONTAINS IMPORTANT
SAFETY INFORMATION.
PLEASE READ AND KEEP FOR
FUTURE REFERENCE.
Sit and surf.
Teknik
Table of Contents Assembly Tools Required
3
4
5-23
Part Identification
Hardware Identification
Assembly Steps
Hammer
Not actual size
No. 2 Phillips Screwdriver
Tip Shown Actual Size
Skip the power trip.
This time.
Page 2
Part Identification
åWhile not all parts are labeled, some of the parts will have a label or an inked letter on the edge
to help distinguish similar parts from each other. Use this part identification to help identify similar parts.
A END (2)
B RIGHT UPRIGHT (1)
C LEFT UPRIGHT (1)
D TOP (1)
E BOTTOM (1)
F BACK PANEL (1)
G FRONT RIGHT PANEL (1)
H FRONT LEFT PANEL (1)
I FRONT CORNER (2)
J RIGHT REAR CORNER (1)
K LEFT REAR CORNER ( 1)
L RIGHT LEG ASSEMBLY
M LEFT LEG ASSEMBLY
N BRACE (2)
O CROSS BRACE (2)
P DRAWER RIGHT SIDE (1)
Q DRAWER LEFT SIDE (1)
R DRAWER FRONT (1)
S DRAWER BACK (1)
T DRAWER BOTTOM (1)
Now you know
our ABCs.
Page 3
A
A
B
C
D
E
F
G
H
I
J
K
L
M
N
O
P
QR
S
T
N
I
O
Hardware Identification
åScrews are shown actual size. You may receive extra hardware with your unit.
Page 4
1/2" MACHINE SCREW - 16
13
HIDDEN CAM - 25
3CAM SCREW - 25
4
1/2" FLAT HEAD SCREW - 4
12
1-1/2" FLAT HEAD SCREW - 21
9
EXTENSION SLIDE - 2
2
EXTENSION RAIL - 2
1
EXTENSION SETS SHOWN SEPARATED
HINGE - 2
6KNOB - 1
7BUMPER - 2
8
1-3/8" ALLEN BOLT - 10
10
3/4" MACHINE SCREW - 2
11
ALLEN WRENCH - 1
16
WOOD DOWEL - 43
5
1/2" PAN HEAD SCREW - 12
15
9/16" LARGE HEAD SCREW - 2
14
Step 1
å Assemble your unit on a carpeted floor or on the empty
carton to avoid scratching your unit or the floor.
å Turn thirteen CAM SCREWS (4) into the exact holes
shown in the TOP (D).
Page 5
D
(13 used) 4
Step 2
å Separate the EXTENSION SLIDES (2) from the
EXTENSION RAILS (1) as shown in the enlarged diagram
below. Be prepared, the parts are greasy.
å Fasten the EXTENSION RAILS (1) to the UPRIGHTS (B
and C). Use six 1/2" PAN HEAD SCREWS (15).
å NOTE: Use the exact holes shown in the RAILS.
å Insert sixteen WOOD DOWELS (5) into
the exact holes shown in the ENDS (A)
and UPRIGHTS (B and C).
Page 6
Mounting holes
Open end
Open end
Open end
1
21
C
B
AA
5
(16 used)
1/2" PAN HEAD SCREW
(6 used in this step)
15
å Turn six CAM SCREWS (4) into the exact holes shown in
the REAR CORNERS (J and K) and BACK PANEL (F).
å Insert ten WOOD DOWELS (5) into the exact holes shown
in the REAR CORNERS (J and K) and BACK PANEL (F).
Step 3
Page 7
(6 used) 4
5
(10 used)
K
F
J
Step 4
Page 8
å Insert two HIDDEN CAMS (3) into the BACK PANEL (F).
å Fasten the BACK PANEL (F) to the CORNERS (J and K).
Tighten two HIDDEN CAMS.
å NOTE: Be sure the WOOD DOWELS in the edges of the
BACK PANEL insert into the CORNERS.
3
21
3
The arrow must
point toward the
edge of the board.
K
F
J
3
3
å Turn six CAM SCREWS (4) into the exact holes shown in the
FRONT PANELS (G and H) and FRONT CORNERS (I).
å Insert fourteen WOOD DOWELS (5) into the exact holes shown
in the FRONT PANELS (G and H) and FRONT CORNERS (I).
Step 5
Page 9
(6 used) 4
5
(14 used)
H
I
G
I
Step 6
Page 10
å Insert two HIDDEN CAMS (3) into the FRONT PANELS (G and H).
å Fasten the FRONT PANELS (G and H) to the FRONT
CORNERS (I). Tighten two HIDDEN CAMS.
å NOTE: Be sure the WOOD DOWELS in the edges of
the FRONT PANELS insert into the FRONT CORNERS.
3
21
3
The arrow must
point toward the
edge of the board.
3
3
H
I
G
I
å Insert four HIDDEN CAMS (3) into the ENDS (A)
and UPRIGHTS (B and C).
å Fasten the ENDS (A) and UPRIGHTS (B and C) to the
FRONT PANELS (G and H) and FRONT CORNERS (I).
Tighten four HIDDEN CAMS.
å NOTE: Be sure the WOOD DOWELS in the edges of the
ENDS (A) and UPRIGHTS (B and C) insert into the FRONT
PANELS (G and H) and FRONT CORNERS (I).
Step 7
419231
3
21
3
The arrow must
point toward the
edge of the board.
H
I
G
I
C
B
A
A
3
(4 used)
Step 8
å Insert four HIDDEN CAMS (3) into the ENDS (A)
and UPRIGHTS (B and C).
å Fasten the ENDS (A) and UPRIGHTS (B and C) to the
BACK PANEL (F) and REAR CORNERS (J and K). Tighten
four HIDDEN CAMS.
å NOTE: Be sure the WOOD DOWELS in the edges of the
ENDS (A) and UPRIGHTS (B and C) insert into the BACK
PANEL (F) and REAR CORNERS (J and K).
Page 12
3
21
3
The arrow must
point toward the
edge of the board.
3
(4 used)
H
K
G
J
C
B
A
A
F
å NOTE: You may need someone's help in this step.
å Insert thirteen HIDDEN CAMS (3) into the ENDS (A),
UPRIGHTS (B and C), BACK PANEL (F), and
FRONT PANELS (G and H).
å Fasten the TOP (D) to the ENDS (A), UPRIGHTS (B and C),
BACK PANEL (F), and FRONT PANELS (G and H). Tighten
thirteen HIDDEN CAMS.
å NOTE: Be sure the WOOD DOWELS in the edges of the
ENDS (A), UPRIGHTS (B and C), BACK PANEL (F), FRONT
PANELS (G and H), and CORNERS (I, J, and K) insert into
the TOP (D).
Step 9
Page 13
3
21
3
The arrow must
point toward the
edge of the board.
3
(13 used)
H
K
G
J
C
B
A
A
D
FI
I
Step 10
å Fasten the BOTTOM (E) to the ENDS (A), UPRIGHTS (B
and C), BACK PANEL (F), and FRONT PANELS (G and H).
Use thirteen 1-1/2" FLAT HEAD SCREWS (9).
å NOTE: Be sure the WOOD DOWELS in the edges of the
ENDS (A), UPRIGHTS (B and C), BACK PANEL (F), FRONT
PANELS (G and H), and CORNERS (I, J, and K) insert into
the BOTTOM (E).
Page 14
1-1/2" FLAT HEAD SCREW
(13 used in this step)
9
H
K
G
J
C
B
A
A
FI
I
E
å Fasten the LEG ASSEMBLIES (L and M) to the
BRACES (N). Use eight 1/2" MACHINE SCREWS (13).
Step 11
Page 15
M
N
L
N
1/2" MACHINE SCREW
(8 used in this step)
13
These holes
must be here.
These holes
must be here.
These holes
must be here.
These holes
must be here.
Step 12
å Fasten the LEG ASSEMBLIES (L and M) and BRACES (N)
to the BOTTOM (E). Tighten ten 1-3/8" ALLEN BOLTS (10)
using the ALLEN WRENCH (16).
Page 16
1-3/8" ALLEN BOLT
(10 used in this step)
10
16
M
N
L
N
These holes
must be here.
G
H
The front of your unit
E
å Fasten the CROSS BRACES (O) to the LEG ASSEMBLIES (L
and M). Use eight 1/2" MACHINE SCREWS (13).
Step 13
Page 17
1/2" MACHINE SCREW
(8 used in this step)
13
M
L
O
O
Step 14
å Fasten the DRAWER SIDES (P and Q) to the DRAWER
BACK (S). Use two 1-1/2" FLAT HEAD SCREWS (9).
Page 18
Q
S
P
1-1/2" FLAT HEAD SCREW
(2 used in this step)
9
These holes
must be here.
Surface without holes
å Insert three WOOD DOWELS (5) into the larger holes
in the edges of the DRAWER SIDES (P and Q) and
DRAWER BACK (S).
å Fasten the DRAWER BOTTOM (T) to the DRAWER
SIDES (P and Q) and DRAWER BACK (S). Use six 1-1/2"
FLAT HEAD SCREWS (9).
å NOTE: Be sure the WOOD DOWELS in the DRAWER
SIDES and DRAWER BACK insert into the
DRAWER BOTTOM.
Step 15
Page 19
1-1/2" FLAT HEAD SCREW
(6 used in this step)
9
Q
S
P
T
55
Step 16
å Fasten the HINGES (6) to the DRAWER FRONT (R). Use
four 1/2" FLAT HEAD SCREWS (12).
å Fasten the KNOB (7) to the DRAWER FRONT (R). Use two
3/4" MACHINE SCREWS (11).
Page 20
6
7
R
6
3/4" MACHINE SCREW
(2 used in this step)
11
1/2" FLAT HEAD SCREW
(4 used in this step)
12

Other Teknik Indoor Furnishing manuals
Teknik Shaker Style 5428225 User manual

Teknik

Teknik Shaker Style 5428225 User manual

Teknik Barrister Home 5418891 User manual

Teknik

Teknik Barrister Home 5418891 User manual

Teknik Hampstead Park Compact Desk 5420284 User manual

Teknik

Teknik Hampstead Park Compact Desk 5420284 User manual

Teknik Hudson 5425825 User manual

Teknik

Teknik Hudson 5425825 User manual

Teknik 5420649 User manual

Teknik

Teknik 5420649 User manual

Teknik Lateral Filer 5421114 User manual

Teknik

Teknik Lateral Filer 5421114 User manual

Teknik Credenza 5421317 User manual

Teknik

Teknik Credenza 5421317 User manual

Teknik Avon 5422051 User manual

Teknik

Teknik Avon 5422051 User manual

Teknik 5418072 User manual

Teknik

Teknik 5418072 User manual

Teknik 5158097 User manual

Teknik

Teknik 5158097 User manual

Teknik Boulevard Cafe Desk 5420701 User manual

Teknik

Teknik Boulevard Cafe Desk 5420701 User manual

Teknik Boulevard Cafe 5420650 User manual

Teknik

Teknik Boulevard Cafe 5420650 User manual

Teknik Hampstead Park 5420834 User manual

Teknik

Teknik Hampstead Park 5420834 User manual

Teknik Home Study 5426616 User manual

Teknik

Teknik Home Study 5426616 User manual

Teknik Barrister Home 5420176 User manual

Teknik

Teknik Barrister Home 5420176 User manual

Teknik Market 5425768 User manual

Teknik

Teknik Market 5425768 User manual

Teknik 5427129 User manual

Teknik

Teknik 5427129 User manual

Teknik Industrial Style Chunky Desk 5422097 User manual

Teknik

Teknik Industrial Style Chunky Desk 5422097 User manual

Teknik Elstree L-Shaped Desk 5426914 User manual

Teknik

Teknik Elstree L-Shaped Desk 5426914 User manual

Teknik Barrister Home L-Shaped Desk 5418270 User manual

Teknik

Teknik Barrister Home L-Shaped Desk 5418270 User manual

Teknik 5427873 User manual

Teknik

Teknik 5427873 User manual

Teknik Essentials L-Shaped Desk 5425092 User manual

Teknik

Teknik Essentials L-Shaped Desk 5425092 User manual

Teknik Craft 5421419 User manual

Teknik

Teknik Craft 5421419 User manual

Teknik 5412320 User manual

Teknik

Teknik 5412320 User manual

Popular Indoor Furnishing manuals by other brands

OVE AYSEL 42 installation manual

OVE

OVE AYSEL 42 installation manual

BDI TANAMI 7109 instructions

BDI

BDI TANAMI 7109 instructions

Tommy Swiss M211 BASE installation guide

Tommy Swiss

Tommy Swiss M211 BASE installation guide

Sauder Camden 101730 Instruction booklet

Sauder

Sauder Camden 101730 Instruction booklet

EasyAS 0022381 install guide

EasyAS

EasyAS 0022381 install guide

Costway SP35344 user manual

Costway

Costway SP35344 user manual

Rehau RAUVOLET VETRO-LINE manual

Rehau

Rehau RAUVOLET VETRO-LINE manual

Lefroy Brooks M1-5301 Installation, operating,  & maintenance instructions

Lefroy Brooks

Lefroy Brooks M1-5301 Installation, operating, & maintenance instructions

Vinsetto 924-047 manual

Vinsetto

Vinsetto 924-047 manual

HON HBXRISER installation guide

HON

HON HBXRISER installation guide

Finori Landwood 44 Assembly instructions

Finori

Finori Landwood 44 Assembly instructions

GPM Corona CHT6DWGRY Assembly instructions

GPM

GPM Corona CHT6DWGRY Assembly instructions

Lavish Home Collection 80-ENTRYF-6 Assembly instructions

Lavish Home Collection

Lavish Home Collection 80-ENTRYF-6 Assembly instructions

Ehrenkind Montessori MKS01 instruction manual

Ehrenkind

Ehrenkind Montessori MKS01 instruction manual

GPM ROBCAM2GY Assembly instructions

GPM

GPM ROBCAM2GY Assembly instructions

Keter LAUREN Assembly instructions

Keter

Keter LAUREN Assembly instructions

Haworth Zody II Adjustment

Haworth

Haworth Zody II Adjustment

JSI Lok ZLKT2430-29TTT Assembly instruction

JSI

JSI Lok ZLKT2430-29TTT Assembly instruction

manuals.online logo
manuals.online logoBrands
  • About & Mission
  • Contact us
  • Privacy Policy
  • Terms and Conditions

Copyright 2025 Manuals.Online. All Rights Reserved.