manuals.online logo
Brands
  1. Home
  2. •
  3. Brands
  4. •
  5. Teknik
  6. •
  7. Indoor Furnishing
  8. •
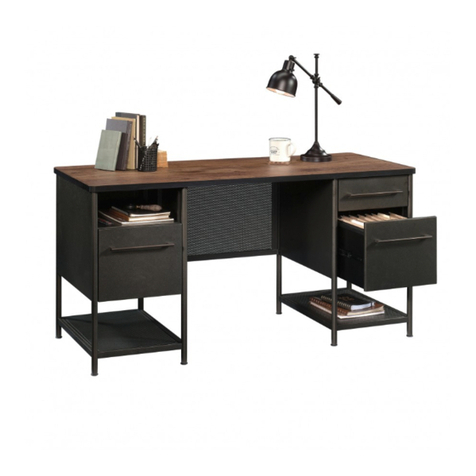
  9. Teknik Elstree Executive Desk 5426918 User manual

Teknik Elstree Executive Desk 5426918 User manual

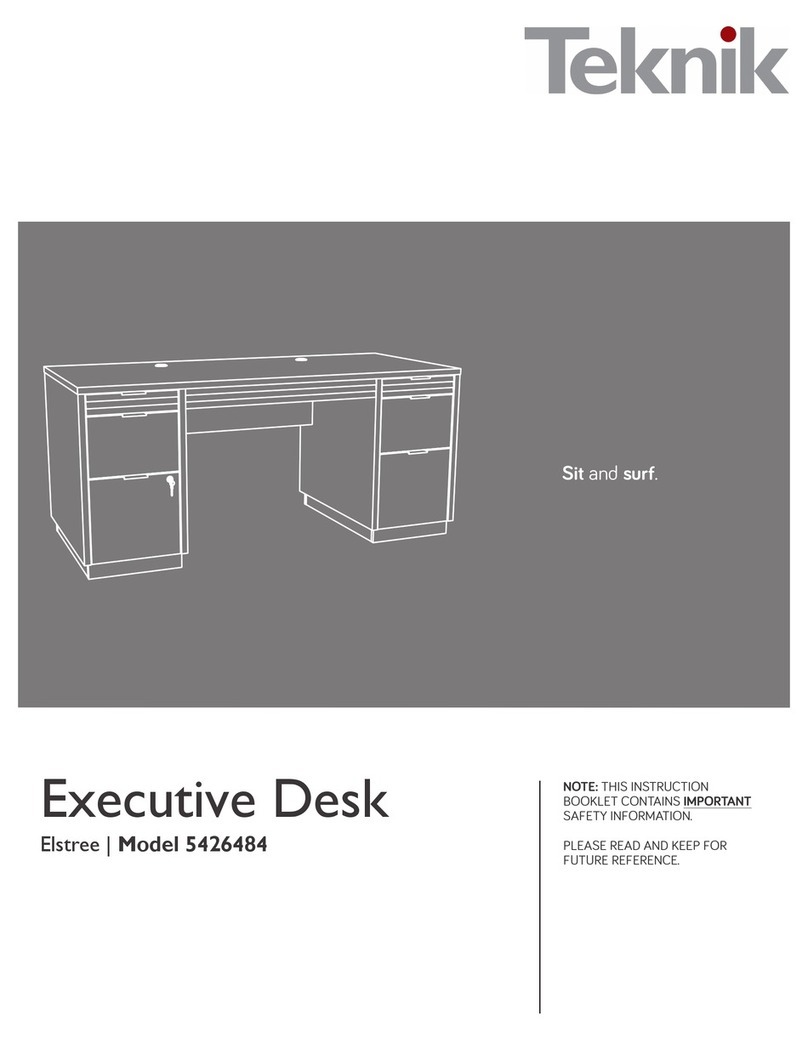
Elstree Executive Desk
Model 5426918
Sit and surf.
Teknik
www.teknikoffice.co.uk
Table of Contents Assembly Tools Required
Part Identification
Hardware Identification
Assembly Steps
2-3
4-5
6-46
A RIGHT END (1)
B LEFT END (1)
C LEFT UPRIGHT (1)
D RIGHT UPRIGHT (1)
D77 DRAWER BACK (1)
D78 FILE DRAWER BACK (1)
D87 FILE RIGHT DRAWER SIDE (1)
D88 FILE LEFT DRAWER SIDE (1)
D133 RIGHT DRAWER SIDE (1)
D139 LEFT DRAWER SIDE (1)
D708 DRAWER BOTTOM (2)
E BOTTOM (2)
F MODESTY PANEL (1)
G ADJUSTABLE SHELF (1)
H SHORT BASE (4)
J LONG BASE (4)
K FILE DRAWER FRONT (1)
L KEYBOARD SHELF (1)
M KEYBOARD SIDE (2)
N KEYBOARD BACK (1)
O DRAWER FRONT (1)
P DOOR (1)
Q BACK (2)
R KEYBOARD FRONT (1)
S TOP (1)
Part Identification
åUse this part identification to help identify the parts.
Page 2
No. 2 Phillips Screwdriver
Tip Shown Actual Size
Hammer
Not actual size
Tape Measure
Part Identification
åWhile not all parts are labeled, some of the parts will have a label or an inked letter on the edge
to help distinguish similar parts from each other. Use this part identification to help identify similar parts.
A
B
C
D
E
E
F
G
H
H
H
H
J
J
J
J
K
D88
D87
D78
L
M
M
N
O
P
Q
Q
R
S
D77
D133
D139
D708
D708
Page 3
Now you know
our ABCs.
Hardware Identification
40CA CABINET RIGHT - 1 40CB CABINET LEFT - 1 40CC DRAWER RIGHT - 1 40CD DRAWER LEFT - 1
WLEFT DRAWER
SLIDE - 1
RIGHT CABINET
RAIL - 1
TLEFT CABINET
RAIL - 1
URIGHT DRAWER
SLIDE - 1
V
31G CORNER BRACKET - 8 KEYBOARD
HINGE - 2
12H DOOR STOP - 1
4I
14H HINGE - 2
METAL
BRACKET - 4
4G
WOOD
DOWEL - 8
15F
HIDDEN
CAM - 8
1F CAM
DOWEL - 8
2F 36F TWIST-LOCK®
FASTENER - 12
Page 4
FILE ROD - 2
8B
FILE GLIDE - 2
6B
(EXTENSION SET SHOWN SEPARATED)
EXTENSION
SLIDE - 2
40MC
EXTENSION
RAIL - 2
40MA 10A SLIDE
CAM - 4
Hardware Identification
KEYBOARD PULL - 1
21K GROMMET CAP - 3
1P CORD CLIP - 2
4P
PULL - 3
189K
Page 5
METAL
PIN - 4
1R
GROMMET - 4
10P RUBBER
SLEEVE - 4
2R HIDDEN WIRELESS Qi COMPATIBLE
CHARGER by EGGTRONIC - Item 425905
(sold separately)
p
o
w
e
r
e
d
b
y
E
G
G
T
R
O
N
I
C
p
o
w
e
r
e
d
b
y
E
G
G
T
R
O
N
I
C
p
o
w
e
r
e
d
b
y
E
G
G
T
R
O
N
I
C
p
o
w
e
r
e
d
b
y
E
G
G
T
R
O
N
I
C
åScrews are shown actual size. You may receive extra hardware with your unit.
BLACK 9/16" PAN HEAD SCREW - 2
51S SILVER 9/16" LARGE HEAD SCREW - 2
54S
18S BROWN 1" FLAT HEAD SCREW - 4
BLACK 1/2" FLAT HEAD SCREW - 4
11S
SILVER 5/8" FLAT HEAD SCREW - 4
23S 30S BLACK 1-9/16" FLAT HEAD SCREW - 8
BLACK 9/16" LARGE HEAD SCREW - 62
1S 3S GOLD 5/16" FLAT HEAD SCREW - 20
BROWN 1-5/8" FLAT HEAD SCREW - 6
55S BLACK 1" FLAT HEAD SCREW - 2
133S
Hardware Usage Guide
1. Insert the dowel end of the FASTENER into the
hole of the adjoining part.
NOTE: The dowel end of the FASTENER must
remain fully inserted in the hole of the adjoining
part while locking the FASTENER.
2. Tighten the FASTENER with a Phillips
screwdriver as tight as possible.
Dowel end
2.
Push a TWIST-LOCK® FASTENER
into the large hole in the part.
1.
HOW TO USE A TWIST-LOCK®FASTENER
HOW TO USE A HIDDEN CAM & CAM DOWEL 2. Insert the metal end of the CAM
DOWEL into the HIDDEN CAM.
1. Push a HIDDEN CAM into
the part. The arrow in the
HIDDEN CAM must point
toward the hole in the edge
of the board.
Hole
Arrow
Metal end
Hidden Cam
Cam Dowel
Start Tighten
Arrow
Minimum
190 degrees
Caution
Risk of damage or
injury. HIDDEN CAMS
must be completely
tightened. HIDDEN
CAMS that are not
completely tightened
may loosen, and parts
may separate. To
completely tighten:
Arrow
Maximum
210 degrees
3.
426918 www.sauder.com/servicePage 6
Step 1
å Assemble your unit on a carpeted floor or on the empty
carton to avoid scratching your unit or the floor.
å Push two TWIST-LOCK® FASTENERS (36F) into the large
holes in the LEFT END (B)
36F
B
Page 7
Do not tighten the TWIST-LOCK® FASTENERS in this step.
Some assembly
(and snacks) required.
Step 2
å Insert two WOOD DOWELS (15F) into the TOP (S).
å Fasten the LEFT END (B) to the TOP (S). Tighten two
TWIST-LOCK® FASTENERS.
å NOTE: Be sure the WOOD DOWELS in the TOP insert
into the LEFT END.
B
S
Surface with
TWIST-LOCK®
FASTENERS
15F
Groove
Page 8
å Push two TWIST-LOCK® FASTENERS (36F) into the large holes
in the LEFT UPRIGHT (C).
å Fasten the LEFT CABINET RAIL (U) to the LEFT UPRIGHT (C).
Use two GOLD 5/16" FLAT HEAD SCREWS (3S).
Step 3
36F
C
C
Roller end
F
L
I
P
O
V
E
R
U
Page 9
These holes must be here.
GOLD 5/16" FLAT HEAD SCREW
(2 used in this step)
3S
Do not tighten the TWIST-LOCK® FASTENERS in this step.
Step 4
å Slide a BACK (Q) into the grooves in the LEFT END (B)
and TOP (S).
S
B
Q
Page 10
Groove
Groove
Step 5
Page 11
E
å Push four HIDDEN CAMS (1F) into a BOTTOM (E).
Then, insert the metal end of a CAM DOWEL (2F) into
each HIDDEN CAM.
Do not tighten the HIDDEN CAMS in this step.
1F
2F
Arrow
Metal end
1F
2F
Metal end
Arrow
Step 6
å Fasten the BOTTOM (E) to the LEFT END (B).
Tighten two HIDDEN CAMS.
å NOTE: Be sure the BACK (Q) inserts into the groove
in the BOTTOM.
B
E
Surface with
HIDDEN CAMS
Page 12
Groove
Q
Step 7
Page 13
å Insert two WOOD DOWELS (15F) into the TOP (S).
å Fasten the LEFT UPRIGHT (C) to the TOP (S). Tighten two
TWIST-LOCK® FASTENERS.
å NOTE: Be sure the WOOD DOWELS in the TOP insert
into the LEFT UPRIGHT.
å NOTE: Be sure the BACK inserts into the groove in the
LEFT UPRIGHT.
å Fasten the LEFT UPRIGHT (C) to the BOTTOM (E).
Tighten two HIDDEN CAMS.
C
S
15F
E
Surface without
TWIST-LOCK®
FASTENERS
Groove
2
1
Step 8
å Push four TWIST-LOCK® FASTENERS (36F) into the large
holes in the MODESTY PANEL (F).
å Fasten the MODESTY PANEL (F) to the LEFT UPRIGHT (C).
Tighten two TWIST-LOCK® FASTENERS.
C
F
F
36F
36F
Surface with
TWIST-LOCK®
FASTENERS
Page 14
Finished edge
å Push two TWIST-LOCK® FASTENERS (36F) into the
large holes in the RIGHT UPRIGHT (D)
å Fasten the CABINET LEFT (40CB) to the RIGHT
UPRIGHT (D). Use two GOLD 5/16" FLAT HEAD
SCREWS (3S) through holes #1 and #4.
Step 9
36F
D
Page 15
1
2
3
4
2
5
Roller end
GOLD 5/16" FLAT HEAD SCREW
(2 used in this step)
3S
Do not tighten the TWIST-LOCK® FASTENERS in this step.
Step 10
D
å Separate the EXTENSION SLIDES (40MC) from the EXTENSION RAILS (40MA) as shown in the upper
diagram below. Be prepared, the parts are greasy.
å Fasten one EXTENSION RAIL (40MA) to the RIGHT UPRIGHT (D). Use two GOLD 5/16" FLAT HEAD
SCREWS (3S) through holes #1 and #4.
å NOTE: For each EXTENSION RAIL, turn a SCREW into the hole shown in the enlarged diagram. Then,
slide the inner cartridge of the EXTENSION RAIL in to find the other hole that lines up with the hole in
the UPRIGHT. Turn a SCREW into this hole.
å NOTE: The EXTENSION SLIDES will be used later for the FILE DRAWER.
Push the black lever in and pull the SLIDE from the RAIL.
40MA40MC
GOLD 5/16" FLAT HEAD SCREW
(2 used in this step)
3S
1
2
3
4
Surface with
TWIST-LOCK®
FASTENERS
Page 16
Open end
Step 11
å Carefully turn the RIGHT UPRIGHT (D) over.
å Fasten the RIGHT CABINET RAIL (T) to the
RIGHT UPRIGHT (D). Use two GOLD 5/16" FLAT
HEAD SCREWS (3S).
å Insert two WOOD DOWELS (15F) into the edge of
the RIGHT UPRIGHT (D).
T
These holes must be here.
15F
D
Page 17
Surface without
TWIST-LOCK®
FASTENERS
Roller end
GOLD 5/16" FLAT HEAD SCREW
(2 used in this step)
3S
å Fasten the RIGHT UPRIGHT (D) to the TOP (S) and MODESTY
PANEL (F). Tighten four TWIST-LOCK® FASTENERS.
å NOTE: Be sure the WOOD DOWELS in the RIGHT UPRIGHT
insert into the TOP.
Step 12
D
S
F
Surface with
TWIST-LOCK®
FASTENERS
Page 18
Step 13
Page 19
å Slide the remaining BACK (Q) into the grooves in the
RIGHT UPRIGHT (D) and TOP (S).
S
D
Q
Groove
Groove
Page 20
Step 14
å Push four HIDDEN CAMS (1F) into the remaining
BOTTOM (E). Then, insert the metal end of a CAM
DOWEL (2F) into each HIDDEN CAM.
E
Do not tighten the HIDDEN CAMS in this step.
1F
2F
Arrow
Metal end
1F
2F
Metal end
Arrow

Other Teknik Indoor Furnishing manuals
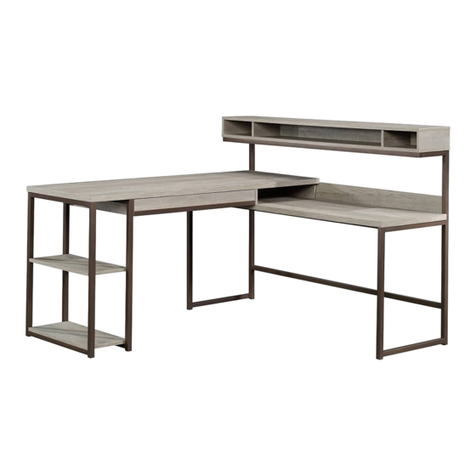
Teknik Elstree L-Shaped Desk 5426914 User manual

Teknik

Teknik Elstree L-Shaped Desk 5426914 User manual

Teknik Industrial Style Chunky Desk 5422097 User manual

Teknik

Teknik Industrial Style Chunky Desk 5422097 User manual

Teknik Home Study 5426616 User manual

Teknik

Teknik Home Study 5426616 User manual

Teknik 5431916 User manual

Teknik

Teknik 5431916 User manual

Teknik Clifton Place 5421113 User manual

Teknik

Teknik Clifton Place 5421113 User manual

Teknik 5401562 User manual

Teknik

Teknik 5401562 User manual

Teknik 5426510 User manual

Teknik

Teknik 5426510 User manual

Teknik Canal Heights Coffee Table 5419233 User manual

Teknik

Teknik Canal Heights Coffee Table 5419233 User manual

Teknik Streamline L-Shaped Desk 5414417 User manual

Teknik

Teknik Streamline L-Shaped Desk 5414417 User manual

Teknik 5427030 User manual

Teknik

Teknik 5427030 User manual

Teknik 5418295 User manual

Teknik

Teknik 5418295 User manual

Teknik 5414142 User manual

Teknik

Teknik 5414142 User manual

Teknik 5418269 User manual

Teknik

Teknik 5418269 User manual

Teknik Barrister Home 5417772 User manual
Teknik

Teknik Barrister Home 5417772 User manual

Teknik 5410416 User manual

Teknik

Teknik 5410416 User manual

Teknik Craft 5421407 User manual

Teknik

Teknik Craft 5421407 User manual

Teknik Hudson 5425709 User manual

Teknik

Teknik Hudson 5425709 User manual

Teknik Craft 5421416 User manual

Teknik

Teknik Craft 5421416 User manual

Teknik 5424943 User manual

Teknik

Teknik 5424943 User manual

Teknik Boulevard Cafe Desk 5420701 User manual

Teknik

Teknik Boulevard Cafe Desk 5420701 User manual

Teknik CUBE RECEPTION CHAIR MODULAR UNIT User manual

Teknik

Teknik CUBE RECEPTION CHAIR MODULAR UNIT User manual

Teknik Hideaway Cotswold 5430446 User manual

Teknik

Teknik Hideaway Cotswold 5430446 User manual

Teknik Canal Heights 5419231 User manual

Teknik

Teknik Canal Heights 5419231 User manual

Teknik Spanish Style Desk 5420114 User manual

Teknik

Teknik Spanish Style Desk 5420114 User manual

Popular Indoor Furnishing manuals by other brands

MyBinding Luxor SPN48F-BK instruction manual

MyBinding

MyBinding Luxor SPN48F-BK instruction manual

Fisher-Price Signature RTA Dresser manual

Fisher-Price

Fisher-Price Signature RTA Dresser manual

CABINETS TO GO Findley & Myers DC224 Assembly instructions

CABINETS TO GO

CABINETS TO GO Findley & Myers DC224 Assembly instructions

kingsley-bate CB53 Assembly instructions

kingsley-bate

kingsley-bate CB53 Assembly instructions

LOGICDATA SILVERstandard owner's manual

LOGICDATA

LOGICDATA SILVERstandard owner's manual

Julian Bowen Limited COX004 Assembly instructions

Julian Bowen Limited

Julian Bowen Limited COX004 Assembly instructions

Living Spaces LONDON OPTICAL REVERSIBLE SOFA CHAISE Assembly instructions

Living Spaces

Living Spaces LONDON OPTICAL REVERSIBLE SOFA CHAISE Assembly instructions

Human Solution Eurotech ME7ERG Assembly instructions

Human Solution

Human Solution Eurotech ME7ERG Assembly instructions

EXPEDO NORA KS1 manual

EXPEDO

EXPEDO NORA KS1 manual

StudioDesk ORBIT Series Assembly manual

StudioDesk

StudioDesk ORBIT Series Assembly manual

Elle Decor Alliel Live Edge Assembly instructions and warranty information

Elle Decor

Elle Decor Alliel Live Edge Assembly instructions and warranty information

PROGRESSIVE DESK ST-03 user manual

PROGRESSIVE DESK

PROGRESSIVE DESK ST-03 user manual

Safavieh Furniture AMH1516A quick start guide

Safavieh Furniture

Safavieh Furniture AMH1516A quick start guide

M-More E-MORE 2S Assembly & operation manual

M-More

M-More E-MORE 2S Assembly & operation manual

Homexperts Fortune Assembly instructions

Homexperts

Homexperts Fortune Assembly instructions

SPECIAL T AIM Assembly instructions

SPECIAL T

SPECIAL T AIM Assembly instructions

Ameriwood HOME 5360307COM Instruction booklet

Ameriwood HOME

Ameriwood HOME 5360307COM Instruction booklet

Okamura Traverse satellite Instructions for use

Okamura

Okamura Traverse satellite Instructions for use

manuals.online logo
manuals.online logoBrands
  • About & Mission
  • Contact us
  • Privacy Policy
  • Terms and Conditions

Copyright 2025 Manuals.Online. All Rights Reserved.