manuals.online logo
Brands
  1. Home
  2. •
  3. Brands
  4. •
  5. Teknik
  6. •
  7. Indoor Furnishing
  8. •
  9. Teknik Mahattan View 5423446 User manual

Teknik Mahattan View 5423446 User manual

www.teknikoffice.co.uk
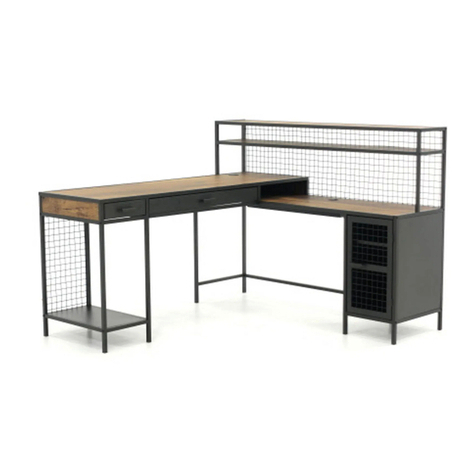
Mahattan View L-Shaped Desk
Model 5423446
NOTE: THIS INSTRUCTION
BOOKLET CONTAINS IMPORTANT
SAFETY INFORMATION.
PLEASE READ AND KEEP FOR
FUTURE REFERENCE.
Sit and surf.
Teknik
Table of Contents Assembly Tools Required
3
4-5
6-27
28-31
32-35
36-38
39
Part Identification
Hardware Identification
Assembly Steps
Français
Español
Safety
Warranty
No. 2 Phillips Screwdriver
Tip Shown Actual Size
Skip the power trip.
This time.
Page 2
Part Identification
åWhile not all parts are labeled, some of the parts will have a label or an inked letter on the edge
to help distinguish similar parts from each other. Use this part identification to help identify similar parts.
A DESK TOP (1)
B RETURN TOP (1)
C END MOLDING (1)
D LEFT END (1)
E REAR PANEL (1)
F FLIP DOWN DOOR (1)
G UPRIGHT (1)
H RIGHT END (1)
J RETURN BACK (1)
K HUTCH BOTTOM (1)
L HUTCH TOP (1)
M LEFT HUTCH END (1)
N RIGHT HUTCH END (1)
O LEFT HUTCH UPRIGHT (1)
P RIGHT HUTCH UPRIGHT (1)
Q HUTCH BACK (1)
R DRAWER FRONT (1)
S LEFT DRAWER SIDE (1)
T RIGHT DRAWER SIDE (1)
U DRAWER BACK (1)
V DRAWER BOTTOM (1)
W DRAWER BRACE (2)
X RIGHT RETURN FRAME (1)
Y LEFT RETURN FRAME (1)
Z DESK FRAME (1)
AA LOWER RETURN MOLDING (1)
BB UPPER RETURN MOLDING (2)
CC HUTCH MOLDING (1)
DD LOWER DESK MOLDING (1)
EE DIVIDER (1)
Now you know
our ABCs.
Page 3
A
B
CD
E
F
G
H
J
K
L
M
N
O
P
Q
R
S
T
U
V
X
Y
Z
AA
BB
CC
DD
EE
BB
W
Hardware Identification
åScrews are shown actual size. You may receive extra hardware with your unit.
Page 4
SMALL HIDDEN
CAM - 8
7
WOOD DOWEL - 22
9
L-WRENCH - 1
15
LARGE HIDDEN
CAM - 19
5LARGE CAM
SCREW - 19
6SMALL CAM
SCREW - 8
8
METAL PIN - 2
10 MAGNETIC
CATCH - 1
11 GROMMET - 3
12
CABINET RIGHT - 1
1CABINET LEFT - 1
2DRAWER RIGHT - 1
3DRAWER LEFT - 1
4
APPLIQUE CARD - 6
13 GROMMET
WITH CAP- 1
14
Hardware Identification
åScrews are shown actual size. You may receive extra hardware with your unit.
Page 5
BLACK 1-7/8" HEX HEAD SCREW - 2
20
BLACK 1-1/2" HEX HEAD SCREW - 19
22
BLACK 1/2" FLAT HEAD SCREW - 12
28
BLACK 9/16" FLAT HEAD SCREW - 3
27
BLACK 1" TAPERED MACHINE SCREW - 5
26
BLACK 1-3/8" HEX HEAD SCREW - 5
23
BLACK 1-9/16" HEX HEAD SCREW - 10
21
BLACK 1-3/8" FLAT HEAD SCREW - 8
24 BLACK 1-3/8" TAPERED MACHINE SCREW - 2
25
BLACK 7/16" HEX HEAD SCREW - 20
29
Step 1
å Assemble your unit on a carpeted floor or on the empty
carton to avoid scratching your unit or the floor.
å Push nineteen LARGE HIDDEN CAMS (5) into the LEFT
END (D), REAR PANEL (E), UPRIGHT (G), RIGHT END (H),
HUTCH ENDS (M and N), HUTCH UPRIGHTS (O and P),
and DIVIDER (EE).
Page 6
Arrow
5
5
Arrow
Arrow
The arrow in the HIDDEN
CAM must point toward the
hole in the edge of the board.
Hole
Arrow
5
(19 used)
D
E
G
H
M
N
PEE
O
Some assembly
(and snacks) required.
Step 2
Page 7
å Fasten the CABINET RIGHT (1) to the UPRIGHT (G). Use
three BLACK 1/2" FLAT HEAD SCREWS (28).
å Fasten the CABINET LEFT (2) to the LEFT END (D). Use
three BLACK 1/2" FLAT HEAD SCREWS (28).
G
D
BLACK 1/2" FLAT HEAD SCREW
(6 used in this step)
28
Roller end
Use these holes.
Use these holes.
1
1
2
2
Roller end
Finished edge
Finished edge
The HIDDEN CAMS
are closer to this edge.
Step 3
Page 8
å Separate the WASHER from the MAGNETIC CATCH (11).
å Fasten the MAGNETIC CATCH (11) to the DESK TOP (A) exactly as
shown. Use two BLACK 9/16" FLAT HEAD SCREWS (27).
å Fasten the WASHER to the FLIP DOWN DOOR (F) exactly as
shown. Use one BLACK 9/16" FLAT HEAD SCREW (27).
å Turn nineteen LARGE CAM SCREWS (6) into the exact holes
shown in the DESK TOP (A), UPRIGHT (G), RIGHT END (H), and
HUTCH TOP (L).
6
(19 used)
11
11
BLACK 9/16" FLAT HEAD SCREW
(3 used in this step)
27
A
NOTE: Be sure the
larger hole is facing
up so the SCREW
will seat down into
the WASHER.
L
H
G
F
Step 4
Page 9
å Insert two WOOD DOWELS (9) into the UPRIGHT (G) and
RIGHT END (H).
å Fasten the DIVIDER (EE) to the UPRIGHT (G) and RIGHT END (H).
Tighten two HIDDEN CAMS.
å NOTE: Be sure the WOOD DOWELS in the UPRIGHT and RIGHT
END insert into the DIVIDER.
å Insert six WOOD DOWELS (9) into the DESK TOP (A).
å Fasten the ENDS (D and H) and UPRIGHT (G) to the DESK TOP (A).
Tighten six HIDDEN CAMS.
å NOTE: Be sure the WOOD DOWELS in the DESK TOP insert into
the ENDS and UPRIGHT.
9
9
EE
H
G
D
Surface with
HIDDEN CAMS
9
A
H
G
1
2
Step 5
Page 10
å Insert two WOOD DOWELS (9) into the DESK TOP (A).
å Insert two METAL PINS (10) into the FLIP DOWN DOOR (F).
å Place the REAR PANEL (E) onto one of the METAL PINS in the FLIP DOWN DOOR (F).
å NOTE: Position the REAR PANEL (E) and FLIP DOWN DOOR (F) exactly as shown.
å Insert the METAL PIN in the other end of the FLIP DOWN DOOR (F) into the RIGHT
END (H) keeping the REAR PANEL (E) connected to the FLIP DOWN DOOR (F).
å Fasten the REAR PANEL (E) to the DESK TOP (A). Tighten three HIDDEN CAMS.
å NOTE: Be sure the WOOD DOWELS in the DESK TOP insert into the REAR PANEL.
10
Washer
Surface with
HIDDEN CAMS
9
F
E
F
E
A
H
å Fasten the REAR PANEL (E) to the LEFT END (D) and
UPRIGHT (G). Tighten four BLACK 1-1/2" HEX HEAD
SCREWS (22) using the L-WRENCH (15).
å Insert one of the GROMMETS (12) into the large hole in
the DIVIDER (EE).
å Insert one GROMMET (12) into the large hole in the
RIGHT END (H).
Step 6
Page 11
15
D
G
E
BLACK 1-1/2" HEX HEAD SCREW
(4 used in this step)
22
EE
12
Just think. The sooner
you do this, the sooner
you do something else.
12
H
Step 7
Page 12
å Insert four WOOD DOWELS (9) into the HUTCH
TOP (L). Fasten the HUTCH ENDS (M and N) and
HUTCH UPRIGHTS (O and P) to the HUTCH TOP (L).
Tighten eight HIDDEN CAMS.
å NOTE: Be sure the WOOD DOWELS in the HUTCH TOP
insert into the HUTCH ENDS and HUTCH UPRIGHTS.
M
L
9
9
Finished edge
Finished edge
Groove
Groove
Groove
N
P
O
å Slide the HUTCH BACK (Q) down into the grooves in the HUTCH
TOP (L) and HUTCH ENDS (M and N).
å Insert four WOOD DOWELS (9) into the HUTCH ENDS (M and N)
and HUTCH UPRIGHTS (O and P).
å Fasten the HUTCH BOTTOM (K) to the HUTCH ENDS (M and N)
and HUTCH UPRIGHTS (O and P). Tighten eight BLACK 1-1/2"
HEX HEAD SCREWS (22) using the L-WRENCH (15).
å NOTE: Be sure the WOOD DOWELS in the HUTCH ENDS and
HUTCH UPRIGHTS insert into the HUTCH BOTTOM.
å NOTE: Be sure the HUTCH BACK inserts into the groove in the
HUTCH BOTTOM.
Step 8
Page 13
M
N
P
O
K
Q
Groove
9
BLACK 1-1/2" HEX HEAD SCREW
(8 used in this step)
15
9
L
22
Step 9
Page 14
å NOTE: Do not completely tighten the SCREWS in this step.
å Slide the MOLDINGS (AA and BB) onto the LEFT RETURN FRAME (Y).
å Fasten the MOLDINGS (AA and BB) to the LEFT RETURN FRAME (Y). Tighten
six BLACK 7/16" HEX HEAD SCREWS (29) using the L-WRENCH (15).
Y
AA
BB
BB
15
BLACK 7/16" HEX HEAD SCREW
(6 used in this step)
29
Surface with
more holes
Surface with holes
Step 10
Page 15
15
å NOTE: Do not completely tighten the SCREWS in this step.
å Slide the RIGHT RETURN FRAME (X) into the MOLDINGS (AA and BB).
å Fasten the RIGHT RETURN FRAME (X) to the MOLDINGS (AA and BB).
Tighten six BLACK 7/16" HEX HEAD SCREWS (29) using the L-WRENCH (15).
X
AA
BB
BB
BLACK 7/16" HEX HEAD SCREW
(6 used in this step)
29
Step 11
Page 16
å Fasten the HUTCH MOLDING (CC) to the RETURN
FRAMES (X and Y). Tighten four BLACK 7/16" HEX
HEAD SCREWS (29) using the L-WRENCH (15).
å NOTE: Position the HUTCH MOLDING (CC) exactly
as shown.
å Completely tighten all of the SCREWS in the frame.
X
Y
CC
15
BLACK 7/16" HEX HEAD SCREW
(4 used in this step)
29
Now might be a
good time to refresh
your drink.
Step 12
Page 17
å Fasten the HUTCH BOTTOM (K) to the RETURN
FRAMES (X and Y) and HUTCH MOLDING (CC).
Tighten five BLACK 1-3/8" HEX HEAD SCREWS (23)
using the L-WRENCH (15).
å NOTE: Start each SCREW a few turns before
tightening any of them.
K
15
X
Y
CC
BLACK 1-3/8" HEX HEAD SCREW
(5 used in this step)
23
Step 13
Page 18
å Fasten the RETURN TOP (B) to the RETURN FRAMES (X
and Y) and UPPER RETURN MOLDINGS (BB). Tighten
ten BLACK 1-9/16" HEX HEAD SCREWS (21) using the
L-WREN CH (15).
å NOTE: Start each SCREW a few turns before tightening any
of them.
X
Y
BB
BB
B
15
These holes
must be here.
BLACK 1-9/16" HEX HEAD SCREW
(10 used in this step)
21
Step 14
Page 19
å With someone's help, carefully stand your unit upright.
å Insert two WOOD DOWELS (9) into the RETURN BACK (J).
å Fasten the RETURN BACK (J) to the RETURN TOP (B). Tighten four BLACK
1-1/2" HEX HEAD SCREWS (22) using the L-WRENCH (15).
å NOTE: Start each SCREW a few turns before tightening any of them.
å NOTE: Be sure the WOOD DOWELS in the RETURN BACK insert into the
RETURN TOP.
å Insert one GROMMET (12) into the large hole in the RETURN BACK (J).
Surface with
fewer holes
9
J
B
12
15
BLACK 1-1/2" HEX HEAD SCREW
(4 used in this step)
The holes are
closer to this edge.
22
Step 15
å Fasten the LOWER DESK MOLDING (DD) to the DESK
FRAME (Z). Tighten two BLACK 7/16" HEX HEAD
SCREWS (29) using the L-WRENCH (15).
å Fasten the LOWER DESK MOLDING (DD) to the LEFT
RETURN FRAME (Y). Tighten two BLACK 7/16" HEX
HEAD SCREWS (29) using the L-WRENCH (15)
Page 20
15
Y
DD
DD
Z
J
BLACK 7/16" HEX HEAD SCREW
(4 used in this step)
29
Surface with holes

Other Teknik Indoor Furnishing manuals

Teknik Barrister Home Credenza 5421458 User manual

Teknik

Teknik Barrister Home Credenza 5421458 User manual

Teknik Streamline L-Shaped Desk 5414417 User manual

Teknik

Teknik Streamline L-Shaped Desk 5414417 User manual

Teknik Hythe 5426438 User manual

Teknik

Teknik Hythe 5426438 User manual

Teknik Home Study 5426616 User manual

Teknik

Teknik Home Study 5426616 User manual

Teknik 5423547 User manual

Teknik

Teknik 5423547 User manual

Teknik City Centre 5426059 User manual

Teknik

Teknik City Centre 5426059 User manual

Teknik City Centre 5425653 User manual

Teknik

Teknik City Centre 5425653 User manual

Teknik Home Study 5426055 User manual

Teknik

Teknik Home Study 5426055 User manual

Teknik Clifton Place 5421116 User manual

Teknik

Teknik Clifton Place 5421116 User manual

Teknik 5424259 User manual

Teknik

Teknik 5424259 User manual

Teknik Hampstead Park 5423704 User manual

Teknik

Teknik Hampstead Park 5423704 User manual

Teknik Essentials L-Shaped Desk 5425092 User manual

Teknik

Teknik Essentials L-Shaped Desk 5425092 User manual

Teknik Market 5425767 User manual

Teknik

Teknik Market 5425767 User manual
Teknik Barrister Home 5418705 User manual

Teknik

Teknik Barrister Home 5418705 User manual

Teknik 5425304 User manual

Teknik

Teknik 5425304 User manual

Teknik 5423505 User manual

Teknik

Teknik 5423505 User manual

Teknik 5427428 User manual

Teknik

Teknik 5427428 User manual

Teknik Barrister Home 3 Drawer Chest 5418702 User manual

Teknik

Teknik Barrister Home 3 Drawer Chest 5418702 User manual

Teknik 5402174 User manual

Teknik

Teknik 5402174 User manual

Teknik Office Affiliate 5427414 User manual

Teknik

Teknik Office Affiliate 5427414 User manual

Teknik 5427455 User manual

Teknik

Teknik 5427455 User manual

Teknik 5431262 User manual

Teknik

Teknik 5431262 User manual

Teknik 5427030 User manual

Teknik

Teknik 5427030 User manual

Teknik Boulevard Cafe 5427345 User manual

Teknik

Teknik Boulevard Cafe 5427345 User manual

Popular Indoor Furnishing manuals by other brands

modway EEI-4343 quick start guide

modway

modway EEI-4343 quick start guide

East West Furniture GROTON Assembly instructions

East West Furniture

East West Furniture GROTON Assembly instructions

Forte TDHV712 Assembling Instruction

Forte

Forte TDHV712 Assembling Instruction

Forte ALCANO ALCK232 Assembling Instruction

Forte

Forte ALCANO ALCK232 Assembling Instruction

Kenroy Home 60571RAT Use and care guide

Kenroy Home

Kenroy Home 60571RAT Use and care guide

Triarch Indoor Lighting 60122 Assembly instructions

Triarch

Triarch Indoor Lighting 60122 Assembly instructions

Costway HW68264 user manual

Costway

Costway HW68264 user manual

Coaster 915107 Assembly instructions

Coaster

Coaster 915107 Assembly instructions

Coaster 651352 Assembly instructions

Coaster

Coaster 651352 Assembly instructions

Cooper Lighting Shaper 642 SERIES Specification sheet

Cooper Lighting

Cooper Lighting Shaper 642 SERIES Specification sheet

Geuther 2712 manual

Geuther

Geuther 2712 manual

zieta 3+ CHAIR quick start guide

zieta

zieta 3+ CHAIR quick start guide

Elle Decor DANI Assembly instructions and warranty information

Elle Decor

Elle Decor DANI Assembly instructions and warranty information

Bouclair 9397506 Assembly instructions

Bouclair

Bouclair 9397506 Assembly instructions

Palace Imports 5361 Assembly instructions

Palace Imports

Palace Imports 5361 Assembly instructions

U-Line H-5168 quick start guide

U-Line

U-Line H-5168 quick start guide

Pinnacle Design TR50X3B parts list

Pinnacle Design

Pinnacle Design TR50X3B parts list

Hill AFT owner's manual

Hill

Hill AFT owner's manual

manuals.online logo
manuals.online logoBrands
  • About & Mission
  • Contact us
  • Privacy Policy
  • Terms and Conditions

Copyright 2025 Manuals.Online. All Rights Reserved.