manuals.online logo
Brands
  1. Home
  2. •
  3. Brands
  4. •
  5. Teknik
  6. •
  7. Indoor Furnishing
  8. •
  9. Teknik Elstree 5426910 User manual

Teknik Elstree 5426910 User manual

NOTE: THIS INSTRUCTION
BOOKLET CONTAINS
IMPORTANT SAFETY
INFORMATION.
PLEASE READ AND KEEP
FOR FUTURE REFERENCE.
Hutch with Drawer
Elstree | Model 5426910
Knick-knack
paddywhack,
give your stuff a
home.
Table of Contents Assembly Tools Required
No. 2 Phillips Screwdriver
Tip Shown Actual Size
Part Identification
Hardware Identification
Hardware Usae Guide
Assembly Steps
Français
Español
Safety
Warranty
3
4
5
5-19
20-22
23-25
26
27
Pae 2
Part Identification
åWhile not all parts are labeled, some of the parts will have a label or an inked letter on the edge
to help distinguish similar parts from each other. Use this part identification to help identify similar parts.
Now you know
our ABCs.
A RIGHT END (1)
B LEFT END (1)
C TOP (1)
D FIXED SHELF (1)
E ADJUSTABLE SHELF (1)
F BRACE (1)
G DRAWER BOX FRONT (1)
H DRAWER BACK (1)
J DRAWER SIDE (2)
K DRAWER FRONT (1)
L DRAWER BOTTOM (1)
M DRAWER BRACE (1)
N BACK (1)
A
B
C
D
E
F
G
H
J
K
L
N
J
M
Pae 3
Hardware Identification
åScrews are shown actual size. You may receive extra hardware with your unit.
BLACK 9/16" LARGE HEAD SCREW - 2
1S BLACK 7/8" LARGE HEAD SCREW - 4
17S
FURNITURE TIPPING
RESTRAINT KIT - 1
97
METAL PIN - 4
1R RUBBER SLEEVE - 4
2R
SILVER 1" LARGE HEAD SCREW - 8
102S
30S BLACK 1-9/16" FLAT HEAD SCREW - 10
BACK CONNECTOR - 8
39F
WOOD DOWEL - 4
15F 36F TWIST-LOCK®FASTENER - 12
PULL - 1
189K
BRACKET CONNECTOR - 2
81G FELT STRIP - 2
180M
Pae 4
å Assemble your unit on a carpeted floor or on the empty
carton to avoid scratchin your unit or the floor.
å To bein assembly, push six SAUDER TWIST-LOCK®
FASTENERS (36F) into the lare holes in the LEFT END (B)
and FIXED SHELF (D).
å Insert two WOOD DOWELS (15F) into the LEFT END (B).
Hardware Usae Guide
1. Insert the dowel end of the FASTENER into the
hole of the adjoinin part.
NOTE: The dowel end of the FASTENER must
remain fully inserted in the hole of the adjoinin
part while lockin the FASTENER.
2. Tihten the FASTENER with a Phillips
screwdriver as tiht as possible.
Dowel end
2.
Push a TWIST-LOCK® FASTENER
into the lare hole in the part.
1.
HOW TO USE A TWIST-LOCK®FASTENER
Step 1
B
D
36F
Do not tihten the TWIST-LOCK® FASTENERS in this step.
15F
36F
Pae 5
å Fasten the FIXED SHELF (D) to the LEFT END (B). Tihten
two TWIST-LOCK® FASTENERS.
Step 2
B
D
Surface with TWIST-LOCK® FASTENERS
Groove
Groove
Pae 6
Step 3
F
36F
Do not tihten the TWIST-LOCK® FASTENERS in this step.
å To bein assembly, push four SAUDER
TWIST-LOCK® FASTENERS (36F) into the
lare holes in the BRACE (F).
36F
Pae 7
Just think. The sooner
you do this, the sooner
you do somethin else.
å Fasten the BRACE (F) to the LEFT END (B). Tihten two
TWIST-LOCK® FASTENERS.
Step 4
B
Surface with TWIST-LOCK® FASTENERS
F
Pae 8
å Push two SAUDER TWIST-LOCK® FASTENERS (36F) into
the lare holes in the RIGHT END (A).
å Insert two WOOD DOWELS (15F) into the RIGHT END (A).
å Fasten the RIGHT END (A) to the FIXED SHELF (D)
and BRACE (F). Tihten four TWIST-LOCK® FASTENERS.
Step 5
F
A
36F
15F
D
A
Surface without TWIST-LOCK® FASTENERS
Groove
Pae 9
å Carefully stand your unit upriht.
å Slide the BACK (N) into the grooves in the ENDS (A and B)
and FIXED SHELF (D).
Step 6
A
B
N
D
Finished
surface
With the palm of your hand,
tap the BACK down into
the roove.
Pae 10
å Fasten the TOP (C) to the ENDS (A and B). Tihten four
TWIST-LOCK® FASTENERS.
å NOTE: Be sure the WOOD DOWELS in the ENDS insert
into the TOP.
å NOTE: Be sure the roove in the TOP inserts into
the BACK.
Step 7
A
BN
C
Groove
Pae 11
å Fasten eiht BACK CONNECTORS (39F) to
the ENDS (A and B), TOP (C), BOTTOM (D),
and BACK (G). Tihten the SCREW in each
BACK CONNECTOR.
Step 8
A
B
N
C
D
Slide the lip into the
roove, then tihten
the screw.
Use two BACK
CONNECTORS per side.
2-3" in from each corner.
39F
39F
39F
39F
Screw
Lip
Lip
Screw
Lip
Screw
Lip
Screw
Pae 12
Now miht be a
ood time to refresh
your drink.
å Carefully turn your unit onto its front edes.
å Fasten the BRACKET CONNECTORS to the ENDS (A and B).
Use four SILVER 1" LARGE HEAD SCREWS (102S).
Step 9
81G
102S
SILVER 1" LARGE HEAD SCREW
(4 used in this step)
81G
102S
Pae 13
A
B
å Open the FURNITURE TIPPING RESTRAINT KIT (97) and fasten
the SAFETY STRAP to the TOP (C). Use the short screw provided.
å NOTE: Position the SAFETY STRAP exactly as shown.
å NOTE: There is no pre-drilled hole in the TOP (C). Use extra force
when turnin this SCREW.
Step 10
C
Safety strap
97
Pae 14
å You have the option to attach this unit to the 426908 and
426909. Below shows how to attach it to either unit.
å Fasten the unit to either the 426908 and 426909. Use
four SILVER 1" LARGE HEAD SCREWS (102S).
Step 11
426908
426909
102S
SILVER 1" LARGE HEAD SCREW
(4 used in this step)
Pae 15
Step 12
å Turn the drawer onto its top.
å Fasten the DRAWER BRACE (M) to the DRAWER BOX FRONT (G) and DRAWER BACK (H). Use two BLACK 1-9/16" FLAT
HEAD SCREWS (30S).
1 2
3
å Fasten the DRAWER SIDES (J) to the
DRAWER BACK (H). Use four BLACK 1-9/16" FLAT
HEAD SCREWS (30S).
å Slide the DRAWER BOTTOM (L) into the rooves in the
DRAWER SIDES (J) and DRAWER BACK (H).
å Fasten the DRAWER BOX FRONT (G) to the
DRAWER SIDES (J). Use four BLACK 1-9/16" FLAT
HEAD SCREWS (30S).
Groove
30S
Start each screw a few turns before
completely tihtenin any of them.
BLACK 1-9/16" FLAT HEAD SCREW
(2 used in this step)
Be sure the DRAWER
BOTTOM inserts into the
DRAWER FRONT roove.
H
J
J
M
J
G
H
G
BLACK 1-9/16" FLAT HEAD SCREW
(4 used in this step)
30S
J
L
H
BLACK 1-9/16" FLAT HEAD SCREW
(4 used in this step)
30S
Pae 16
Step 13
180M
å Apply the FELT STRIPS (180M) to the bottom, front and
back edes of the DRAWER SIDES (J) as shown.
å NOTE: The FELT STRIPS should completely cover the
bottom edes of the DRAWER SIDES and wrap equally
around the front and back edes.
J
J
The FELT STRIPS should
equally overhan the
front and back edes of
the DRAWER SIDES.
Pae 17
Step 14
å Turn your drawer onto its bottom.
å Fasten the DRAWER FRONT (K) to the DRAWER
BOX FRONT (G). Use four BLACK 7/8" LARGE
HEAD SCREWS (17S).
å Fasten the PULL (189K) to the DRAWER FRONT (K). Use
two BLACK 9/16" LARGE HEAD SCREWS (1S).
K
G
BLACK 7/8" LARGE HEAD SCREW
(4 used in this step)
17S
BLACK 9/16" LARGE HEAD SCREW
(2 used in this step)
1S
189K
Pae 18
If you're doin this to
help a friend, don't
leave without a bite.
Step 15
å Position your unit in its final location. We recommend usin the SAFETY STRAP for added stability.
å NOTE: Do not turn the SAFETY DRYWALL ANCHOR into a wall stud. If you prefer to fasten the SAFETY STRAP to a wall
stud, o to your local hardware store for proper hardware.
å INSTALLATION INSTRUCTIONS:
1. Insert the SAFETY DRYWALL ANCHOR throuh the WASHER and the end of the SAFETY STRAP.
2. Usin a Phillips screwdriver or a hand drill, press the screw slihtly onto the drywall.
3. Apply pressure; turn the screw until a pilot hole is made and the nylon sheath slips throuh.
4. Turn the screw until it is flush aainst the wall and you feel a firm resistance.
5. Continue to turn until the screw starts spinnin freely.
å NOTE: Before movin your unit to a dierent location, unscrew the SAFETY DRYWALL ANCHOR from your wall. The
nylon sheath will remain behind your wall.
å Insert the DRAWER into the unit.
Safety
drywall
anchor
Safety strap
Washer
97
Pae 19
å Push the RUBBER SLEEVES (2R) over one end of the METAL PINS (1R). Insert the METAL PINS into the hole locations of
your choice in the ENDS (A and B). Set the ADJUSTABLE SHELF (E) onto the METAL PINS.
å NOTE: Please read the back paes of the instruction booklet for important safety information.
å This completes assembly. Clean with a damp cloth. Wipe dry.
Step 16
25 lbs.
25 lbs.
25 lbs.
No load
(4 used)
1R
2R
Pae 20
E
A
B

Other Teknik Indoor Furnishing manuals

Teknik Home Study 5426616 User manual

Teknik

Teknik Home Study 5426616 User manual

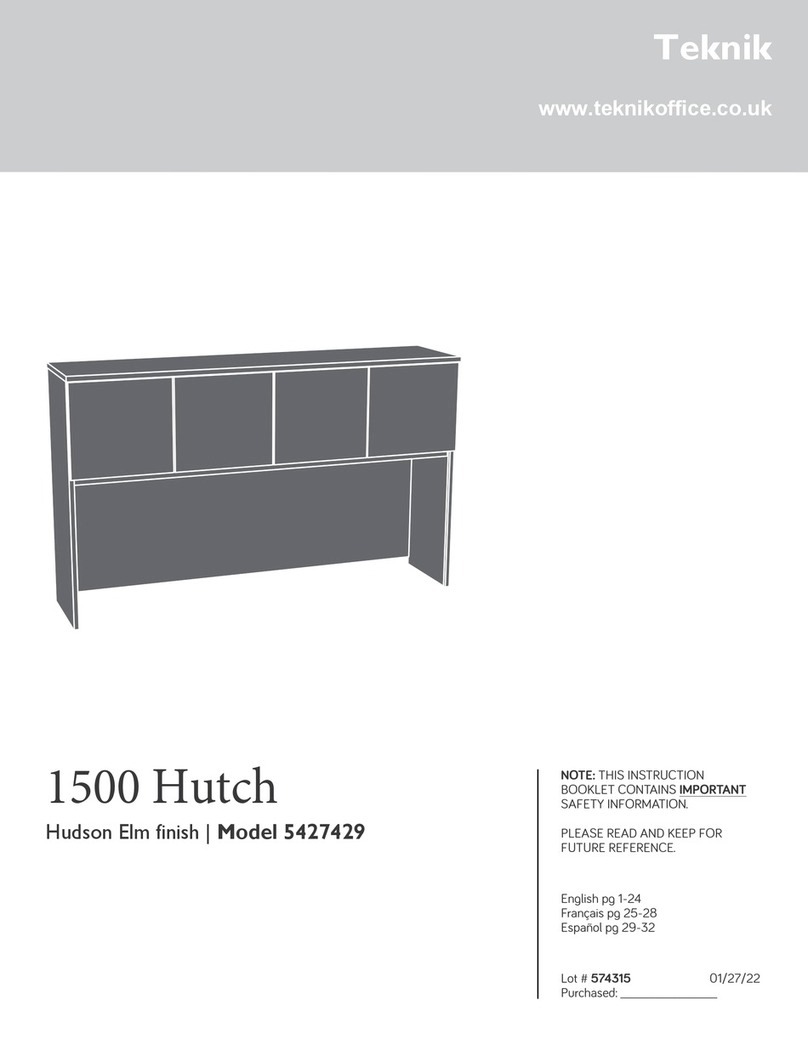
Teknik 5427429 User manual

Teknik

Teknik 5427429 User manual

Teknik 5402174 User manual

Teknik

Teknik 5402174 User manual

Teknik Industrial Style Bench Desk 5420032 User manual

Teknik

Teknik Industrial Style Bench Desk 5420032 User manual

Teknik Scribed Oak Storage Desk 5418294 User manual

Teknik

Teknik Scribed Oak Storage Desk 5418294 User manual

Teknik Stationmaster 5426454 User manual

Teknik

Teknik Stationmaster 5426454 User manual

Teknik 5426135 User manual

Teknik

Teknik 5426135 User manual

Teknik 5427030 User manual

Teknik

Teknik 5427030 User manual

Teknik Craft 5421419 User manual

Teknik

Teknik Craft 5421419 User manual

Teknik Canal Heights End 5419229 User manual

Teknik

Teknik Canal Heights End 5419229 User manual

Teknik Executive Trestle Desk 5424128 User manual

Teknik

Teknik Executive Trestle Desk 5424128 User manual

Teknik 5422379 User manual

Teknik

Teknik 5422379 User manual

Teknik Boulevard Cafe Desk 5420701 User manual

Teknik

Teknik Boulevard Cafe Desk 5420701 User manual

Teknik Hudson Elm finish 5427422 User manual

Teknik

Teknik Hudson Elm finish 5427422 User manual

Teknik City Centre 5426059 User manual

Teknik

Teknik City Centre 5426059 User manual

Teknik City Centre 5425653 User manual

Teknik

Teknik City Centre 5425653 User manual

Teknik 5423505 User manual

Teknik

Teknik 5423505 User manual

Teknik Office Affiliate 5427414 User manual

Teknik

Teknik Office Affiliate 5427414 User manual

Teknik Wide Bookcase 5420282 User manual

Teknik

Teknik Wide Bookcase 5420282 User manual

Teknik 5427134 User manual

Teknik

Teknik 5427134 User manual

Teknik Hampstead 5426504 User manual

Teknik

Teknik Hampstead 5426504 User manual

Teknik 5158097 User manual

Teknik

Teknik 5158097 User manual

Teknik Craft 5421407 User manual

Teknik

Teknik Craft 5421407 User manual

Teknik Louvre 5415109 User manual

Teknik

Teknik Louvre 5415109 User manual

Popular Indoor Furnishing manuals by other brands

Deuba 103201 instructions

Deuba

Deuba 103201 instructions

MPO Moveis 8021 quick start guide

MPO Moveis

MPO Moveis 8021 quick start guide

Goldfern Mobility GM-HYE8063 instruction manual

Goldfern Mobility

Goldfern Mobility GM-HYE8063 instruction manual

SweetGo SG5011 manual

SweetGo

SweetGo SG5011 manual

Childcare Universal Change Table 092100 Instruction booklet

Childcare

Childcare Universal Change Table 092100 Instruction booklet

Alice's Home PANAM Assembly

Alice's Home

Alice's Home PANAM Assembly

meubar LOVINA KB6L Assembly instruction

meubar

meubar LOVINA KB6L Assembly instruction

Weba ELSA WR 80206-4M-S5V manual

Weba

Weba ELSA WR 80206-4M-S5V manual

BROSA Josie Sideboard Small Assembly guide

BROSA

BROSA Josie Sideboard Small Assembly guide

fantastic furniture Seaforth quick start guide

fantastic furniture

fantastic furniture Seaforth quick start guide

Rapid Racking NMPS3 Assembly instructions

Rapid Racking

Rapid Racking NMPS3 Assembly instructions

Kvik MH470,060 Assembly guide

Kvik

Kvik MH470,060 Assembly guide

Habitat GALA 365139 Assembly instructions

Habitat

Habitat GALA 365139 Assembly instructions

AFi HBFB-RCM Assembly instructions

AFi

AFi HBFB-RCM Assembly instructions

2K Furniture Designs B8025F Assembly instructions

2K Furniture Designs

2K Furniture Designs B8025F Assembly instructions

fantastic furniture Havana Bookcase Large Narrow manual

fantastic furniture

fantastic furniture Havana Bookcase Large Narrow manual

Poliman COZINHA C5200 Assembly instructions

Poliman

Poliman COZINHA C5200 Assembly instructions

Linon 580454WAL01U manual

Linon

Linon 580454WAL01U manual

manuals.online logo
manuals.online logoBrands
  • About & Mission
  • Contact us
  • Privacy Policy
  • Terms and Conditions

Copyright 2025 Manuals.Online. All Rights Reserved.