manuals.online logo
Brands
  1. Home
  2. •
  3. Brands
  4. •
  5. Teknik
  6. •
  7. Indoor Furnishing
  8. •
  9. Teknik Shaker Style 5428225 User manual

Teknik Shaker Style 5428225 User manual

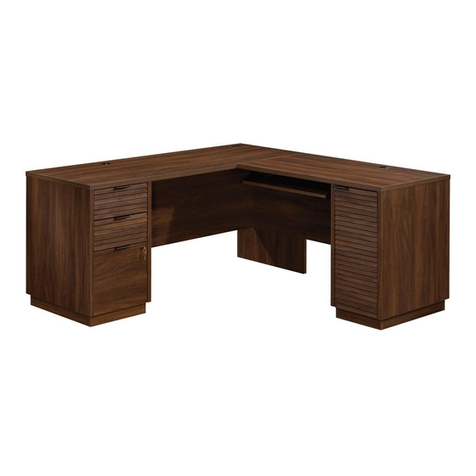
Shaker Style L-Shaped Desk
Model 5428225
Sit and surf.
Teknik
www.teknikoffice.co.uk
Table of Contents Assembly Tools Required
Part Identification
Hardware Identification
Hardware Usage Guide
Assembly Steps
Hammer
Not actual size
No. 2 Phillips Screwdriver
Tip Shown Actual Size
2-3
4-5
6
7-46
Page 2
Part Identification
åWhile not all parts are labeled, some of the parts will have a label or an inked letter on the edge
to help distinguish similar parts from each other. Use this part identification to help identify similar parts.
A RIGHT END (1)
B LEFT END (1)
C LARGE TOP (1)
D SMALL TOP (1)
D14 LARGE RIGHT DRAWER SIDE (1)
D15 LARGE LEFT DRAWER SIDE (1)
D20 SMALL RIGHT DRAWER SIDE (1)
D21 SMALL LEFT DRAWER SIDE (1)
D74 SMALL DRAWER BACK (1)
D78 LARGE DRAWER BACK (1)
D716 DRAWER BOTTOM (2)
E BACK (1)
F INNER BOTTOM (2)
G OUTER BOTTOM (2)
H SHORT TOP MOLDING (1)
J UPRIGHT (1)
K LONG TOP MOLDING (2)
L LEFT FRONT LEG (1)
M CENTER FRONT LEG (1)
N CENTER REAR LEG (1)
O SMALL MODESTY PANEL (1)
P LEFT REAR LEG (1)
Q LARGE MODESTY PANEL (1)
R SKIRT (2)
S RIGHT END SKIRT (1)
T SIDE SKIRT (2)
U END MOLDING (2)
V LARGE DRAWER FRONT (1)
W SMALL BRACE (1)
X LARGE BRACE (1)
Y RIGHT FRONT LEG (1)
Z SMALL DRAWER FRONT (1)
AA RIGHT REAR LEG (1)
BB RIGHT SUPPORT (1)
CC LEFT SUPPORT (1)
Part Identification Now you know
our ABCs.
Page 3
D74
D716
A
B
C
D
E
F
G
H
J
K
L
M
N
O
P
Q
R
S
T
Z
V
W
X
Y
U
AA
BB
CC
D15
D78 D14
D21
D20
D716
F
GU
K
R
T
Hardware Identification
åScrews are shown actual size. You may receive extra hardware with your unit.
Page 4
(EXTENSION SET SHOWN SEPARATED)
EXTENSION RAIL - 4
35MA EXTENSION SLIDE - 4
35MC 10A SLIDE CAM - 4 FILE GLIDE - 2
4B
FILE ROD - 2
8B HIDDEN CAM - 66
1F CAM DOWEL - 34
2F CAM SCREW - 32
8F
WOOD DOWEL - 34
15F
12F TWIST-LOCK®
FASTENER - 8
METAL
BRACKET - 3
4G CONNECTOR
PLATE - 1
14G
KNOB SET - 4
157K GROMMET CAP - 2
1P GROMMET - 2
10P
SCREW COVER - 8
17P METAL PIN - 3
1R
CAM COVER - 19
19P
Hardware Identification
åScrews are shown actual size. You may receive extra hardware with your unit.
Page 5
BLACK 9/16" LARGE HEAD SCREW - 14
1S 3S GOLD 5/16" FLAT HEAD SCREW - 16
30S BLACK 1-9/16" FLAT HEAD SCREW - 8 BLACK 9/16" FLAT HEAD SCREW - 4
32S
GOLD 1" MACHINE SCREW - 4
50S BLACK 1-15/16" FLAT HEAD SCREW - 10
113S
Hardware Usage Guide
HOW TO USE A HIDDEN CAM & CAM DOWEL
Cam Screw
Hidden Cam
Arrow
Push a HIDDEN CAM into
the part. The arrow in the
HIDDEN CAM must point
toward the hole in the
edge of the board.
Hole
2. 3.
1
2
Insert the CAM SCREW into the HIDDEN CAM.
Tighten the HIDDEN CAM.
HOW TO USE A HIDDEN CAM & CAM SCREW
Turn the CAM SCREW until
the shoulder is against the
surface of the part.
1.
2. Insert the metal end of the CAM
DOWEL into the HIDDEN CAM.
1. Push a HIDDEN CAM into
the part. The arrow in the
HIDDEN CAM must point
toward the hole in the edge
of the board.
Hole
Arrow
Metal end
Hidden Cam
Cam Dowel
Start Tighten
Arrow
Minimum
190 degrees
Caution
Risk of damage or
injury. HIDDEN CAMS
must be completely
tightened. HIDDEN
CAMS that are not
completely tightened
may loosen, and parts
may separate. To
completely tighten:
Arrow
Maximum
210 degrees
3.
Page 6
Step 1
å Assemble your unit on a carpeted floor or on the empty
carton to avoid scratching your unit or the floor.
å Push eight HIDDEN CAMS (1F) into the long edge of the
SMALL MODESTY PANEL (O) and LEFT SUPPORT (CC).
Then, insert the metal end of a CAM DOWEL (2F) into
each HIDDEN CAM.
å Now, push two HIDDEN CAMS (1F) into the short edge of
the SMALL MODESTY PANEL (O).
Page 7
Do not tighten the HIDDEN CAMS in this step.
Arrow
1F
2F
Metal end
1F
2F
Metal end
Arrow
1F
Arrow
O
CC
å Fasten the LEFT SUPPORT (CC) to the SMALL MODESTY
PANEL (O) and SMALL BRACE (W). Use four BLACK
1-15/16" FLAT HEAD SCREWS (113S).
å NOTE: You should start each SCREW a few turns before
completely tightening any of them.
Step 2
Page 8
O
CC
Surface with HIDDEN CAMS
Surface without HIDDEN CAMS
W
For support, place packing
foam and magazines here.
Edge with CAM DOWELS
Curved edge
BLACK 1-15/16" FLAT HEAD SCREW
(4 used in this step)
113S
å Push two HIDDEN CAMS (1F) into the short edge of
the UPRIGHT (J). Then, insert the metal end of a CAM
DOWEL (2F) into each HIDDEN CAM.
å Now, push six HIDDEN CAMS (1F) into the UPRIGHT (J)
and one SIDE SKIRT (T).
Step 3
Page 9
Arrow
1F
2F
Metal end
1F
Arrow
1F
Arrow
J
T
Do not tighten the HIDDEN CAMS in this step.
The holes are
closer to this edge.
å Turn twelve CAM SCREWS (8F) into the LEGS (M and N).
å Insert six WOOD DOWELS (15F) into the LEGS (M and N).
Step 4
M
N
Page 10
8F
15F
15F
15F
8F 8F
(12 used)
å Fasten the LEGS (M and N) to the UPRIGHT (J) and SIDE
SKIRT (T). Tighten six HIDDEN CAMS.
å NOTE: Be sure the WOOD DOWELS in the LEGS insert
into the UPRIGHT.
Step 5
M
N
Page 11
Surface with
HIDDEN CAMS
These surfaces
should be even.
Edge with
CAM DOWELS
J
T
The holes are
closer to this edge.
Step 6
Page 12
å Separate the EXTENSION SLIDES (35MC) from the EXTENSION RAILS (35MA) as
shown in the upper diagram below. Be prepared, the parts are greasy.
å Fasten two EXTENSION RAILS (35MA) to the UPRIGHT (J). Use four GOLD 5/16" FLAT
HEAD SCREWS (3S) through holes #1 and #3.
å NOTE: For each EXTENSION RAIL, turn a SCREW into the hole shown in the enlarged
diagram. Then, slide the inner cartridge of the EXTENSION RAIL in to find the other hole
that lines up with the hole in the UPRIGHT. Turn a SCREW into this hole.
å NOTE: The EXTENSION SLIDES (35MC) will be used later for the DRAWERS.
Push the black lever in and pull the SLIDE from the RAIL.
35MA
35MC
1
2
3
J
Open end
1
2
3
GOLD 5/16" FLAT HEAD SCREW
(4 used for the RAILS)
3S
å Fasten the CENTER REAR LEG (N) to the SMALL MODESTY
PANEL (O). Tighten two HIDDEN CAMS.
å NOTE: Be sure the WOOD DOWELS in the LEG insert into the
MODESTY PANEL.
å Fasten the CENTER REAR LEG (N) to the SMALL BRACE (W).
Use two BLACK 1-15/16" FLAT HEAD SCREWS (113S).
å NOTE: You should start each SCREW a few turns before
completely tightening any of them.
Step 7
Page 13
N
W
O
BLACK 1-15/16" FLAT HEAD SCREW
(2 used in this step)
113S
å Push two HIDDEN CAMS (1F) into the short edge of the
BACK (E). Then, insert the metal end of a CAM DOWEL (2F)
into each HIDDEN CAM.
å Now, push four HIDDEN CAMS (1F) into the remaining holes
in the BACK (E).
Step 8
Page 14
Arrow
1F
2F
Metal end
1F
Arrow
1F
Arrow
E
Do not tighten the HIDDEN CAMS in this step.
å Fasten the BACK (E) to the CENTER REAR LEG (N).
Tighten two HIDDEN CAMS.
Step 9
Page 15
E
For support, place packing
foam and magazines here.
N
Edge with
CAM DOWELS
å Push four HIDDEN CAMS (1F) into the SKIRTS (R).
å Push twelve HIDDEN CAMS (1F) into the BOTTOMS (F
and G). Then, insert the metal end of a CAM DOWEL (2F)
into each HIDDEN CAM.
Step 10
Page 16
1F
Arrow
1F
Arrow
Do not tighten the HIDDEN CAMS in this step.
Arrow
1F
2F
Metal end
Arrow
1F
2F
Metal end
1F
2F
Arrow
Metal end
1F
2F
Metal end
Arrow
R
R
G
F
F
G
å Insert four WOOD DOWELS (15F) into the BOTTOMS (F and G).
å Fasten the SKIRTS (R) to the BOTTOMS (F and G). Tighten eight
HIDDEN CAMS.
å NOTE: Be sure the WOOD DOWELS in the BOTTOMS insert into
the SKIRTS.
Step 11
Page 17
Edge with
CAM DOWELS
Edge with
CAM DOWELS
R
R
G
F
F
G
15F
15F
These surfaces
should be even.
These surfaces
should be even.
å Fasten one of the OUTER BOTTOMS (G) to the LEGS (M
and N) and SIDE SKIRT (T). Tighten four HIDDEN CAMS.
Step 12
Page 18
T
G
N
M
Step 13
Page 19
å Turn two BLACK 9/16" FLAT HEAD SCREWS (32S) into
the LEFT END (B) until the shoulders of the SCREWS rest
on the surface of the END.
å NOTE: Do not overtighten the SCREWS.
å Slide one END MOLDING (U) onto the LEFT END (B). Line
up the grooves in the MOLDING over the heads of the
SCREWS in the END.
å NOTE: The MOLDING should be centered on the END.
å NOTE: If the MOLDING comes up o of the SCREWS,
remove it and slide it on again.
BLACK 9/16" FLAT HEAD SCREW
(2 used in this step)
32S
Shoulder
Apply pressure with your hands
as you guide the MOLDINGS over
the SCREWS and onto the ENDS.
U
B
å Push two HIDDEN CAMS (1F) into the short edge of
the LEFT END (B). Then, insert the metal end of a CAM
DOWEL (2F) into each HIDDEN CAM.
å Now, push six HIDDEN CAMS (1F) into the LEFT END (B)
and remaining SIDE SKIRT (T).
Step 14
Page 20
1F
Arrow
1F
Arrow
Do not tighten the HIDDEN CAMS in this step.
Arrow
1F
2F
Metal end
T
B

Other Teknik Indoor Furnishing manuals
Teknik Craft 5427456 User manual

Teknik

Teknik Craft 5427456 User manual

Teknik 5427427 User manual

Teknik

Teknik 5427427 User manual

Teknik 5425655 User manual

Teknik

Teknik 5425655 User manual

Teknik City Center 5425658 User manual

Teknik

Teknik City Center 5425658 User manual

Teknik Barrister Home 5418705 User manual

Teknik

Teknik Barrister Home 5418705 User manual

Teknik 1800 Hutch User manual

Teknik

Teknik 1800 Hutch User manual

Teknik 5426436 User manual

Teknik

Teknik 5426436 User manual

Teknik 5427872 User manual

Teknik

Teknik 5427872 User manual

Teknik 5427428 User manual

Teknik

Teknik 5427428 User manual

Teknik Scribed Oak Storage Desk 5418294 User manual

Teknik

Teknik Scribed Oak Storage Desk 5418294 User manual

Teknik Office Affiliate 5427468 User manual

Teknik

Teknik Office Affiliate 5427468 User manual

Teknik Executive Trestle Desk 5424128 User manual

Teknik

Teknik Executive Trestle Desk 5424128 User manual

Teknik Hampstead Park  Narrow Bookcase 5420283 User manual

Teknik

Teknik Hampstead Park Narrow Bookcase 5420283 User manual

Teknik Contemporary Bureau 5416966 User manual

Teknik

Teknik Contemporary Bureau 5416966 User manual

Teknik Craft 5421407 User manual

Teknik

Teknik Craft 5421407 User manual

Teknik Boulevard Cafe Desk 5420701 User manual

Teknik

Teknik Boulevard Cafe Desk 5420701 User manual

Teknik Hideaway Cotswold 5430446 User manual

Teknik

Teknik Hideaway Cotswold 5430446 User manual

Teknik 5427412 User manual

Teknik

Teknik 5427412 User manual

Teknik 5427127 User manual

Teknik

Teknik 5427127 User manual

Teknik Hythe 5426438 User manual

Teknik

Teknik Hythe 5426438 User manual

Teknik Elstree 5426910 User manual

Teknik

Teknik Elstree 5426910 User manual
Teknik Scribed Oak Desk 5414836 User manual

Teknik

Teknik Scribed Oak Desk 5414836 User manual

Teknik Barrister Home 5417772 User manual

Teknik

Teknik Barrister Home 5417772 User manual

Teknik Hythe 5426437 User manual

Teknik

Teknik Hythe 5426437 User manual

Popular Indoor Furnishing manuals by other brands

Herida Healthcare Argyll II HH/P09 User & Full Service Manual

Herida Healthcare

Herida Healthcare Argyll II HH/P09 User & Full Service Manual

Winsome 94145 manual

Winsome

Winsome 94145 manual

Wenger Nota Series Replacement instructions

Wenger

Wenger Nota Series Replacement instructions

sweeek. NEPAL INEPNCTX2 manual

sweeek.

sweeek. NEPAL INEPNCTX2 manual

FSG 11211763V quick start guide

FSG

FSG 11211763V quick start guide

Seconique CHARISMA SIDEBOARD Assembly instructions

Seconique

Seconique CHARISMA SIDEBOARD Assembly instructions

Onespace 50-JN173SHLFWN Assembly instructions

Onespace

Onespace 50-JN173SHLFWN Assembly instructions

WFI W 250 Mounting instructions

WFI

WFI W 250 Mounting instructions

Safavieh Furniture Nrma AMH4114 manual

Safavieh Furniture

Safavieh Furniture Nrma AMH4114 manual

dellonda Fusion DG57 quick start guide

dellonda

dellonda Fusion DG57 quick start guide

DHP 5139096 manual

DHP

DHP 5139096 manual

Habitat Compton 916/5238 manual

Habitat

Habitat Compton 916/5238 manual

Ovente MLW75 Series manual

Ovente

Ovente MLW75 Series manual

Wholesale Interiors JENIFER Assembly instructions

Wholesale Interiors

Wholesale Interiors JENIFER Assembly instructions

Next 666017 Assembly instructions

Next

Next 666017 Assembly instructions

Songmics VASAGLE LBC42 manual

Songmics

Songmics VASAGLE LBC42 manual

Whalen PROL-37 Assembly manual

Whalen

Whalen PROL-37 Assembly manual

Costway HW71613 quick start guide

Costway

Costway HW71613 quick start guide

manuals.online logo
manuals.online logoBrands
  • About & Mission
  • Contact us
  • Privacy Policy
  • Terms and Conditions

Copyright 2025 Manuals.Online. All Rights Reserved.