manuals.online logo
Brands
  1. Home
  2. •
  3. Brands
  4. •
  5. Tynetec
  6. •
  7. Security System
  8. •
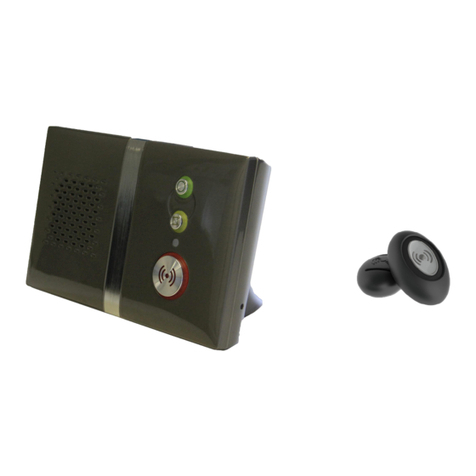
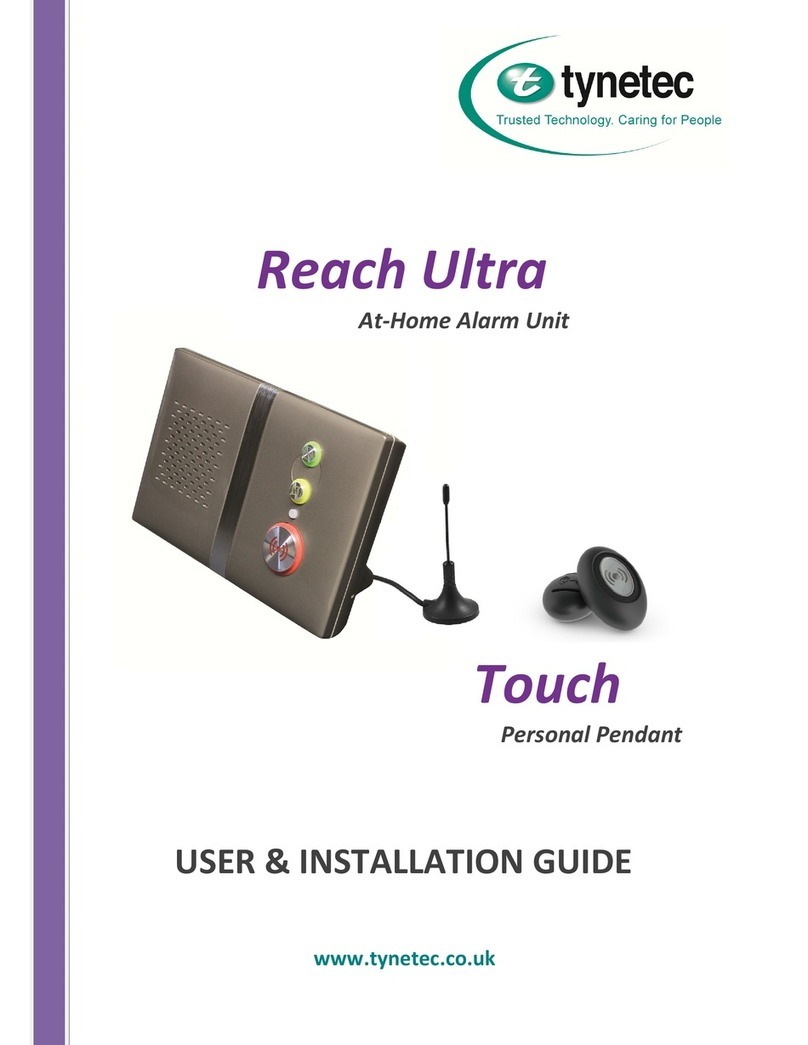
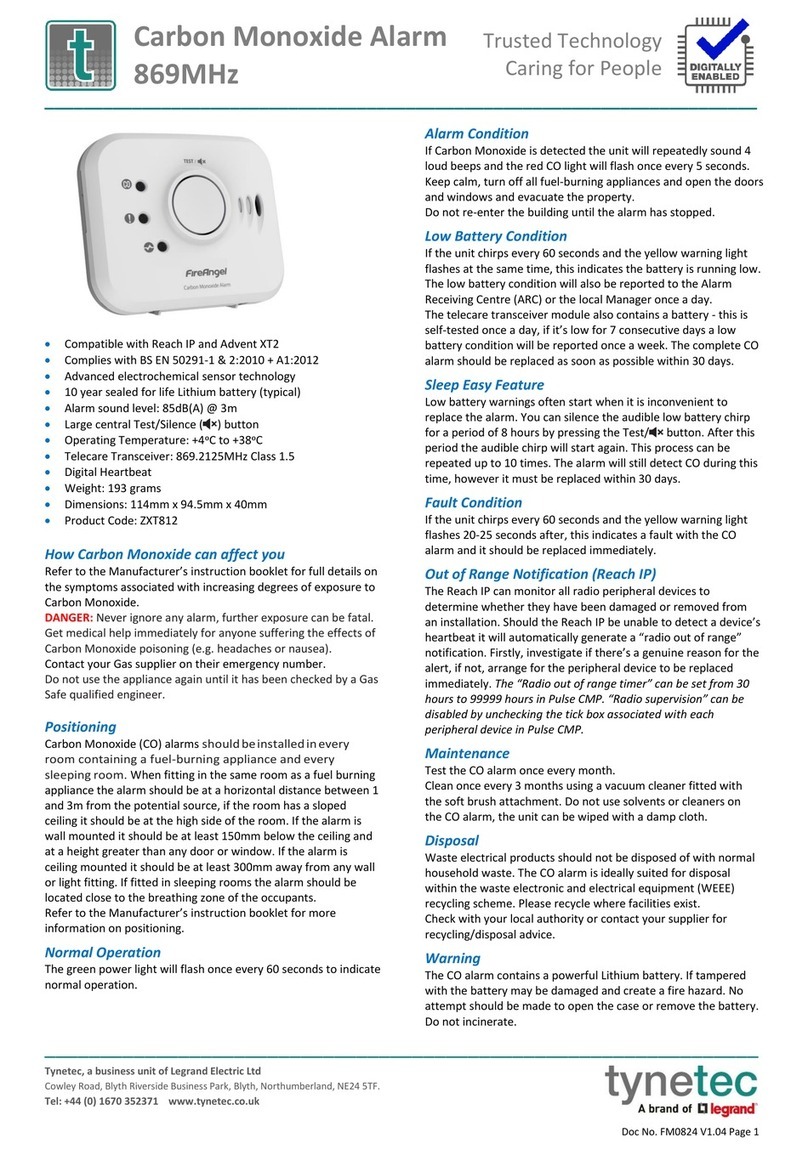
  9. Tynetec Reach IP User manual

Tynetec Reach IP User manual





















Fig1:Partsinthebox







Fig2:Buttons,StatusLED&Connections








Fig3:TouchPendantWearingOptions








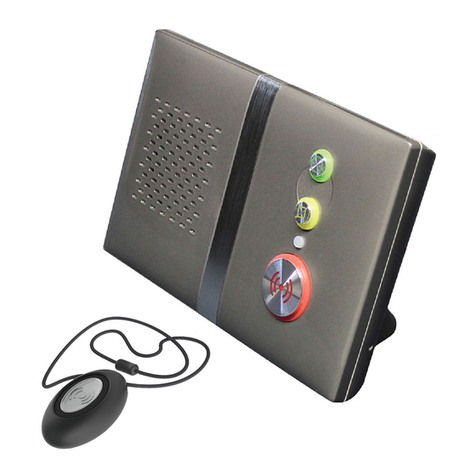
1.0Partsinthebox(seeFig1)
#Item
1ReachIPAt‐HomeAlarmunit
2ACAdapterincluding UK&EUmainsplugoptions
3Connector CoverformountingtheReachIPflat
4StandformountingtheReachIPvertically
5ScrewforfixingtheStand orConnectorCover
6TouchPendant&WearingOptions(neckcord/wriststrap/beltclip)

2.0Buttons,StatusLED&Connections(seeFig2)
#Function
RedAlarmButton:make anemergencycall
GreenCancelButton:cancelanemergencycallmadeinerror
YellowFunctionButton: toggleHome/Awaymode(ifenabled)
BlackPowerButton: on/offandenterControl Mode/ServiceMenu
StatusLED: off isnormal (Green nosignal,Red alarm,Amber fault)
SUPPLY5VDCinputfromACAdapter
USBProgrammingPort (factoryuseonly)
ETHERNETConnectiontotheInternetviaaRouter (future upgrade)

3.0TouchPendantWearingOptions(seeFig3)
TheTouchPendantisaportablealarmtriggerthatcanbewornaroundtheneck,on
thewristorclippedtoabelt.ThePendantisalreadyregisteredtotheReachIPunit
andreadytouse,justfitthedesiredwearingoptionasdescribedbelow;

NeckCord:liethecordthroughoneofthegroovesontherearonthePendantthen
slidetheneckcordattachmentintoplace.Note:smallercordendmarkedinFig3.

WristStrap:feedthewriststrap(patternsideup)throughthe2slotsinthewrist
strapattachment.Note:locatethepipmarkedinthecentreholeinFig3.
Pushthealuminiumfixingstudthroughtheholemarkedattheendofthestrap.

BeltClip:simplyclipintoplaceontherearofthePendant.Note:thesuctioncupcan
befittedtothebeltcliptostickthePendanttoahardsurface,e.g.atiledwall.

3.1Setting‐uptheReachIPunit
1.PlugtheACAdapterintothemainssupply.
2.PlugtheACAdapterLeadintotheReachIPunitSUPPLYport.
3.Switchthemainssupplyonatthewall,pressandholdthePowerbuttonfora
coupleofsecondsuntilthe3frontbuttonsilluminatebrieflythenrelease.TheRed
Alarmbuttonwillremainlitifilluminationisenabled(default)andtheStatusLEDwill
belitgreenuntilaGSMsignalisestablishedthenitwillgoout.
4.IMPORTANT:rangetestthePendantfromallextremesofthehome‐seesection4.4
5.MakeanalarmcalltotheAlarmReceivingCentre(ARC)tocheckoperation.

3.2MakinganAlarmCall
PresstheAlarmbuttonandtheunitwillannounce“callingforhelp‐pleasewait”
whenanalarmcallisbeingmade.TheAlarmbuttonwillflashred.Itispossibleto
cancelthealarmwithinthefirst5secondsbypressingtheCancelbutton.
4.0ControlMode&ServiceMenu
TheReachIPisnormallyinidlemode;ControlModeandServiceMenuarewaysof
easilyreconfiguringtheunit.Theunitwillreturntoidlemodeafterachangeismade
orafter5secondsofinactivity.
ControlModeFunctions
EnterControlModebypressingthePowerbuttononce,theunitwillbeepandthe
andbuttonswillilluminate.TheControlModefunctionsarelistedbelow;
#ControlModeFunctions
RedAlarmButton:toggleRedAlarmButtonillumination on/off
GreenCancelButton:changespeechandsounds volume
YellowFunctionButton:enterServiceMenu (seebelow)

ServiceMenuFunctions
OnceinControlMode,pressandholduntiltheunitannouncesthefirstService
Menufunction“addradiodevice”thenrelease,thebuttonwillbeflashing.Press
thebuttontosequentiallystepthroughthefunctions,pressthebuttontoselect
therequiredfunction.TheServiceMenufunctionsarelistedbelow;
#ServiceMenuFunctions
1AddRadioDevice
2RangeTestMode(alsoincludesGSMSignalStrengthMode)
3DeleteRadioDevices
4Home/AwayActivityFunction

4.1ToggleRedAlarmButtonIllumination
PressthePowerbuttontoenterControlModethenpressandholduntiltheunit
announcesthenewRedButtonstatee.g.iftheilluminationwasONthenitwill
announce“functionisdisabled”andilluminationwillnowbeoff,ifitwasOFFthenit
willannounce“functionisenabled”andilluminationwillnowbeon.
4.2ChangeSpeechandSoundsVolume
PressthePowerbuttontoenterControlModethenthenpressandholduntilthe
unitsoundsanumberofbeepstoindicateitsSPEECHvolumesetting‐continue
holdingtocyclethroughthe3settingsandreleaseontherequiredsetting.Press
andholdagainwithin5secondstochangetheSOUNDlevelsetting.
4.3AddRadioDevice
PressthePowerbuttontoenterControlModethenpressandholduntiltheunit
announces“addradiodevice”thenrelease.Pressthebuttontoconfirmthen
activatetheradiodevice.Theunitwillsoundahighbeepifit’sanewdeviceand
announce“rangetestmode”‐presstoconfirm,orpresstosteptothenext
function,orpresstoexitthemodeandtheunitwillannouncethenextfunction.
Note:ifthedevicealreadyexistsalowbeepwillsound.
4.4RangeTestMode
PressthePowerbuttontoenterControlModethenpressandholduntiltheunit
announces“addradiodevice”thenrelease.Pressagainandtheunitwillannounce
“rangetestmode”thenpresstoconfirm.Theandbuttonswillbeflashing.
GotoallextremesofthehomeandpressthePendant,theReachIPwillrespondwith
abeepandthePendantbuttonwillflashgreenifthesignalisreceived.Presstoexit
themodeandtheunitwillannouncethenextfunction.
ReachIP
At‐HomeAlarm
Screwfor
Stand/Cover
ACAdapterwith
UK&EUPlugs
TouchPendant&
WearingOptions
Connector
Cover
Stand
ReachIPunit
Red
AlarmButton
Green
CancelButton
Yellow
Function
Button
Status
LED
Touch
PendantNeckCord
Attachment
WristStrap
Attachment
BeltClip
Attachment
Black
PowerButton
Ethernet
Port
USB
Port
Supply
Port
UserGuide
WristStrap
NeckCordwith
SafetyBreak



Aluminium
FixingStud
Suction
Cup
RearConnectorArea
TrustedTechnology
CaringforPeople
4.4.1GSMSignalStrengthIndication
DuringRangeTestModetheStatusLEDwillindicatetheGSMsignalstrength,seetable
below;
GSMSignalStrengthRSSIStatusLED
High21‐31SolidGreen
Good 11‐200.1SecFlashingGreen
Low1‐100.5SecFlashingGreen
NoSignal0NotLit

4.5DeleteRadioDevices
PressthePowerbuttontoenterControlModethenpressandholduntiltheunit
announces“addradiodevice”thenrelease.Repeatedlypressuntiltheunit
announces“deleteradiodevices”thenpresstoconfirm.Activatetheradiodeviceto
beremovedandabeepwillbeheard.Pressandholduntilabeepisheard,andthe
unitwillannouncethenextfunction.

4.5.1DeletingALLRadioDevices
PressthePowerbuttontoenterControlModethenpressandholduntiltheunit
announces“addradiodevice”thenrelease.Repeatedlypressuntiltheunit
announces“deleteradiodevices”thenpresstoconfirm.Pressandholduntila
beepisheardthenrelease.Pressandholdagainuntilabeepisheard,andtheunit
willannouncethenextfunction.

4.6Home/AwayActivityFunction
PressthePowerbuttontoenterControlModethenpressandholduntiltheunit
announces“addradiodevice”thenrelease.Repeatedlypressuntiltheunit
announces“homeawayactivityfunction”thenpresstoconfirm.Theunitwill
announceitscurrentstate;“functionisdisabled”or“functionisenabled”.Tochange
thesettingpressandholduntiltheunitannouncesthenewstate,theunitwillthen
announcethenextfunction.Note:ifenabledtheFunctionButtonisusedinidle
modetotoggleHome/Awaymode.
5.0ErrorIndications
Anerrorisindicatedbya“blurp”oravoicemessage;e.g.“powerdisconnected”or
“GSMnetworkfailure”.Thiswillrepeatevery2minutesuntiltheproblemisresolved
orthebuttonispressedtosilencethewarning.Errorsarealsoindicatedonthe
StatusLED,seethetablebelow;
StatusLED PossibleReasonSuggestedAction
SolidGreen NoGSM
networksignalCheckGSMnetworksignalstrength
FlashingRedMainsfailureCheckmainssupplyand/orACadapter
connection
SolidAmberBatteryfailure
ornotchargingCheck/replacebattery
Flashing
Green/Red/Amber
Radio
Interference
Checkinterferingradiosources.Move
DECTphones,WiFiRoutersetc.at
least1metreawayfromtheReachIP

6.0SwitchingtheReachIPOff
TheReachIPusesverylittlepowerandshouldalwaysbeleftswitchedon.Iftheunitis
beingremovedandstoredforaprolongedperiod,thenitshouldbeswitchedoff.
PressandholdthePowerbuttonuntilall3frontbuttonsandtheStatusLEDflash
oncethenrelease;theunitisnowswitchedoff.

7.0ImportantInformation
Itisveryimportanttoreadandunderstandthissectionbeforeuse.
Keeptheseinstructionsinasafeplaceforfuturereference.
7.1Use&Maintenance
•OperatingTemperatureRange:+5to+45°C
•Donotdamagetheunitoritsparts,ifdamagedcontactyoursupplierimmediately
•Donotexposetodirectsunlight
•Keepawayfromdust,moistureanddirt
•Donotdrop,knock,twistorshakethedevice
•Donotwarmupthedeviceoruseitnearafire

7.2Cleaning
•AllpartsintheReachIPkitcanbecleanedwithamildsoapsolutionandadamp
cloth.Drywithasoftdrycloth.
•Strongchemicalsandotherharshsubstancesmustnotbeusedwhencleaningor
handlingthepartsintheReachIPkit.
•TheReachIPmustbedisconnectedfromthemainssupplybeforecleaning.
•Aftercleaning,confirmthattheunitworksproperlybymakingatestalarmcalltothe
AlarmReceivingCentre.

7.3SafetyNotes
•Readinstructionsbeforeuse
•Alwaystesttheproductaspertheinstructionsbeforeuse
•Alwayscheckthefunctionoftheproductaftermakingchangestosettings
•Thisproductmaynotbesuitableforallpersonsandshouldnotbeasubstitutefor
theroutinevisualmonitoringbyaCarer.
•Thisproductmustnotbeusedinsituationswhereadelayinthearrivalof
appropriatemedicalcarecouldleadtoapotentiallylife‐threateningsituation.
•Testtheproductregularlyandreplacewhennecessary.
•Donotintegratewithothersystemsotherthanthosespecifiedbythemanufacturer.
•Alwayskeeptheproductdry,exposuretoexcessivemoisturecancausemalfunction.
•Thisproductwillnotcauseelectromagneticdisturbancesundernormalworking
conditions.
•Thisproductcanbeplacednearotherproductsordevicesaslongasmechanical
vibrationisnotpresent.
•Removethebatteryiftheunitistobeoutofuseorstoredforanextendedperiod.
7.4Disposal
 Thecrossed‐outwheeliebinsymbolontheproductindicatesitisclassedas
 ElectricalorElectronicEquipmentandshouldnotbedisposedofincommercial
wasteatitsendoflife.

TheWasteofElectrical&ElectronicEquipment(WEEE)Directive(2012/19/EU)has
beenputinplacetorecycleproductsusingthebestavailablerecoveryandrecycling
techniquestominimizeimpactontheenvironment,treathazardoussubstancesand
avoidincreasedlandfill.Forproductdisposalpleasecontactyoursuppliertocheckthe
termsandconditionsofthepurchasecontract.Alwaysensurethisproductisnot
mixedwithcommercialwastefordisposal.








8.0Specification
•ReachIPcomplieswiththeSocialAlarmStandard:EN50134‐3:2012
•Dimensions:120mmx187mmx38mm(HxWxD)
•Weight:455grams(excPSU)
•PendantFrequency:869.2125MHz
•Maxtransmissionpower:50.000μV/m
•Protocols:TS50134‐9(SCAIP),BS8521&TT92
•PowerSupply:100‐240VAC50/60Hz<5Watts
•ACAdapterType:KSAS0050500100D5D(5VDC1.0ARated)
•BatteryType:3.6VNiMH1000mAh
9.0EUDeclarationofConformity
Changesormodificationsnotexpresslyapprovedbythepartyresponsiblefor
compliancecouldvoidtheuser’sauthoritytooperatetheequipment.

ThisdevicecomplieswithEMCEmissions&ImmunityStandards;
EN61000‐6‐3:2007+A1:2011
EN50130‐4:2011+A11:2014
Operationissubjecttothefollowingtwoconditions:(1)Thisdevicemaynotcause
harmfulinterference,and(2)thisdevicemustacceptanyinterferencereceived,
includinginterferencethatmaycauseundesiredoperation.

ThisdevicecomplieswiththeRadioEquipmentDirective;
ETSIEN300220‐3‐1V2.1.1(2016‐12)
Theselimitsaredesignedtoprovidereasonableprotectionagainstharmful
interferenceinaresidentialinstallation.Thisequipmentcangenerate,useandradiate
radiofrequencyenergyand,ifnotinstalledandusedinaccordancewiththe
instructions,maycauseharmfulinterferencetoradiocommunications.However,
thereisnoguaranteethatinterferencewillnotoccurinaparticularinstallation.Ifthis
equipmentdoescauseharmfulinterferencetoradioortelevisionreception,whichcan
bedeterminedbyturningtheequipmentoffandon,theuserisencouragedtotryto
correcttheinterferencebyoneormoreofthefollowingmeasures;
•Re‐orientateorrelocatethedevice
•Increasetheseparationbetweentheequipmentandreceiver
•ConnecttheequipmentintoaMainsoutletonacircuitdifferentfromthattowhich
thereceiverisconnected
•Consultthesupplieroranexperiencedradio/TVtechnicianforhelp
ChrisDodd
ManagingDirector,LegrandAssistedLiving&HealthcareUK.


TynetecisabusinessunitofLegrandElectricLtd,
Unit10CowleyRoad,BlythRiversideBusinessPark,
Blyth,Northumberland,NE245TF,UK.
Tel:+44(0)1670352371Web:www.tynetec.co.uk DocNo.FM0802V1.04

Other manuals for Reach IP

1

Other Tynetec Security System manuals

Tynetec Safe Call User manual

Tynetec

Tynetec Safe Call User manual

Tynetec Aidcall ZXT434 User manual

Tynetec

Tynetec Aidcall ZXT434 User manual

Tynetec Advent xt Operating instructions

Tynetec

Tynetec Advent xt Operating instructions

Tynetec Aidcall FM0743 User manual

Tynetec

Tynetec Aidcall FM0743 User manual

Tynetec Altec Response User manual

Tynetec

Tynetec Altec Response User manual

Tynetec ZXT812 User manual

Tynetec

Tynetec ZXT812 User manual

Tynetec Reach IP User manual

Tynetec

Tynetec Reach IP User manual

Tynetec Reach Plus Troubleshooting guide

Tynetec

Tynetec Reach Plus Troubleshooting guide

Tynetec Reach User manual

Tynetec

Tynetec Reach User manual

Tynetec SayPhone V2 User manual

Tynetec

Tynetec SayPhone V2 User manual

Tynetec Advent XT2 User manual

Tynetec

Tynetec Advent XT2 User manual

Tynetec reach ultra Manual

Tynetec

Tynetec reach ultra Manual

Tynetec Reach Troubleshooting guide

Tynetec

Tynetec Reach Troubleshooting guide

Tynetec Aidcall User manual

Tynetec

Tynetec Aidcall User manual

Tynetec ZXT830 User manual

Tynetec

Tynetec ZXT830 User manual

Popular Security System manuals by other brands

Paradox STAY D MG5000 Installer setup guide

Paradox

Paradox STAY D MG5000 Installer setup guide

HIK VISION NB V6 user manual

HIK VISION

HIK VISION NB V6 user manual

RF Technology HELP ALERT user guide

RF Technology

RF Technology HELP ALERT user guide

smart things ADT Keychain Remote Setup guide

smart things

smart things ADT Keychain Remote Setup guide

HIK VISION Pyronix Enforcer V10 Extended user guide

HIK VISION

HIK VISION Pyronix Enforcer V10 Extended user guide

Scantronic Spartan 650F owner's manual

Scantronic

Scantronic Spartan 650F owner's manual

SAFE HOME WS210 manual

SAFE HOME

SAFE HOME WS210 manual

HIK VISION 607 Series user manual

HIK VISION

HIK VISION 607 Series user manual

HIK VISION DS-PRI120 user manual

HIK VISION

HIK VISION DS-PRI120 user manual

Q-See QT4760-16A6-5 Brochure & specs

Q-See

Q-See QT4760-16A6-5 Brochure & specs

Axesstel AX240 user manual

Axesstel

Axesstel AX240 user manual

Scantronic i-on Security System user guide

Scantronic

Scantronic i-on Security System user guide

Abus SHSG10000 Installation and maintenance manual

Abus

Abus SHSG10000 Installation and maintenance manual

USASPEC BSM 200 product manual

USASPEC

USASPEC BSM 200 product manual

M-TI FREEDOM CORE product manual

M-TI

M-TI FREEDOM CORE product manual

HIK VISION DS-PS1-I-WA manual

HIK VISION

HIK VISION DS-PS1-I-WA manual

Paradox MG5050 Programming guide

Paradox

Paradox MG5050 Programming guide

Fire-Lite Device owner's manual

Fire-Lite

Fire-Lite Device owner's manual

manuals.online logo
manuals.online logoBrands
  • About & Mission
  • Contact us
  • Privacy Policy
  • Terms and Conditions

Copyright 2025 Manuals.Online. All Rights Reserved.