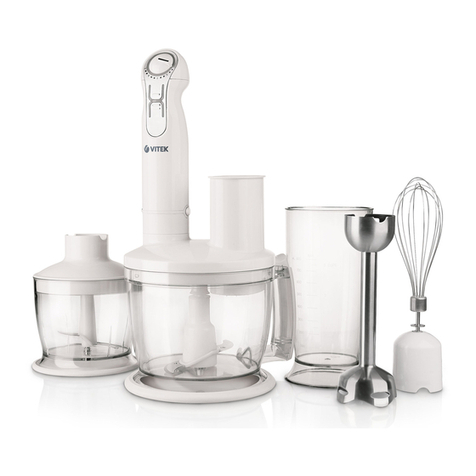
Vitek VT-1467 GY User manual

1
VT-1467 GY
3
7
12
17
22
27
31
36
41
Блендерный набор
Hand blender set
VT-1467.indd 1 18.10.2012 15:06:30

рис. 1
1
6
7
2
3
5
9
8
12
11
13
14
15
16
17
18
19
10
4
21
20
VT-1467.indd 2 18.10.2012 15:06:31
3
E N G L I S H
HAND BLENDER SET
Description
1. Rotation speed control knob
2. ON button “I”
3. Turbo mode button “II”.
4. Motor unit
5. Blender attachment
6. Whisk gear
7. Whisk for beating/mixing of liquid products
8. Pusher for cleaning of cubic grid
9. Pusher
10. Processing bowl geared lid
11. Cubic attachment driving shaft
12. Cubic attachment knife
13. Cubic attachment with removable grid
14. Clamps
15. Cubic grid
16. Lock button of processing bowl lid
17. Processing bowl
18. Processor chopping knife
19. Processor driving shaft
20. Measuring cup lid
21. Measuring cup
Safety measures
Before using the unit, read these instructions
carefully. Keep these instructions for future
reference.
Use the unit according to its intended purpose
only, as it is stated in this user manual.
Mishandling the unit can lead to its breakage
and cause harm to the user or damage to his/
her property.
• Before connecting the unit to the mains,
make sure that unit operating voltage corre-
sponds to your home mains voltage.
• The blender set allows quick and effective
operation, but continuous operation time
should not exceed 1 minute while using blend-
er attachment, whisk, mash making attach-
ment and 20-30 seconds while chopping
products in the processor. Make at least a
two-minute interval between operation cycles.
• Cool down hot products when using the
blender attachment.
• Do not use the unit outdoors.
• Use only the accessories supplied.
• Before using the unit for the first time wash
all the removable parts that will contact food
thoroughly.
• Before using the unit make sure that all the
parts are set properly.
• Place the bowl on a flat, stable surface.
• Products should be put into the bowl before
switching the unit on.
• Do not overfill the chopper bowl with prod-
ucts and watch the level of poured liquids.
• The blades of chopping knife are very sharp
and dangerous. Handle the knife very carefully!
• If rotation of the chopping knife is hindered,
unplug the unit and carefully remove prod-
ucts that prevent blade rotation.
• Remove products and pour out liquids from
the chopper bowl only after complete stop
of the knife.
• Do not touch the rotating parts of the unit. Do
not allow hair or clothes edges get into the
blades rotating zone of blender attachment.
• Do not leave the operating unit unattended.
• Always unplug the unit before cleaning and
when you do not use it.
• Do not use the unit near hot surfaces (such
as gas or electric stove, oven).
• Provide that the power cord does not touch
sharp edges of furniture and hot surfaces.
• Do not pull the power cord and do not twist it.
• Do not touch the plug with wet hands.
• Do not use the unit if the power cord is dam-
aged.
• Do not try to repair the unit by yourself. If the
unit has damages, apply to the authorized
service center.
• To avoid risk of electric shock or fire, do not
immerse the unit, the power cord and the
power plug into water or other liquids. If the
unit was dropped into water:
– do not touch water;
– unplug the unit immediately, and only then
take it out of water;
– apply to the authorized service center for
testing or repairing the unit.
• For children safety reasons do not leave
polyethylene bags, used as a packaging,
unattended.
• Attention! Do not allow children to play with
polyethylene bags or film. Danger of suf-
focation!
• Do not allow children to use the unit as a toy.
VT-1467.indd 3 18.10.2012 15:06:31

4
ENGLISH
• Close supervision is necessary when chil-
dren or disabled persons are near the oper-
ating unit.
• This unit is not intended for usage by children
or disabled persons unless they are given all
the necessary and understandable instruc-
tions by a person who is responsible for their
safety on safety measures and information
about danger that can be caused by improper
usage of the unit.
THE UNIT IS INTENDED FOR HOUSEHOLD
USAGE ONLY
BEFORE USING THE UNIT
Note: After unit transportation or storage at low
temperature it is necessary to keep it for at least
two hours at room temperature before switching
on.
• Wash the attachments that will contact food
with warm water and a neutral detergent and
dry them thoroughly before use.
• Wipe the motor unit (4), whisk gear (6) and
processing bowl geared lid (10) with a soft
slightly damp cloth.
Attention!
– Do not immerse the motor unit (4), whisk
gear (6), processing bowl geared lid (10),
power cord and power plug into water or any
other liquids.
– Do not put the attachments and bowls in a
dish washing machine.
OPERATION TIME
Continuous operation time while working with
attachments (5, 7) should not exceed 1 minute.
Operation time of processor should not exceed
20-30 seconds. Make at least a two-minute
interval between operation cycles.
USING THE BLENDER ATTACHMENT
Warning:
– Before assembling make sure that the power
plug is not inserted into the power socket.
• Insert the blender attachment (5) into the
motor unit (4), and turn it counterclockwise
until bumping.
• Insert the power plug into the socket.
• Immerse the blender attachment (5) into the
bowl with products that you want to chop/
mix; you can use the measuring cup (21)
for it.
Note: When using the measuring cup (21)
for chopping/mixing products the amount
of ingredients should not exceed 200 ml.
Otherwise the mixed products can splash.
• To switch the blender on press and hold the
button (2). Set the required operation speed
from 1 to 20 using the control knob (1). Use
this operation mode for mixing liquid prod-
ucts.
• If you press and hold the button (3), the unit
will operate at maximum rotation speed. Use
this operation mode for combined process-
ing of liquid and hard products.
Note:
– Food should be put into the bowl before
switching the unit on.
– Before starting of chopping/mixing, we rec-
ommend to peel fruit, remove inedible parts,
such as stones, and cut fruit into 2х2 cm
cubes.
• After you finish using the unit, take the power
plug out of the socket and remove the blend-
er attachment (5), turning it clockwise.
Attention!
– Do not remove the blender-attachment (5)
during operation.
– In order not to damage the blades, do not
process too hard products such as cereals,
rice, spices, coffee beans, ice, cheese, fro-
zen food.
– If the products are difficult to process add
some liquid into the bowl.
USING THE WHISK
Use the whisk attachment (7) only for beating
cream, making biscuit dough or mixing ready
desserts.
Warning:
– Before assembling make sure that the power
plug is not inserted into the socket.
• Insert the whisk (7) into the gear (6).
• Insert the whisk gear (6) into the motor unit
(4), and turn it counterclockwise until bump-
ing.
• Insert the power plug into the socket.
• Sink the whisk (7) into the bowl with food.
• Set the required operation speed from 1 to
20 using the control knob (1).
VT-1467.indd 4 18.10.2012 15:06:31

5
E N G L I S H
• To switch the blender on press and hold the
button (2). Use this operation mode for mix-
ing liquid products.
• If you press and hold the button (3), the unit
will operate at maximum rotation speed.
• After you finish using the unit, take the plug
out of the socket, disconnect the whisk (7)
from the gear (6) and disconnect the gear (6)
from the motor unit (4) turning it clockwise.
Attention!
– Do not use the whisk (7) to kneed tight
dough.
– Products for beating/mixing should be put
into the bowl before switching the unit on.
USING THE CHOPPING KNIFE (18)
Attention!
– Do not chop very hard products, such as nut-
megs, coffee beans and cereals.
Before you start chopping:
– Remove bones, veins and cartilage from
meat.
– Cut meat, onion, garlic, carrots etc. into
approximately equal slices.
– When chopping greens, remove stems of
herbs.
Chopping
Warning:
– Before assembling make sure that power
plug is not inserted into the socket.
– Do not overfill the processing bowl.
Caution: The blades are very sharp!
• Set the driving shaft (19) on the spindle of the
processing bowl (17).
• Remove the plastic protective cover from the
blades of the knife (18) and set the knife in
the slots of the driving shaft (19).
• Put the products into the processing bowl
(17).
• Put the geared lid (10) on the bowl (17).
• Press the lock button (16) and turn the geared
lid (10) counterclockwise, setting it to the
position “ ”, release the lock button (16)
and make sure that the geared lid (10) is fixed
properly.
• Place the motor unit (4) on the geared lid
(10) and rotate it clockwise until it is securely
fixed.
• Insert the power plug into the socket.
• Set the required speed from 1 to 20 using the
control knob (1).
• To switch the blender on press and hold the
button (2).
• When the button (3) is pressed, the knife
rotates at maximum rotation speed.
• Hold the motor unit (4) with one hand and
the bowl (17) with the other hand during
operation.
• After using the unit remove the power plug
from the socket, disconnect the motor unit
(4) from the geared lid (10), turning it coun-
terclockwise.
• Then remove the geared lid (10) from the
bowl (17), pressing the lock button (16) and
turning the lid (10) clockwise.
• Carefully remove the knife (18) gripping the
upper end of the driving shaft (19).
• Take the chopped products out of the pro-
cessing bowl (17).
• Clean, wash and dry all the used parts imme-
diately after operation.
• Put the knife (18) into the plastic protective
cover.
Attention! Continuous operation time of the
unit should not exceed 20-30 seconds.
USING THE CUBIC ATTACHMENT
Use the cubic attachment for cutting fruit and
boiled vegetables.
Attention!
– Do not process hard and frozen food. It can
damage the cubic attachment.
Warning:
– Before assembling make sure that the power
plug is not inserted into the socket.
• Open the clamps (14), set the knife (12) on
the cubic attachment (13) and fix it with the
clamps (14).
• Match the groove on the cubic attachment
(13) with the ledge inside the processing
bowl (17) (near the bowl handle) and install
the attachment in the bowl (PIC. 1).
• Set the driving shaft (11) into the attach-
ment (13).
Note: Check whether the attachment (13) is set
properly, otherwise the processor lid (10) will
not close.
• Put the geared lid (10) on the bowl (17).
• Press the lock button (16) and turn the
geared lid (10) counterclockwise to the posi-
VT-1467.indd 5 18.10.2012 15:06:31
Table of contents
Languages:
Other Vitek Kitchen Appliance manuals

Vitek
Vitek VT-5051 BK User manual

Vitek
Vitek VT-7101 User manual

Vitek
Vitek VT-1185 User manual

Vitek
Vitek VT-1432 BD User manual

Vitek
Vitek VT-1195 User manual

Vitek
Vitek VT-4220 SR User manual

Vitek
Vitek VT-4272 BK User manual

Vitek
Vitek VT-1188 GY User manual

Vitek
Vitek VT-5056 W User manual

Vitek
Vitek VT-4213 GY User manual

Vitek
Vitek VT-1601 User manual

Vitek
Vitek VT-4206 R User manual

Vitek
Vitek VT-4219 W User manual

Vitek
Vitek VT-1635 User manual

Vitek
Vitek VT-3660 User manual

Vitek
Vitek VT-1600 User manual

Vitek
Vitek VT-4282 User manual

Vitek
Vitek VT-4216 CM User manual

Vitek
Vitek VT-1631 User manual

Vitek
Vitek VT-1190 User manual