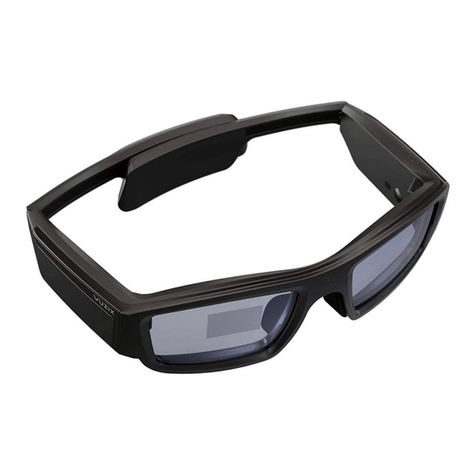
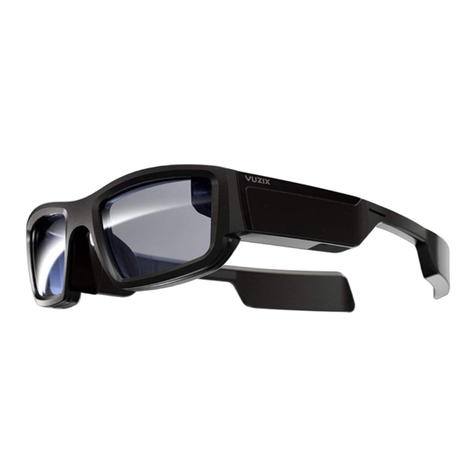
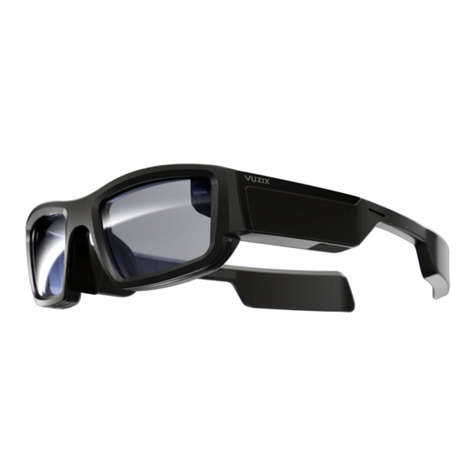
Vuzix Blade User manual

User’s Manual
version 1.0
Before getting started, please read the Safety Instructions at https://www.vuzix.com/support/safety-warranty-blade.

Photos App . . . . . . . . . . . . . . . . . . . . 14
Viewing Pictures and Videos . 14
Capturing Pictures . . . . . . . . . .11
Recording Video . . . . . . . . . . . . 11
Additional Camera Actions . . . 12
Onboard Apps . . . . . . . . . . . . . . . . . . . . 10
Home Screen . . . . . . . . . . . . . . . . . . 10
Camera App . . . . . . . . . . . . . . . . . . . 11
User Controls . . . . . . . . . . . . . . . . . . . . . 06
Power Button . . . . . . . . . . . . . . . . . . 06
Touchpad . . . . . . . . . . . . . . . . . . . . . 06
Navigation Basics . . . . . . . . . . . . . . 06
Basic Gestures . . . . . . . . . . . . . . . . 07
Advanced Gestures . . . . . . . . . . . . 07
Turning Blade ON . . . . . . . . . . . . . . . 08
Toggling Display ON/OFF . . . . . . . 09
Rebooting Blade . . . . . . . . . . . . . . . 09
Turning Airplane Mode ON/OFF . . 09
Hard Shutdown . . . . . . . . . . . . . . . . 09
Introduction to Vuzix Blade . . . . . . . . . . 03
Package Contents . . . . . . . . . . . . . . 04
Device Layout and Components . . 04
Charging . . . . . . . . . . . . . . . . . . . . . . . . . 05
Companion Link . . . . . . . . . . . . 15
USB Mode . . . . . . . .. . . . . . . . . 16
Haptic Feedback . . . . . . . . . . 16
Time and Date . . . . . . . . . . . . . 16
Software Update . . . . . . . . . . . 17
Bluetooth . . . . . . . . . . . . . . . . . . 16
Wi-Fi . . . . . . . . . . . . . . . . . . . . . . 16
Learning More . . . . . . . . . . . . . . . . . . . . 20
Settings App . . . . . . . . . . . . . . . . . . . 15
Keyboard . . . . . . . . . . . . . . . . . . . . . . . . 18
Companion App . . . . . . . .. . . . . . . . . . . 19
Table of Contents
02
First Time User Experience . . . . . . . 08
Turning Blade OFF . . . . . . . . . . . . . . 09
Control (Music) App . . . . . . . . . . . . 13
Games . . . . . . . . . . . . . . . . . . . . . . . . 13
Audio. . . . . . . . . . . . . . . . . . . . . . 17

The Vuzix Blade delivers enhanced
functionality for your on-the-go, hands-
free, mobile computing requirements.
Stay connected and keep your phone
Congratulations and welcome to the
Vuzix Blade AR Smart Glasses!
in your pocket!
The Blade Quick Start Guide, included in
your Blade package, provides concise
information on the basic use of the Blade
AR Smart Glasses.
This User’s Manual provides more
comprehensive and detailed information
for setup, configuration and use.
Be sure to read this manual and retain it
for future reference.
Read Me First
Read the Safety and Warranty document at
https://www.vuzix.com/support/safety-
warranty-blade before proceeding.
Product, features and operation
descriptions are based on the device's
default settings and may change without
notice.
Some content and operation descriptions
may differ from your device depending on
your region, service provider options, and/
or software.
Display brightness and content requiring
high CPU and RAM usage will affect the
overall performance of the device and its
battery life.
Some Android applications and content
may not work as expected due to the Vuzix
Blade Smart Glasses’ design
characteristics and its application.
Vuzix is not liable for performance issues
caused by applications supplied by other
Applications provided with the device are
subject to updates and discontinuation
without prior notice.
Attempting to customize the device or
software may result in improper operation
and voiding of the device's warranty.
providers or alteration of the device, its
settings, or software.
Software, data, images, and other media
provided with this device are licensed for
limited use. Using or incorporating these
materials for commercial or other
purposes is an infringement of copyright
laws.
You may incur additional charges for
services provided by third parties, such
as, but not limited to, an ISP, Wi-Fi
provider, software or other service
providers.
Introduction to Vuzix Blade
03
Quick Start Guide
Before getting started, please read the online Safety Instructions
at www.vuzix.com/legal.
Device Layout and Components
Please be sure your Vuzix Blade came
with all the contents shown. If you are
missing any items contact Vuzix at
Package Contents
www.vuzix.com/support/blade-smart-glasses.
Introduction to Vuzix Blade
04
Carrying Case
Microfiber
Cleaning Pouch
Quick Start
Guide
Micro USB
cable
Camera LED
HD Camera (8MP)
MicroSD Storage
Full Color See
Through Display
Touchpad
Power LED
USB Connection
Power Button
Noise Cancelling Mics
Vuzix Blade can accommodate a MicroSD
card up to a maximum of 32 GB.
* Wired Headphone
Adapter Cable
*Wired Headphone Adapter Cable will be
shipped as a part of the Commercial Edge
package.

Your Blade is equipped with internal rechargeable
batteries and is shipped with a partial charge. It is
recommended that the battery be fully charged for first
time use.
For speed charging connect to 5V 2A source.
(Blade will draw a maximum of 5V 1A.)
Connect the included micro USB connector into the
device.
Connect the USB connector to any standard USB
power source.
Check that the device has entered charger mode.
Blade will automatically enter charger mode when
it is connected to a USB power source. It will turn
off if disconnected from the power source while in
charge mode.
Charging
05
To USB
Power Source
The Power LED will indicate the various battery and
charging states using the following blink patterns:
•Fast blink - battery is less than 15%
•Slow breathing - battery is charging, up to 90%
•Off - battery is fully charged
•Fast breathing - battery has minimal charge, too
low to boot device

Tap to select the “in focus” app.
Swipe forward or backward to
navigate through the App List.
• display ON/OFF, press and release the power button.
• power ON/OFF, with display on, hold power button for 3 Seconds to get the menu.
• reboot, with display on, hold power button for 3 Seconds to get the menu.
• airplane mode ON/OFF, with display on, hold power button for 3 Seconds to get the menu.
• hard shutdown*, hold power button for 7-8 Seconds for a hard shutdown.
* This may lose or corrupt data, and is not recommended unless the device becomes unresponsive.
There are only two physical interfaces on the device, the power button and the touchpad (see illustration on page 4).
Power Button
The power button has multiple functions including:
Touchpad
The touchpad is the primary means to interact with the Blade. Taps and swipes are the basic gestures.
Navigation Basics
Swipe to navigate to actions or return
to the App List.
06
User Controls
App List (see page 10)
Touchpad
Power Button
tap
swipe swipe

One Finger Swipe Forward and Backward
• navigate features, lists and App List
• scrub video
• navigate keyboard
One-Finger Tap
• turn on display and wake up
(if in sleep mode)
• select an item (app, action or feature)
• display action list (if in full screen mode)
Basic Gestures
These two simple gestures will quickly
get you started using your Blade.
07
Two-Finger Swipe Forward
• delete action
• clear current notification
• delete photo or video
• add space (keyboard)
Two-Finger Swipe
Backward
• backspace (keyboard)
• available gesture
definable within app
Two-Finger Swipe
Up / Down
• increase or
decrease volume
• navigate to recovery
options
Two-Finger Hold
One second
• return to home
Two-Finger Tap
• move backward
• close action bar
One-Finger Hold
One second
• open menu
• displays options
for keyboard
characters
One-Finger Swipe
Up / Down
• navigate vertical lists
Two finger gestures combined with the
basic gestures are all you need to
navigate the device.
Advanced Gestures
User Controls

Turning Blade ON
Ensure Blade has enough power
(see page 5).
To turn ON press and hold the power button
for three seconds.
At start up, the welcome animation will play,
followed by the home screen. Every time Blade
boots, the users will notice a message to read
Health & Safety document under settings.
08
The power LED
will light and
remain on when
Blade is on.
4
5
6
53 sec.
power ON/OFF
User Controls
6
(see page 5).
To turn ON press and hold the power button for
three seconds.
When the Blade boots for the first time, the
welcome animation will play, followed by the
Welcome screen showing how to swipe
forward on the touch pad. The user also has to
accept End User License Agreement and
Safety & Warranty.
First Time User Experience
1 Ensure Blade has enough power
2
3
When starting your
Blade for the first
time, initial set up
may take several
seconds.
3

A hard shutdown initiates
a fresh restart. This may
lose or corrupt data, and
is not recommended
unless the device
becomes unresponsive.
Hard Shutdown
Press and hold the power button for
seven seconds.
Press and hold the power button for
three seconds.
Turning Airplane Mode ON/OFF
7 Select Airplane mode from the menu.
09
6
8
User Controls
6
3 sec.
87 sec.
hard shutdown
7
swipe tap
Press and hold the power button for
three seconds.
Select Reboot from the menu.
Turning Blade Off
Toggle Display On/Off
Press and release (one second).
Rebooting Blade
Press and hold the power button for
three seconds.
Select Power Off from the menu.
4
1
3
5
2
5
1
3 sec.
power ON/OFF
2 3
1 sec.
display ON/OFF
3 sec.
Blade on/off
Reboot
tap
swipe tap
4

Home Screen
The Home App screen consists of the fields
identified in the illustration.
Icons for all other apps appear in the App List
with the current app “in focus” (larger and
highlighted).
•Home
•Camera
•Control (Music)
•Photos
•Settings
•Dino Hunt
•Golf
•Racers
•Space Miners
The Vuzix Blade comes pre-installed with
five standard applications..
The Vuzix Blade comes with four pre-
installed games.
10
Onboard Apps
App Name
Status BarWarning Bar
Widget
App List
A widget is a snapshot of an
applications current state and
functionality. It exists to
provide insightful information
about an application without
having to open it. Example:
Settings widget, which shows
the state of the Blade's Wi-Fi
and Companion App
connections.

Tap to launch the Camera App.
Tap to capture a picture.
Camera App
The Camera App is where you will find all of Vuzix
Blade’s picture taking and video recording features.
Capturing Pictures
Use the Photos App to view your pictures. (See later
pages)
Recording Video
Tap to launch the Camera App.
Swipe to navigate to Record.
Tap to start recording.
Tap again to stop recording.
11
1
2
3
5
2
1
Onboard Apps
When the Camera App is
launched, the camera LED will
turn ON.
When video is being recorded,
you can navigate away from
the Camera App to enjoy
other Blade features.
While recording, the red, on
screen, REC icon will blink.
The length of recording time
will also be displayed.
tap tap
34 5
tap tap
swipe
4

Camera App (continued)
Additional Camera Actions
Within the Camera App, there are actions that are common
between the Capture and Record modes.
You can not currently capture a
photo while video is being
recorded. This feature will be
available in a future release.
12
1
2
1 2
Onboard Apps
Back - returns to the app’s main screen
Preview - displays an image of the picture or video being
captured.
Preview mode can be ON or OFF.
When the preview is off, the Blade's display is not obstructed
with the preview image and the user can see the real world.
When preview is off, a reticle is displayed to indicate the
approximate center of the frame.

13
Onboard Apps
Widget when no
music is playing.
Widget when
music is playing.
The track details
and controls.
Control (Music) App
The Control App allows the Blade to control music
being played on your smart-phone. The app shows
3 lines indicating the track details. These details
are also shown on the widget. Controls that are
available are return, go to previous track, play/pause
and go to next track.
Games
The Blade is pre-installed with 4 games.
Golf Golf Racers Racers
Dino HuntDino HuntSpace MinersSpace Miners
•Dino Hunt
•Golf
•Racers
•Space Miners

14
Onboard Apps
Photos App
The Photos App allows you to navigate through and view
pictures and videos captured on the Blade.
A preview of the most recent media will be displayed on the
home screen.
Note: The Blade is pre-loaded with four videos and 16 photos.
Viewing Pictures and Videos
Tap to launch the Photos App.
Tap to view the first image (most recent photo or video).
Navigate the available actions with a one-finger swipe,
forward or backward. Select an action with a one-finger
tap.
To delete, you can use the advanced gesture, two-finger
swipe forward.
To scrub a video use a one-finger swipe forward/
backward gesture.
1
2
3
1 2 3
tap tap
When deleting a file
you will be asked to
confirm.
swipe
(video)

15
Onboard Apps
2
Settings App
The Settings App is where users can go to adjust the
Blade's settings or check the status of any of the Blade’s
features.
Included features are:
• Battery
• Companion Link
• Connectivity (Wi-Fi, Bluetooth and Airplane Mode)
• Device (USB Mode, Display, Volume, Apps)
• System (Software Update, Date & Time, About)
1
tap swipe
3
Companion Link
The Companion Link App will allow you to connect a smart-phone (Android phones or iPhones) to
your Blade. More details on Companion App are in later pages.
Your Blade will have three potential connected states.
Not linked - Blade is not linked with the phone. Default state.
Connected - Blade is connected and linked with the phone.
Linked but not connected - Blade and the phone are linked but are not
actively connected because Bluetooth is either OFF or not in range.
or or

16
Onboard Apps
Settings App
USB Mode
Blade currently has three USB modes.
MTP - This is the default mode. Your
connected device will show Blade with
media icon under Devices and Drivers. It
will show Blade’s SD Card (if installed)
and internal storage. Internal storage will
show all available folders including:
DCIM, Alarms, Download, Movies, Music,
Notifications, Pictures, Podcasts and
Ringtones.
PTP - Your connected device will show
Blade with camera icon under Devices
and Drivers. It will only show Blade’s
internal storage even if an SD card is
installed. Internal storage will only show
the DCIM and Pictures folders.
Charge Only - The device will not show
internal storage and media files.
Haptic Feedback (Vibration)
The haptic feedback feature on Blade is
currently under development and is
functioning on a limited basis.
The vibration can be turned ON/OFF and
there is test to check vibration on both sides
of the Blade.
Time and Date
You can adjust the date and time settings to
meet your specific needs. Adjustable
features include: Date, Time, Time Zone and
12/24 Hour Format.
Wi-Fi
Blade is Wi-Fi enabled. The
Settings App allows you to turn Wi-
Fi ON/OFF, add networks and save
networks. Network specific
settings and details are also
accessible.
Bluetooth
Blade is Bluetooth capable and
can be paired with any standard
Bluetooth device, including:
headsets, headphones, speakers
and mouse.
Through the Settings App you can
turn Bluetooth ON/OFF, add/
remove devices and pair devices.

17
Onboard Apps
Settings App
Software Update
Software updates are installed via Wi-Fi
directly onto your Blade. Here you can: check
for and install updates, check the current build
of your Blade and change the frequency of
Update Alerts.
Be sure battery level is at 50% or higher
before running an update.
Blade will reboot automatically when
installation is complete.
Updating the software does not remove
any personal data.
Audio
The Blade has two built-in microphones that are used during video recording
and by applications that require voice input. To listen to audio from the Blade,
you can either connect a Bluetooth speaker, Bluetooth headphones, or wired
headphones.
The Wired Headset Adapter cable allows any wired earbuds or headphones with
a standard 3.5mm connector to be connected to the Blade. To connect, plug
the adapter cable into the USB port of the Blade, and plug the headphones into
the headphone jack of the adapter cable.
The wired headphone adapter cable does not support microphone input. The
built-in microphones on the Blade will continue to be used whether or not the
attached wired headphones include a microphone.
A USB charging cable may optionally be connected to the wired headphone
adapter cable to charge the Blade while using headphones. Only USB charging
functionality is available through this adapter cable, USB data connections to a
computer are not possible.

Several task specific keyboards are
included in the BladeOS. When character
entry is required, the appropriate keyboard
will appear automatically.
For example, if text is required to be
entered, a text specific keyboard will be
displayed. If a numeric password needs
to be entered, a numeric keyboard will be
displayed.
A one-finger hold gesture on a key
will show options for that
character.
18
Keyboard
Text
Text Keyboards
Numeric Keyboards
Numbers Numeric Passwords Phone Number
Date and Time Date Time
Multiline Text
Symbols Caps Lock

19
Companion App
Companion App is an app used to control Blade’s
settings from your smart-phone. To enable
advanced features like installing apps, updating
settings, and receiving notifications, connect your
Vuzix Blade to your iOS or Android phone via the
Companion App.
Install the Vuzix Blade Companion App.
Find the Vuzix Blade Companion App on the
App Store or Google Play Store (Search for
"Vuzix Blade") and install it on your phone.
To link Vuzix Blade, on your Phone, open
the Companion App and select "Start
Setup", follow the instructions to link your
Blade with the Companion App.
After linking your Blade to your phone,
select Settings > General Settings > Login,
to log into your Vuzix Account. Your Blade
is now linked to the Vuzix Apps Store and
will show up under your devices.
Companion App has three tabs, Home tab
showing the Blade dashboard, Apps tab to install/
uninstall applications on to the Blade and
Settings tab to configure the settings of the
Companion app and also to configure the settings
on the Blade.
The ability to
transfer photos and
videos from Blade to
smartphone will be
available in future
releases.

20
Learning More
Please register your Vuzix Blade AR Smart Glasses in the
Developer Center at www.vuzix.com/developers.
As a developer, registration gives you access to Vuzix’s
suite of developer tools including: product documentation,
sample code, and more.
Visit www.vuzix.com/support/blade-smart-glasses to
reference the documentation on Vuzix Blade.
Visit www.vuzix.com/contact for technical support and
other Vuzix contacts.
For safety, warranty and regulatory information, go to the
Vuzix legal page at https://www.vuzix.com/support/legal.
Additional information on the Vuzix Blade AR Smart
Glasses is available at
vuzix.com ׀ vuzix.eu ׀ vuzix.jp
© Vuzix 2018. This user manual is subject to change. Before using
this product, please read the online Safety Instructions at https://
www.vuzix.com/support/legal. All trademarks belong to the
respective owners.
447PB0001 (0001)-USER’S MANUAL, BLADE, US
Other manuals for Blade
2
Table of contents
Other Vuzix Smart Glasses manuals

Vuzix
Vuzix M300 User manual

Vuzix
Vuzix M400C User manual

Vuzix
Vuzix Blade 494 User manual

Vuzix
Vuzix STAR 1200XLD User manual

Vuzix
Vuzix Smart Swim SS-147B User manual

Vuzix
Vuzix M100 User manual

Vuzix
Vuzix Wrap 1200DX User manual

Vuzix
Vuzix Blade User manual

Vuzix
Vuzix CamAR User manual

Vuzix
Vuzix Blade User manual

Vuzix
Vuzix Star 1200 User manual

Vuzix
Vuzix M300 User manual

Vuzix
Vuzix M400 User manual

Vuzix
Vuzix Smart Swim User manual

Vuzix
Vuzix M4000 User manual

Vuzix
Vuzix SHIELD 492 User manual

Vuzix
Vuzix BLADE 2 User manual

Vuzix
Vuzix M300XL User manual

Vuzix
Vuzix M400 Installation instructions manual

Vuzix
Vuzix M300 User manual