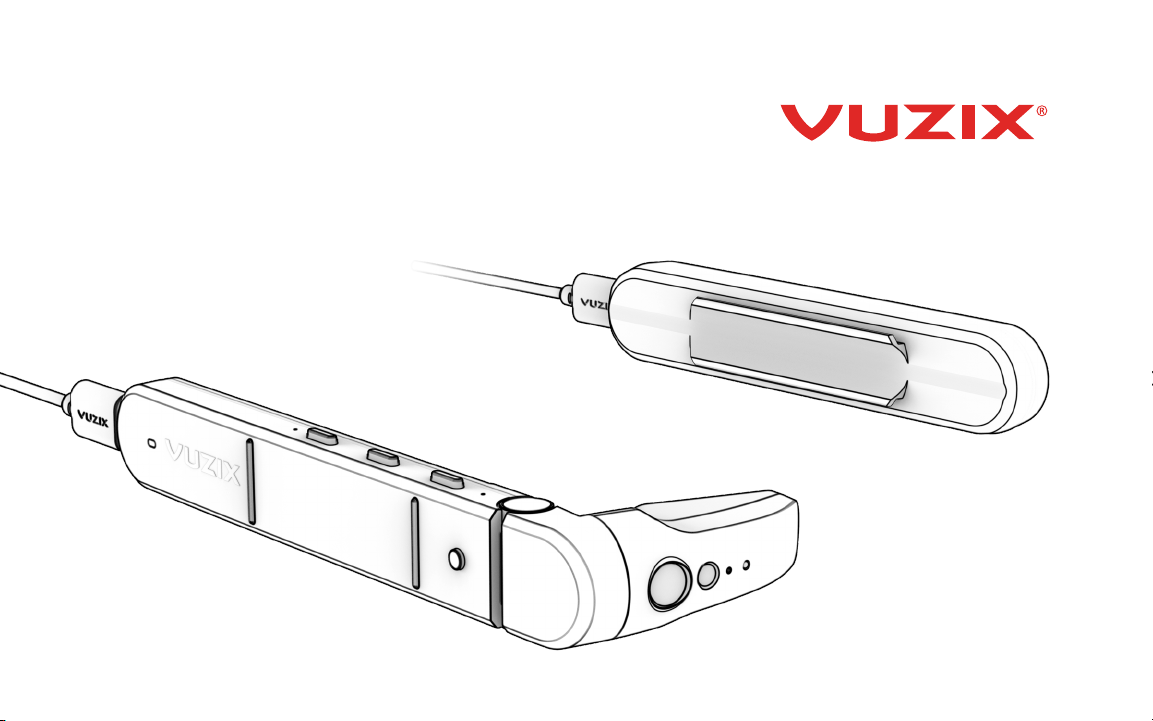
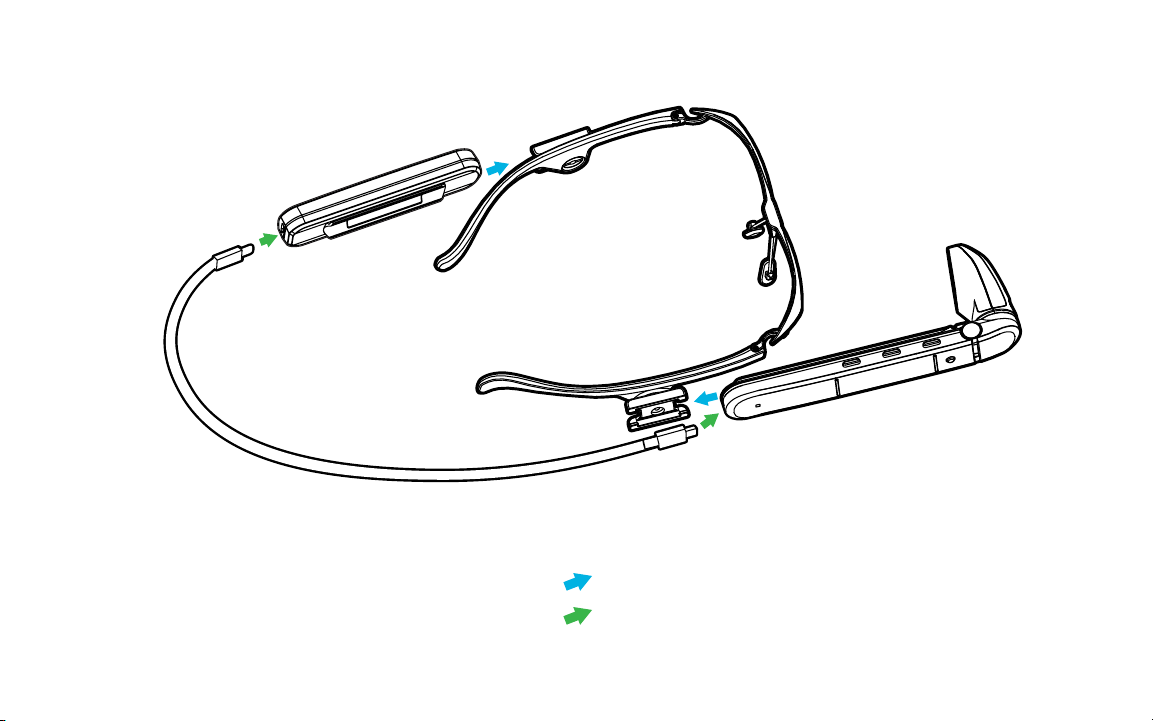
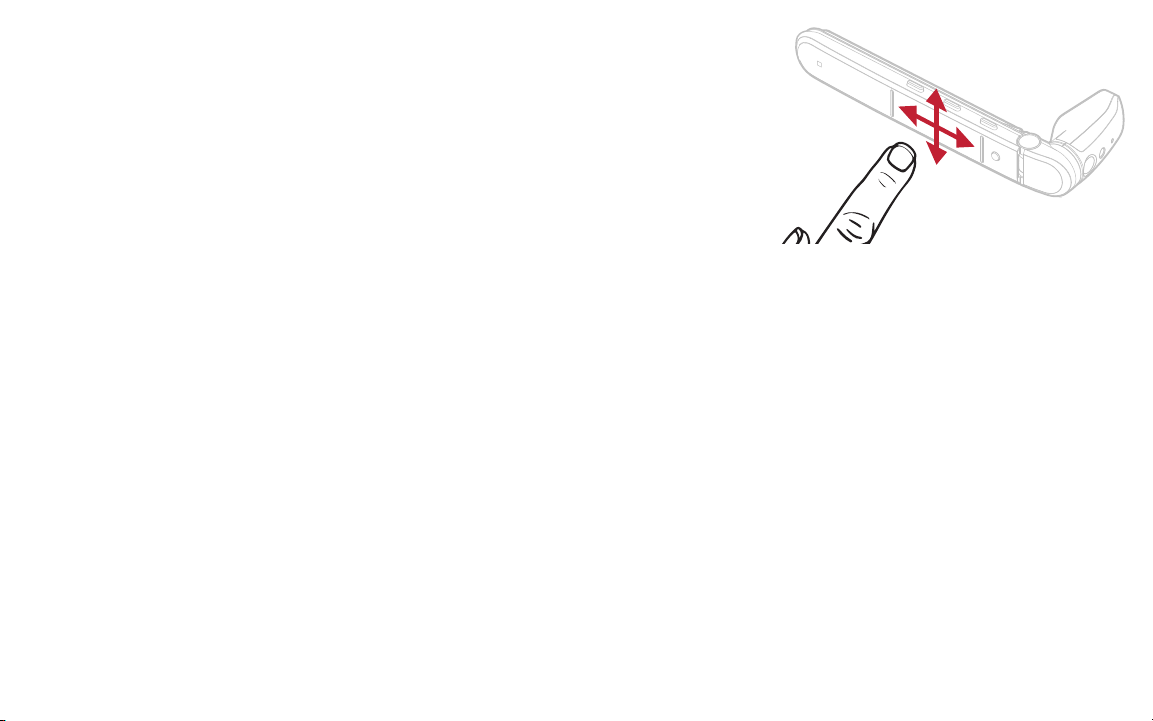
Vuzix M4000 User manual

M400
User Manual V2.0
Model 472

CONGRATULATIONS ON YOUR NEW VUZIX M400 SMART GLASSES SYSTEM
Your M400 Smart Glasses System is an ergonomically designed,
wearable Android-based computer with Wi-Fi connectivity,
voice-command functionality and HD camera — right out of the
box, including:
• M400 viewer with adjustable display screen
• USB-C Battery
• USB-C to USB-C power cable
• USB-A to USB-C cable (for charging the USB-C Battery)
• M-Series Lens-less frames
• Soft case for storage
02

03
CHARGING FOR FIRST-TIME USE
Charge battery before use with wall charger, wait until all
three LEDs are solid.
Can take up to two hours if the battery is fully empty.

Assembling the M400 mounting system
Power to M400 from Battery
USB-C Battery
USB-C to
USB-C Cable
Viewer
04

05
ASSEMBLING YOUR M400 SMART GLASSES SYSTEM
1. The viewer will be worn on the dominant eye. Before attaching the viewer to either side of the
Smart Glasses frames, determine your dominant eye for optimum use of M400 capabilities.
2. Attach viewer to the side of the frame by sliding the mounting rail onto the temple mount on
the frames. Once properly fitted, the unit will be adjustable by sliding forward and backward.
3. Using the same mounting process, attach the USB-C battery onto the other side of the frames.
4. Plug one end of the USB-C cable into the viewer and the other end into the battery.
5. When ready to wear your M400 Smart Glasses, lift the power cable over
your head to rest on your shoulders as you place the Smart Glasses as
you would a pair of glasses.
6. Ear hooks and alternate nose pads are available for proper fit.
DETERMINE YOUR DOMINANT EYE
Extend your hands, placing them together to make a small triangle between your thumbs
and knuckle. Keeping both eyes open, center a nearby object inside the triangle. Close each
eye one at a time. Notice how the object moves out of view when one eye is closed? When
the object remains in view, the open eye is your dominant eye.

06

FOCUSING NEAR-FIELD
First time users may find some challenges focusing their near-field
vision on the M400 display. Making sure to keep both eyes open,
some users may need up to 20 minutes to adjust.
1. Make sure the Smart Glasses frames are resting comfortably on your head. Frames can
be worn over the top of the majority of regular prescription eyewear. The nosepiece of
the frames can be adjusted to fit comfortably and securely.
2. After mounting the viewer, adjust the viewer as shown until it is a comfortable distance
and preferred position from your dominant eye.
3. Adjust the eyepiece as shown until you can see the full image.
4. Additional mounting options, including frames with prescription lenses, safety frames,
hard hat, headband mounts, and more, can be found online at Vuzix.com under
Products > M400 Smart Glasses > Accessories.
07
WEARING THE M400

08
NAVIGATING THE M400
Touchpad
Power Button
Back
Navigation Buttons
Mounting Rail
Display
Camera
Flash/Flashlight
Recording LED
Power LED
USB-C Port
Center Front

TOUCHPAD
One finger:
• Tap to activate selection or
turn on the screen
• Hold to activate menu
• Swipe up/down/left/right to
move selection
Two fingers:
• Tap to go back or return
• Hold to go to home screen
• Swipe back for backspace
• Swipe forward for delete
• Swipe up to raise volume
• Swipe down to lower volume
Three fingers:
• Tap to turn off screen
BUTTONS
Short Press for primary functions:
Front: Forward navigation
Center: Back navigation
Back: Select
Long Press (approx. one sec) touch for secondary functions:
Front: Open menu
Center: Exit to home menu
Back: Back one step
VOICE
The M400 can be activated by “Hello Vuzix” when
properly configured. The M400 will listen for voice
commands for 15 seconds by default.
To activate Voice control, open the Settings menu and
navigate to System -> Speech Recognition. Enable the
speech recognition.
A full list of voice control commands can be viewed from
that same settings menu. 09

10
M400 POWER LED
Color Meaning
Green On
Blinking red Too low to power on, keep plugged in to USB to charge
IF THE BATTERY RUNS OUT DURING USE
If the battery runs out of power the viewer will display a message on the screen
1. Unplug the USB cable from the battery
2. Remove the battery from the mount and replace with a charged one
3. Plug the USB cable back in

11
POWERING DOWN AND RESTARTING
Press and hold the power button on the viewer to access the power menu.
• To reboot, highlight the reboot entry and activate it.
The viewer will power off and automatically turn back on.
• To fully power off, highlight the power off entry and activate it. The viewer will
ask you to unplug the USB cable. After you unplug the cable the viewer will fully
power off. Leave the cable disconnected while the viewer is off. The battery will
power off as soon as it’s unplugged.
If the USB cable is unplugged the device will power off after about five minutes. If the
internal battery is already discharged this may occur sooner.

12
PREINSTALLED APPLICATIONS
The M400 comes preinstalled with several standard applications
such as Camera, Gallery and QR and barcode Scanner.

13
CONNECTING TO WI-FI
QR code setup:
1. The easiest way to connect to Wi-Fi is by
scanning a QR code — QR codes can be
securely created using vuzix.com/wifiQR from
your phone or computer.
2. Open Scanner from the main carousel.
3. Point the M400 at the phone or computer
screen that is displaying the QR code to scan.
Manual setup:
1. At the home page, select the Settings app.
2. Select Network & Internet then Wi-Fi menu
option and then press the select button to
activate Wi-Fi.
3. Once the list of available networks populates,
highlight the preferred network and select.
4. Enter password using displayed keyboard,
Select Connect.

REGISTERING YOUR DEVICE
1. Register your device by logging on
to your Vuzix App Store account
from a computer or phone at
vuzix.com/appstore.
2. Follow the instructions on the website
3. Once registered, you will see the serial
number of your M400 under your
account.
INSTALLING APPLICATIONS
Application can be installed on the M400
via the Vuzix App Store. The Vuzix App
Store will install and manage applications
via the OTA (Over the Air) mechanism and
will require Wi-Fi connectivity.
For instructions and additional
information about installing applications
and using the Vuzix App Store, visit:
www.vuzix.com/support.
The M400 supports ADB (Android Debug
Bridge) as an alternative mechanism for
advanced users to install applications.
serial number
location
14

GETTING THE LATEST UPDATES
The M400 will automatically check for updates once it is connected
to Wi-Fi. Click Update on the following pop-up.
NOTE: If your corporate firewall prevents access to the external
website, your system administrator may provide additional settings
for your M400 or may provide a software update offline.
15

DEVELOPING FOR M400
Developer documentation is available at vuzix.com/developers.
In order to power the unit during development, please note:
• The included battery does not support data pass-through.
• The viewer should be plugged into the developer’s machine with
a USB C-to-C cable for the best experience.
• If a USB A-to-C cable must be used, then using a CDP-capable
port will provide enough power. If the USB-A port is not providing
sufficient power, functions of the device may become impaired
without notice, and the viewer may shut down completely.
16

17
TROUBLESHOOTING COMMON ISSUES
SYMPTOM DIAGNOSIS REMEDY
M400 will not turn on and
status LED is not lit.
Battery is discharged. Connect battery to wall charger for
up to two hours for a full charge, then
connect battery to viewer.
M400 will not turn on and
status LED is blinking red.
Internal battery is
discharged.
Leave viewer connected to USB power.
System will begin booting within a few
minutes.
M400 display is blank but
status LED is lit.
Screen has turned off to
conserve power.
Tap any button to wake the screen.
M400 powers off after
20-30 minutes while
plugged in to USB.
USB source does
not provide enough
current.
M400 can draw up to 1.5A while in
operation.

CLEANING AND CARE
• Clean the viewer and battery with a damp cloth and mild
detergent if necessary. Do not use all-purpose cleaners as
these may damage the seals and impair the water resistance.
• Make sure that there is no standing water in the USB
connector before inserting the cable.
• Do not insert sharp objects into any holes in the viewer as this
may damage the mesh and impair the water resistance.
• Do not use metal objects to clean the USB port as this may
cause electrical damage.
18

19
REGULATORY INFORMATION
Regulatory information can be viewed from the Settings application:
1. Open “System”
2. Open “About Glasses”
3. Open “Regulatory Labels”
Radiation Exposure Statement – Europe
The maximum combined SAR head measurements (limit 2.0 W/kg)
WLAN 2.4G 0.011 W/kg 10 g Head SAR
WLAN 5.2G 0.014 W/kg 10 g Head SAR
FCC/IC/MIC Statement
Operation of this device in the band 5150-5250 MHz is restricted to
indoor use only.

FOR MORE INFORMATION ON THE M400
AND ACCESSORIES, VISIT:
vuzix.com | vuzix.eu | vuzix.jp
Vuzix Corporation
25 Hendrix Road
West Henrietta, NY 14586
©Vuzix 2019. This User Manual is subject to change.
Please read the included safety information, also at www.vuzix.com/support/safety-warranty-m-series before using this product.
All trademarks belong to respect owners.
472PB0002(0003) – M400 USER MANUAL
LEARNING MORE
Visit www.vuzix.com/support/M400-smart-glasses for more information on the
M400 or contact technical_support@vuzix.com for additional information.
This manual suits for next models
1
Table of contents
Other Vuzix Smart Glasses manuals

Vuzix
Vuzix Blade User manual

Vuzix
Vuzix M300 User manual

Vuzix
Vuzix Blade User manual

Vuzix
Vuzix Blade User manual

Vuzix
Vuzix Smart Swim User manual

Vuzix
Vuzix Star 1200 User manual

Vuzix
Vuzix Blade 494 User manual

Vuzix
Vuzix SHIELD 492 User manual

Vuzix
Vuzix STAR 1200XLD User manual

Vuzix
Vuzix M400C User manual

Vuzix
Vuzix M400 User manual

Vuzix
Vuzix M400 Installation instructions manual

Vuzix
Vuzix Smart Swim SS-147B User manual

Vuzix
Vuzix CamAR User manual

Vuzix
Vuzix M300XL User manual

Vuzix
Vuzix M300 User manual

Vuzix
Vuzix BLADE 2 User manual

Vuzix
Vuzix Wrap 1200DX User manual

Vuzix
Vuzix M100 User manual

Vuzix
Vuzix M300 User manual