Vuzix M300 User manual

Getting Started
Version 1.0, Dec 12, 2017

Table of Contents
Overview.......................................................................................................................................... 3
M300 Device Setup ......................................................................................................................... 3
Unboxing and Assembly .............................................................................................................. 3
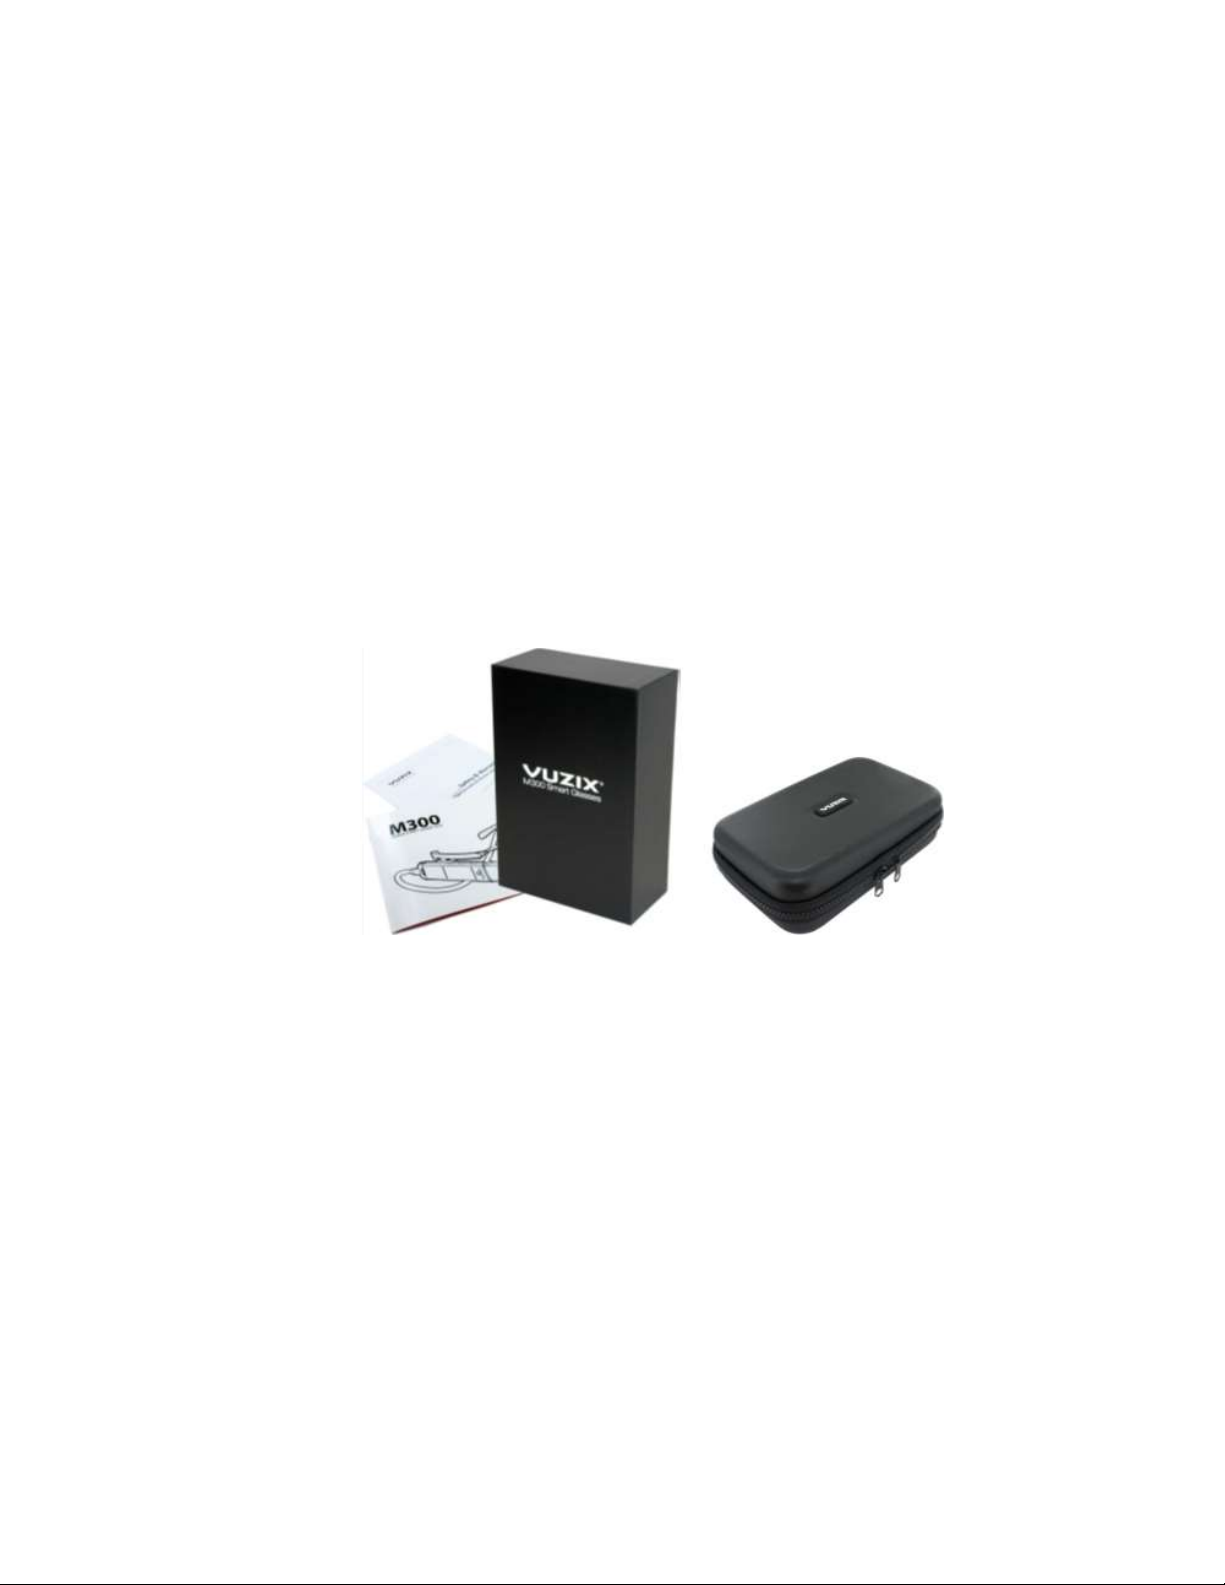
Package Contents .................................................................................................................... 3
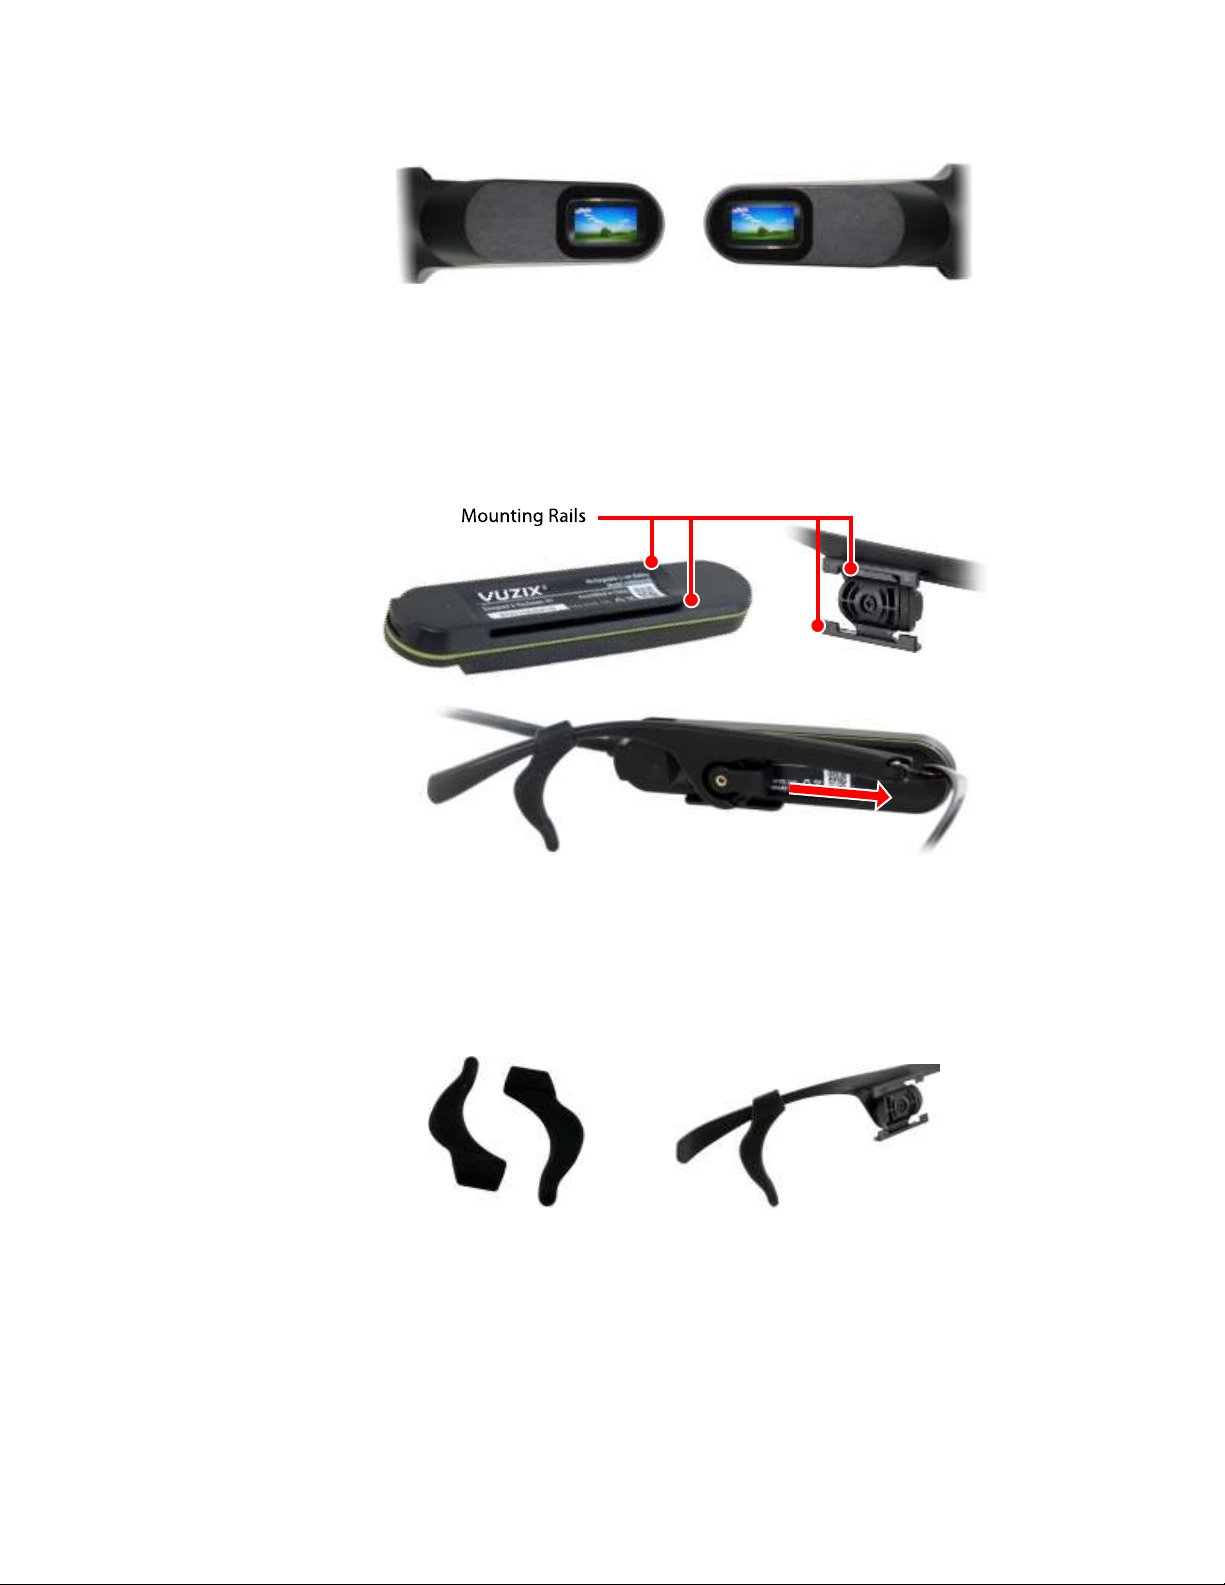
Device Layout & Components ................................................................................................. 5
Nose Pad Options .................................................................................................................... 6
Determine Your Dominant Eye................................................................................................ 6
Assembly.................................................................................................................................. 6
Ear Hooks................................................................................................................................. 7
M300 Power Button ................................................................................................................ 8
Display Adjustment ................................................................................................................. 8
Charging the M300 and First Boot .............................................................................................. 9
Connecting to WiFi .................................................................................................................... 12
Setting App Permissions............................................................................................................ 12
Vuzix Basics Video –M300 User.................................................................................................... 15
Starting the App......................................................................................................................... 16
Connecting a Call....................................................................................................................... 17
Disconnecting a Call................................................................................................................... 17
Vuzix Basics Video –Desktop User................................................................................................ 18
Additional Documentation and FAQs............................................................................................ 20
US Customers ............................................................................................................................ 20
EU Customers ............................................................................................................................ 20

OVERVIEW
This guide is intended to guide you through initial steps to begin using your M300 and the Vuzix
Basics Video application. Please be sure to follow all of the instructions below to properly set up
and configure your M300 prior to attempting your first call with Vuzix Basics Video.
For more in depth information on using the M300 and its features, refer to the full M300 User
Manual.
M300 DEVICE SETUP
Unboxing and Assembly
Package Contents
Your M300 Smart Glasses package contains a Safety & Warranty document, a
Quick Start Guide and a carry case containing the various M300 Smart Glasses
components and cables.

Your M300 Carry Case contains:
Also included (not pictured) are a pair of ear hooks to help secure the frame on
the user’s head, as well as a set of interchangeable frame nose pads for
comfort. See the section Device Layout & Components below for more detail.
Inspect the package’s contents. In the unlikely event that any items are
damaged or missing contact your purchase source immediately.
•If you purchased your M300 Smart Glasses directly from Vuzix, contact
Vuzix Customer Service in the region in which they were purchased. (see
Customer Service)
•If you purchased your M300 Smart Glasses from another vendor,
contact that vendor directly.

Device Layout & Components
Main Unit
Hot-Swap Battery
Smart Glasses Frame

Nose Pad Options
There are three different nose pad options that come with your M300. The
default set of pads that sit on either side of the nose, and the included alternate
full bridge pads come in two sizes and span the bridge of the nose for added
comfort and stability. These pads can be swapped with the included
screwdriver. It is recommended to compare each and use the one that fits you
best.
Determine Your Dominant Eye
Each of us has a dominant eye, also known as an eye preference. This is a
tendency to prefer visual input from one eye to the other, similar to being right
or left-handed.
For the M300 Smart Glasses to be most effective, its display should be
positioned in front of your dominant eye –on the left or right side of the Smart
Glasses Frame.
Follow the steps below to identify your dominant eye.
To identify your dominant eye:
•Hold your hands out in front of yourself, forming a triangle with your
forefingers and thumbs, as shown in the illustration.
•With both eyes open, frame an object in the triangle.
•Without moving your hands, close one eye only then reopen it and close
the other.
•The eye with which you can see the object through your hands clearly is
your dominant eye. Repeat as necessary until you can clearly determine
your dominant eye.
Assembly
The Hot-Swap Battery and Main Unit attach to the M300 Smart Glasses Frame
by sliding the grooves on the back of either component into the corresponding
mounting rails on the frame.
The Main Unit can be positioned on either side of the frame, and the display will
automatically rotate the image to be properly oriented for either side.

To mount the M300 components onto the frame:
•Align the grooves on the back the Main Unit into the corresponding
slots of the mounting bracket on the side of the frame which
corresponds to your dominant eye.
•Align the grooves on the back the Hot-Swap Battery into the
corresponding mounting bracket on the other side of the frame.
Ear Hooks
In some operating environments, a more secure fit may be required to ensure
the M300 will remain stable. Optional Ear Hooks are included with your M300 to
help secure the frame.
The Ear Hooks slide over the ends of the M300 Smart Glasses Frame temple
arms and can be adjusted to fit your needs. If you encounter any difficulty
getting the Ear Hooks to slide onto the temple arms, applying a small amount of
moisture can make this process easier.
Left-eyeOrientation Right-eyeOrientation

M300 Power Button
Using the Power Button:
•If the M300 is powered off, press and hold the Power Button for 2 –3
seconds until the Power Indicator flashes to power on the M300.
•If the M300 is powered on, a quick press of the Power Button will wake
the device from sleep mode or put it to sleep.
•If the M300 is powered on, pressing and holding the Power Button for a
full second will access the power options menu.
•Press and hold the Power Button for 10 seconds to force a hard
shutdown of the M300.
Display Adjustment
The M300 Smart Glasses can be worn over most prescription eyeglasses when
mounted to the included Smart Glasses Frame. Optional frames which can include
prescription lenses are available for order through the Vuzix website.
The M300 Smart Glasses allow for a great deal of adjustability:
•Mount the Hot-Swap Battery and Main Unit on either the left or right
side of the Smart Glasses Frame to accommodate positioning relative to
your dominant eye.
•The Main Unit and Hot-Swap Battery can be slid forward and backwards
on the mounting rail to comfortably position the distance to your eye as
well as for balance.
•The display module can be adjusted on two axes to achieve the optimal
viewing angle.
•Pivot the display and main unit up and down to position the display at
the desired height.

To adjust the display position:
•Press the Power Button on the Main Unit to power up your M300 Smart
Glasses.
•Put on the M300 Smart Glasses the same as you would put on
traditional eyeglasses, looping the power cord behind your head like a
tether strap.
•Slide the Main Unit forward or back to position the display at a
comfortable viewing distance, about 1 inch (25 mm) in front of your
dominant eye.
Experiment with each of the swivel points to achieve a display position and
angle that provides a clear view of the M300 Smart Glasses screen.
First-time users may encounter some challenges in focusing their near-field vision
on the display without closing their non-dominant eye. An adjustment period is
common and the time will vary from user to user. For the best user experience and
for safety, both eyes should be kept open when operating the M300
Charging the M300 and First Boot
Your M300 Smart Glasses contain two batteries, both of which must be fully
charged prior to their initial use. The Hot-Swap Battery module contains the
primary battery and a standby battery is contained in the Main Unit to keep the
M300 powered during swapping of the Hot-Swap Battery modules.
The Hot-Swap Battery can be charged independently using a USB power source
providing a minimum of 500mA. You can also connect the Main and Hot-Swap
p

Battery units together using the Power Cable to charge them simultaneously
using a USB power source providing a minimum of 1.5A.
Standard USB ports on computers provide only 500mA. A USB power source
providing a minimum of 1.5A is required to charge the M300 while connected to
the Hot-Swap Battery.
The connectors on each end of the Power Cable are interchangeable and can be
connected to either the Hot-Swap Battery or Main Unit. The tab on the heel of
the connector which secures the connector can be used to help align the
connector for a proper connection.
To connect the Power Cable:
•Align the positioning tab on the heel of the connector with the
corresponding indent in the female connector on the Hot-Swap Battery,
then rotate the front edge of the connector down until its spring clip
clicks into place.
•Repeat the above step to connect the other end of the Power Cable to
the Main Unit.
To release the Power Cable:
•Pull back the spring clip on the back of the Power Cable connector and
then lift the front end of the connector to release. The connector should
release easily, without any significant amount of force required.
PositioningPin
ReleaseClip

To charge to Primary and Standby batteries:
•Insert the Micro-B USB cable into the USB port on the Hot-Swap Battery,
below the Power Cable connector.
•Connect the USB Charge Cable to a USB power source providing a
minimum of 1.5A. Most standard mobile phone chargers will be
sufficient, however please refer to the annotations on your charger to
ensure it will supply sufficient current.
When connected to a power source, the charging LED on the back of the Hot-
Swap Battery will illuminate. An amber light is displayed while the battery is
charging and will turn green when fully charged. Charging may take up to two
hours.
Due to the architecture needed to support the Hot-Swap Batteries, the M300 will
continue to consume a small amount of power, even when powered off if the Hot-
Swap Battery and Main Units are connected. To prevent the batteries from
discharging when the device is not in use, disconnect either end of the Power Cable
connecting the Hot-Swap Battery and Main Unit.
p

Connecting to WiFi
From the WiFi section of the M300 Settings application, enable WiFi by toggling from Off to
On. The M300 will then scan for available networks. Scroll down to the network you want to
connect to and select it. A standard Android keyboard will come up if the network is
password protected. Use this keyboard to enter the password.
You can also use the bar code scanner to scan in an encoded network and password. You
can use almost any QR code generator to do this. An example might be: https://qifi.org
Once the QR code is created, you simply scan the QR code using the Scanner app or by
selecting “Scan QR code” in context menu in WiFi settings.
Advanced WiFi settings can be accessed from the context menu on the WiFi settings page,
by long-pressing on the forward button closest to the M300 display and selecting
"Advanced". This will show you your WiFi MAC and IP address, as well as allow you to
modify other advanced settings such as restricting the wireless to 5GHz WiFi bands.
Setting App Permissions
Before you can use the application, you must set the required permissions for the camera
and microphone. Navigate to the Settings app.
Figure 1 - Settings App
Once you enter the settings, navigate to “Apps” under the Device category.

Figure 2 - App Settings
]Select the “Apps” menu and then navigate to the “Basics Video”.
Figure 3 - Vuzix Basics Video
Once you select the Basics Video app, navigate to the permissions menu.

Figure 4 –Permissions
Ensure the permissions are set for the Camera and Microphone (storage isn’t required).
Figure 5 - Permissions Enabled
When you return to the App Info menu, you will now see the permissions listed.

Figure 6 - Permissions Listed
You are now ready to run the Vuzix Basics Video application.
VUZIX BASICS VIDEO –M300 USER
Once you have your M300 powered on, you will see the Basics Video application installed as
shown in Figure 7.
Figure 7 - Vuzix Basics Video App

Starting the App
Once the app settings and WiFi has been configured, you are now ready to start the app. Return
to the App Carousel and navigate to the Vuzix Basics Video app. When you start the app you will
see the following screen.
Figure 8 - App Home Screen
The details for each field are:
Session ID: In this example “VB208A7”. This is the ID you will need to send to the remote expert
to join your video session. A new key is auto generated each time you start the application.
Connect Button: This button will connect you to the video call.
Green Audio Bar: The green bar at the bottom shows the microphone level and verifies the
application has the correct permissions.
Camera view here

Connecting a Call
Figure 9 - Call Connected
To start the call, press the M300 select button. Once started, you will see “Connected” at the
bottom of the display.
Disconnecting a Call
To disconnect a call, simply press the M300 select button and you will see the call status change
to disconnected.

Figure 10 - Call Disconnected
When a call is disconnected, the remote expert will no longer be able to see the M300 camera
view or hear audio from the microphone.
VUZIX BASICS VIDEO –DESKTOP USER
For the remote desktop user, you will use a web portal to join the video call. Visit
https://www.vuzix.com/basicsvideo/connector.html to access the portal.

Figure 11 - Web Portal
On this screen you will need to enter two pieces of information:
Display Name: Name of the desktop user. It will show where “Preview” is in Figure 11.
Resource ID: This is the 7 digit ID (VBXXXXX) provided by the M300 user.
Once you enter this information and ensure your microphone and speaker settings are correct,
you can start the call.
The supported browsers for the Basics Video web portal are: Chrome, Firefox, and Opera.
Other manuals for M300
2
Table of contents
Other Vuzix Smart Glasses manuals

Vuzix
Vuzix M400C User manual

Vuzix
Vuzix M300 User manual

Vuzix
Vuzix Blade 494 User manual

Vuzix
Vuzix M400 User manual

Vuzix
Vuzix CamAR User manual

Vuzix
Vuzix M400 Installation instructions manual

Vuzix
Vuzix SHIELD 492 User manual

Vuzix
Vuzix BLADE 2 User manual

Vuzix
Vuzix Blade User manual

Vuzix
Vuzix M4000 User manual

Vuzix
Vuzix Blade User manual

Vuzix
Vuzix STAR 1200XLD User manual

Vuzix
Vuzix Blade User manual

Vuzix
Vuzix Smart Swim SS-147B User manual

Vuzix
Vuzix Star 1200 User manual

Vuzix
Vuzix M300XL User manual

Vuzix
Vuzix Wrap 1200DX User manual

Vuzix
Vuzix Smart Swim User manual

Vuzix
Vuzix M100 User manual

Vuzix
Vuzix M300 User manual