manuals.online logo
Brands
  1. Home
  2. •
  3. Brands
  4. •
  5. Assa Abloy
  6. •
  7. Door Lock
  8. •
  9. Assa Abloy Valencia Filip User manual

Assa Abloy Valencia Filip User manual

User Manual
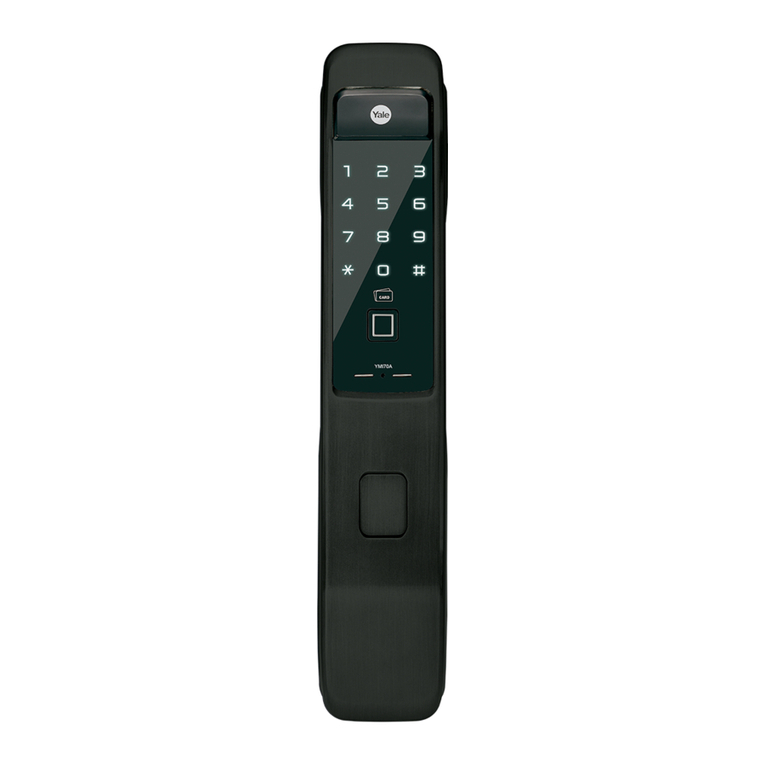
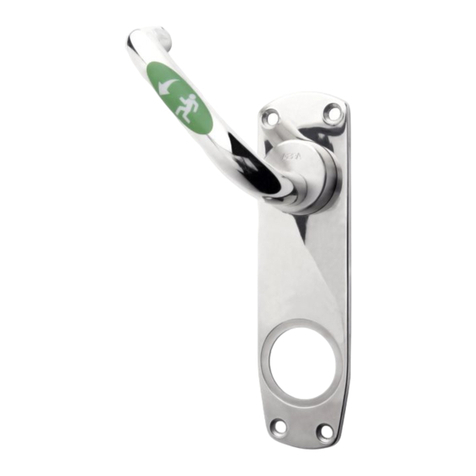
Filip Smart Door Lock
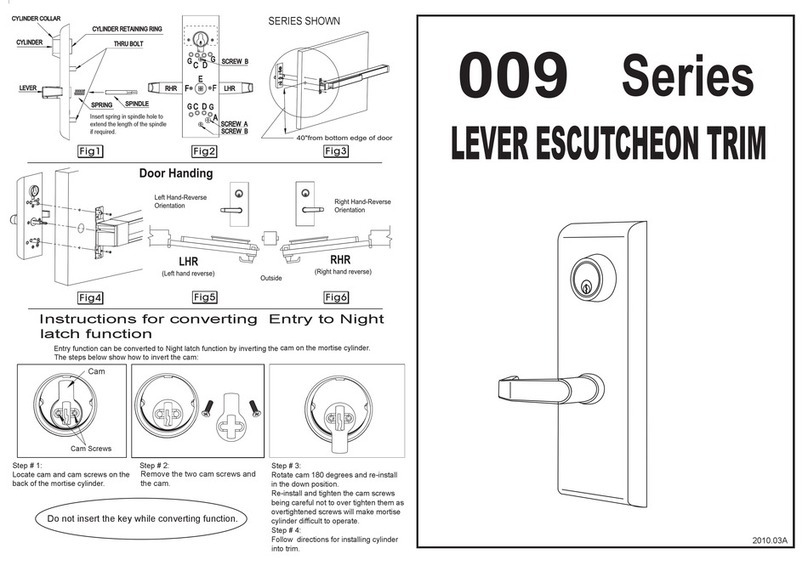
Product Layout:
Reminder: Please keep in/out panel inside clean when install
Please keep internal/external panel clean before installation
2 3
Battery Cover
Battery Box
Reset Button
Inside Handle
Night Latch
Snib
Installation
Screw
Installation
Screw
Key Cover
Outside Handle
Fingerprint
Scanner
Door Bell
RFID Card
Scanner
Keypad
180°
1.Use a cross
screwdriver to
unscrew the
handle screw
in the square
hole.
2.Pull out handle and rotate
it 180° clockwise or
counterclockwise, then
reinstall to the original posi-
tion and tighten the handle
screw.
1.Push
latch in.
2.rotate latch
180°.3.Confirm
in/out side,
screw always
go along
with inside
panel, if
required to
reverse,
please screw
out and
screw in other
side
and fix it
properly.
Change handle direction Lock body change direction
Outside panel
Inside panel
Screw
Battery box
cover
Lock body guide post
Screw
Spindle
Lock body
Lock body screw
Panel screw stud
1.Change handle & Lock Body opening direction, if necessary according to the door.
2.Put Lock body in cavity and tighten the lock body with installation screws.
.
3.After inserting spindle in square hole, make sure outside handle, spindle, lock core
& lock core hole all are in correct position and then tighten the outside panel on the
door.
Panel and lock body installation step:
Internal Panel External Panel
When connecting front & back panel, make sure connecting wise is not left outside.
Product Features:
.
User Addition:
1. Reset factory default: Press RESET at back of lock for 5 seconds, voice will
prompt reset succeed.
2. Register master/user:
2.1 Initial mode: Touch screen key pad for lights on and press # for
2 seconds and voice prompts addtions of master code.
2.2 Once master user is added:
a. Add new master: Touch screen for lights on and press #
for 2 seconds, voice prompts confirm master, input any registered master
and press # again to add master user (fingerprint /password)
b. Add new common user: Touch screen for lights on and press # for
2 seconds input any registered master user “and” voice prompts
“add user” to add new fingerprint, password and card etc.
3. Addition of “One Time password or Guest password”: Users can be
added for with password access which will provided access one time
and will expire after its used.
1. When Deleting fingerprint, one master user in fingerprint has to be left.
2. When keypad light is off use “0” as door bell.
Important Instructions:
1. After installation of lock please reset lock to factory default mode.
2. After factory default mode make sure to register 1 master user.
3. The handle is the key part for opening and closing door, and its flexibility ratio
directly influences the usage of door lock, hence, don't hang articles on handle.
4. Gently press fingerprint on the fingerprint sensor for registration of fingerprint.
Please don't press with great force to prevent scratching the fingerprint sensor.
5. This lock uses 4 AA high-energy alkaline batteries (1.5V). When it prompts "the
voltage is low, please replace battery" for the first time, the door can be opened
for about 100 times as per different battery capacities; At this time, the battery
should be replaced promptly to avoid inconvenience due to the exhausted
battery.
4 5
1. All fingerprint need to scan 3 times for addition.
2. Password is of 8 digit and has to be entered 2 times for addition.
3. Card is registered after voice prompts "add user" & scan card near RFID
scanner for confirmation.
4. After successful registration press * to exit.
3. Delete registered fingerprint/card/password:
3.1. Deleting individual fingerprint: Touch screen for lights on & long press 1 for
2 seconds. After voice prompts input fingerprint to delete, press fingerprint on
scanner to delete.
3.2. Deleting by user numbers: Touch screen for lights on & long press 1 for
2 seconds. After voice prompts input fingerprint code to delete enter user
number of fingerprint to delete.
3.3. Delete all cards: Touch screen for lights on & long press 2 for 2 seconds
press # to enter in to delete all cards option and # again to confirm deletion.
3.4. Delete corresponding password: Touch screen for lights on & long press 4
for 2 seconds at this time input password code and press # to confirm.
3.5. Delete all password: Touch screen for lights on & long press 4 for
2 seconds press # to delete all passwords.
● Multiple way to access: Fingerprint, Pin Code, RFID Card, & Mechanical Key.
● Fingerprint: Advanced semiconductor sensors with 360° scanner.
● Pin code Elegant keypad with code scrambling feature. Before correct password
can input 12 digital which can avoid password peeping.
● Dual authentication mode: Fingerprint mode ( master + common user ),
fingerprint + pin code, fingerprint + RFID card mode, After this setting dual
authentication will be required to access the lock at same time to open the
door, suitable for special occasions.
● Lock can have multiple access users capacity: Fingerprint ( 5 Master Users &
85 Normal Users ), Pin-code ( 5 Master Users & 15 Normal Users ), RFID cards
(99 Normal Users)
● Alarm: Tamper, low battery alarm and password protection.
● External power supply: Can use power bank with 5V for emergency power supply.
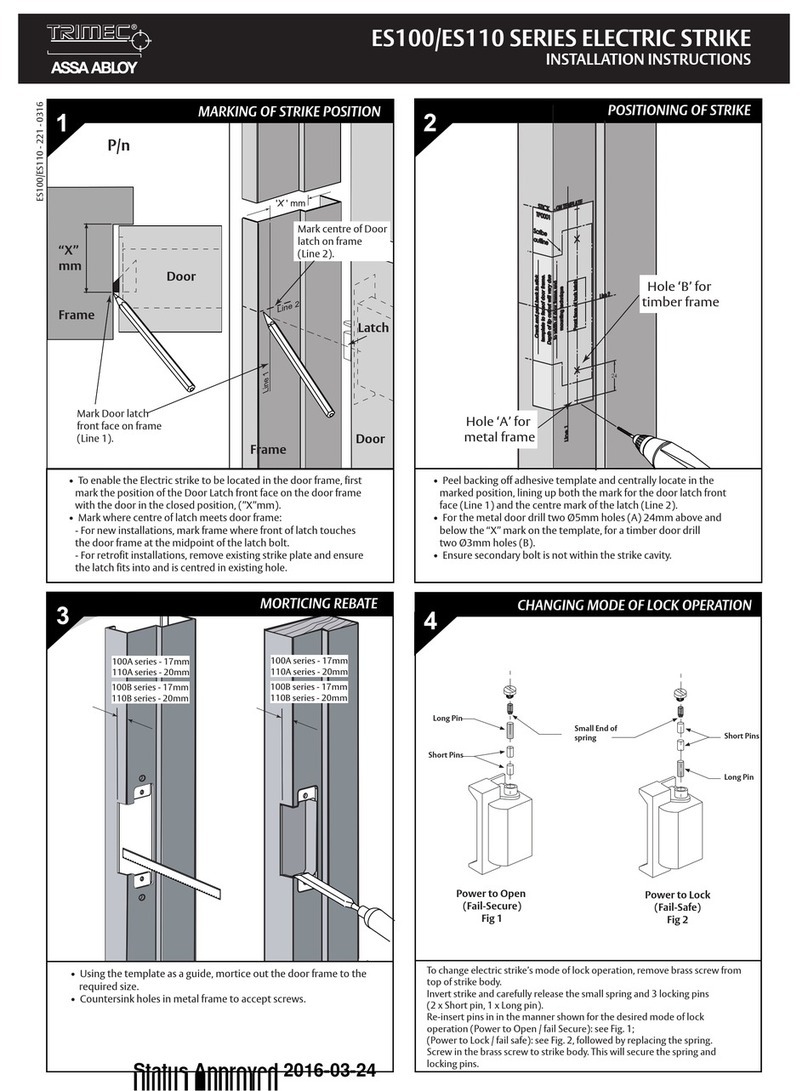
4. Put lock body guide post on the inside panel and make sure inside handle, spindle,
screws and stud are at right position.
Lastly, outside and inside panel should be connected with spindle at right position, if
required adjust accordingly & tighten screw.
Install battery cover, try opening by fingerprint, RFID card or pin code or manual key.
5.
6.
4. Checking lock information:
Touch screen for lights on 2 long press 0 for 2 seconds:
Press 1 To open with any registered user.
Press 2 For dual authentication with fingerprint.
Press 3 For fingerprint + password opening.
Press 4 For fingerprint + card opening.
Press 5 To get the lock storage status: Number of master users, number of
normal users, for fingerprint, RFID & Pin code access.
Press 6 To get the lock series information: XXXXXXXX
Press 7 For rest factory default and # to confirm.
5. Internal Forced Lock:Turn knob clockwise or counterclockwise 90˚to
enable Internal force lock ( only master and key can unlock).
6

Other Assa Abloy Door Lock manuals

Assa Abloy Lockwood Standalone Manual

Assa Abloy

Assa Abloy Lockwood Standalone Manual

Assa Abloy IKON eCLIQ SPARK N112 User manual

Assa Abloy

Assa Abloy IKON eCLIQ SPARK N112 User manual

Assa Abloy Yale Assure Lock SL Technical specifications

Assa Abloy

Assa Abloy Yale Assure Lock SL Technical specifications

Assa Abloy Sargent PE8700 Series User manual

Assa Abloy

Assa Abloy Sargent PE8700 Series User manual

Assa Abloy DC340 User manual

Assa Abloy

Assa Abloy DC340 User manual

Assa Abloy Corbin Russwin ED5800 Series User manual

Assa Abloy

Assa Abloy Corbin Russwin ED5800 Series User manual

Assa Abloy ADAMS RITE 4300 Series User manual

Assa Abloy

Assa Abloy ADAMS RITE 4300 Series User manual

Assa Abloy Effeff EX118P Series User manual

Assa Abloy

Assa Abloy Effeff EX118P Series User manual

Assa Abloy Yale Doorman User manual

Assa Abloy

Assa Abloy Yale Doorman User manual

Assa Abloy RIXSON 93 User manual

Assa Abloy

Assa Abloy RIXSON 93 User manual

Assa Abloy Corbin Russwin ED2400 Series User manual

Assa Abloy

Assa Abloy Corbin Russwin ED2400 Series User manual

Assa Abloy Emtek F20 User manual

Assa Abloy

Assa Abloy Emtek F20 User manual

Assa Abloy Securitron UnLatch Manual

Assa Abloy

Assa Abloy Securitron UnLatch Manual

Assa Abloy LOCKWOOD 3782 User manual

Assa Abloy

Assa Abloy LOCKWOOD 3782 User manual

Assa Abloy Corbin Russwin Access 600 CL33600 TCRNE1... User manual

Assa Abloy

Assa Abloy Corbin Russwin Access 600 CL33600 TCRNE1... User manual

Assa Abloy ePED 1386-00 User manual

Assa Abloy

Assa Abloy ePED 1386-00 User manual

Assa Abloy Sargent PE8500 Series User manual

Assa Abloy

Assa Abloy Sargent PE8500 Series User manual

Assa Abloy effeff Security lock 309 Series User manual

Assa Abloy

Assa Abloy effeff Security lock 309 Series User manual

Assa Abloy Union CodeGUARD 5 Assembly instructions

Assa Abloy

Assa Abloy Union CodeGUARD 5 Assembly instructions

Assa Abloy CL33700 TCPWI1 User manual

Assa Abloy

Assa Abloy CL33700 TCPWI1 User manual

Assa Abloy effef 118 User manual

Assa Abloy

Assa Abloy effef 118 User manual

Assa Abloy ENTR User manual

Assa Abloy

Assa Abloy ENTR User manual

Assa Abloy IP2326N Operating instructions

Assa Abloy

Assa Abloy IP2326N Operating instructions

Assa Abloy Sargent 6-Line User manual

Assa Abloy

Assa Abloy Sargent 6-Line User manual

Popular Door Lock manuals by other brands

ZKTeco ML10-ID user manual

ZKTeco

ZKTeco ML10-ID user manual

Locstar MINI General introduction

Locstar

Locstar MINI General introduction

HES 5900 Series installation instructions

HES

HES 5900 Series installation instructions

Gainsborough Austral Lock Virtus Two Point Hinged Door Mortice... installation guide

Gainsborough

Gainsborough Austral Lock Virtus Two Point Hinged Door Mortice... installation guide

COX Homelife Pairing Instructions

COX

COX Homelife Pairing Instructions

CodeLock CL500 instructions

CodeLock

CodeLock CL500 instructions

ANXELL ML-605M Series Installation instruction

ANXELL

ANXELL ML-605M Series Installation instruction

ID Lock 202 MULTI installation manual

ID Lock

ID Lock 202 MULTI installation manual

Samsung SHS-H625 user manual

Samsung

Samsung SHS-H625 user manual

ID Lock 150 user manual

ID Lock

ID Lock 150 user manual

Hafele ER4400-TC user manual

Hafele

Hafele ER4400-TC user manual

Schlage CO-Series Service manual

Schlage

Schlage CO-Series Service manual

ZKTeco PL10 Series installation guide

ZKTeco

ZKTeco PL10 Series installation guide

Blusafe Contour user manual

Blusafe

Blusafe Contour user manual

IULOCK IU-20 Installation and user guide

IULOCK

IULOCK IU-20 Installation and user guide

alpro EB1001 manual

alpro

alpro EB1001 manual

Samsung Ezon SHS-5120XM series user guide

Samsung

Samsung Ezon SHS-5120XM series user guide

BURG-WACHTER SET 5011 PINCODE Assembly and user's manual

BURG-WACHTER

BURG-WACHTER SET 5011 PINCODE Assembly and user's manual

manuals.online logo
manuals.online logoBrands
  • About & Mission
  • Contact us
  • Privacy Policy
  • Terms and Conditions

Copyright 2025 Manuals.Online. All Rights Reserved.