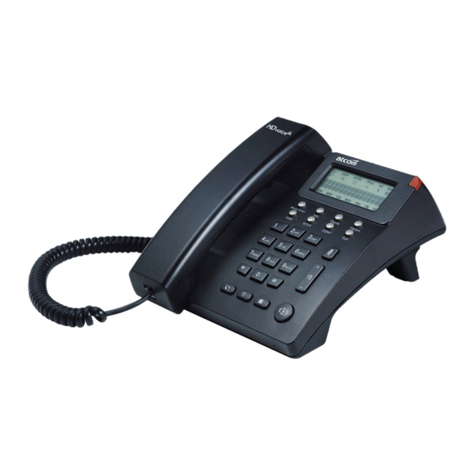
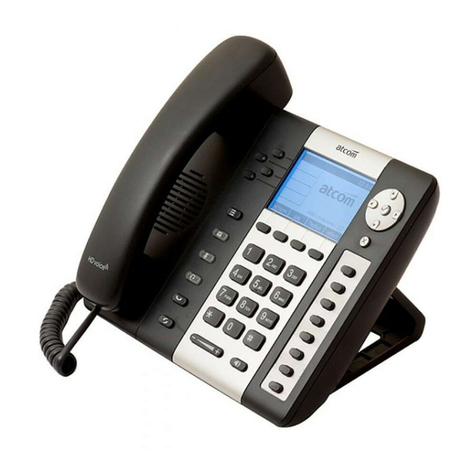
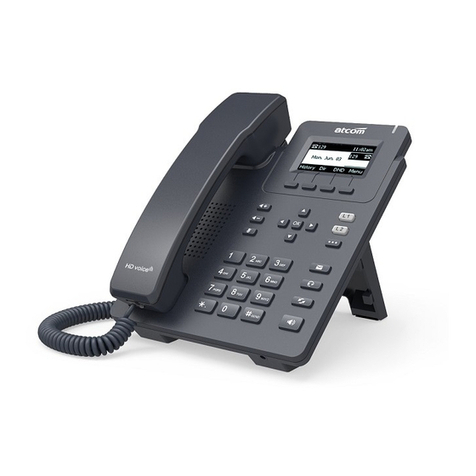
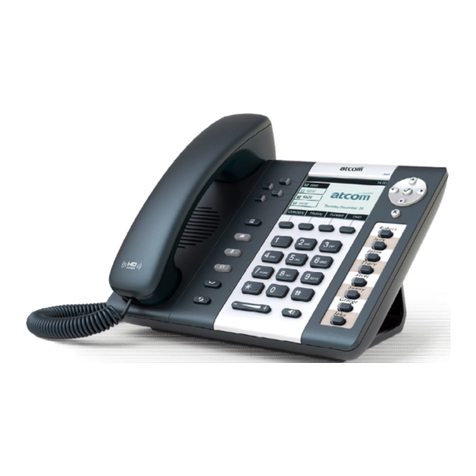
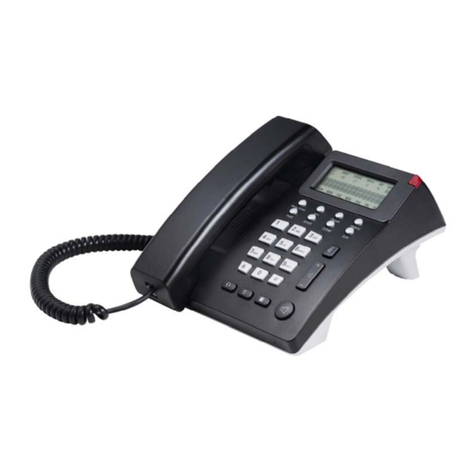
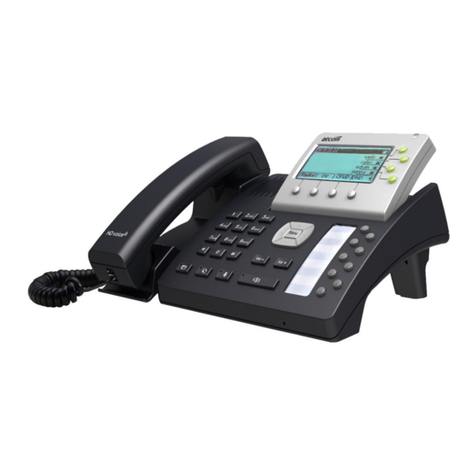
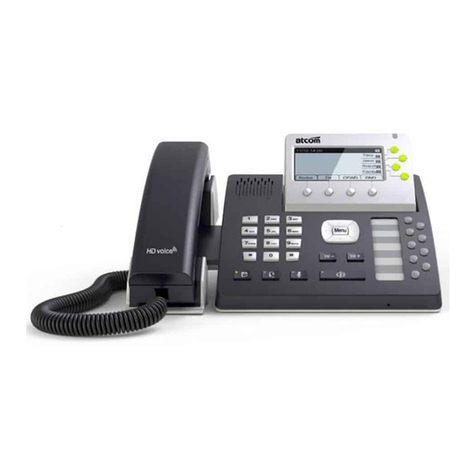
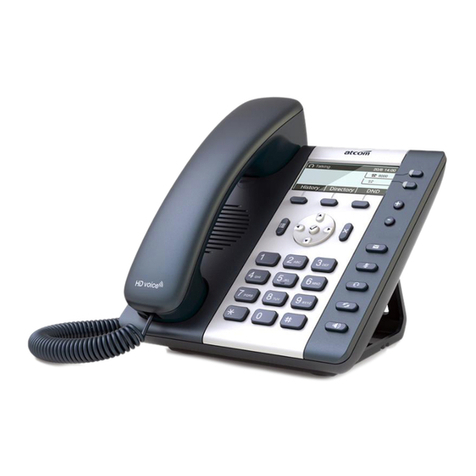
ATCOM AT-620P User manual

AT-620P User Manual
ATCOM TECHNOLOGY CO., LIMITED
AT-620P User Manual
ISSUE 1.2
2009-10-22

AT-620P User Manual
ATCOM TECHNOLOGY CO., LIMITED
1st、AT-620P’s Network Features.................................................................4
1、The View ................................................................................................................4
2、Interfaces ..............................................................................................................4
3、Electricity characteristic...................................................................................4
4、Software.................................................................................................................5
5、Network:..............................................................................................................5
6、Management and Maintenance.....................................................................6
7、Protocol ..................................................................................................................6
8、Compliant Standard...........................................................................................6
9、Operating Requirement....................................................................................7
10、Packing List...........................................................................................................7
11、Installation............................................................................................................7
2nd、Feet installation instruction............................................................8
3rd、Keypad of IP Phone:.....................................................................11
4th、Basic functions and operations...................................................12
1、Answer the calls................................................................................................12
2、Make Call .............................................................................................................13
3、Speed dial............................................................................................................14
4、Multiple line dial-up.........................................................................................14
5、Hang up the phone..........................................................................................14
6、Call Transfer........................................................................................................15
7、Call Hold...............................................................................................................16
8、3-Way Conference Calls.................................................................................16
9、Call History..........................................................................................................16
10、Call pickup...........................................................................................................17
11、Join call.................................................................................................................17
12、Redial/Unredial..................................................................................................18
13、vport......................................................................................................................18
14、Click to dial.........................................................................................................19
15、SMS function.........................................................................................................19

AT-620P User Manual
ATCOM TECHNOLOGY CO., LIMITED
16、Preload Password..............................................................................................20
17、Check the Phone’s IP.......................................................................................20
5th、Web settings.......................................................................................20
1、Current state......................................................................................................21
2、Network................................................................................................................21
2.1.Wan Config...................................................................................... 21
2.2.LAN Config ...................................................................................... 23
3、VoIP........................................................................................................................24
3.1.SIP1 ................................................................................................. 24
3.2.SIP 2 ................................................................................................ 27
3.3.Iax2 Config ..................................................................................... 30
4、Advance................................................................................................................31
4.1.DHCP Server ................................................................................... 31
4.2.NAT ................................................................................................... 32
4.3.Net Service ..................................................................................... 35
4.4.Firewall ............................................................................................ 36
4.5.Qos ................................................................................................... 37
4.6.Digital Map ...................................................................................... 38
4.7.Stun ................................................................................................. 39
4.8.Call Service ..................................................................................... 40
4.9.MMI Filter ........................................................................................ 41
4.10.Audio Settings ................................................................................ 42
4.11.VPN .................................................................................................. 43
5、Dial Peer...............................................................................................................44
6、Config Manage...................................................................................................46
7、Update ..................................................................................................................47
7.1.Web Update .................................................................................... 47
7.2.FTP/TFTP Update ........................................................................... 47
7.3.Auto Provisioning ........................................................................... 48
8、System Manage.................................................................................................49
8.1.Account Manage ............................................................................. 49
8.2.Phone Book ..................................................................................... 51
8.3.Syslog Config .................................................................................. 51
8.4.Time Set .......................................................................................... 53
8.5.Call Log ............................................................................................ 54
8.6.Language Set ................................................................................. 54
8.7.Logout ............................................................................................... 54
8.8.Reboot ............................................................................................... 55
AT-620P User Manual
ATCOM TECHNOLOGY CO., LIMITED
1st、AT-620P’s Network Features
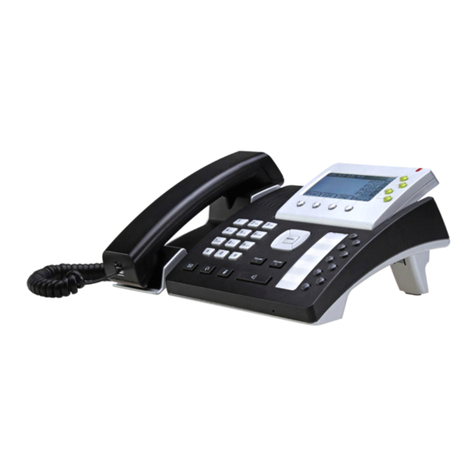
1、The View
2、Interfaces
¾Power: Output Power: 12VDC, 500mA.
¾WAN: RJ45 port.
¾LAN: RJ45 port.
3、Electricity characteristic
¾Specialty of electric: output 12V 500mA DC
¾The network connects: 2 RJ45 connect, a WAN, a LAN
¾Headset jack : RJ9 jack * 2

AT-620P User Manual
ATCOM TECHNOLOGY CO., LIMITED
¾Support PoE
4、Software
¾Sip 2.0 (RFC3261)
¾Two lines SIP, support IAX2
¾STUN
¾Jitter Buffer(200ms),VAD,CNG
¾G.711A/u、G722、G.723、G.729 Codec
¾G.168 compliant 96ms echo cancellation
¾Support SIP domain,SIP authentication(none,basic,MD5).
¾Support inbound audio, RFC2833 and SIP info , DTMF transmission way
¾SIP Call Forward、Call transfer、Call hold、Call waiting, 3-way talking、
Pickup、Join call、Redial、Unredial、Call Park、Vport、Click to dial
¾Dial without register
¾Support Hotline、DND(Do Not Disturb)、Blacklists、Call Limitation、DND、
Incoming list
¾Dial-peer calling rule, IP to IP call
¾SIP server conference
¾Phone book with 500 records, 100 answered call、missed call for each
¾Support HTTP、FTP TFTP updating the configuration and firmware
¾Syslog
¾Answering machine
¾Support SNTP client
¾Telnet, WEB visit terminal
¾Support different level user management
¾Support multi language ( LCD support Latin language system, web
support all languages)
¾soft button: soft button * 4
¾Support SMS
5、Network:
¾WAN/LAN:Support bridge or route mode
¾Support base of NAT and NAPT
¾Support PPPoE,(ADSL,cable modem use for internet connecting)
¾Support VLAN(DATA VLAN and VOICE VLAN)
¾Support DMZ
¾Support L2TP VPN(OpenVPN optional)
¾WAN support Primary and Alter function
¾WAN support DHCP Client
¾LAN support DHCP Server
¾Qos support Diffserv

AT-620P User Manual
ATCOM TECHNOLOGY CO., LIMITED
¾Support Network command tool: include ping, trace route, telnet
6、Management and Maintenance
¾Support safe mode and firmware updating under safe mode
¾Support different level user management
¾Configuration via web , keyboard and command
¾Support multi language (LCD support Latin language system, web
support all languages) and easy dynamic switch between different
languages
¾Firmware and configuration updating via HTTP , FTP and TFTP
¾Support system log and calling record
¾Firmware, firmware and configuration auto provision
7、Protocol
¾IEEE 802.3 /802.3 u 10 Base T / 100Base TX
¾PPPoE:PPP over Ethernet
¾SIP RFC3261, RFC 2543
¾TCP/IP: Transfer Control Protocol/Internet Protocol
¾RTP: Real-time Transport Protocol
¾RTCP:RTP Control Protocol
¾VAD/CNG
¾Telnet:remote host access protocol
¾DNS: Domain Name Server
¾TFTP:Trivial File Transfer Protocol
¾HTTP:Hypertext Transfer Protocol
¾FTP:File Transfer Protocol
8、Compliant Standard
¾CE:EN55024,EN55022
¾FCC part15
¾Comply with ROHS in EU
¾Comply with ROHS in China
¾
Explanation:
The letter “e” is the first letter of “environment: and “electronic”. The rim is
a round with two arrow, stands for recycle. The number 20 stands for the

AT-620P User Manual
ATCOM TECHNOLOGY CO., LIMITED
years of environment protection. Please note the years of environment
protection is not discarding year nor usage life.
9、Operating Requirement
¾Operation temperature: 0 to 40° C (32° to 104° F)
¾Storage temperature: -30° to 65° C (-22° to 149° F)
¾Humidity: 10 to 90% no dew
10、Packing List
¾AT-620P IP phone
¾Power adaptor (output 12v ,500mA)
¾Manual CD
11、Installation
Use Ethernet cable to connect AT-620P’s LAN port and your computer. Set
computer’s IP to the network 192.168.10.x or using dynamic obtain IP. Open
web browser and key in 192.168.10.1. Then user will see the logon page of
AT-620P, the default username and password is admin/admin for administrator
and guest/guest for guest.
Set up page for VoIP user only:

AT-620P User Manual
ATCOM TECHNOLOGY CO., LIMITED
2nd、Feet installation instruction
1、Desktop position:
A、Put the bottom side of the IP phone upside and press the plate with letter “PUSH”into
the slot, please refer the picture as below:
B、Press the other plate into the slot in accordance with the direction of the arrow

AT-620P User Manual
ATCOM TECHNOLOGY CO., LIMITED
C、Repeat A and B. It is the right picture of putting on desk after fixing the two feet below:
D、Disassemble the feet:
Press the plate with word “PUSH” and pull the feet with the direction of arrow. When the
plate is pull out of the slot (there will be a sound of “pa”) you can take off the feet
2、On wall postion
A、Put the bottom side of the IP phone upside and push the plate with letter “PUSH”into
the slot, please refer the picture as below:
B、Push the other plate into the slot in accordance with the direction of the arrow

AT-620P User Manual
ATCOM TECHNOLOGY CO., LIMITED
C、Repeat A and B. It is the picture of wall mounting after fixing the two feet below:
D、Disassemble the feet way:
Press the plate with word “PUSH” and pull the feet with the direction of arrow. When the
plate is pull out of the slot (there will be a sound of “pa”) you can take off the feet
Attention: Please rotate the hook to the position as in
picture with a coin or other tools

AT-620P User Manual
ATCOM TECHNOLOGY CO., LIMITED
3rd、Keypad of IP Phone:
Describe of the buttons and Screen:
Soft buttons Press to select an feature shown in the soft button features
Soft button
features Shows available choices based on current phone function
displayed on the last line of LCD screen
Status Shows the phone status, if the phone is standby, the LED is
with light. If there is income calling, the LED will flicker.
¾If the phone is starting ,the LED is flicker
¾if the phone is standby, the LED is off
¾If there is income calling, the LED will flicker. The
frequency is 500ms off, 500ms on.
¾When have voicemail, LED shows red and flicker, and the
frequency is 1000ms off, 1000ms on.
¾If the phone not obtain the IP address, the LED is ON
LCD Screen Display screen for the phone: It shows the date, time, phone
number, incoming caller’s ID(if available),line/call status,
extension numbers and the soft button features.

AT-620P User Manual
ATCOM TECHNOLOGY CO., LIMITED
Lines Shows extension number and status.
There are three colors for LED, red,yellow and orange.
¾If the line is registered, the LED shows yellow
¾If the line is enable registered but register to server failed, the LED
shows orange
¾If the line has income calling, the LED shows red and flicker
¾If the line is on the calling , the LED shows red
¾If the line disable for register, the LED is off.
¾when there is the incoming call , LED blinks, The frequency is 500ms
off,500ms on.
¾When have voicemail, LED shows red and flicker , The frequency is
1000ms off,1000ms on.
Navigation
button Allows users to navigate(left, right, up, down), on the
standby, up and down shows the network information, right
shows the lines information, left shows the call record
Dial pad For entering numbers, letters or characters(not shown)
Menu Come into Keypad menu
Volume buttons Adjust the volume
Speakerphone
button Pick up and hung up on the speakerphone mode, when pick
up by speakerphone, the LED of the button is on
Mute button Mute the handset, headset or speakerphone by press the
Mute button; this prevents the person on the active call form
hearing what you or someone else in the room is saying.
To cancel the Mute function, press the Mute button again.
If Mute the voice, the LED is light on this button
Headset button Pick up and hung up on headset mode. When pick up by
headset, the LED button will light
Voicemail
button Check the Voicemail status, if there are voicemail, the button
will light
4th、Basic functions and operations
1、Answer the calls
When there is an incoming call, AT620P will remind user with ringing. There
are 5 ways to answer the call
A、Answer by handset
Pick up the handset and talk with the caller. If you want to hang up, just put
back the handset.

AT-620P User Manual
ATCOM TECHNOLOGY CO., LIMITED
B、Hand-free mode
Press the hand-free button in the phone and talk with callers by built-in
Micro-phone and Speaker. If you want to hang up, please press the hand-free
button again.
C、Answer by earphone
Keep your earphone connected with the RJ9 earphone jack, when there is an
incoming call, press the earphone button on the IP phone and talk with the caller.
If you want to hang up, please press the earphone button again.
D、Handset to hand-free
When you are phoning with the handset and want to phone with hand-free
mode, please press the hand-free button and put down the handset.
E、Hand-free mode to handset
If you are phoning under hand-free mode and want to change to speaker
phone, juts pick up the handset without press any buttons.
2、Make Call
A、Use the handset
Pickup the handset, the LCD will show the current lines (user could switch
between line1 and line2 by pressing the line button beside the LCD). User can
input the number with the keyboard and press # to send the number. When you
hear the tones of “du~~du~~” with dialed number showed on the LCD, the
called’s phone is ringing. If the called answer the call, the phone call is
established and the LCD will show the calling time and the called’s number.
B、Answer the phone under hand-free mode
Press the Speaker Phone button, the LCD will show the current lines (user
could switch between line1 and line2 by pressing the line button beside the LCD).
User can input the number with the keyboard and press # to send the number.
When caller hear the tones of “du~~du~~” with dialed number showed on the
LCD, the called’s phone is ringing. If the called answers the call, the phone call
is established, and the LCD will show the calling time and the called’s number.
C、Used phone book
a、Pick up the handset.
b、Press " Menu” button and use the "up" and "down" keys to enter
phonebook.
c、Press "OK" to show the total amount in telephone.
d、Press "OK" to enter the phone list and use "up" and "down" keys to find
the contact person.
e、When you find the certain contact person, press" OK" to show the
details.
f、Press "Edit" to edit the number or press" Dial" to call.

AT-620P User Manual
ATCOM TECHNOLOGY CO., LIMITED
3、Speed dial
It’s method for the phone in standby mode to dial number immediacy.
The method is as below:
A、Dial-up the number in standby mode
B、Push soft button “dail”, ”#”key or hang up directly to send the dial
number.
C、Push soft button to save the number in telephone directory.
4、Multiple line dial-up
AT620P IP phone supports 2 Sip lines. That means user can register on 2
different sip accounts simultaneity in the same IP phone. The User can choose
line1 or line2 to switch dial-up, System default Sip1 when dial-up.
IP Phone be called:
AT-620P maximum supports one incoming call when it is called, when the
second line calling, the LCD will show the incoming telephone number. The User
can press the “corresponding line key” indicated by LED flicker, or press soft
button “ANS” to receive the second line call, when two calls coming together,
press soft button “SWIT” to Switch.
Notice:
The phone must work with Call Waiting function when work for this feature.
5、Hang up the phone
1) Headset hang up
When use handset mode calling, put back the handset to hang up.
2) Hands free hang up
When use hands free calling, press soft button “speaker phone” to hang up.
3) Earphone Hang up
When use Earphone calling, Press the soft button “headset” to hang up.
4) Hang up one line call
When 2 lines call simultaneous, press soft button “SWIT” to choose the line
which you want to hang up, then press soft button “#” to end the call. In the
mean time, it will automatic switch to another line and continue call. Moreover,
user can redial-up or accept the second call
Notice:
Hang up with “#” is invalidation when only one line call.

AT-620P User Manual
ATCOM TECHNOLOGY CO., LIMITED
6、Call Transfer
¾Blind Transfer
User A.B.C, assume B is AT-620P IP phone
1) When A Calls B and B receives
2) B presses soft button “Xfer” when A is calling.
3) B dials C’s number.
4) After dialing C, B Presses soft button “xfer”, then transfers the call to C.
5) When C’s phone ring, B hangs up the call with A, the Led on B’s Phone shows
“pls hang up”.
6) C receives, starts the call with A.
Remarks:
SIP lines are not available for choosing when call transfer.
¾Attended Transfer
User A.B.C, assume B is AT-620P Ip phone
1) When A Calls B and B receives
2) B presses soft button “Xfer” when A is calling.
3) B dials C’s number.
4) After dialing C, B Presses soft button “Bxfe”, then transfers the call to C.
5) C receives the phone, starts the call with A.
6) B presses soft button ”XFER” directly starts to talk with A, Meanwhile The
LCD on B’s phone shows “pls hang up”.
Remarks:
To carry out this function, IP Phone must work with Call waiting and call transfer
function; meanwhile Sip server must support RFC3515.
¾Alert Transfer
User A.B.C, assume B is AT-620P Ip phone
1) When A Calls B with B receives.
2) B presses soft button “Xfer” when A is calling.
3) B dials C’s number.
4) After dialing C, B Presses soft button “Bxfe”, then transfers to C.
5) When C’s Phone ring, B presses soft button “XFER” directly starts to talk with
A, Meanwhile The LCD on B’s phone shows “pls hang up”
6) C receives the phone, starts to talk to A.
Remarks:
To carry out this function, IP Phone must work with Call waiting and call transfer
function; meanwhile Sip server must support RFC3515

AT-620P User Manual
ATCOM TECHNOLOGY CO., LIMITED
7、Call Hold
User can hold the current call by pressing soft button “Hold”. And by
pressing soft button “Hold” again, user can get back to the previous call. In
3-way conference call mode, user can also press this button to hold 3-way
conference call, and if you press it again, user can go back to 3-way conference
mode. If hang up without exiting the status of hold. The conversation will not be
cancelled; the line is still on hold
8、3-Way Conference Calls
Assume B is AT-620P phone among user A,B and C.
A calls B and talks with B through VoIP.
1) B can press soft button “conf” to hold the call with A.
2) Then B inputs C’s number.
3) B presses Soft button “dial” to call to C.
4) C is on the call with B and A is on hold.
5) B presses Soft button “Spli” button to make 3-way conference call.
6) B presses soft button “spli” to end 3-way conference call and returns to the
call with A.
7) B presses soft button “exit” to end all the calls.
9、Call History.
AT-620P supports 100 missed calls, incoming calls and dialed calls record.
When the storage is full, the latest call will update the history. When the phone
reboots or be out of power, all the call history will be cleared.
¾Missed call
1) When the LCD screen displays “(number) Missed call(s)”, press soft button
“Miss”, then the screen shows “Missed Call”.
2) Press soft button “OK”, the phone displays missed call numbers.
3) Press navigation button to browse missed call history.
4) Choose the missed call record, press “OK” soft button to browse the specific
information of the record.
5) Press “Edai “soft button to revise the records and press soft button “dial” to
call this number.
¾Incoming call
1) Press the menu button.
2) Press the navigation button to choose “call history” and then press OK
button.

AT-620P User Manual
ATCOM TECHNOLOGY CO., LIMITED
3) Press the navigation button to choose “incoming call”, press soft button OK.
4) Press the navigation button to browse the incoming call record. If there is no
record, the LCD screen display “List is Empty”.
¾Out coming call
Method 1,
1) Press “Menu”
2) Press up or down navigation key, and select call history and press soft
button “OK”
3) Select “Outgoing call” through “up” or “down” key, and press soft button
“OK”
4) Press up or down navigation button and check the received calls, LCD will
show “List is Empty”, if there is no received incoming call.
Method 2,
1) Press “soft button Clog” under standby status, entering outgoing call list.
2) Press up or down navigation button to read the received calls, LCD will
show “List is Empty”, if there is no received incoming call.
10、Call pickup
Call pickup is simulated from “Pickup” function processes from IPPBX. When A
call B with no reply after ring tones, C could pick up the call from A for B by
inputting the prefix and B’s phone No.
C needed to set the dial peer with prefix code as follow
To refer *1* as the set prefix code, C could get the call from A to B by dialing
*1*+B,
*1* prefix could be freely set as long as no confliction with other dialing rules.
11、Join call
“A” could join in the conference call,by input a prefix plus a phone No. which is
already in the conference.
A requested to set the prefix code for dial peer as follow
To refer *2* as the set prefix code,“A” could join in the conference by dial *2*
plus the call No. which is already in the conference.
*2* prefix could be freely set as long as no confliction with other dialing rules.

AT-620P User Manual
ATCOM TECHNOLOGY CO., LIMITED
12、Redial/Unredial
In order to being efficiently to contact the busy line, A could use Redial to call B
the busy line with setting prefix. When B is free A could get through the call
as usual. When B is busy, A could hang the phone with checking B’s situation
with every 60S by the set of prefix.
IP Phone of User A would ring and prompt picking up handset if B is
available. It would call B automatically once A picking up handset. The call
would get through as soon as had set being picked up at B. A could dial the
predecessor which set already add number of B to cancel the call before the
phone automatic redialing if A is not available suddenly or don’t want to call B
anymore.
*3* is the predecessor. Then A could make the redial function via dialing *3* +
number of B.
*4* is the predecessor. Then A could make the redial function via dialing *4* +
number of B.
User could name any predecessor like *3*/*4* if it is compliant with present dial
rule.
13、vport
Vport makes more flexible calling application. Eg. It could forward a call from
Line 1 to one account of Line 2 after configuring forward type and number@line
via web interface. The forward could make either from Line 1 to Line 2 or Line
2 to Line 1. But the end user may not aware the configuration being made
therefore probably the end user should be advised that it may cost with the
forward function. The forwarding could be done via either Line Key to select the
line or dialing IP after calling under server. It could be implemented by the
following 4 ways:
Point to Point Call Forward
Make the configuration like @ip:port in the column of Forward Number. Then
it could make SIP call point to point with this IP and port in system. User could
select forward type accordingly.
Point to Point Blind Transfer
Transfer the call via dialing IP directly.
Call Forward, Call Transfer (Blind Transfer/ Attended Transfer) in different
Line.

AT-620P User Manual
ATCOM TECHNOLOGY CO., LIMITED
Make the configuration like sip: username@n in the column of Forward
Number. Then system would select Line N and make call accordingly.
SIP Line (eg:0/1/2. Or 0.0.0.0/0.0.0.1/0.0.0.2/255.255.255.255 which is
compliant with former configuration).
Call Forward, Call Transfer (Blind Transfer/ Attended Transfer) between SIP
Line and Point to Pint.
It is compliant for the Call Forward, Call Transfer (Blind Transfer/ Attended
Transfer) between SIP Line and Point to Pint.
14、Click to dial
When User A accesses web interface and calls User B via clicking one link which
is direct to B, IP Phone of User A would ring. Then call B automatically once User
A picking up handset.
15、SMS function
¾Create new SMS
1) press MORE (soft button 4)
2) press SMS(soft button 2)
3) press NEW(soft button 1)
4) Edit SMS context and you can switch the input method by press # such as
ABC(capital letters) ,abc ( English letters) , 123 ( number input)
5) When the edit is done , press Send(soft button 2)and input the receiver’s
phone number
A、press Sear(soft button 1) to find the contact person in phonebook
B、directly input receiver’s phone number
C、Use P2P method , input # + IP address ( press * 2 times to input #)
For example if you send the SMS to the phone with IP address of
192.168.1.88, you will press **192*168*1*88
After inputting receiver’s address, press Send (soft button 2) to send out
¾SMS Check new SMS
When there is a new SMS, LCD will show New Message(S)
6) Press More(soft button 4)
7) Press MS(soft button 2), LCD will display Number New Number old
8) If there is a new SMS and 2 old SMS, LCD will display 1 New 2 Old
9) Press OK (soft button2) to enter SMS list , if it’s unread , there will be a

AT-620P User Manual
ATCOM TECHNOLOGY CO., LIMITED
NEW before it , or else it has been read
10) Press up and down key in navigation keyboard to select the message
and press ok (soft button2)to read it
11) If you want to delete the SMS , just press del(soft button 1) after you
select it
Caution:
In SMS list, you can press quit (soft button) to go to the upper menu
Dial means dial to call sender directly when you are reading his SMS
Edia means call the sender after edit his number
Edit means editing the SMS context
16、Preload Password
There are 2 models to set the authority of web accessing and command line:
Guest model and Admin model. User could view and configure all items in Admin
model. While user couldn’t change the SIP (1-2) and IAX2 configuration as well
as server address and port but only access and view the information. User would
enter different model after input different user name and password:
zGuest Model
User Name:guest
Pass word:guest
zAdmin Model:
User Name:admin
Pass word:admin
Keypad password: 123
17、Check the Phone’s IP
Press the up or down navigation button to check the phone’s IP address
5th、Web settings
Enter AT-620P IP addresses in the web browser to go to the log on page, and key
in the username and password to access AT-620P setting page.
Default username and password is:
Administrator: Username: admin password: admin
User: Username:guest Username: guest
Other manuals for AT-620P
1
Table of contents
Other ATCOM IP Phone manuals

ATCOM
ATCOM AT800DP User manual

ATCOM
ATCOM AT-610P User manual

ATCOM
ATCOM A21 User manual

ATCOM
ATCOM Rainbow 1 User manual

ATCOM
ATCOM Rainbow1 User manual

ATCOM
ATCOM AT800 Series User manual

ATCOM
ATCOM AT-323 User manual

ATCOM
ATCOM AT-620 User manual

ATCOM
ATCOM Nimbus CQ400 User manual

ATCOM
ATCOM Rainbow4 User manual

ATCOM
ATCOM AT820 series User manual

ATCOM
ATCOM 5520 User manual

ATCOM
ATCOM Rainbow4(s) User manual

ATCOM
ATCOM AT-610 User manual

ATCOM
ATCOM AT-610 User manual

ATCOM
ATCOM A20 User manual

ATCOM
ATCOM AT800D User manual

ATCOM
ATCOM Rainbow 2 Owner's manual

ATCOM
ATCOM AT-640 User manual

ATCOM
ATCOM A2SV Series User manual