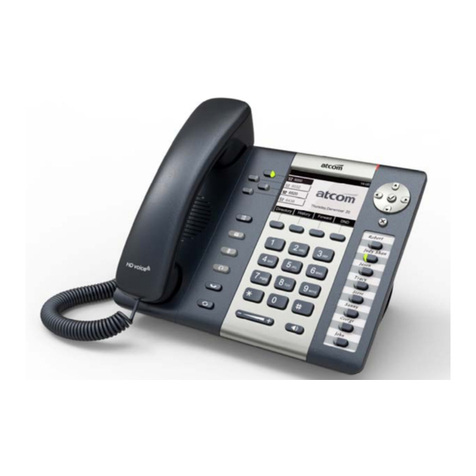
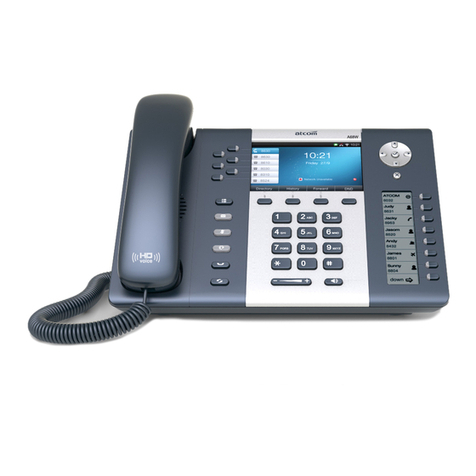
ATCOM Nimbus CQ400 User manual

CQ400 User Guide

Content
Contents
Contact CQ Simple ............................................................................ 4
Contact Sales................................................................................ 4
1. Overview of CQ400 .................................................................... 5
1.1 Interface ............................................................................ 6
1.2 Hardware ............................................................................. 6
1.3 Software ............................................................................. 6
1.4 Network .............................................................................. 7
1.5 Management and Maintenance ........................................................... 7
1.6 Protocol ............................................................................. 7
1.7 Compliant and Certified Standard ..................................................... 8
1.8 Packing list ......................................................................... 8
1.9 Installation ............................................................................ 9
2. CQ400 Keypad .............................................................................13
2.1 Description of Buttons and Screen .......................................................14
2.2 Line Keys ...............................................................................16
2.3 Status Indicator ........................................................................16
2.4 Memory Keys .............................................................................16
2.5 LCD screen icons .....................................................................17
3. Call Functions ............................................................................20
3.1 Answer the calls .....................................................................20
3.2 Make Calls ...........................................................................21
3.3 Pre-dial ................................................................................22

3.4 Multiple line dial-up ................................................................22
3.5 Call Hold ............................................................................23
3.6 Call Transfer ........................................................................23
3.7 Mute calls ...........................................................................24
3.8 3-Way Conference .....................................................................24
3.9 Hang up the phone ....................................................................24
3.10 Voicemail ..............................................................................25
4. Keypad and GUI ............................................................................25
4.1 Starting ................................................................................25
4.2 Standby .................................................................................25

Contact CQ Simple
Contact Sales
Address
5113 Eastman Ave Suite125
Midland, MI 48640
Tel
855-344-2774
E-mail
kim@cqsimple.com
Contact Technical Support
Tel
855-344-2774
E-mail
support@cqsimple.com

1. Overview of CQ400

1.1 Interface
Power Input
DC 5V-2000mA or PoE
LAN Port
RJ45
PC Port
RJ45
EXPAN Port
RJ45
Headset Jack
RJ9
Handset Jack
RJ9
1.2 Hardware
LCD
461*278 4.3” TFT
FLASH
64M
RAM
64M
CPU
CQ400 262MHz Dual-Core
CQ400 393MHz Dual-Core
LED Indicator
1 Status Light , 4 line indicators, 8 BLF indicators, 1 voicemail
indicator, 1 headset indicator, 1 mute indicator
1.3 Software
Sip 2.0 (RFC3261) and other related SIP RFCs
4 SIP lines registration
STUN
Jitter Buffer, VAD,CNG
G.711A/u, G722, G.723, G.726-16, G.726-24, G.726-32, G.726-40, G.729, Lin16-16, iLBC
Echo Cancellation
SIP Domain name, Authentication and Backup SIP Server
DTMF(Inband, RFC2833, SIP INFO)

Call transfer, Call forward, 3-way conference, Call hold, Call back
DND(Do Not Disturb), Auto answer, Blacklists, Block Call-ID, Block Anonymous call, Dial
plan, IP call
Phone book with 200 records, 200 answered calls, 200 missed calls, 200 dialed calls
Auto update via HTTP, FTP, TFTP, PNP
Syslog
SNTP,NTP
Customized Ringtone
Daylight Saving time
VLAN, VPN
WEB access with different login level
Multi-language: English, Chinese, Farsi, French, German, Hebrew, Italian, Portuguese,
Russian, Spanish, Turkish
1.4 Network
LAN/PC:Support Bridge mode
Support VLAN
Support L2TP VPN
Support DHCP, STATIC, PPPoE
Primary/Secondary DNS Server
Support QoS
Web access via HTTP&HTTPS
1.5 Management and Maintenance
Support safe mode and firmware updating under safe mode
Support different level user management
Configuration via web , keyboard
Support multi-language
Firmware and configuration file auto provision
Support system log
1.6 Protocol
IEEE 802.3 /802.3 u 10 Base T / 100Base TX
PPPoE: PPP over Ethernet

DHCP: Dynamic Host Configuration Protocol
SIP RFC3261, RFC3262, RFC3263, RFC3264, RFC3265, RFC2543, RFC3489, RFC3842,
RFC3515, RFC2976, RFC3428, RFC2327, RFC2782, RFC1889
TCP/IP: Transfer Control Protocol/Internet Protocol
RTP: Real-time Transport Protocol
RTCP:RTP Control Protocol
DNS: Domain Name Server
TFTP: Trivial File Transfer Protocol
HTTP:Hypertext Transfer Protocol
FTP:File Transfer Protocol
1.7 Compliant and Certified Standard
CE:AGC01180140201E2,AGC01180140202E2
Comply with ROHS in EU
Comply with ROHS in China
Operation temperature: lower than 60° C
Storage temperature: lower than 60° C
Humidity: 10 to 90% no dew
1.8 Packing list
Model
CQ400
Telephone
1Unit
Handset
1 Unit
Handset cable
1 Unit
Stand bracket
1Unit
Power adapter
Optional
Network Cable
1 unit
,
1.5 meters

1.9 Installation
The CQ400 is able to be connected with network via LAN port. Under the Bridge mode, other
devices
(Laptop, CQ400) is able to access network via the PC port of CQ400.
1. Stand bracket installation instruction
A.
Put the bottom side of the CQ400 upside and press one-side joints of stand bracket
into the slot, please refer the picture as below
B.
Press the other side joints into the slot according to the direction of the arrow:

C.
Disassemble the stand bracket:
Push the spring joint of stand and pull the stand according to the direction of the arrow. When
the joints are pulled out of the slot, you can take off the stand bracket

2. Wiring instruction
Plug in the power adapter, cable and handset or headset to the corresponding ports as below
picture and press them to the slots on the stand bracket.

DESI Strips Instructions
Step1. Use needle or some other tools to insert into the hole of the plastic sheet, press up on
the
plastic sheet.
Step2. Lift out the plastic sheet
Step3. Take off the plastic sheet
Step4. Use needle or some other tools to insert into the edge of the paper strip, press up and
lift out.
Step5. Write down the identification of each programmable key on the paper strip.
Step6. Put back the paper strip.
Step7. Insert the plastic sheet into the slot
Step8. Push the other side of the plastic sheet into the other slot

Soft Keys
400
2. CQ400 Keypad
Line keys
Navigation
OK
Cancel
Headset
Hold
Redial
Soft Key
Memory Key
Dial pad
Menu
Mute
Voicemail
Hold
Headset
Redial

2.1 Description of Buttons and Screen
Soft Keys
Press to select a function which displayed at the soft
key
zone of screen
Display all optional functions at the last line of LCD screen
Status Indicator
Indicates the phone’s status.
LCD Screen
All information such as date, time, phone number,
incoming caller’s ID (if available), line/call status,
extension numbers and the soft key features are
displayed
on it.
Line Key
Show extension status and choose corresponding line.
Long hold the line key will enter the editor interface.
Dial pad
Entering numbers or characters.
Memory Keys
All the memory keys can be defined as BLF key, intercom,
DTMF etc. Long hold the programmable key will enter the
editor interface if the programmable key has been already
defined as the BLF/Speed dial/Intercom/Key event as
pickup, call park, DTMF etc. Short hold the programmable
key will enter the editor interface immediately if the
programmable has not been defined.
Navigation keys
Allow users to navigate (left, right, up, down). Press
can enter “Directory”.
Cancel users’ operation.
Enter menu settings.
Adjust the volume (speaker/handset/headset/ring).
Volume level will be displayed on LCD when pressing
volume key.
Pick up and hang up under the speaker mode.
Mute the mic in a conversation by pressing the Mute
button; this prevents the person on the active call from
hearing what you or someone else in the room is saying.

If the call is muted, the mute LED is lighted in red.
To un-mute, press the Mute button again.
Pick up and hung up under headset mode. The LED button
will be lighted when talking in headset mode.
Check the Voicemail status. The LED button will be lighted
when there is a new message. Long hold will enter the
editor interface to configure the voicemail number.
Hold the current call.
Redial the last dialed number.

2.2 Line Keys
LED Status
Description
Off
The line is idle or disabled for register
Blink in green at 120ms off, 120ms on
The line has an incoming call
Green
The line is talking
Blink in red at 600ms off, 600ms on
The line is held
2.3 Status Indicator
LED Status
Description
On
CQ400 is being started
Off
CQ400 is standby
Blink in red at 120ms on, 120ms off
There is an incoming call
2.4 DSS or Memory Keys
LED Status
Description
Off
The monitored account is unregistered
Green
The monitored account is idle
Red
The monitored account is talking
Fast blink in red
The monitored account is ringing

2.5 LCD screen icons
Icon
Description
The extension is registered
The extension is unregistered
There is a new voice mail
CQ400 is dialing
CQ400 is talking
CQ400 is calling
There is an incoming call
The call is held
CQ400 is in speaker mode
CQ400 is in handset mode
CQ400 is in headset mode
CQ400 is in conference
The line key is used as the BLF key and the BLF
monitored number is registered
The line key is used as the BLF key and the BLF
monitored number is unregistered
The line key is used as Speed Dial key

3. Call Functions
3.1 Answer the calls
A.
Answer by handset
Pick up the handset and talk with the caller. If you want to hang up, just put back the handset.
When you are talking with the handset and want to switch to speaker or headset mode, please
press
key or key, and then put down the handset.
B.
Answer by speaker
Press
key and talk with callers by built-in Micro-phone and Speaker. If you want to
hang up, please press key again. Switch calling or talking into handset mode by
lifting the handset under speaker mode. Press key will switch calling or talking into
headset mode.
C.
Answer by headset
Keep your microphone connected with the RJ9 headset jack, when there is an incoming call,
press
and talk with the caller. If you want to hang up, please press again.
Pressing
can change calling or talking into speaker mode, and lifting the handset
switches to handset mode.

3.2 Make Calls
A.
Use the handset
Pickup the handset, the LCD will show the current lines (user is able to switch from line1 to
line6 by pressing the line key beside the LCD). Press soft key "Send" to dial the number.
When you hear the tones of “du~~du~~” and the phone number your dialed is being
displayed on the LCD, the phone at the side of being called should be ringing. If the called
party answers this calling, the call is established and the calling timer is started immediately.
B.
Use the speaker
Press
key, the LCD will show the current lines (user is able to switch from line1 to
line6 by pressing the line key beside the LCD). Input the phone number and press soft key
"Send" to dial the number. When caller hear the tones of “du~~du~~” and the phone number
your dialed is being displayed on the LCD, the phone at the side of being called should be
ringing. If the called party answers this calling, the call is established and the calling timer is
started immediately.
C.
Use the headset
Press
Key, the LCD will show the current lines (user is able to switch from line1 to
line6 by pressing the line key beside the LCD). Input the phone number and press soft key
"Send" to dial the number. When caller hear the tones of “du~~du~~” and the phone number
your dialed is being displayed on the LCD, the phone at the side of being called should be
ringing. If the called party answers this calling, the call is established and the calling timer is
started immediately.
D.
Dial from phone book
1.
Press
key to enter the menu and choose “Directory” option. Press "Enter" soft
key and then find the contact person by navigation keys. When the certain contact person
is highlighted, press "Dial" or just pick up the handset to call this number.
2.
Pick up the handset, press "Directory" soft key, then find the contact person and press
"Dial" soft key.

3.
Pick up the handset, press and enter “Directory”, then find the contact person and
press “Dial” soft key.
E.
Dial from call history
1.
Press
key to enter the menu and choose “History” option, then select one of call
history entry, and press "Dial" soft key or pickup the handset to call this number.
2.
Pickup the handset, press "History” soft key, then select one of call history entry, and
press "Dial" soft key to call this number.
3.
Pickup the handset, press and enter “Call History” ,then select one of call history
entry, and press "Dial" soft key to call this number.
3.3 Pre-dial
A. Dial-up the phone number at standby mode.
B. Press soft key "Dial” or Pick up the handset or Press
or
to send out the
number.
3.4 Multiple line dial-up
"Hold" the current line on which you’re talking then press “Answer” to receive the incoming
call from another line.
Pick up a new incoming call while on calling: When a new incoming call happened on the being
occupied line, press the key
or
to check details of the new incoming call, and press
the soft key “Answer” on GUI to pick up the new call. The current calling will be hold after the
new call picked up. When a new incoming call happened on another idle line, the source phone
number of new incoming call will be displayed on the Screen and the LED of corresponding line
key will be fast blinking (Green), Press the corresponding line key to pick up the new call, Or
Press the soft key “Hold” to hold the current call and then press “Answer” key to pick up the
new call.
Make a new call while on calling: To make a new call on a being occupied line, Press the key
“Hold”, then input the destination phone number and press the key “Dial”, or Press the soft
key “New”, then input the destination phone number and press the key “Dial”. To make a new
call on an idle line, press the corresponding line key, input the destination phone number and
press the key “Dial”.
Table of contents
Other ATCOM IP Phone manuals