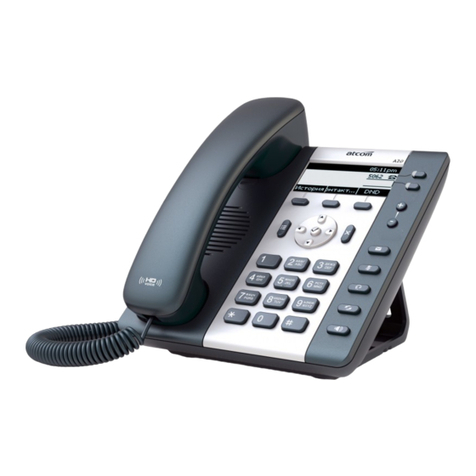
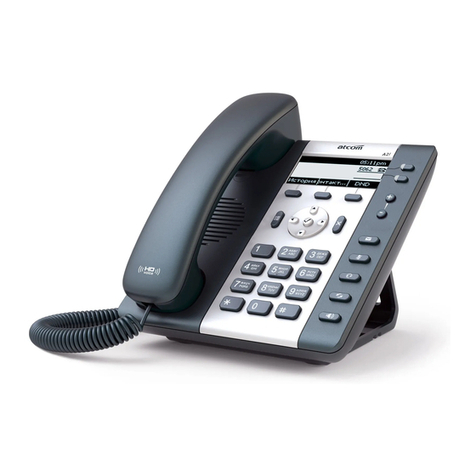
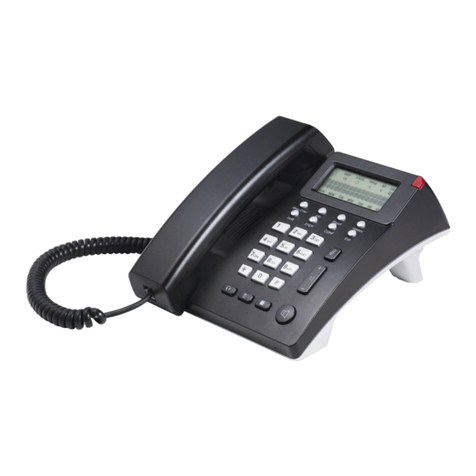
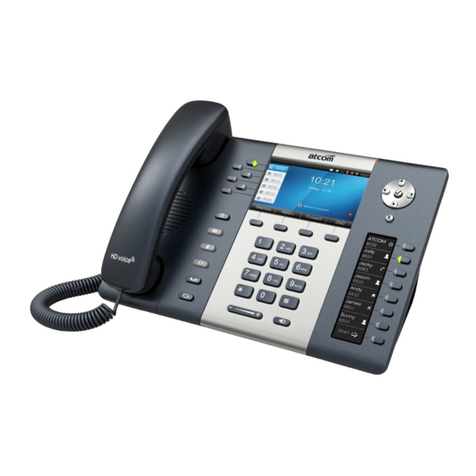
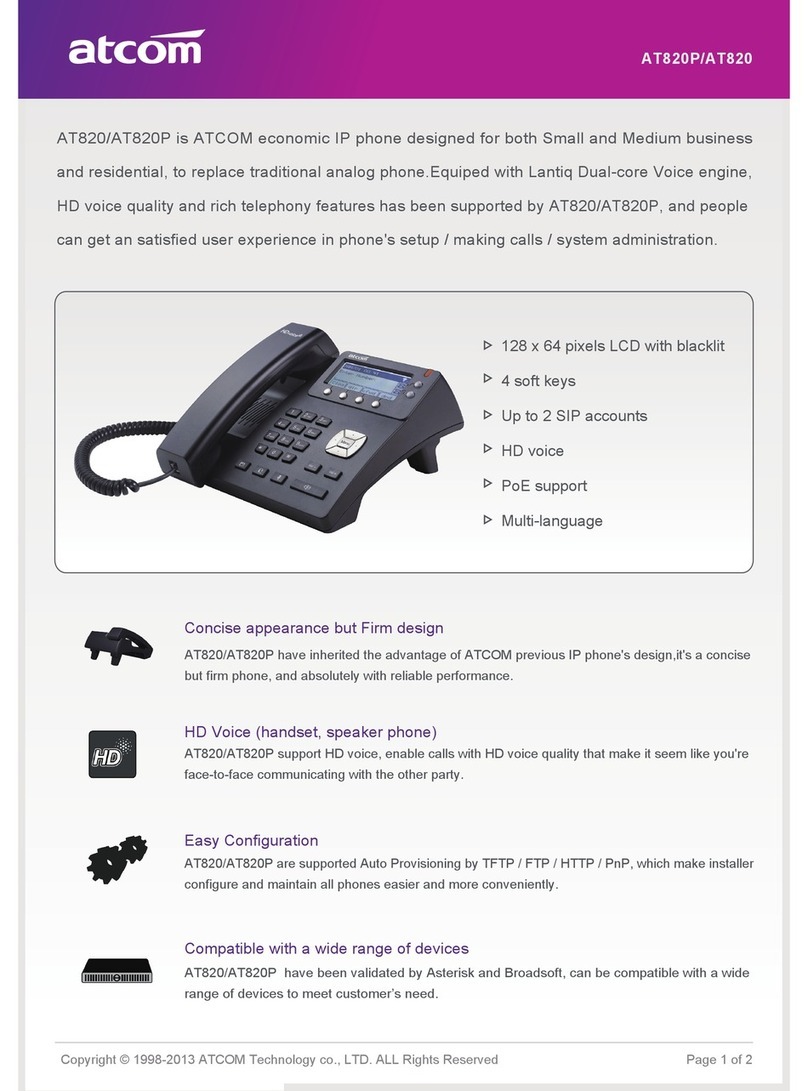
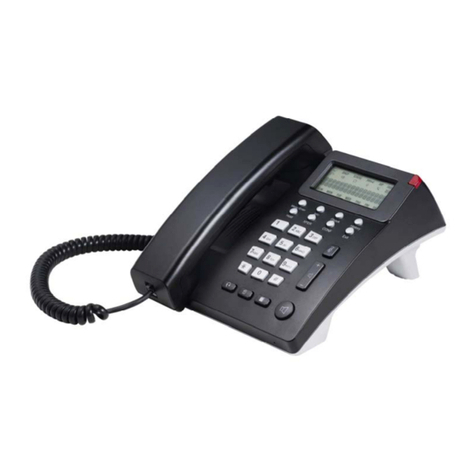
ATCOM AT810 series User manual

AT810 series User Manual
Version: 1.2
2013-08-29

AT810 Series User Manual
2
ATCOM TECHNOLOGY CO., LIMITED www.atcom.cn
Release note
Version
Changed note
Editor
Date
1.0
First Release
Stefen
2013-1-25
1.1
Page 9: Packing List
1. Add Ethernet Cable(1.5m)
Jessie
2013-5-13
1.2
Web Settings -> Account
Add parameters description:
1.Session Timer Enable
2.Early Update Enable
3.Caller ID Display
4.AutoSubscribeMWBEnable
5.Server List
6.Dns Mode
7.Blf List Uri
8.G711A
9.G711U
10.AVT
11.G722
12.G723
13.G729ab
14.iLBC
15.G726-16
16.G726-24
17.G726-32
18.G726-40
Jason
2013-8-29

AT810 Series User Manual
3
ATCOM TECHNOLOGY CO., LIMITED www.atcom.cn
Content
Contact ATCOM....................................................................................................................5
1. AT810 Series Overview...............................................................................................6
1.1 Interfaces ......................................................................................... 6
1.2 Hardware.......................................................................................... 6
1.3 Software........................................................................................... 7
1.4 Network ........................................................................................... 7
1.5 Management and Maintenance............................................................. 7
1.6 Protocol............................................................................................ 8
1.7 Compliant Standard ........................................................................... 8
1.8 Operating Requirement ....................................................................... 8
1.9 Packing List....................................................................................... 9
1.10 Installation...................................................................................... 9
1.11 Feet installation instruction ...............................................................10
1.11.1 Desktop position .....................................................................10
1.11.2 Wall position...........................................................................11
2. Keypad of IP Phone ....................................................................................................12
3. Menu Operation............................................................................................................14
4. Basic functions and operations ..............................................................................15
4.1 Answer the calls ...............................................................................15
4.2 Make Calls .......................................................................................16
4.3 Hang up ..........................................................................................17
4.4 Call Transfer.....................................................................................17
4.5 Mute ...............................................................................................18
4.6 Call Hold..........................................................................................18
4.7 3-way conference call ........................................................................18
4.8 Call History ......................................................................................19
4.9 Date and Time..................................................................................19
4.10 Access Mode...................................................................................19
5. Web settings..................................................................................................................20
5.1 System status ..................................................................................20
5.2 Network ..........................................................................................21
5.2.1 Basic.......................................................................................21
5.2.2 Advance ..................................................................................22
5.3 Sip Setting.......................................................................................24
5.3.1. Sip Timer Values......................................................................24
5.3.2 RTP Parameters ........................................................................24
5.3.3 SDP Payload Types....................................................................25
5.3.4 NAT Support Parameters ............................................................26
5.4 Account ...........................................................................................26
5.4.1 SIP .........................................................................................26
5.4.2 Codec Configuration ..................................................................27
5.4.3 Call Feature Setting ..................................................................28
AT810 Series User Manual
4
ATCOM TECHNOLOGY CO., LIMITED www.atcom.cn
5.4.4 Dial Plan..................................................................................28
5.5 Phone Setting...................................................................................30
5.5.1 Preference ...............................................................................30
5.5.2 Features ..................................................................................33
5.5.3 Voice ......................................................................................34
5.5.4 Ring........................................................................................35
5.5.5 Tone .......................................................................................36
5.6 Update ............................................................................................37
5.6.1 Manual Update .........................................................................37
5.6.2 Auto Provision ..........................................................................37
5.6.3 Reset & Reboot.........................................................................38
5.7 Phone Book......................................................................................38
5.8 Call Log ...........................................................................................39
6. FAQ & Trouble Shooting............................................................................................39
6.1 Frequently Asked Questions................................................................39
6.1.1 How to make a factory reset.......................................................39
6.1.2 Upgrade firmware under safe mode .............................................40
6.1.3 How to make direct IP call..........................................................40
6.2 Trouble Shooting...............................................................................40
6.2.1 The phone can’t register successfully...........................................40
6.2.2 The phone can’t obtain IP address...............................................41

AT810 Series User Manual
5
ATCOM TECHNOLOGY CO., LIMITED www.atcom.cn
Contact ATCOM
The Introduction of ATCOM
ATCOM is the leading VoIP hardware manufacturer in global market. We have been
keeping innovating with customer’s needs oriented , working with partners to establish
a total solution for SMB VoIP with IP phone , IP PBX and Asterisk cards.
With over 10 years’ experience of R&D, manufacturing and service in network and VoIP
filed, mission of creating the biggest value for IP terminals, we commit ourselves in
supplying the competitive IP phone and other terminals for IP PBX, softswitch, IMS, NGN
providers and carriers; supplying the competitive total VoIP solution for SMB market. We
keep improving the customer’s experience and creating the bigger value with our
reliable products. Until now, our VoIP products has been sold to over 60 countries and
used by millions of end users.
Contact Sales
Address
Area C, A2F , Block 3 ,Huangguan Technology Park , #21 Tairan
9th Rd, Chegongmiao , Futian District , Shenzhen China
Tel
+ (86) 755-83018618-8888
Fax
+ (86) 755-83018319
E-mail
sales@atcomemail.com
Contact Technical Support
Tel
+ (86) 755-83018618-8011
E-mail
Support@atcomemail.com
Website Address: http://www.atcom.cn/
Download Center: http://www/atcom/cn/download.html

AT810 Series User Manual
6
ATCOM TECHNOLOGY CO., LIMITED www.atcom.cn
1. AT810 Series Overview
AT810 is almost the same with AT810P without PoE.
AT810/AT810P
Type
POE
Power adapter
AT810
No
Standard accessory
AT810P
Yes
Optional accessory
1.1 Interfaces
Power input: DC 12V, 500mA.
WAN: RJ45 port.
PC: RJ45 port.
Headset port: RJ9 port.
Handset port: RJ9 port.
1.2 Hardware
LCD: Block code LCD
FLASH: 8M.
RAM: 16M.
CPU: 262MHz Dual Core.
LED indicator: 1 Status Light

AT810 Series User Manual
7
ATCOM TECHNOLOGY CO., LIMITED www.atcom.cn
1.3 Software
Supports Sip 2.0 (RFC3261) and other related SIP RFCs.
Supports web control.
Supports Syslog.
Supports G.711A/U, G722, G.723, G.726, G.729, iLBC Codec.
Supports STUN.
Supports 1 SIP account.
Supports SIP domain,SIP authentication.
Supports DTMF (Inband, RFC2833 and Info).
Supports voicemail.
Supports dial rule, IP to IP call.
Supports network time synchronization (NTP).
Supports speed dial.
Supports Call Forward, Call transfer, 3-way conference, Call hold, Call waiting,
Redial.
Supports VAD, CNG,Jitter Buffer.
Supports DND (Do Not Disturb), Auto Answer, Blacklist, Block Call ID, Block
Anonymous Call.
Supports HTTP, FTP, TFTP updating the configuration and firmware.
Supports auto provision for config file upgrade.
Supports phone book with 100 whitelist records and 50 blacklist records.
Supports call log with 50 answered calls 50 missed calls, 50 dialed calls.
1.4 Network
WAN port: Static IP, DHCP and PPPoE.
PC port: Bridge mode
Supports VLAN (DATA VLAN and VOICE VLAN).
Supports L2TP VPN.
Supports Qos, Qos supports Diffserv.
Supports NAT.
1.5 Management and Maintenance
Supports safe mode and firmware updating under safe mode.
Supports different level user management.

AT810 Series User Manual
8
ATCOM TECHNOLOGY CO., LIMITED www.atcom.cn
Configuration via web, keyboard.
Firmware and configuration file auto provision.
Firmware and configuration updating via HTTP, FTP and TFTP.
Supports system log and call log.
1.6 Protocol
IEEE 802.3 /802.3u 10 Base T/100Base TX.
PPPoE:PPP over Ethernet.
SIP RFC3261, RFC3262, RFC3263, RFC3264, RFC3265, RFC2543, RFC3489,
RFC3842, RFC3515, RFC2976, RFC3428, RFC2327, RFC2782, RFC1889.
TCP/IP: Transfer Control Protocol/Internet Protocol.
RTP: Real-time Transport Protocol.
RTCP: RTP Control Protocol.
SRTP: Secure Real-time Transport Protocol
VAD/CNG: Voice Activation Detection/Comfort Noise Generaror.
DNS: Domain Name Server.
TFTP: Trivial File Transfer Protocol.
HTTP:Hypertext Transfer Protocol.
FTP: File Transfer Protocol.
1.7 Compliant Standard
CE:EN55024, EN55022.
Comply with ROHS in EU.
Comply with ROHS in China.
Explanation: The letter “e” is the first letter of “environment” and “electronic”. The
rim is a round with two arrows, stands for recycles. The number 20 stands for the
years of environment protection. Please note the years of environment protection is
not discarding year nor usage life.
1.8 Operating Requirement
Operation temperature: 0 to 45°C (32°to 113°F)
Storage temperature: -5°to 55°C (23°to 131°F)

AT810 Series User Manual
9
ATCOM TECHNOLOGY CO., LIMITED www.atcom.cn
Humidity: 10 to 90% no dew
1.9 Packing List
Model
Phone
Handset
Handse
t line
Power
adapter
Ethernet
Cable
Manual
CD
Feet
underp
rop
AT810
1
1
1
1,Standar
d
accessory
1,1.5m
1
2
AT810
P
1
1
1
Optional
accessory
1,1.5m
1
2
Note: Power adapter Input: AC 100~240V, 50/60Hz; Output: 12V, 500mA.
1.10 Installation
Use Ethernet cable to connect the phone’s WAN port and computer on the same switch,
the phone defaults to use DHCP to obtain IP from switch. The following is the connection
diagram of application:
Steps to configure the phone via web:
Press "Info" button for several times, user will see the information in sequence: IP
address, Gateway and Account number.
Open web browser and key in the IP address to enter the configuration page.

AT810 Series User Manual
10
ATCOM TECHNOLOGY CO., LIMITED www.atcom.cn
Click on “admin” to configure under admin mode.
The default username is admin for administrator and user for user. They were defaults
with no password. User can set it in the webpage.
1.11 Feet installation instruction
1.11.1 Desktop position
Put the bottom side of the IP phone upside and press the plate with letter “PUSH” into
the slot, please refer the picture as below:
A. Press the other plate into the slot in accordance with the direction of the arrow.
B. Repeat A and B. It is the right picture of putting on desk after fixing the two feet
below:
C. Disassemble the feet:
Press the plate with word “PUSH” and pull the feet with the direction of arrow. When the
plate is pull out of the slot (there will be a sound of “pa”) user can take off the feet.

AT810 Series User Manual
11
ATCOM TECHNOLOGY CO., LIMITED www.atcom.cn
1.11.2 Wall position
A. Put the bottom side of the IP phone upside and push the plate with letter “PUSH” into
the slot, please refer the picture as below:
B. Push the other plate into the slot in accordance with the direction of the arrow.
C. Repeat A and B. It is the picture of wall mounting after fixing the two feet below:
D. Disassemble the feet way:
Press the plate with word “PUSH” and pull the feet with the direction of arrow. When the
plate is pull out of the slot (there will be a sound of “pa”) user can take off the feet.
Attention: Please rotate the hook to the
position as in picture with a coin or other
tools

AT810 Series User Manual
12
ATCOM TECHNOLOGY CO., LIMITED www.atcom.cn
2. Keypad of IP Phone
Keypad Map of AT810/AT810P
Description of indicators and buttons:
Number
Function description
1
Network status indicator:
When the network connection is successful, it’s on;
When the network connection is unsuccessful, it blinks.
3. 5. 7
Network mode indicator:
Number 3 stands for DHCP, When the IP phone gets IP address
in DHCP mode, the indicator is on, or it blinks;
Number 5 stands for Static, when the IP phone gets IP address
in Static mode, the indicator is on, or it blinks;

AT810 Series User Manual
13
ATCOM TECHNOLOGY CO., LIMITED www.atcom.cn
Number 7 stands for PPPoE, when the IP phone gets IP address
in PPPoE mode, the indicator is on, or it blinks.
2. 4. 6
Answering mode indicator:
Number 2 stands for answering call with handset;
Number 4 stands for answering call in handfree mode;
Number 6 stands for answering call with headset.
8
Mute indicator:
When the phone is muted, this indicator is on, or it’s off.
9
Protocol indicator:
When the register is enabled and the phone successfully
register to SIP server, this indicator is on;
When the register is enabled but the phone does not
successfully register to server, this indicator blinks;
When the register is disabled, this indicator is off.
10
Missed call indicator:
When there is a missed call, this indicator will be on, and it will
turn off when user checks the missed call information.
11
Voicemail indicator:
When there is a new voice mail, this indicator will be on, only after
all the voicemail have been checked, this indicator will turn off.
12
incoming call indicator
When the phone is in standby without any incoming call, the
indicator is off.
When there is a missed call, this indicator blinks;
When there is an incoming call, this indicator blinks;
When there is a new voicemail, the indicator blinks.
13
Monday to Sunday indicator :
The correct day will be on while others will be off.
14
This is the multi-function key
In standby mode , press “Menu/Enter” to enter the Menu;
In functional menu, press “Menu/Enter” to confirm selection.
15
Press “Info” to check network and registration status.
16
Press “Pbook” to enter the phone book and add or delete or edit.
17
Press “History” button to check call history including incoming
calls, outgoing calls and missed calls.
18
Exit button:
When dialing , press “Exit” to delete the dialed number and so
user can dial a new number;
In functional menu, press “Exit” to exit current menu and
return to the upper one.
19
conference key :
When user want to realize conference call, press “CONF” button
and key in the third part number.
20
Transfer key, when need to transfer the current call to others,

AT810 Series User Manual
14
ATCOM TECHNOLOGY CO., LIMITED www.atcom.cn
press it.
21
Press “Hold” to hold the call when talking, once more to recover.
22
Mute key:
Press “Mute”, user could hear the voice from the other end but he
could not get any voice from user.
23
Voice volume key:
“+” for turning up the volume unless the volume is the loudest
yet.
“-” for turning down the volume unless the volume is the
lowest yet.
24
Numeral keys.
25
Handfree button:
Press to enter handfree mode.
26
Dial button:
When finish dialing the telephone number, press this button to
send out the phone number.
After lifting the phone, this button can act as redial key.
27
Del button:
Press to delete a single number or letter.
28
Headset button:
Press to enter headset answering mode.
3. Menu Operation
Press “Menu/Enter” to enter menu, there will be two modes to select when it displays
“INPUT PASSWORD” on LCD:
1. If user input the password (which defaults to 123), it’s the admin mode;
2. If user do not input password but press “Menu/Enter” directly, it’s the user mode,
user have no rights to configure anything but browse them.
If the password is error, it will display “INPUT AGAIN 2”on LCD. Please press Menu/Enter
key to input the password again. If user input the incorrect password three times, the
phone will return to idle state automatically. If user wants to modify the configurations
via phone, “De” button is needed to be pressed firstly, and then user can set a new value,
and press “Menu/Enter” to save it.
Level 1 Menu
Level 2 Menu
Level 3 Menu
Level 4 Menu
NETWORK
NET MODE
DHCP ON
PPPOE

AT810 Series User Manual
15
ATCOM TECHNOLOGY CO., LIMITED www.atcom.cn
STATIC
WAN
STATIC NET
IP
DNS
DNS2
GATEWAY
NETMASK
PPPoE
USER NAME
PASSWORD
SIP
SIP SERVER
PORT
NUMBER
PASSWORD
ACCOUNT
REGISTER
1 ON
0 OFF
SYSTEM
TIME
REBOOT
SET DEFAULT
DSP
HANDSET VOL
HEADSET VOL
SPEAKER VOL
RING VOL
RING TYPE
4. Basic functions and operations
4.1 Answer the calls
When there is an incoming call, the phone will remind user with ring. There are 3 ways
to answer the call:
Answer by handset
Pick up the handset and talk with the caller. If user wants to hang up, just put back
the handset. If user wants to switch in handset mode, headset mode and handfree
mode, just press the handfree button or the headset button. Be attention: only after
done the switch can user put the handset back, or the call will be ended.

AT810 Series User Manual
16
ATCOM TECHNOLOGY CO., LIMITED www.atcom.cn
Answer by handfree
Press the handfree button in the phone and talk with callers by built-in Micro-phone
and Speaker. If user wants to switch in handset mode, headset mode and handfree
mode, pick up the handset to switch to handset mode, and press the headset button
to switch into headset mode.
Answer by headset
Keep the headset connected with the RJ9 headset jack, when there is an incoming
call, press the headset button on the IP phone and then user can talk with the caller
by the headset. If user wants to switch in handset mode, headset mode and handfree
mode, pick up the handset to switch to handset mode, and press the handfree button
to switch into the handfree mode.
4.2 Make Calls
Use the handset
1. Pick up the handset then input the number with the keyboard and press “#” or
“Dial” to send the number. After hearing the tones of “du~~du~~” with
“CALLING” showed on the LCD, it means that the callee’s phone is ringing. If the
callee answers the call, the phone call will be established and the LCD will show
the calling time and the callee’s number.
2. Input the number then pick up the handset, the phone will dial the number
automatically. After hearing the tones of “du~~du~~” with “CALLING” showed
on the LCD, it means that the callee’s phone is ringing. If the callee answers the
call, the phone call will be established and the LCD will show the calling time and
the callee’s number.
Use the handfree button
1. Press the Speaker Phone button then input the number with the keyboard and
press “#” or “Dial” to send the number. After hearing the tones of “du~~du~~”
with “CALLING” showed on the LCD, it means that the callee’s phone is ringing. If
the callee answers the call, the phone call will be established, and the LCD will
show the calling time and the callee’s number.
2. Input the number then press the handfree button, the phone will dial the number
automatically. After hearing the tones of “du~~du~~” with “CALLING” showed
on the LCD, it means that the callee’s phone is ringing. If the callee answers the
call, the phone call will be established and the LCD will show the calling time and
the callee’s number.
Use the headset
1. Press the headset then input the number with the keyboard and press “#” or
“Dial” to send the number. After hearing the tones of” du~~du~~” with
“CALLING” showed on the LCD, it means that the callee’s phone is ringing. If the
callee answers the call, the phone call will be established and the LCD will show
the calling time and the callee’s number.

AT810 Series User Manual
17
ATCOM TECHNOLOGY CO., LIMITED www.atcom.cn
2. Input the number then press the headset button, the phone will dial the number
automatically. After hearing the tones of “du~~du~~” with “CALLING” showed
on the LCD, it means that the callee’s phone is ringing. If the callee answers the
call, the phone will be established and the LCD will show the calling time and the
callee’s number.
Use the phone book
1. Press “Pbook” button to enter the content, select the item “CURRENT”, then use
the keys “+” and “-” to find the certain contact. When the LCD shows the message
of the right contact, dial to the number by pressing the “Menu/Enter” button twice,
or pressing button “Dial”, or making one of the three modes (handset, handfree
and headset) active.
2. Press “Pbook” button to enter the content, select the item “SEARCH”, then input
the name saved in the phone book earlier who user want to dial, press button
“Menu/Enter” to ensure the operation. When the LCD shows the message of the
right contact, user could dial to the number wanted by pressing the “Menu/Enter”
button twice, or pressing button “Dial”, or making one of the three modes
(handset, handfree and headset) active.
Use the History
Press “History” key to enter the content, select one of the three kinds of record:
DIALED, RECEIVED or MISSED. Press “Menu/Enter” key to enter the content, use
the keys “+” and “-” to find the certain contact. After finding out the certain number,
user can dial to the number wanted by pressing the “Menu/Enter” button twice, or
pressing button “Dial”, or making one of the three modes (handset, handfree and
headset) active.
4.3 Hang up
Handset hang up
When calling under handset mode, put the handset back to hang up.
Handfree hang up
When calling under handfree mode, press button “handfree” to hang up.
Headset hang up
When calling under headset mode, press button “headset” to hang up.
4.4 Call Transfer
Attended transfer:
Attended transfer allow user to speak to the third part before transfer.
If A is using AT810 talking with B, B wants to speak to C with A’s help of transferring.
The operation steps are:

AT810 Series User Manual
18
ATCOM TECHNOLOGY CO., LIMITED www.atcom.cn
1. A presses "Hold".
2. A dials C’s number to ask whether C would answer the call from B.
3. If C agrees, then A presses "XFER" to transfer B’s call to C.
Blind transfer:
Blind transfer do not allow user to talk with the third part instead of ending the call
directly, it means to user that the call is over after the blind transfer.
If A is using AT810 talking with B, B want to speak to C with A’s transfer. The
operation steps are:
1. A presses "XFER".
2. A dials C’s number, then A will be hang up no matter C receives the call or not.
4.5 Mute
Once the “Mute” key is been pressed, no voice will be transported to the other part in the
call anymore. Such state will be kept, no matter user switches the mode among handset
mode and handfree mode and earphone mode, until the button “Mute” is been pressed
again.
4.6 Call Hold
User can hold the current call by pressing “Hold”. To resume the call, user needs to press
soft “Hold” again. The functions are available under 3-way conference mode the same as
under normal mode. When the phone is in the situation of “Hold”,the call won’t be hang
up, instead, the call will be kept holding.
4.7 3-way conference call
Steps of starting a 3-way conference call are as follows:
1. When A is using AT810 talking with B and they want to make conference call with C.
A or B just needs to press soft key "Conf", the other one in the call will be held, and then
the initiator dials C’s number, presses “#” or ”Dial” to make the call.
2. After C answers the call, the initiator presses “Conf” to begin the 3-way conference
call.
3. If the initiator hangs up directly before the 3-way conference call established, it will
be ended, and the others will be hanged up, too.
4. Anyone in the 3-way conference call can act as an initiator of a new 3-way
conference call. This initiator obeys the above rule number 3.

AT810 Series User Manual
19
ATCOM TECHNOLOGY CO., LIMITED www.atcom.cn
4.8 Call History
AT810 series phone supports 50 missed calls, 50 incoming calls and 50 dialed calls
record. The latest call will update the history if the storage is full. When the phone
updates or is factory resets, all the call history records will be cleared.
A. Missed call
1. When there is a missed call, the LCD screen will display the Missed call icon and
the status LED will be 2s on, 500ms off.
2. Press history button, then press “Vol+” or “Vol-” to select “MISSED”.
3. Press “Menu/Enter” to make AT810 display the records of missed call.
4. Press “Vol+” or “Vol-” to browse missed call history.
5. If there is no missed record, the LCD screen will display “EMPTY”.
B. Received call
1. Press “History” button, then press “Vol+” or “Vol-”to select “RECEIVED”.
2. Press “Menu/Enter” to make AT810 display the records of received call.
3. Press “Vol+” or “Vol-” to browse received call records.
4. If there is no record, the LCD screen will display “EMPTY”.
C. Dialed call
1. Press “History” button and press “Vol+” or “Vol-“to select “DIALED”.
2. Press “Menu/Enter” to make AT810 display the records of dialed call.
3. Press “Vol+” or “Vol-” to browse dialed call records.
4. If there is no record, the LCD screen will display “EMPTY”.
4.9 Date and Time
1. Press “Menu/Enter” and input right password to enter the phone’s menu.
2. Use “Vol+” or “Vol-” to find “System” item, press “Menu/Enter” to confirm.
3. Press “Menu/Enter” to confirm again when the LCD shows “Time”.
4. Press “Del” to enter edit mode, when the phone shows “INPUT VALUE”, input
“month*day*year*hour*minute” such as “12*21*2012*12*21” which means
December 21st, 2012, 21 past 12.
5. Press “Menu/Enter” to save, and press “Exit” to exit the menu and check the time.
4.10 Access Mode
There are two kinds of web access mode for AT810 series: admin mode and user mode.
User could view and configure all items in admin mode, while user couldn’t change the
SIP configuration as well as server address and port but only access and view the

AT810 Series User Manual
20
ATCOM TECHNOLOGY CO., LIMITED www.atcom.cn
information. User would enter different mode after input different web address and user
name and password:
A. Administrator mode
Web address: the phone’s IP/index.asp.
User Name: admin.
Password: default password is none.
B. User mode
Web address: the phone’s IP/user.asp.
User Name: user.
Password: default password is none.
5. Web settings
Input phone’s IP addresses in the web browser and press the “Menu/Enter” button, it will
go to the web interface of the user mode .Click on “admin” at right of the web page, user
can config the phone from the web then.
5.1 System status
Other manuals for AT810 series
1
This manual suits for next models
1
Table of contents
Other ATCOM IP Phone manuals

ATCOM
ATCOM A21 User manual

ATCOM
ATCOM AT800 Series User manual

ATCOM
ATCOM r2 User manual

ATCOM
ATCOM AT-610 User manual

ATCOM
ATCOM AT800 Series User manual

ATCOM
ATCOM A1XW series User manual

ATCOM
ATCOM A20 User manual

ATCOM
ATCOM Rainbow1 User manual

ATCOM
ATCOM AT-610P User manual

ATCOM
ATCOM AT800 Series User manual

ATCOM
ATCOM AT-640 User manual

ATCOM
ATCOM D2SW User manual

ATCOM
ATCOM AT840 series User manual

ATCOM
ATCOM AT820 series Owner's manual

ATCOM
ATCOM AT-610P User manual

ATCOM
ATCOM AT530 User manual

ATCOM
ATCOM AT-640 User manual

ATCOM
ATCOM AT-640P User manual

ATCOM
ATCOM Rainbow 1 User manual

ATCOM
ATCOM AT-610P User manual