Biotage TurboVap P+ User manual

Other Biotage Laboratory Equipment manuals

Biotage
Biotage PhyPrep User manual

Biotage
Biotage Extrahera LV-200 User manual

Biotage
Biotage TurboVap 96 Dual User manual

Biotage
Biotage V-10 Touch User manual

Biotage
Biotage Turbo Vap II User manual

Biotage
Biotage PRESSURE+ 48 User manual

Biotage
Biotage Lysera User manual

Biotage
Biotage V-10 Touch User manual

Biotage
Biotage Lysera User manual

Biotage
Biotage Turbo Vap II User manual

Biotage
Biotage Extrahera Classic User guide

Biotage
Biotage PRESSURE+ 96 User manual

Biotage
Biotage TurboVap 96 Dual User manual

Biotage
Biotage Selekt User manual

Biotage
Biotage TurboVap 96 Dual User manual

Biotage
Biotage Isolera Prime User manual

Biotage
Biotage Extrahera LV-200 User manual

Biotage
Biotage TurboVap 96 Dual User guide

Biotage
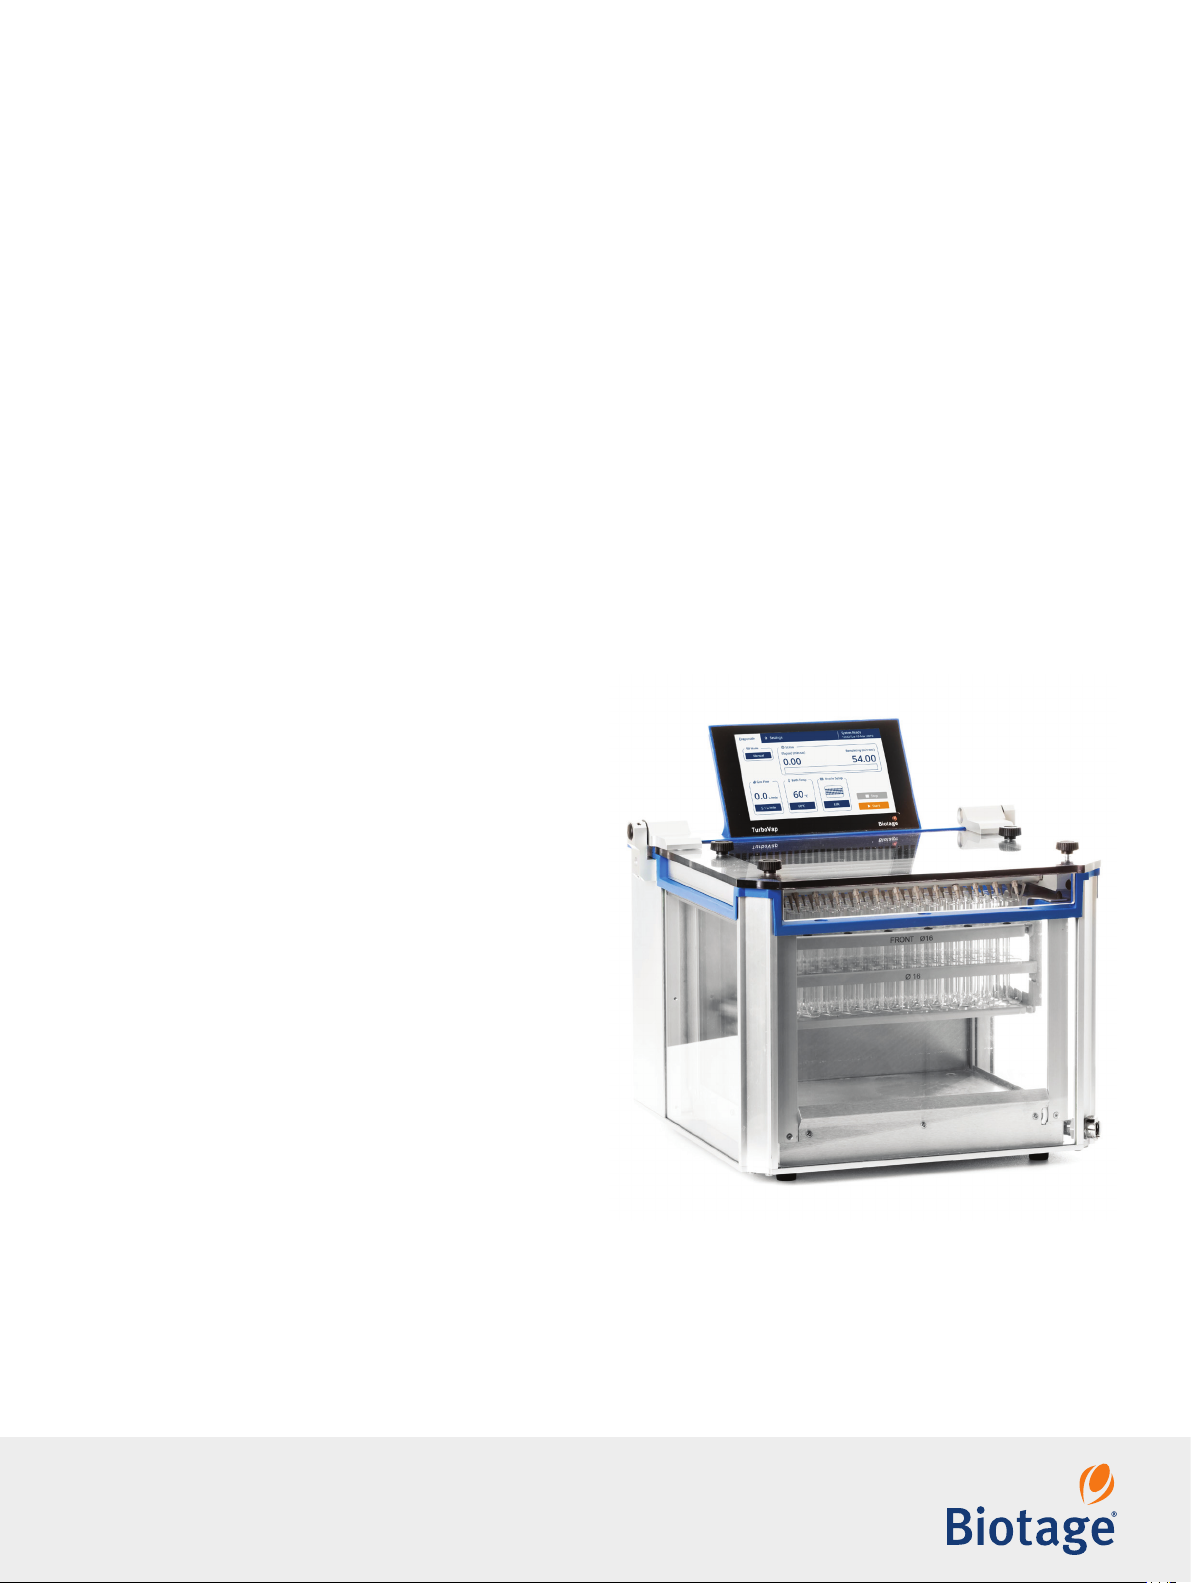
Biotage TurboVap Series User guide

Biotage
Biotage TurboVap LV User manual


Popular Laboratory Equipment manuals by other brands

Hettich
Hettich EBA 280 operating manual

CORNING
CORNING LSE 6783 instruction manual
Specac
Specac ARROW Quick start manual

Kodak
Kodak X-Omat 460 RA Processor Service manual

Terra Universal
Terra Universal Cleanroom Airlock Installation and operating guide

Tuttnauer
Tuttnauer T-Top 10 Operation and maintenance manual

Waters
Waters Vion IMS QTof Overview and maintenance guide

Labnet
Labnet Orbit S2030-LS-B instruction manual

Noraxon
Noraxon Ultium EMG System user manual

Ken A Vision
Ken A Vision Video Flex 5400 installation manual

IKA
IKA Roller 6 basic operating instructions

Fisher Scientific
Fisher Scientific accuSpin 1 operating instructions

Sigma
Sigma 2-5 Operating instruction

Showa Denko
Showa Denko Shodex ORpak CDBS-453 Operation manual

NeedleSmart
NeedleSmart Professional user manual

Thermo Scientific
Thermo Scientific TSQ Endura Hardware manual

ROMANOFF
ROMANOFF Yasui K2NEXT 8K product manual

IKA
IKA ULTRA-TURRAX T 18 basic operating instructions