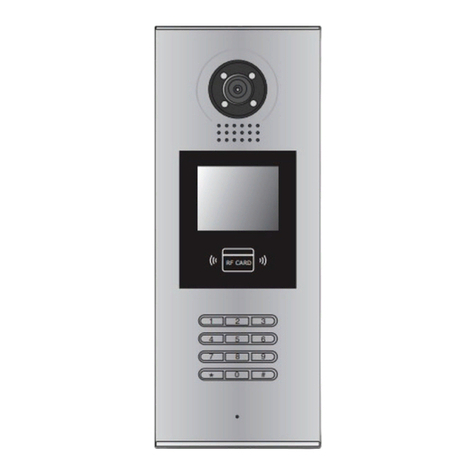
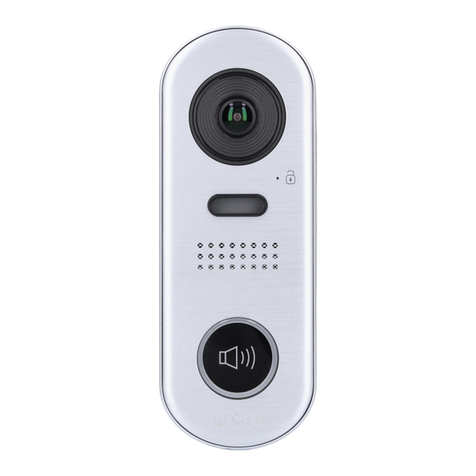
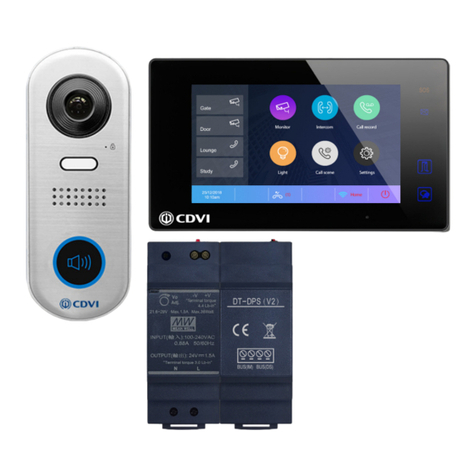
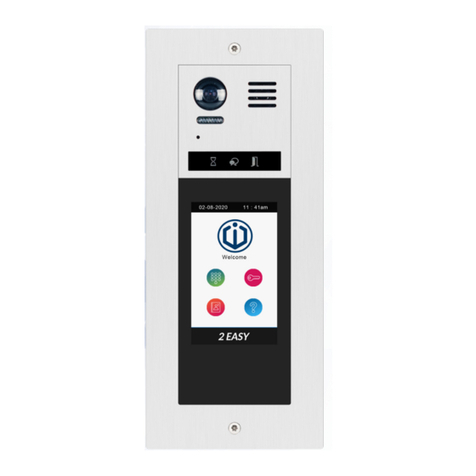
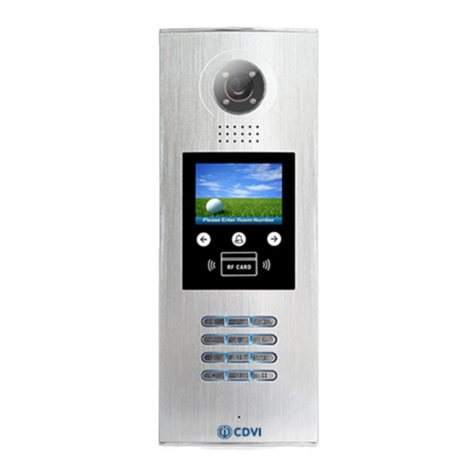
CDVI 2EASY CDV-96KP User manual

WARRANTY
YEAR
2
2EASY 2-wire Video Door Station with
Keypad
CDV-96KP
EN

EN EN
2
CDV-96KP
2EASY 2-wire Video Door Station with Keypad
1] CONTENTS
2] Parts and Functions 3
3] Terminal Description 3
4] Installation 4
5] System Wiring and Connections 5
6] Panview & Zoom 8
7] Settings 8
8] Unlock Operations 16
9] Product Specifcations 16
10] Cable Requirements 17
11] Precautions 17
Title Page

EN EN
3
CDV-96KP
2EASY 2-wire Video Door Station with Keypad
2] PARTS AND FUNCTIONS
[1] Camera lens
[2] Camera LED
[3] Speaker
[4] Touch keypad
[5] Keypad LED
[6] Call button
[7] Microphone
[8] Power LED
3] TERMINAL DESCRIPTIONS
Lock Control Jumper: To select the lock
type
Main Connect Port: For connection of the
bus line and the electronic locks
L1, L2: Bus line connection, no polarity
PL: External lock power input
S1+, GND: Lock power connection port

EN EN
4
CDV-96KP
2EASY 2-wire Video Door Station with Keypad
4] INSTALLATION
Name label placement
Use a screwdriver to remove the screw holding the panel in place. Slide out the name
label as shown.

EN EN
5
CDV-96KP
2EASY 2-wire Video Door Station with Keypad
Single door station system wiring
5] SYSTEM WIRING AND CONNECTIONS
Electric lock connections
Door lock controlled with internal power
Notes:
1. This mode only supports Fail Secure (power
on to unlock) Strikes
2. The door lock is limited to 12V, and holding
current must be less than 250mA.
3. The door lock control is not timed from Exit
Button (EB).
4. The Unlock Mode monitor parameter must
be set to 0 (by default).
Door lock controlled with dry contact
Notes:
1. An external power supply must be used
according to the lock power requirements.
2. The internal relay contact is restricted to AC
or DC Max 24V/1A
3. Remove jumper before connecting.
4. Setup the monitor’s Unlock Mode for
different lock types.
• Power-on-to-unlock (fail secure): Unlock
Mode = 0 (default)
• Power-off-to-unlock (fail safe): Unlock Mode
= 1

EN EN
6
CDV-96KP
2EASY 2-wire Video Door Station with Keypad
Unlock settings (set in monitor)
On the main menu page, touch [LOGO] icon to enter the About page.
Then, press the UNLOCK button on the front panel and hold for 2 seconds.
A QWERTY keyboard will display. Refer to the following:
Note:
1. The CDV-96KP must be connected before setting it up.
2. Parameters will be saved in the CDV-96KP automatically. It only needs to be set up
on one monitor.
Multi door stations system wiring (4 max*)
Camera #1
(Device Address: 0)
Camera #2
(Device Address: 1)
Camera #3
(Device Address: 2)
Camera #4
(Device Address: 3)

EN EN
7
CDV-96KP
2EASY 2-wire Video Door Station with Keypad
Multidoor monitors system wiring (4 max*)
Simple IN/OUT wiring
CDV-DBC4A system wiring
*IMPORTANT: Subject to cable type. Please
see cable distance chart on pg 17. For
further help, call CDVI Technical Support
on +44 (0) 1628 531300 or visit the CDVI
Support Centre.

EN EN
8
CDV-96KP
2EASY 2-wire Video Door Station with Keypad
6] PANVIEW & ZOOM
When a door station image is displayed,
move to the desired position by touching
on the screen to view the
image in zoom mode.
Note: The edge of pantilt image will not be
displayed.
You can zoom in or zoom out to identify anyone at the entrance.
Touch the icon to zoom to the center position.
Pressing any button of the
5-direction pad will enlarge
the screen to full screen
mode.
Press to return to the full
screen mode
Press to navigate
and see individuals up close.
Note: This function requires a monitor with sh-eye function to operate. (CDV-47 or
CDV-47DX)
You can adjust the image display of a sh-eye door station when answering a call by
using the 5-direction pad button.
7] SETTINGS
The table below explains the settings of each function.
• Enter the master code to open the programming mode
• Enter the corresponding setting code to perform the required function.
• Enter the value required using the setting codes below.
• Press “*” to exit the setting mode.

EN EN
9
CDV-96KP
2EASY 2-wire Video Door Station with Keypad
• The default setting is * as the cancel button and # as conrm button,
please refer to */# function (8) setting below for detailed information.
• Sliding a nger to touch the digital keypad may cause erroneous key
selection, use a direct nger press to select the digit required.
• The “conrm” button # must be used after inputting the code number
each time otherwise the operation will be cancelled automatically in 10s.
Order Setting item Setting range Default value Setting code
1Reset all settings -1, 2, 3, 4 00
2Setting the master code 1 - 12 digits
Valid keys: 0-9 1234 01
3Setting the key illumination
time
10 to 99 seconds/
(00 = continually lit) 10 seconds 02
4Setting the unlock time 1 to 99 seconds 1 second 03
5Setting the unlock mode 0 = NO / 1 = NC NO 04
6Operation tone settings 0 = on / 1 = off on 05
7Reset code settings -1, 2, 3, 4 06
8* & # function settings 0 = Normal / 1 = Reverse Normal 07
9Language Valid keys: 0-9 Enable 08
10 Voice Volume Valid keys: 0-9 5 09
11 MIC Volume Adjust
(microphone) Valid keys: 0-9 7 10
12 SPK Volume Adjust Valid keys: 0-9 4 11
13 Device Address Valid keys: 0-3 0 12
14 Night Light Level Valid keys: 0-5 4 13
15 Reserved (not used) Reserved Reserved 14-17
16 Temporary code (single use
only) Password for relay 1
1-12 digits
Valid keys: 0-9 - 18
17 Temporary code (single use
only) Password for relay 2
1-12 digits
Valid keys: 0-9 - 19
18 Setting the code for user
group 1
1-12 digits
Valid keys: 0-9 - 20-59
19 Setting the code for user
group 2
1-12 digits
Valid keys: 0-9 - 60-99
20 Work Mode 0: Apartment /
1: Villa 1 (villa) 100
21 Call Address Valid keys: 0-9 Villa: 00,16
Apartment: 00-31 101
22 Display Scene Valid keys: 0-1 0 102
23 TS_Sensitivity (Touch
Screen) Valid keys: 0-5 3 103
EN EN
10
CDV-96KP
2EASY 2-wire Video Door Station with Keypad
Each operation is indicated by the keys and
nameplate lighting up, as well as the buzzer
sounding.
Enter the master code
(Default: [1 2 3 4] + [#] )
The colour of key indicator will light up
(blue-white) and beep, notifying that you
entered the settings mode
1. Reset all settings
2. Setting master
code
(Default: 1234)
3. Setting key
illumination time
(Default: 10s)
4. Setting
unlock time
(Default: 1s)
- All settings will restore
to their default value.
- With power on and the
reset activated, the key
illumination will blink
and the touching will not
operate, once complete
the key illumination will
stop ashing and a long
beep will be emitted.
The master code can
be 1~12 digits in
length. The same code
cannot be set for both
the user code and
the master code. It is
receommended that the
master code is changed
from the default code.
- Key illumination time
set to 00 = constantly lit
when power is on.
- Key illumination time
set to 10~99 = lights
up for 10~99 seconds.
Switches off in standby
mode. Touch any key to
illuminate. This activation
only turns on the keypad.
The unlock time can be
set by both monitor and
door station, the valid
value is always the time
last set either at the
door station or monitor.
• When the “* cancel” key is pressed, the indicator will show the
standby color, the buzzer beeps, and the system will exit the out of
programming mode.
• When there isn’t any operation within 10s, the indicator will show
the standby color, the buzzer beeps, and the system will exit the
programming mode.
• When a setting input fails, the color of key indicator will turn red and
the buzzer will beep.
Enter the setting code
00+#
Colour of key indicator
(green)
--> Beep+, Beep
Enter the setting code
01+#
Enter the setting code
02+#
Enter the setting code
03+#
Colour of key indicator
(green)
--> Beep+, Beep
Colour of key indicator
(green)
--> Beep+, Beep
Colour of key indicator
(green)
--> Beep+, Beep
Enter the mastercode
1234+#
Colour of key indicator
(green --> blue-white)
--> Beep+
Enter new master code
(ex.) 4321+#
Enter the code req (ex.10)
10+#
Enter the code req (ex.10)
09+#
Colour of key indicator
(green --> blue-white)
--> Beep+
Colour of key indicator
(green --> blue-white)
--> Beep+
Colour of key indicator
(green --> blue-white)
--> Beep+

EN EN
11
CDV-96KP
2EASY 2-wire Video Door Station with Keypad
5. Setting the unlock
mode
(Default: 0 opened)
6. Setting operation
tone
(Default: ON)
7. Reset code setting
8. *&# function
setting
(Default: normal)
The unlock mode can be
set by both monitor and
door station, and the
valid value will always be
the last value set.
• When the operation
tone is set to 0,
pressing the digital
keypad will issue a
beep.
• When the operation
tone is set to 1,
pressing the digital
keypad will ash one
time.
• Cancel all passwords
except the master code
• Restore the master
code to default value
(1,2,3,4)
• When set to 0, press
the * button to cancel
the input and press the
# button to conrm
the input.
• When set to 1, press
the # button to cancel
the input and press the
* button to conrm the
input.
• When the “* cancel” key is pressed, the indicator will show the
standby color, the buzzer beeps, and the system will exit the out of
programming mode.
• When there isn’t any operation within 10s, the indicator will show
the standby color, the buzzer beeps, and the system will exit the
programming mode.
• When a setting input fails, the color of key indicator will turn red and
the buzzer will beep.
Enter the setting code
04+#
Colour of key indicator
(green)
--> Beep+, Beep
Enter the setting code
05+#
Enter the setting code
06+#
Enter the setting code
07+#
Colour of key indicator
(green)
--> Beep+, Beep
Colour of key indicator
(green)
--> Beep+, Beep
Colour of key indicator
(green)
--> Beep+, Beep
Enter the code req. (ex.:
1) range: 0=NO / 1=NC
1+#
Colour of key indicator
(green --> blue-white)
--> Beep+
Enter code req. (ex.: 1)
range: 0=on / 1=off
1+#
Enter the code
1234+#
Enter code req (ex.1)
Range: 0=normal / 1=reverse
1+#
Colour of key indicator
(green --> blue-white)
--> Beep+
Colour of key indicator
(green --> blue-white)
--> Beep+
Colour of key indicator
(green --> blue-white)
--> Beep+
Enter the master code
(Default: [1 2 3 4] + [#] )
The colour of key indicator (blue-white)
--> Beep+, Beep

EN EN
12
CDV-96KP
2EASY 2-wire Video Door Station with Keypad
9. Language
(Default: 1d)
10. Voice volume
(Default: 5)
11. MIC volume
adjust setting
(Default: 7)
12. SPK volume
adjust setting
(Default: 4)
• Unlock via pin (password) is still available even
when a call is in progress
• When in talking mode, enter the Master code (the
LED turns white) to activate the volume adjusting
function:
- MIC adjustment: 1 (up), 4 (down);
- Speaker adjustment: 3 (up), 6 (down).
• When the “* cancel” key is pressed, the indicator will show the
standby color, the buzzer beeps, and the system will exit the out of
programming mode.
• When there isn’t any operation within 10s, the indicator will show
the standby color, the buzzer beeps, and the system will exit the
programming mode.
• When a setting input fails, the color of key indicator will turn red and
the buzzer will beep.
Enter the setting code
08+#
Colour of key indicator
(green)
--> Beep+, Beep
Enter the setting code
09+#
Enter the setting code
10+#
Enter the setting code
11+#
Colour of key indicator
(green)
--> Beep+, Beep
Colour of key indicator
(green)
--> Beep+, Beep
Colour of key indicator
(green)
--> Beep+, Beep
Enter code req. (ex.: 1)
Range: 0-9
1+#
Colour of key indicator
(green --> blue-white)
--> Beep+
Enter code req. (ex.: 3)
Range: 0-9
3+#
Enter code req. (ex.: 5)
Range: 0-9
5+#
Enter code req (ex.5)
Range: 0-9
1+#
Colour of key indicator
(green --> blue-white)
--> Beep+
Colour of key indicator
(green --> blue-white)
--> Beep+
Colour of key indicator
(green --> blue-white)
--> Beep+
Enter the master code
(Default: [1 2 3 4] + [#] )
The colour of key indicator (blue-white)
--> Beep+, Beep

EN EN
13
CDV-96KP
2EASY 2-wire Video Door Station with Keypad
13. Device address
setting
(Default: 0)
14. Night light level
setting
(Default: 4)
Device address Settings:
0 (device address:0),
1 (device address:1),
2 (device address:2),
3 (device address:3).
• Night Light Level: 0~5.
• The higher the number,
the brighter the night
lights.
• When the “* cancel” key is pressed, the indicator will show the
standby color, the buzzer beeps, and the system will exit the out of
programming mode.
• When there isn’t any operation within 10s, the indicator will show
the standby color, the buzzer beeps, and the system will exit the
programming mode.
• When a setting input fails, the color of key indicator will turn red and
the buzzer will beep.
Enter the setting code
12+#
Colour of key indicator
(green)
--> Beep+, Beep
Enter the setting code
13+#
Colour of key indicator
(green)
--> Beep+, Beep
Enter code req. (ex.: 1)
Range: 0-2
1+#
Colour of key indicator
(green --> blue-white)
--> Beep+
Enter code req. (ex.: 3)
range: 0-5
3+#
Colour of key indicator
(green --> blue-white)
--> Beep+
Enter the master code
(Default: [1 2 3 4] + [#] )
The colour of key indicator (blue-white)
--> Beep+, Beep

EN EN
14
CDV-96KP
2EASY 2-wire Video Door Station with Keypad
15. Temporary code
(single use only)
Password for relay 1
16. Temporary code
(single use only)
Password for relay 2
17. Setting the code
for user group 1
Locations 20 to 59
18. Setting the code
for user group 2
Locations 60 to 99
• The user code group 1 is used to release the rst
lock and the user code group 2 is used to release
the second lock (the second lock requires external
device CDV-RLC to support this function).
• If the password length exceeds 12 digits, the
system will emit 4 beeps eg. “beep, beep, beep,
beep”, and the digits you input before will be
cleared at the same time.
• The user code can not be set the same as the
master code and temporary code.
• When the “* cancel” key is pressed, the indicator will show the
standby color, the buzzer beeps, and the system will exit the out of
programming mode.
• When there isn’t any operation within 10s, the indicator will show
the standby color, the buzzer beeps, and the system will exit the
programming mode.
• When a setting input fails, the color of key indicator will turn red and
the buzzer will beep.
Enter the setting code
18+#
Colour of key indicator
(green)
--> Beep+, Beep
Enter the setting code
19+#
Enter the setting code
20+#
Enter the setting code
60+#
Colour of key indicator
(green)
--> Beep+, Beep
Colour of key indicator
(green)
--> Beep+, Beep
Colour of key indicator
(green)
--> Beep+, Beep
Enter code req. (ex.: 1006)
1-12 digits
1006+#
Colour of key indicator
(green --> blue-white)
--> Beep+
Enter code req. (ex.: 2011)
1-12 digits
2011+#
Enter code req. (ex.: 2021)
1-12 digits
2021+#
Enter code req (ex.2020)
1-12 digits
201+#
Colour of key indicator
(green --> blue-white)
--> Beep+
Colour of key indicator
(green --> blue-white)
--> Beep+
Colour of key indicator
(green --> blue-white)
--> Beep+
Enter the master code
(Default: [1 2 3 4] + [#] )
The colour of key indicator (blue-white)
--> Beep+, Beep
• When the correct temporary password has been
used to release the door the system will clear
the temporary password after 60 seconds. The
password is still valid for 60 seconds after entering
the correct temporary password
• Temporary 1 is used to release the rst lock
and temporary 2 is used to release the second
lock (the second lock requires external device,
CDV-RLC, to support this function).
• If the password length exceeds 12 digits, the
system will emit 4 beeps eg. and the digits
entered before will be cleared at the same time.
• The temporary code can not be set the same as
the master code and user code.

EN EN
15
CDV-96KP
2EASY 2-wire Video Door Station with Keypad
19. Work mode
setting
(Default: 1/villa)
20. Call address
setting
(Default: villa-00,16 /
apartment-00,31)
21. Display scene
setting
(Default: 0)
22. TS sensitivity
(Default: 3)
Work mode setting:
0 = apartment (multiway)
1 = villa (House)
• When the work mode is
villa, the call address is
00 or 16.
• When the work mode is
apartment, the range
of call addresses is 00
to 31
• Scene 0:
standby (blue)
calling (blue blinks rapidly)
talking (blue blinks slowly)
unlock (green).
• Scene 1:
standby (green)
calling (green blinks rapidly)
talking (green blinks slowly),
unlock (blue).
• Scene 2:
standby (blue)
calling (yellow)
talking (red)
unlock (green).
TS = Touch screen
• When the “* cancel” key is pressed, the indicator will show the
standby color, the buzzer beeps, and the system will exit the out of
programming mode.
• When there isn’t any operation within 10s, the indicator will show
the standby color, the buzzer beeps, and the system will exit the
programming mode.
• When a setting input fails, the color of key indicator will turn red and
the buzzer will beep.
Enter the setting code
100+#
Colour of key indicator
(green)
--> Beep+, Beep
Enter the setting code
101+#
Enter the setting code
102+#
Enter the setting code
103+#
Colour of key indicator
(green)
--> Beep+, Beep
Colour of key indicator
(green)
--> Beep+, Beep
Colour of key indicator
(green)
--> Beep+, Beep
Enter code req.(ex.: 1)
Range: 0 (apartment) / 1 (villa)
0+#
Colour of key indicator
(green --> blue-white)
--> Beep+
Enter code req.(ex.: 1)
Range: valid keys: 0-9
0+#
Enter code req.(ex.: 1)
Range: 0 (apartment) / 1 (villa)
0+#
Enter code req.(ex.: 1)
Range: valid keys: 0-9
0+#
Colour of key indicator
(green --> blue-white)
--> Beep+
Colour of key indicator
(green --> blue-white)
--> Beep+
Colour of key indicator
(green --> blue-white)
--> Beep+
Enter the master code
(Default: [1 2 3 4] + [#] )
The colour of key indicator (blue-white)
--> Beep+, Beep

EN EN
16
CDV-96KP
2EASY 2-wire Video Door Station with Keypad
Feature Description
Power Supply 24 Vdc
Power Consumption Standby: 15mA, Working: 105mA
Camera Color CMOS, 2.0 mega pixel
Lock Time 1-99s
Lock Power Supply 12 Vdc, 280mA (internal Power)
Number of Relay Circuits 2 (the second lock requires external device support)
Operating Temperature -15°C - +55°C
Dimensions 182(H) x 93(W) x 44(D) mm
IP Rating IP54
8] UNLOCK OPERATIONS
Unlocking by user code
When the registered user code has been entered using the keypad (1~12 digits), the
LED background indicator lights up, the buzzer sounds and the electric door lock is
unlocked (note; that you should press “#” button (if “#” button is set as the conrm
button) after entering the unlock code.
• The time interval during which the buttons must be pressed is aproximately 10
seconds. If the time interval exceeds approximately 10 seconds, the input value will
be cleared.
• If you make a mistake when inputting the user code press the «cancel» button ‘*’
and input user code again
• The keypad will be locked and disabled for 60 seconds if an incorrect password is
entered 10 times. During this time the buzzer will sound continuously.
1. During calling,pressing “cancel” button ‘*‘ will cancel the call.
2. If the incorrect password is entered, you will hear 3 beeps.
9] PRODUCT SPECIFICATIONS

EN EN
17
CDV-96KP
2EASY 2-wire Video Door Station with Keypad
10] CABLE REQUIREMENTS
The maximum distance of the wiring is limited in the 2EASY system. Using different
cables may also affect the maximum distance which the system can reach.
Two to four monitors from outputs A, B, C & D of DBC4A
When monitor quantity < 20
Cable Usage A B C
Twisted cable 2x0.75mm260 60 30
Twisted cable 2x1mm280 80 40
When monitor quantity > 20
Cable Usage A B C
Twisted cable 2x1mm270 30 20
Twisted cable 2x1.5mm270 50 30
11] PRECAUTIONS
• Please clean the unit with soft cotton cloth, don’t use any wet wipes cloth or chemical
cleaning agent. If necessary, use a little pure water or diluted soapy water to clean the
dust.
• The unit is weather resistant. However do not spray high pressure water directly onto
the keypad. Excessive moisture may cause problems with the unit.
• You must use the correct power adapter which is either supplied or approved by the
manufacturer
• Pay attention to the high voltage inside the products, please refer service only to a
trained and qualied professional.
Recommended cable:
16AWG, Belden 8471

www.cdvigroup.com
CDVI Group
FRANCE (Headquarters)
Phone: +33 (0) 1 48 91 01 02
CDVI FRANCE + EXPORT
+33 (0) 1 48 91 01 02
www.cdvi.com
CDVI AMERICAS [CANADA - USA]
+1 (450) 682 7945
www.cdvi.ca
CDVI BENELUX [BELGIUM - NETHERLANDS - LUXEMBOURG]
+32 (0) 56 73 93 00
www.cdvibenelux.com
CDVI GERMANY
+49 (0) 175 2932 901
www.cdvi.de
CDVI TAIWAN
+886 (0) 42471 2188
www.cdvichina.cn
CDVI SUISSE
+41 (0) 21 882 18 41
www.cdvi.ch
CDVI CHINA
+86 (0) 10 84606132/82
www.cdvichina.cn
CDVI IBÉRICA [SPAIN - PORTUGAL]
+34 (0) 935 390 966
www.cdviberica.com
CDVI ITALIA
+39 (0) 321 90 573
www.cdvi.it
CDVI MAROC
+212 (0) 5 22 48 09 40
www.cdvi.ma
CDVI SWEDEN
[SWEDEN - DENMARK - NORWAY - FINLAND]
+46 (0) 31 760 19 30
www.cdvi.se
CDVI UK [UNITED KINGDOM - IRELAND]
+44 (0) 1628 531300
www.cdvi.co.uk
CDVI POLSKA
+48 (0) 12 659 23 44
www.cdvi.com.pl
All the information contained within this document (pictures, drawings, features, specications and dimensions)
could be perceptibly different and can be changed without prior notice. - Aug 2021
*CDV-ENG-611KP-V2*
Reference : CDV-ENG-611KP-V2
Extranet : CDVI_CDV-96KP_IM_01_EN_A4_C
Table of contents
Other CDVI Intercom System manuals

CDVI
CDVI 2EASY CDV-850IP User manual

CDVI
CDVI CDV96KP User manual

CDVI
CDVI 2EASY CDV-91S User manual

CDVI
CDVI DMR18S User manual

CDVI
CDVI CDV96KP User manual

CDVI
CDVI 2Easy CDV4796KP-DX User manual

CDVI
CDVI KCIEN User manual

CDVI
CDVI CDV4796KP-DX User manual

CDVI
CDVI CDV91S User manual

CDVI
CDVI 2EASY CDV-47DX User manual
Popular Intercom System manuals by other brands

PACH & COMPANY
PACH & COMPANY AeGIS NPB9000P Series Installation and programming manual

ARCHEAN
ARCHEAN Audio Accessibilite DCSTS-K072 Installation & user guide

Panasonic
Panasonic VL-MWD501 installation guide

Zamel
Zamel VP-810BHD manual

Intratone
Intratone Intracall 14-0144 Installing and connecting

Akuvox
Akuvox R28 Series Administrator's guide