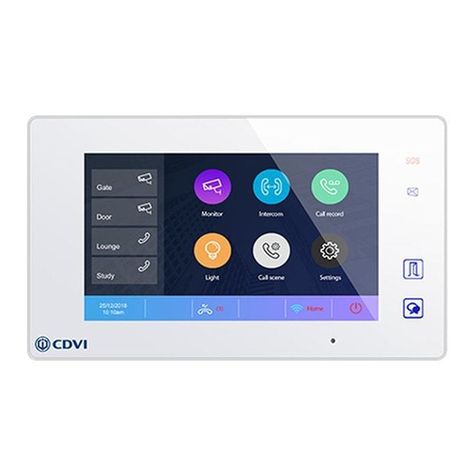
CDVI CDV-471IP User manual

2EASY IP, 7” Screen Intercom Monitor
CDV-471IP
EN
WARRANTY
YEAR
2

EN EN
2
CDV-471IP
2EASY IP, 7” Screen Intercom Monitor
1] CONTENTS
Title Page
2] PARTS AND FUNCTIONS 3
3] MOUNTING 3
4] MAIN MENU 4
5] ANSWERING A CALL 5
6] MONITORING 6
7] CALLING FUNCTIONS 6
8] VIEW CALL RECORD 7
9] DO NOT DISTURB FUNCTION 8
10] DIVERT CALL 9
11] SETTINGS 9
12] ADDRESS SET UP 11
13] UPGRADE 12
14] DOWNLOAD & SETUP VDP CONNECT APP 13
15] SURVEILLANCE DOOR STATION VIA VDP CONNECT APP 13
16] SPECIFICATIONS 14
17] PRECAUTIONS 14

EN EN
3
CDV-471IP
2EASY IP, 7” Screen Intercom Monitor
2] PARTS AND FUNCTIONS
Item Description
Speaker
For audio, ring tones, and alerts.
Talk/Mon button
Touch to communicate hands-free with visitors.
Touch to view through the door station camera in standby mode.
LCD screen
Displays the visitor's image.
Power/ Do Not Disturb
Indicator
Shows the power status of the system.
Shows the Do Not Disturb status.
Microphone
Transmit audio from one station to other stations.
Unlock button
Press to release the door.
Terminal connector
Use to connect external devices to the indoor station.
LAN connector Use to connect the indoor station to the network.
LCD Screen
Talk/Mon Button Unlock Button
Speaker Power/No Disturb Indicator
Microphone
Terminal connector
Lan connector
NC
NC
12V
SW-
SW+
3] MOUNTING
145~160 cm
The unit
Cat-5e/Cat-6 cable
Mounting screw
x 2(included)
Mounting bracket
Mounting box

EN EN
4
CDV-471IP
2EASY IP, 7” Screen Intercom Monitor
4] MAIN MENU
The Main Menu is your starting point for using all the applications on your monitor.
Touch the Unlock button, or touch anywhere on the screen when in standby mode - the
Main Menu will appear as follows:
The recommended installation height is 145-160cm.
1. Use screws to fasten the mounting bracket to the wall with a standard single gang
ush lightswitch box.
2. Connect the two-wire cables to the unit.
3. Mount the unit to the mounting bracket, making sure the unit is securely attached
to the mounting bracket.
123
4
5
678
9
10
Monitor icon
Allows you to monitor the door stations
and cameras.
Close icon
Touch to turn off the screen.
Intercom icon
Allows you to call other indoor monitors.
About icon
Allows you to view information about
the device.
Setting icon
Use to change the indoor monitor’s
settings.
Date and time
Allows you to set the device’s date and
time.
Call Record icon
Allows you to view the call record.
Status bar
Displays icons that indicate the indoor
monitor’s status (see 4. Status bar
icons on page 4).
Call Scene icon
Allows you to activate the No Disturb
and Divert functions.
Shortcut windows
Touch to navigate directly to the
corresponding items.

EN EN
5
CDV-471IP
2EASY IP, 7” Screen Intercom Monitor
Icon Description
Missed call
Displays when there is a missed call.
Touch to review the missed call.
Do not disturb
Indicates the device is in “Do Not Disturb”
mode.
Call transfer
Indicates the device is in “Divert Call”
mode.
Device online
Indicates the device is online, but not
connected to the internet.
Cloud server is working
Indicates the device is connected to the
cloud server.
No cloud server
Indicates the device is not connceted to the
cloud server.
Cloud server anomaly
Indicates the device cloud server connection
is abnormal.
Mute Indicates the device is in “Mute” mode.
Recording Indicates the device is recording.
Talking Indicates the device is in “Talking” status.
Unlock Indicates that the corresponding door is
unlocked.
5] ANSWERING A CALL
Status bar icons
00:10 Door Station1
2. When nished, touch the icon or press the
TALK/MON button again.
Available functions while talking on a call
• Door release
• Manual recording
When you receive a call, the indoor station rings. The image will be displayed on the
screen.
1. Touch the icon or press the TALK/MON button.
Speak within about 50cm of the
microphone.
You can communicate hands-free
with the visitor for 90 seconds.

EN EN
6
CDV-471IP
2EASY IP, 7” Screen Intercom Monitor
1. Receiving a call while talking with a door station
2. Receiving a call while talking with other monitors
A call from different door station is not possible as the system is busy.
You will have to end the current call to answer the new call-in.
Communication will stop immediately and the ring tone sounds as normal.
The video image from the door station is displayed on the screen, and the following
functions can be operated: unlock the door, capture images/videos, and
adjust screen & volume settings.
Notes:
6] MONITORING
1. From the main menu, tap the Monitor icon.
2. Select the desired type of camera.
- You can select a door station camera or an IP camera (if the system was
installed with multiple door stations or IP cameras) .
3. Select the desired camera.
4. When nished, tap the button on the panel.
Note:Tap the monitor’s quick actions to monitor a corresponding camera directly (if
the monitor quick actions is set up in the shortcut windows).
This section can be used to monitor your home by viewing one of the cameras in
apartments, common areas (e.g. garages, garden), or at entrances.
During monitoring, images can be viewed, but audio cannot be heard.
Available functions during monitoring:
• Door release
• Manual recording
7] CALLING FUNCTIONS
You can call other residences, common area phones, facility staff ofces, and even
other rooms in your own residence.
Depending on which monitor answers the call, you can use many of the features
described in the features available while talking on a call.

EN EN
7
CDV-471IP
2EASY IP, 7” Screen Intercom Monitor
Using the namelist for calls
1. From the main menu, tap the Intercom icon.
- A list of available items is displayed.
2. Select Namelist.
- A list of names is displayed (if set up in the system).
3. Select the desired name.
- You will call the recipient directly.
Inner call
1. From the main menu, tap the Intercom icon.
- A list of available items is displayed.
2. Select Inner Call.
- A list of monitor stations is displayed.
3. Select the desired monitor.
- You will call the chosen monitor directly.
If you have monitors installed in different rooms in your residence, you can call the
different rooms and use the system as an intercom.
Calling a guard station
1. From the main menu, tap the Intercom icon.
- A list of available items is displayed.
2. Select Guard Station.
- You will call the guard station directly.
8] VIEW CALL RECORDS
1. From the main menu, tap the Call Record icon.
2. Select the desired type of call you want to view.
- Missed: Displays calls you received but did not answer.
- Incoming: Displays calls you answered.
- Outgoing: Displays calls you made.
- Playback: Displays pictures/videos you received or made.
3. Browse the call record as needed.
4. When nished, tap the to return to the previous menu, or tap return to the
home page.
The monitor records information about calls you have answered, missed, and made,
and saves it in the call record. Follow these steps to view the call record:

EN EN
8
CDV-471IP
2EASY IP, 7” Screen Intercom Monitor
Play pictures and videos
1. From the main menu, tap the Call Record icon.
2. Select the desired type.
3. Tap the desired call record.
- Displays the images/videos recorded.
4. When nished, tap to return.
You can record camera images/videos manually while talking to a visitor or monitoring
camera images/videos. Follow these steps to play the recorded pictures/videos.
Pictures and videos playback
The following controls appear when you tap the screen while playing an image/video.
Plays the image/video.
Plays the next image/video.
Plays the previous image/video.
Deletes the image/video.
Conrms the deletion.
?
Note:
9] DO NOT DISTURB FUNCTION
1. From the main menu, tap the Call Scene icon.
2. Select the desired option.
- No Disturb 8H: Activate DND mode for a period of 8 hours.
- No Disturb always: Activate DND mode indenitely.
If you don't want to be disturbed, you can activate DND mode.
• The recorded still images are stored to the internal memory rst.
• Max. 120 pictures can be stored to the inner memory.*
• Additional records/images/videos will be overwritten, removing the oldest items.
• If a micro SD card is installed, images can be copied to the SD card.
• Max 32GB Micro SD card is supported.*
Note:
* Automatic recording function cannot be cancelled.
* Automatic recording is not available while monitoring a door station. To save images while monitoring,
see manual recording below.

EN EN
9
CDV-471IP
2EASY IP, 7” Screen Intercom Monitor
Notes:
• The No Disturb indicator turns from green to red, to indicate that the no disturb
function has been activated.
• This function will activate immediately if selected, and the status bar on the main
menu interface will show the icon.
10] DIVERT CALL
1. From the main menu, tap the Call Scene icon.
2. Select the desired option.
- Divert call if no answer: If nobody answers the call for 30s when the call
comes in from the door station, call is diverted to the smart phone. In this
mode, the monitor will always open the screen and show the image from the
door station during the divert. If the monitor answers the call, the divert ends
immediately.
- Divert call always: When a call comes in from the door station, it is diverted
immediately to the smartphone. In this mode, the monitor screen will turn off
after successfully diverting the call, and you can still use the monitor as normal.
Notes:
• If the call is diverted to the smartphone via SIP Server, you will need to choose
one smartphone/server.
• This function will activate immediately if selected, and the status bar on the main
menu interface will show the icon.
Calls from a door station can be diverted to your smartphone. Please note that this
function should be supported by a SIP network.
11] SETTINGS
List of settings
Ring volume - Ring timing - DS ring - CDS ring - OS ring - Message ring
- Doorbell ring - Intercom ring - Innercall ring - Alarm ring
Date and time - Language - Monitor timing - Shortcut setting - SD card
IP address - Call_Nbr - Parameter - Upgrade - Onsite tools
Sipcong - Private unlock code - Common unlock code - Card manager -
Back and restore
Auto setup wizard - IM extensions - Outdoor Stations - IPC camera - Enter
OS binding
Call Tune
General
Installer
Manager
Ext.Unit

EN EN
10
CDV-471IP
2EASY IP, 7” Screen Intercom Monitor
• Ring volume: Adjust the ring tone volume.
• Ring timing: Adjust the ring tone time.
• DS ring: Call tone from door station panel.
• CDS ring: Call tone from common door station panel.
• OS ring: Call tone from outward door station panel.
• Message ring: Call tone when message is received.
• DoorBell ring: Call tone from doorbell.
• Intercom ring: Call tone from the intercom of another apartment.
• InnerCall ring: Call tone from an intercom in your apartment.
• Alarm ring: Alarm tone.
Door station ring tone settings
1. From the main menu, tap the Settings icon.
- A list of settings is displayed.
2. Select Call Tune, and then tap DS Ring.
- A list of available tunes is displayed.
3. Select your chosen tune.
4. Tap the or icon to save the new setting.
Language settings
Shortcut settings
1. From the main menu, tap the Settings icon.
- A list of settings is displayed.
2. Select General, and then tap Language.
- The language interface is displayed.
3. Select and change the settings as desired.
4. Tap the or icon to save the new setting.
1. From the main menu, tap the Settings icon.
- A list of settings is displayed.
2. Select General, and then tap Shortcut Setting.
- The shortcut settings interface is displayed.
3. Select the type of function for which you want to add/remove a quick action.
4. Tap the or icon to save the new settings.
Note: Other settings are dependent on the type of system you have. Set parameters
according to the specic functions provided by your system.
1. From the main menu, tap the Setting icon. The setting list will be displayed.
2. Select the desired setting category.
3. Select the desired sub-setting.
4. Change the settings as desired.
5. Tap the or icon to save the new setting.
EN EN
11
CDV-471IP
2EASY IP, 7” Screen Intercom Monitor
12] ADDRESS SET UP
1. From the main menu, tap the Settings icon.
- A list of available settings is displayed.
2. Select Installer, and then tap Call_Nbr.
3. Input the password if required (66666666 by default).
Device_Addr:
• (VS) Single Family: For single villa one-to-one installation, there is no need to
input room numbers.
• (SS) Standalone Apartment: For standalone buildings, tap to input room
numbers (1-digit, 2-digit, 3-digit, or 4-digit).
Ex: Tap (SS) and input 0001 for a room in a standalone building.
• (NS) Networked System: For standalone buildings, you must input an 8-digit
number (rst 4 digits for building/block number, last 4 digits for room number).
Ex: 00010003 - 1st building, 3rd monitor; 00030005 - 3rd building, 5th monitor
• Restore/Update from RES: Reserved for conguring database les (RES les)
for updates and backups.
MS_NBR:
Master and slave number. 01 is the master monitor, 02-32 are slave monitors.
Name:
The name input here will automatically sync to the door station’s calling list.
Global_Nbr:
Extra call number for door stations which commonly call this monitor.
Local_Nbr:
Extra call number for a door station in the same building which calls this monitor.
IP address 192.168.251.016-s
Call_Nbr (VS)Single Family
Parameter
Upgrade
Onsite tools
Installer
Call Tune
General
Installer
Manager
ExternalUnit
Device_Addr (VS)Single Family
MS_Nbr (1)Master
Name IX471
Global_Nbr -
Local_Nbr -
(VS)Single Family
(SS)Standalone Apartment
(NS)Networked System
Restore Call_Nbr default
Update Call_Nbr from RES
Call_NbrCall_Nbr
IP address
Call_Nbr
Parameter
Upgrage
Onsite tools
Call_Nbr
Input installer PWD
-
123

EN EN
12
CDV-471IP
2EASY IP, 7” Screen Intercom Monitor
13] UPGRADE
1. From the main menu, tap the Settings icon.
- A list of available settings is displayed.
2. Select Installer, and then tap Upgrade.
3. Input the installer password (66666666 by default, or no password when the door
station has installer mode enabled)
IP address 192.168.251.016-s
Call_Nbr (VS)Single Family
Parameter
Upgrade
Onsite tools
Installer
Call Tune
General
Installer
Manager
ExternalUnit
Server Server1[47.91.88.33]
Download code
Check
Input IP Address
Server1[47.91.88.33]
Server2[47.106.104.38]
Server3[192.168.2.60]
SD Card
UpgradeUpgrade
IP address
Call_Nbr
Parameter
Upgrage
Onsite tools
IP address
Call_Nbr
Parameter
Upgrage
Onsite tools
Input installer PWD
66666666
123
Touch Server to select the rmware source:
1. Cloud Server: Cloud server requires internet.
Server1[47.91.88.33]
Server2[47.106.104.38]
2. Local LAN server (IX -Builder)
Use IX-Builder PC software to create a tempory local server for update.
Server3 [192.168.2.60] #IX-Builder default IP
[Input IP address]
3. SD card
Copy upgrade rmware before upgrade.
After tapping Download Code and inputting the code, contact CDVI to get the code
when the device needs to be updated. Touch Check to load the upgrade information
from the source.
Screen messages:
• Please insert SD card: #The upgrade is too large, requires SD card to store rmware.
• Mismatched: #Firmware update was found, but is not suitable for this device.
• Connect Error: #Check networks.
• No le: #Source has been inspected but there is no required rmware upgrade.

EN EN
13
CDV-471IP
2EASY IP, 7” Screen Intercom Monitor
Otherwise the device will upgrade automatically.
Do not power off the device during upgrades.
14] DOWNLOAD & SETUP VDP CONNECT APP
1. Scan the following QR code and
download VDP Connect app, or search
“VDP Connect” on the app store.
2. Permit “VDP Connect” with permissons:
On IP monitor, tap the “Cloud” icon on
main menu, and stay in “SIP cong”.
4. After logging into the SIP account on
VDP Connect app, check on status bar, or
tap on the “Connected” area to manually
register, until the app displays this screen:
15] SURVEILLANCE DOOR STATION VIA VDP CONNECT APP
On the VDP Connect app, press on the icon and wait for a few seconds.
If the system has multiple door stations, you can switch to view the door station you
want. Push PTT icon to talk, or push the unlock icon to open the door.
Search: VDP Connect
Note: SIP divert calls only functions if the IP door entry system is connected to an
internet connected router. Please refer to your installer.
3. On VDP Connect app, tap on top-right,
to scan QR code showing on the monitor,
and tap “Save”.
SIP enable [Enable]
Divert account 0e001bec57ee
Divert PWD 32012
SIP server 47.91.88.33:5068
Re register
Sip cong
Manager

EN EN
14
CDV-471IP
2EASY IP, 7” Screen Intercom Monitor
Feature Description
Power Source PoE (IEEE 802.3af Class 0)
LAN Interface 10 BASE-T / 100 BASE-TX Ethernet (RJ-45)
Monitor Screen 7inch digital colour TFT
Display Resolution 800 x 480
Wire Type Cat-5e or Cat-6
Wiring Distance 100m (Approx. 330’)
Operating Temperature -10°C to 50°C
Dimension 161(H) x 174(W) x 22(D) mm
16] SPECIFICATIONS
1) All components should be protected from violent vibration. Do not allow the unit to
be impacted, knocked, or dropped.
2) Clean with a soft cotton cloth. Do not use organic or chemical cleaning agents. If
necessary, use a little pure water or diluted soapy water to clean the dust.
3) Image distortion may occur if the video monitor is mounted too close to a magnetic
eld e. g. microwaves, TVs, computers etc.
4) Keep the monitor away from moisture, high temperatures, dust, caustic and
oxidised gases in order to avoid unforeseen damage.
5) Use the right adaptor supplied or approved by the manufacturer.
6) Pay attention to the high voltage inside the products. Please refer service only to a
trained and qualied professional.
17] PRECAUTIONS
GATE

EN EN
15
CDV-471IP
2EASY IP, 7” Screen Intercom Monitor
Notes

www.cdvigroup.com
CDVI Group
FRANCE (Headquarters)
Phone: +33 (0) 1 48 91 01 02
CDVI FRANCE + EXPORT
+33 (0) 1 48 91 01 02
www.cdvi.com
CDVI AMERICAS [CANADA - USA]
+1 (450) 682 7945
www.cdvi.ca
CDVI BENELUX [BELGIUM - NETHERLANDS - LUXEMBOURG]
+32 (0) 56 73 93 00
www.cdvibenelux.com
CDVI GERMANY
+49 (0) 175 2932 901
www.cdvi.de
CDVI TAIWAN
+886 (0) 42471 2188
www.cdvichina.cn
CDVI SUISSE
+41 (0) 21 882 18 41
www.cdvi.ch
CDVI CHINA
+86 (0) 10 84606132/82
www.cdvichina.cn
CDVI IBÉRICA [SPAIN - PORTUGAL]
+34 (0) 935 390 966
www.cdviberica.com
CDVI ITALIA
+39 (0) 321 90 573
www.cdvi.it
CDVI MAROC
+212 (0) 5 22 48 09 40
www.cdvi.ma
CDVI SWEDEN
[SWEDEN - DENMARK - NORWAY - FINLAND]
+46 (0) 31 760 19 30
www.cdvi.se
CDVI UK [UNITED KINGDOM - IRELAND]
+44 (0) 1628 531300
www.cdvi.co.uk
CDVI POLSKA
+48 (0) 12 659 23 44
www.cdvi.com.pl
All the information contained within this document (pictures, drawings, features, specications and dimensions)
could be perceptibly different and can be changed without prior notice. - Aug 2021
*DT-ENG-DX47-V2*
Reference : DT-ENG-DX47-V2
Extranet : CDVI_CDV-471IP_IM_01_EN_A4_C
Table of contents
Other CDVI Intercom System manuals

CDVI
CDVI CDV-91IP User manual

CDVI
CDVI CDV-DDP User manual

CDVI
CDVI 2EASY CDV-850IP User manual

CDVI
CDVI CDV-91 User manual

CDVI
CDVI CDV91S User manual

CDVI
CDVI 2Easy CDV4796KP-DX User manual

CDVI
CDVI CDV97-1ID User manual

CDVI
CDVI DMR18S User manual

CDVI
CDVI 2EASY CDV-91S User manual

CDVI
CDVI 2EASY CDV-T5 User manual

CDVI
CDVI CDV-91 User manual

CDVI
CDVI KCIEN User manual

CDVI
CDVI 2EASY CDV-47DX User manual

CDVI
CDVI CDV4791 User manual

CDVI
CDVI CDV97-8ID Series User manual

CDVI
CDVI CDV-4791S-DXB User manual

CDVI
CDVI CDV-DDP-F User manual

CDVI
CDVI CDV96KP User manual

CDVI
CDVI CDV96KP User manual

CDVI
CDVI CDV4796KP-DX User manual