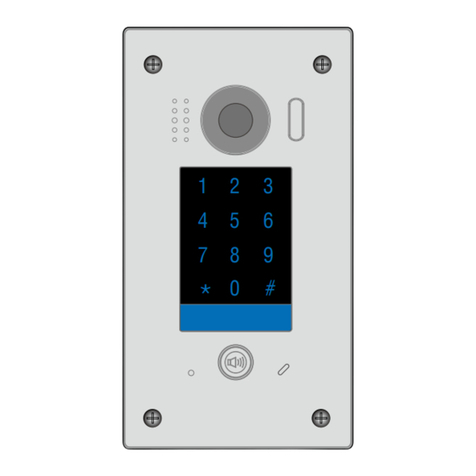
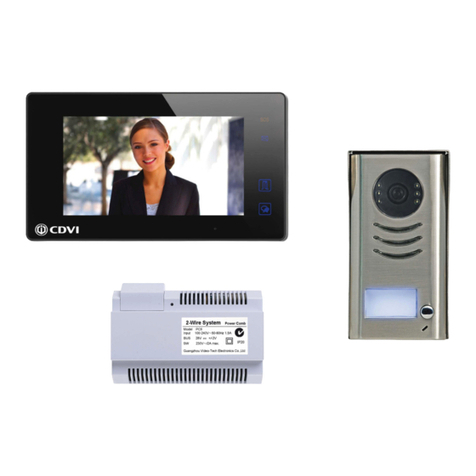
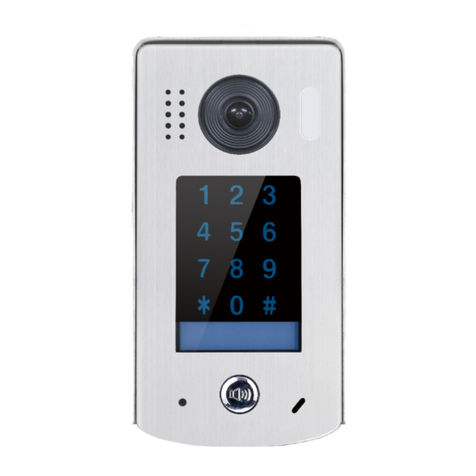
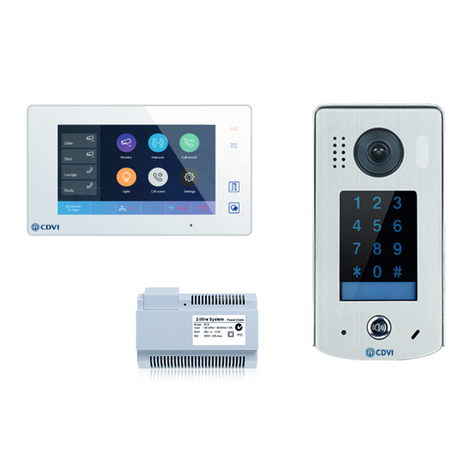
CDVI 2EASY CDV-T5 User manual

2EASY 2-wire Touchscreen Video Door
Station
CDV-T5
EN
WARRANTY
YEAR
2

EN EN
2
CDV-T5
2EASY 2-wire Touchscreen Video Door Station
1] CONTENTS
2] Parts and Functions 3
3] Installation 5
4] Electric Lock Connections 6
5] System Wiring and Connections 9
6] Door Station Operations 10
7] Firmware Update Notice 11
8] Installer Mode 11
9] Main Menu 12
10] Specications 18
Title Page

EN EN
3
CDV-T5
2EASY 2-wire Touchscreen Video Door Station
2] PARTS AND FUNCTIONS
L1 L2
1 2 3 4 5 6
ON DIP
A B
Front panelEmbedded boxSurface mount box
IN
OUT
Terminal Descriptions
+12V: 12Vdc power output.
LK-: Power ground.
LK+: Common contact of the relay.
NO.: Normally open contact of the relay (see page 6 for
Lock connections).
EB+: Exit button positive connection port.
EB-: Exit button negative connection port.
JP-LK: For electric lock safety settings (see page 6 for
Lock connections).
CN-LK
JP-LK
+12V
LK-
LK+
NO
EB-
EB+
SET
12V
TX1
RX1
GND
RX3
TX3
GND
5CL
GND
5DA
RST
INT
GND
12V
CLK
DAT
STR
C2
C1
CTR
GND
GND
VIO
POW
WG0
WG1
GND
12V
CN/KMB CN/T-COIL
CN/FUN CN/WGN
L1 L2
1 2 3 4 5 6
ON DIP
L1 L2
1 2 3 4 5 6
ON DIP
A B
Front panelEmbedded boxSurface mount box
IN
OUT
Speaker
Camera Lens
Night View LED
Microphone
Status Indicator
Card Reader
Screw Hole
SET: DIP switches for system congurations
CN/KMB: N/A
CN/T-COIL: N/A
CN/FUN: TFT display module connection port.
CN/WGN: N/A
Bus (L1,L2): No polarity bus line. Connect to
CDV-PC7 (power combiner unit).

EN EN
4
CDV-T5
2EASY 2-wire Touchscreen Video Door Station
Door Station Module
A total of 6 bits can be congured by DIP switch. All switches can be modied either
before or after installation. Restart the power whenever the switches have been modied.
ON(1)
=
OFF(0)
=
ON
ON
ON
123456
• Bit-1 and Bit-2 are used for door station ID settings. When multi-door stations
are installed in the system, these two bits must be set correctly. The rst door
station is set to 00, the second to 01, the third to 10, the fourth to 11. If only one
door station is installed, the bit is set to 00.
• Bit-3: Not used.
• Bit-4: Not used.
• Bit-5 is used for unlocking time setting. 0 is the default setting and the default
time is 1 second. If set to 1, the unlock time is 5 seconds (the unlock time can be
modied via door station or software).
• Bit-6 is used for activating the key A and key B. Normally key A and key B are
not activated. When the touch button module is powered and the bit-6 set to 1, the
keys A and B are activated.
Note: Key A and key B are invisible on the panel as they are cryptic.
Speaker
Camera lens
Night view LED
MIC
Invisible key A
Status indicator
Talk indicator
Unlock indicator
Invisible key B
DIP Switch Settings

EN EN
5
CDV-T5
2EASY 2-wire Touchscreen Video Door Station
1 2 3 4 5
6 7
IN
OUT
IN
OUT
CN/KMB
No. Name Description
1 SET DIP switch for system congurations
2 JP-LK For electric lock safety type setting
3 CN/KMB Touchscreen module connection port
4 CN/T-COIL Reserved
5 Bus No polarity bus line. Connect to power combiner unit
6 CN-LK Electric lock and exit button connection port
7 CN/FUN TFT display module connection port
3] INSTALLATION
Flush Mount
Drill a hole in the wall and
attach the ush housing to it.
Wire correctly and plug in the
bus line connector. Use the screws to x the
panel to wall.

EN EN
6
CDV-T5
2EASY 2-wire Touchscreen Video Door Station
Surface Mount
4] ELECTRIC LOCK CONNECTIONS
Door lock controlled with internal power
1. The door lock is limited to 12Vdc. The holding current must be less than 250mA
when using internal power supply.
2. The monitor’s Unlock Mode must be set to 0 (by default).
3. Set the jumper to position 1-2 for Fail Safe type locks (Power off to unlock). Set to
position 2-3 for Fail Secure type locks (Power on to unlock).
4. You can change the unlocking time on the door station directly.
Door lock controlled with dry contact
1. The external power supply must be chosen according to the lock.
2. The jumper must be taken off before connecting.
3. Set the monitor’s Unlock Mode for different types of lock.
• Fail Secure (Power on to unlock): Unlock Mode=0 (by default)
• Fail Safe (Power off to unlock): Unlock Mode=1
Fail Safe Fail Secure
12V 300mA
Jumper position in 1-2
+12V
LK -
LK+
N.O.
EB-
EB+
+
-
JP_LK
123
Exit button
JP_LK
12V 300mA
Exit button
Jumper position in 2-3
+
-+12V
LK -
LK+
N.O.
EB-
EB+
123

EN EN
7
CDV-T5
2EASY 2-wire Touchscreen Video Door Station
Fail Safe Fail Secure
+
+
-
-
+12V
LK - (GND)
LK+(COM)
N.O.
EB-
EB+
Take off the Jumper
JP_LK
Cut off the line
123
Exit button
+12V
LK - (GND)
LK+(COM)
N.O.
EB-
EB+
Take off the Jumper
+
+
-
-
JP_LK
Cut off the line
123
Exit button
4. You can change the unlocking time on the door station directly.
5] SYSTEM WIRING AND CONNECTIONS
Apartment View
= CDV-BDU

EN EN
8
CDV-T5
2EASY 2-wire Touchscreen Video Door Station
Wiring Diagram

EN EN
9
CDV-T5
2EASY 2-wire Touchscreen Video Door Station
Star Topology with CDV-DBC4A1
The system can be extended by up to 3 slave monitors for each monitor. We recommend
you use the CDVI distributor CDV-DBC4A for the extension.
Recommended cable:
16AWG, Belden 8471
IMPORTANT: Subject to cable type.
For further help, call CDVI Technical Support on
+44 (0) 1628 531300 or visit the CDVI Support Centre.

EN EN
10
CDV-T5
2EASY 2-wire Touchscreen Video Door Station
6] DOOR STATION OPERATIONS
Main Menu
Calling a resident via room number input
1. Press the keypad button to enter the keypad page.
2. Input the room number.
3. Press to call.
Calling a resident via namelist
1. Press the namelist button to enter the namelist page.
2. Select the desired name from the list.
3. Press to call.
Opening the door by entering password
Opening the door by using an access card
Touch your access card to the card reader area of the door station.
1. Press the unlock button to enter the keypad page.
2. Input your unlock password.
3. Press to open the door.

EN EN
11
CDV-T5
2EASY 2-wire Touchscreen Video Door Station
In order to update the CDV-T5 door station to the latest rmware, follow these steps:
• During power up, the “Busy/ Sandclock” LED will light up until the touchscreen
module booting is nished:
8] INSTALLER MODE
Entering The Menu
Tap and enter the installer password on the screen.
Default installer password: 66666666
NOTE: In order to exit Installer mode, you will have to manually exit or power off the
door station and restart.
Tap to exit Installer mode.
Tap to return to the main menu.
7] FIRMWARE UPDATE NOTICE
• After the rebooting of the door station is nished, the screen will light up.
• All card and password information is stored in the touchscreen module.

EN EN
12
CDV-T5
2EASY 2-wire Touchscreen Video Door Station
You can check if you are still in Installer mode by looking at the main menu:
If the door station is still in installer mode, tap the blue bar at the top to get into
installer menu and exit it.
Installer mode exited Installer mode still actived
4. System Settings
9] MAIN MENU
Sub-menu Description
Video Format PAL or NTSC. Sould be kept as default.
Tone Prompt Tone or prompt setup. 0: Mute, 1: Tone, 2: English
Sound Volume Tone or prompt volume. Beep volume: 1-9
Unlock Mode Lock release mode: “Normally open” or “Normally closed”
Unlock Timing Lock release time
Night LED Level Night LED under camera illumination level
Night LED Mode Night LED mode: “Auto” (detect each 10min), “Always On” or “Always Off”
Raincover Enable If the CDV-T5 is surface mounted with a raincover, it adjusts to a smaller camera angle.

EN EN
13
CDV-T5
2EASY 2-wire Touchscreen Video Door Station
5. Other Settings
Sub-menu Description
Default menus select
Default main menus when in standby:
Room list
Sorted by room number
Name list
Sorted by name Classic main menu
List display date time
Display date and time in the list calling menu:
Enabled
Disabled
List display unlock
Display unlock icon in the list calling menu:
Enabled
Disabled
List display name only Display name only or with a room number
1
1
0
Screen mode Day mode: White background
Night mode: Black background

EN EN
14
CDV-T5
2EASY 2-wire Touchscreen Video Door Station
6. Installer Password
Change installer password.
Input current installer password -> Input new password twice.
Default installer password: 66666666
Sub-menu Description
Screen brightness TFT screen illumination level
Auto call in timing The maximum waiting time to call without a tap to conrm. (keypad calling)
Auto call min digit The minimum digit input to call without a tap to conrm. (keypad calling)
Auto call max digit The maximum digit input to call directly. (keypad calling)
The Villa Mode enables one-touch setup of 1 to 4 named buttons on the display.
Setting the ACC mode allows card data to be extracted from the bus to a standard
Wiegand reader port of an ACU, such as CDVI’s ATRIUM system.
Note: The built-in reader is dual-technology for 125Khz Proximity Cards and 13.56Mhz
for MIFARE® Classic.
Villa Mode
Switching Access Card Output
To set this mode enter the ‘Other Settings’ menu:
• Navigate to the end of the menu and select Villa
Mode.
• Select Villa 1, Villa 2, Villa 3 or Villa 4.
• Press back.
• Press to leave Installer Mode and set the
display.
To set this mode enter the ‘Other Settings’ menu:
• Navigate to the end of the menu.
• Select DT-ACC and set to enabled.
• Press back
• Press to leave Installer Mode and set the
display.

EN EN
15
CDV-T5
2EASY 2-wire Touchscreen Video Door Station
7. Password
• Disable code unlock: When enabled, users won’t be able to unlock with a password.
• Change public unlock: Enter current public unlock password, then enter the new
password twice (4digits).
• Default public unlock password: 1234
8. Monitor Manage
This setting includes important settings:
• Namelist and name change
• Private password
• Call numbers
After getting into the monitor manage menu, T5 displays as below:
IM Manage
1-16
01 1 02 2
03 3 04 4
05 5 06 6
07 7 08 8
09 9 10 10
12 1211 11
13 13 14 14
15 15 16 16
Display monitor 1 to 16
Monitor list
Disable or enable monitors Flash monitors’ status
Display monitor 17 to 32
17-32
Monitor connected
Monitor ofine
By default, all 32 monitors will be listed. To remove the monitor from the list follow the
steps below:
IM Manage
1-16
01 1 02 2
03 3 04 4
05 5 06 6
07 7 08 8
09 9 10 10
12 1211 11
13 13 14 14
15 15 16 16
17-32
IM Manage
1-16
01 1 02 2
03 3 04 4
05 5 06 6
07 7 08 8
09 9 10 10
12 1211 11
13 13 14 14
15 15 16 16
17-32
IM Manage
1-16
01 1 02 2
03 3 04 4
05 5 06 6
07 7 08 8
09 9 10 10
12 1211 11
13 13 14 14
15 15 16 16
17-32
To enable removed monitors, follow the same procedure: tap the icon and tap on the
monitor that has been removed.
Remove or enable monitors from the namelist

EN EN
16
CDV-T5
2EASY 2-wire Touchscreen Video Door Station
9. Card Management
Add Cards
Room
01
Name
-
Card ID
-
Add card
Save
Tap “Add cards”.
1. Tap “Room” to select the room number to which the card belongs
to.
2. Enter the card holder’s name or keep as default (room name).
3. Hold the card to the reader or enter the 10-digit card ID.
4. Tap “Save” to save the card.
5. Repeat steps 2 & 3 to add further cards to this room.
6. Repeat steps 1 to 5 to add cards to different rooms.
Tap on the monitor that needs conguring as follows:
IM Manage
1-16
01 1 02 2
03 3 04 4
05 5 06 6
07 7 08 8
09 9 10 10
12 1211 11
13 13 14 14
15 15 16 16
17-32 DT addr
01
Manage PWD
0000
Unlock code
1234
Local_Nbr
Name
1
Call tes�ng
• DT addr: Current monitor address. This is read-only information.
• Manage PWD: Password management for this user. Each user can get into their
own setting menu by entering a “manage password”: Enter “Address” + “Manage
password” to get into this menu. (Example: For user 01 and password 2234, enter 12234 to
enter the manage page)
• Unlock code: The password entered to release the door station. Enter “Address” +
“Unlock Code” to unlock the door. (Example: For door station 16 and unlock code 3324, enter
163324)
• Local_Nbr: Alias dial number to call this monitor.
• Name: Name displayed in the name list.
Manage monitors

EN EN
17
CDV-T5
2EASY 2-wire Touchscreen Video Door Station
View Cards
Room
-
Name
-
Card ID
-
Date
-
View card
Seach
Tap “View Cards” to display card information.
• Hold the card to the reader of which the card information you
want to check
• Enter or select a room
• Enter card holder’s name
• Enter card ID
• Enter Date (YYYYMMDD)
Or tap “Search” to display all cards.
Delete Cards
WFF
15654646516dgdsg
4546466304164611
Name
fdfd1546462+89363
kkK
FAIJCP16456461319
MADF
lkkjioh16546466560
fdsac
Card List
Delete single item
1/2
Delete all item
In the card display list,
• Tap the “bin” icon on the top to delete all cards.
• Tap the “bin” icon next to single items to delete
a single card.
Card Data
Tap “Card data”,
• Backup to SD: Backup card data to SD card. (the card in T5 module).
• Restore from SD: Restore a backup from SD card.
• Clear RES Data: Delete all cards.
10. Device Information
• Firmware version
• Up time (running since power up)
• SN number
11. Backup & Restore
• Backup: Backups include system settings, other settings, namelist (including private
password) and call records.
• Restore from backup: Restore from a backup.
• Restore factory settings: Restores all settings, cards, namelist and password back
to default.
s

EN EN
18
CDV-T5
2EASY 2-wire Touchscreen Video Door Station
Feature Description
Power Supply 24Vdc (supplied by CDV-PC7)
Camera 1/2.7’’ sheye camera, 170owide angle
Power Consumption Standby: 1W
Working: 5W
Card Reader RFID, 125KHz, 13.56MHz
Screen: 5” digital colour TFT
Display Resolution 800x480 pixels
Unlock Power Ouput 250mA @ 12Vdc
Unlocking Time 1-99 sec
Operating Temperature -10°C to 50°C
Wiring 2-wire (no polarity)
IP Protection IP65 (screen)
Dimension Surface: 316(H)×133(W)×48(D)mm 3gang
Flush: 232(H)×133(W)×48(D)mm 2gang
10] SPECIFICATIONS
12. Upgrade
Source
SD card
Download code
xxxxxx
Check
Upgrade
Tap to upgrade the module's rmware. (core rmware)
Uploads customised les: display language, default settings and logo.
RES manage does not manage “Voice prompt”.
• Backup to SD: Backup of customised les (display language, default settings and
logo) to SD card.
• Restore from SD: Restores customised les.
• Clean customisation: Remove customisation and revert back to standard version.
13. RES manage

EN EN
19
CDV-T5
2EASY 2-wire Touchscreen Video Door Station
Notes
.......................................................................................................................
......................................................................................................................
.......................................................................................................................
.......................................................................................................................
.......................................................................................................................
.......................................................................................................................
.......................................................................................................................
.......................................................................................................................
.......................................................................................................................
.......................................................................................................................
.......................................................................................................................
.......................................................................................................................
.......................................................................................................................
.......................................................................................................................
.......................................................................................................................
.......................................................................................................................
.......................................................................................................................
.......................................................................................................................
.......................................................................................................................
.......................................................................................................................
.......................................................................................................................
.......................................................................................................................
.......................................................................................................................
.......................................................................................................................
.......................................................................................................................
.......................................................................................................................
.......................................................................................................................
.......................................................................................................................
.......................................................................................................................
.......................................................................................................................
.......................................................................................................................
.......................................................................................................................

www.cdvigroup.com
CDVI Group
FRANCE (Headquarters)
Phone: +33 (0) 1 48 91 01 02
CDVI FRANCE + EXPORT
+33 (0) 1 48 91 01 02
www.cdvi.com
CDVI AMERICAS [CANADA - USA]
+1 (450) 682 7945
www.cdvi.ca
CDVI BENELUX [BELGIUM - NETHERLANDS - LUXEMBOURG]
+32 (0) 56 73 93 00
www.cdvibenelux.com
CDVI GERMANY
+49 (0) 175 2932 901
www.cdvi.de
CDVI TAIWAN
+886 (0) 42471 2188
www.cdvichina.cn
CDVI SUISSE
+41 (0) 21 882 18 41
www.cdvi.ch
CDVI CHINA
+86 (0) 10 84606132/82
www.cdvichina.cn
CDVI IBÉRICA [SPAIN - PORTUGAL]
+34 (0) 935 390 966
www.cdviberica.com
CDVI ITALIA
+39 (0) 321 90 573
www.cdvi.it
CDVI MAROC
+212 (0) 5 22 48 09 40
www.cdvi.ma
CDVI SWEDEN
[SWEDEN - DENMARK - NORWAY - FINLAND]
+46 (0) 31 760 19 30
www.cdvi.se
CDVI UK [UNITED KINGDOM - IRELAND]
+44 (0) 1628 531300
www.cdvi.co.uk
CDVI POLSKA
+48 (0) 12 659 23 44
www.cdvi.com.pl
All the information contained within this document (pictures, drawings, features, specications and dimensions)
could be perceptibly different and can be changed without prior notice. - Jan 2022
*DT-ENG-821-T5-V1*
Reference : DT-ENG-821-T5-V1
Extranet : CDVI_CDV-T5_IM_01_EN_A4_C
Table of contents
Other CDVI Intercom System manuals

CDVI
CDVI 2EASY CDV-47DX User manual

CDVI
CDVI CDV4796KP-DX User manual

CDVI
CDVI CDV97-8ID Series User manual

CDVI
CDVI CDV96KP User manual

CDVI
CDVI CDV-DDP-F User manual

CDVI
CDVI DMR18S User manual

CDVI
CDVI CD97-4ID User manual

CDVI
CDVI CDV-91 User manual

CDVI
CDVI CDV91F User manual
CDVI
CDVI CDV-4791S-DXB User manual

CDVI
CDVI 2EASY CDV-96KP User manual

CDVI
CDVI KCIEN User manual

CDVI
CDVI 2EASY CDV-850IP User manual
CDVI
CDVI CDV91S User manual

CDVI
CDVI CDV4791 User manual

CDVI
CDVI CDV-471IP User manual

CDVI
CDVI CDV-DDP User manual

CDVI
CDVI CDV97-1ID User manual

CDVI
CDVI CDV4791S-DX User manual
CDVI
CDVI 2EASY CDV-91S User manual