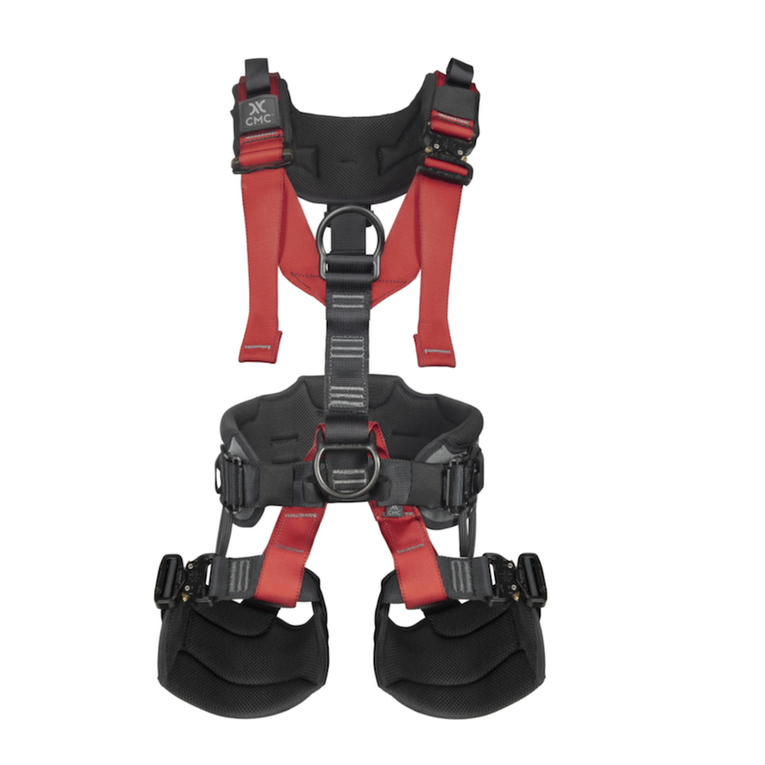
CMC OUTBACK HARNESS User manual

Activities involving the use of this equipment are potentially dangerous. Special knowledge
and training are required to use this product. You are responsible for your own actions and
decisions. Before using this device, you must:
• Read and understand these user instructions and warnings.
• Familiarize yourself with its capabilities and limitations.
• Getspecictraininginitsproperuse.
• Understand and accept the risks involved.
FAILURE TO HEED ANY OF THESE WARNINGS MAY RESULT IN SEVERE INJURY OR DEATH.
Find the latest version and translations of this Manual at cmcpro.com
Convertible Harness System Patent Pending
EN
DE
ES
FR
IT
NO
SV
WARNINGS
OUTBACK™ HARNESS
CONVERTIBLE HARNESS SYSTEM
ASTM 1772-17EN 12277:2015+A1:2018
!
Imminent risk of serious
injury or death.
Imminent risk of accident
or injury.
Appropriate function
or use.
Equipment
incompatibility.

2 |CMCPRO.COM
Outback Convertible Sit Harness
Waist Belt Leg Loops Leg Loop Rear Strap
Outback Convertible Chest Harness
Chest Harness Chest Harness Rear Strap
Outback Chest Ascender Kit
Atom™ Ascender Strap Kong Futura™
Chest Ascender
Maillon Rapide
Stainless Steel Delta
Quick Link
Outback Pouch
Outback Pouch
CONVERTIBLE HARNESS SYSTEM

|OUTBACK HARNESS USER MANUAL 3
CONTENTS
1 | TRACEABILITY & MARKINGS 4
2 | FIELD OF APPLICATION 5
3 | NOMENCLATURE 6
4 | INSPECTION POINTS TO VERIFY 8
5 | COMPATIBILITY 8
6 | HARNESS DONNING AND FITTING 8
DONNING THE WAIST BELT 8
ADDING THE LEG LOOPS 9
ADDING THE TYPE D CHEST HARNESS 10
USE OF DIFFERENT BUCKLE TYPES 11
SIZING 11
7 | OPTIONAL COMPONENTS 12
INSTALLATION OF THE OUTBACK™ POUCH (OPTIONAL) 12
INSTALLATION OF THE LEG LOOP REAR STRAP (OPTIONAL) 12
INSTALLATION OF THE CHEST HARNESS REAR STRAP (OPTIONAL) 13
INSTALLATION OF THE CHEST ASCENDER (OPTIONAL) 13
8 | TIE-IN POINTS / CONNECTIONS 14
SIT HARNESS CONNECTION POINT 14
FULL BODY HARNESS CONNECTION POINT 14
CONNECTING COMPONENTS 15
9 | ADDITIONAL INFORMATION 16
10 | MANUAL TEXT 18
Page No.

4 |CMCPRO.COM
1 TRACEABILITY & MARKINGS
D E F
G C
EN 12277+A1
TYPE C
A
D E F
CB
EN 12277+A1
TYPE D
000121_Rev01
3.625” (92.075MM)
1” (24MM)
3.625” (92.075MM)
1” (24MM)
THIS DRAWING AND ALL INFORMATION HEREIN IS THE PROPERTY OF CMC RESCUE, INC.
ANY COPYING, REPRODUCTION OR UNAUTHORIZED USE WITHOUT WRITTEN CONSENT IS FORBIDDEN.
LABEL, COVER 1”
DESCRIPTIONREV. DATE INITIALS
ADD PROP65 WARNING, UPDATE TO CMC TEMPLATE01
NOTES:
1. WHITE SATIN POLY - TEAR RESISTANT
2. 100% BLACK PRINT
3. PART NUMBER TO BE HIDDEN WHEN SEWN IN
CMC RESCUE
6740 CORTONA DR. GOLETA, CA
PART#: 000121
DATE: 12/02/2020DRAWN BY: AHOUTS
DRAWING SCALED @ 100%
12/02/20 AH
WARNING: Cancer and Reproductive Harm
www.P65Warning.ca.gov
!
WARNING
• SERIOUS INJURY OR DEATH MAY RESULT FROM THE IMPROPER USE OF THIS EQUIPMENT.
• THIS EQUIPMENT HAS BEEN DESIGNED AND MANUFACTURED FOR USE BY EXPERIENCED PRO-
FESSIONALS ONLY.
• DO NOT ATTEMPT TO USE THIS EQUIPMENT WITHOUT PRIOR TRAINING.
• THOROUGHLY READ AND UNDERSTAND ALL LABELS AND INSTRUCTIONS BEFORE USE.
• USE, INSPECT AND REPAIR ONLY IN ACCORDANCE WITH MANUFACTURER’S INSTRUCTIONS.
DO NOT REMOVE THIS LABEL!
000307
MODEL NO:____________________________________
DATE OF MANUFACTURE:________________________
LOT NO:_______________________________________
FITS WAIST SIZE:________________________________
NYLON AND POLYESTER MATERIALS
TESTED TO ASTM F1772-17
000522
WAIST
MODEL NO:____________________________________
DATE OF MANUFACTURE:________________________
LOT NO:_______________________________________
NYLON AND POLYESTER MATERIALS
TESTED TO ASTM F1772-17
000522
LEGS
MODEL NO:____________________________________
DATE OF MANUFACTURE:________________________
LOT NO:_______________________________________
FITS CHEST CIRCUMFERENCE:_____________________
NYLON AND POLYESTER MATERIALS
TESTED TO ASTM F1772-17
000522
CHEST
BAG
MODEL NO:____________________________________
DATE OF MANUFACTURE:________________________
LOT NO:_______________________________________
NYLON AND POLYESTER MATERIALS
000522
I
H

|OUTBACK HARNESS USER MANUAL 5
A Location of rope or lanyard attachment.
B Drawing to indicate that the Type D
harness shall not be used alone.
C Graphical symbol that advises the user
to read the information provided in the
user manual.
D CEMarkandNumberofnotiedbody
controlling production of this PPE:
1019
VVUÚ, a.s.
Pikartská 1337/7
716 07 Ostrava-Radvanice
Czech Republic
tel.: 00420 596 252 111
fax: 00420 596 232 098
E European Standard EN
12277:2015+A1:2018 and harness type
designation.
F Drawing showing how to fasten and
secure load transmitting buckles and
adjusting devices.
G Location and method of rappel and
belay device attachments
H Component size and year of
manufacture
I ManufacturerIdentication
CMC Rescue, Inc.
6740 Cortona Drive
Goleta, CA 93117 USA
805-562-9120 / 800-235-5741
cmcpro.com
J Product Label Locations
2 FIELD OF APPLICATION
SEE TEXT
J
J
J

6 |CMCPRO.COM
3 NOMENCLATURE
13
12
8
9
10
4
1
7
2
3
6
5
14
4
3
2
1
7
6
5

|OUTBACK HARNESS USER MANUAL 7
15
11
16
5
1 Waist Belt
2 Waist Belt Quick Connect Buckle
3 Waist Belt Connect Loop
4 Ventral D-Ring
5 Leg Loop Assembly
6 Leg Loops Quick Connect Buckles
7 Leg Loop Assembly Girth Hitch
8 Front Lift
9 Chest Ascender (optional)
10 Chest Ascender (optional) Front Lift
Adjuster Buckle
11 Chest Harness
12 Sternal Attachment Point
13 Shoulder Strap
14 Adjustment Buckles
15 Chest Harness Rear Strap (optional)
16 Leg Loop Rear Strap (optional)

8 |CMCPRO.COM
4 INSPECTION POINTS TO VERIFY
SEE TEXT FOR MORE
5 COMPATIBILITY
SEE TEXT FOR MORE
6 HARNESS DONNING AND FITTING
Donning the Waist Belt

|OUTBACK HARNESS USER MANUAL 9
Adding the Leg Loops

10 |CMCPRO.COM
Adding the Type D Chest Harness

|OUTBACK HARNESS USER MANUAL 11
Use of Dierent Buckle Types
Sizing
Component Sizing Detail
Universally Adjustable Chest Circumference
79cm – 137cm (31in – 54in)
Size S: Waist Size 74-84 cm (29-33in)
Size M: Waist Size 84-94cm (33-37in)
Size L: Waist Size 94-104cm (37-41in)
Size XL: Waist Size 104-114cm (41-45in)
Universally Adjustable
Harness Weight (Medium Size w/o Chest Ascender Kit):
Sit Harness: 617g (1.36lb)
Full Harness: 1179g (2.61lb)

12 |CMCPRO.COM
7 OPTIONAL COMPONENTS
Installation of the Outback™ Pouch (optional)
Installation of the Leg Loop Rear Strap (optional)

|OUTBACK HARNESS USER MANUAL 13
Installation of the Chest Harness Rear Strap (optional)
Installation of the Chest Ascender (optional)

14 |CMCPRO.COM
8 TIE-IN POINTS / CONNECTIONS
Sit Harness Connection Point
WARNING: The leg loop assembly must be connected to the waist belt
exactly as shown in this manual to form a secure tie-in point. The Waist
Belt Connect Loop (Item 3 in Section 3) is intended to accept the leg loop
assembly with the rated ventral D-ring per the donning instructions and is
not a rated connection point by itself.
Full Body Harness Connection Point
WARNING: The connections between the leg loop assembly, waist belt
andchestharnessmustbeconguredexactlyasshowninthismanualto
form secure tie-in points. Do not use the chest harness alone, it is only safe
to use when connected to the sit harness assembly. The chest ascender
and tri-link are only designed to aid in ascending a rope and are not rated
connection points.

|OUTBACK HARNESS USER MANUAL 15
Connecting Components

16 |CMCPRO.COM
9 ADDITIONAL INFORMATION
Manufacturer
CMC Rescue, Inc.,
6740 Cortona Drive
Goleta, CA 93117, USA
805-562-9120 / 800-235-5741
ISO9001Certied
©2021 CMC Rescue, Inc.
All rights reserved CMC and are registered marks of CMC Rescue Inc.
Notied Body conducting the EU type examination and Product Quality Management
according to Module C2
VVUÚ, a.s.
Pikartská 1337/7
716 07 Ostrava-Radvanice
Czech Republic
tel.: 00420 596 252 111
fax: 00420 596 232 098
Declaration of Conformity
CMC Rescue, Inc. declares that this article is in conformity with the essential requirements
and the relevant provisions of EU regulation 2016/425. The original Declaration of
Conformity can be downloaded at the following website: www.cmcpro.com

|OUTBACK HARNESS USER MANUAL 17

18 |CMCPRO.COM
EN
WARNING
Activities involving the use of this equipment
are potentially dangerous. Special knowledge
and training are required to use this product.
You are responsible for your own actions and
decisions. Before using this device, you must:
• Read and understand these user instruc-
tions and warnings.
• Familiarize yourself with its capabilities and
limitations.
• Beacompetentpersonand/orgetspecic
training in its proper use, or be under the
direct supervision of a trained or otherwise
competent person.
• Understand and accept the risks involved.
FAILURE TO HEED ANY OF THESE WARN-
INGS MAY RESULT IN SEVERE INJURY
OR DEATH
Find the latest version of this Manual at
cmcpro.com
1. TRACEABILITY &
MARKINGS
(A) Location of rope or lanyard attachment. (B)
Drawing to indicate that the Type D harness
shall not be used alone. (C) Graphical symbol
that advises the user to read the information
provided in the user manual. (D) CE Mark and
Numberofnotiedbodycontrollingproduction
of this PPE (E) European Standard EN
12277:2015+A1:2018 and harness type desig-
nation. (F) Drawing showing how to fasten and
secure load transmitting buckles and adjusting
devices. (G) Location and method of rappel
and belay device attachments (H) Component
size and year of manufacture (I) Manufacturer
Identication(J)ProductLabelLocations
2. FIELD OF
APPLICATION
This equipment is personal protective
equipment (PPE) used for mountaineering,
rope access, rope rescue, and activities
including climbing. This product meets the
requirements of Regulation (EU) 2016/425 on
personal protective equipment when used in
mountaineering or climbing activities according
to (EN12277:2015+A1:2018). The EU dec-
laration of conformity is available at cmcpro.
com. This product must not be used beyond its
limits or intended purpose.
RESPONSIBILITY
Activities involving the use of this device are
inherently dangerous. The user shall assume
all risks and responsibilities for any damage,
injury, or death, which may occur during or
following the incorrect use of this equipment.
This document must be provided to the user
by the retailer in the respective country’s
language and must be kept with the equipment
while it is in use. Observe relevant national
regulations.
These instructions explain the correct use of
your equipment. The warning symbols inform
you of some potential dangers related to the
use of your equipment, but it is impossible
to describe them all. You are responsible for
heeding each warning and using your equip-
ment correctly. Any misuse of this equipment
will create additional dangers. Contact CMC
ifyouhaveanyquestionsordicultyunder-
standing these instructions. Check cmcpro.
com for updates and additional information.
Before using this equipment, you must:
• Read and understand these instructions
and warnings.
• Obtainspecictrainingandcompetencyin
its proper use.
• Familiarize yourself with its capabilities and
limitations.
• Understand and accept the risks involved.
• Have a rescue plan in place to deal with any
emergencies that could arise during use
of the device
• Bemedicallytforactivitiesatheightand
capable of controlling your own security and
emergency situations.
• Check equipment before and after use.
WARNING: The user must ensure that, in the
event of falling into the PPE system, rescue
can take place immediately, safely, and
eectively.Motionlesssuspensioninaharness
may cause severe injury and even death.
Avoid hanging unsupported in the harness for
an extended period of time.
3. NOMENCLATURE
(1) Waist Belt (2) Waist Belt Quick Connect
Buckle (3) Waist Belt Connect Loop (4)
Ventral D-Ring (5) Leg Loop Assembly (6) Leg
Loops Quick Connect Buckles (7) Leg Loop
Assembly Girth Hitch (8) Front Lift (9) Chest
Ascender (optional) (10) Chest Ascender
(optional) Front Lift Adjuster Buckle (11) Chest
Harness (12) Sternal Attachment Point (13)
Shoulder Strap (14) Adjustment Buckles (15)
Chest Harness Rear Strap (optional) (16) Leg
Loop Rear Strap (optional)
4. INSPECTION,
POINTS TO VERIFY
INSPECTION
User safety depends on equipment integrity.
Equipment should be thoroughly inspected
prior to being placed into service and before
and after each use. In addition, a detailed
periodic inspection, by a competent person, is
required at least every 12 months (depending
on current local regulations, and your
conditions of usage). Follow the inspection
procedures available at cmcpro.com. Record
and store the results of the inspection in the
inspection checklist. If the harness system fails
inspection, it should be taken out of service
and marked accordingly or destroyed to
prevent further use.
LIFESPAN / RETIREMENT
The equipment has a lifespan of 10 years
from the date of manufacture shown on the
product label. Retirement is also a function
of the operating conditions, level of use, and
environmental conditions. Protect from sharp
edges,opename,extremetemperatures,
UV rays, chemicals, oils, moisture, and
mechanical stress. A fall load or other
exceptional event can lead to retirement after
a single use. Any concerns about its safe use
is cause for retirement. If the harness shall be
retired, it should be taken out of service and
marked accordingly or destroyed to prevent
further use.
The device must be retired when:
• It has reached the 10 year age limit
• It has been subjected to a major event (fall,
shock-load etc.)
• It has been exposed to extreme environ-
ments (sharp edges, high temperatures,
corrosive environment etc.) or become
contaminated (chemicals etc.)
• It fails to pass inspection or there are any
doubts about its reliability
• It has an uncertain usage history
• When it becomes obsolete due to changes
in legislation, standards, technique or
compatibility.
BEFORE EACH USE
• Check the harness for signs of wear includ-
ing structural stitching.
• Inspect webbing for damage and hardware
for cracks.
• Verify that the adjustment buckles are
threaded correctly and function properly.
• Conrmproductlabelingislegible.
• Carry out a suspension test in a safe
place to ensure that the harness is the
correctsize,hassucientadjustment,and
is of an acceptable comfort level for the
intended use.
DURING USE
Continually:
• Monitor the condition of the harness, and
position of the adjustable buckles making
sure they remain securely fastened.
• Check the condition of attachment points
and the connections to other equipment in
the system.
• Evaluate environmental conditions. Damp
or icy environments can alter equipment
behavior.
CARRYING, STORAGE AND TRANSPORT
• Storage - Store in a cool, dry, dark place.
Avoid chemicals, moisture, and direct
sunlight. Store without mechanical stress
caused by jamming, pressure, or tension.
• Transport - Keep away from direct sunlight,
chemicals, dirt and mechanical damage. For
this purpose, a protective bag or container
should be used.
• Drying - Dry at room temperature between
10° C and 30° C, avoid direct sunlight, never
use a tumble drier or direct heat.
• Cleaning – Wash soiled products in clean
warm water. Rinse well. Dry at room tem-
perature between 10° C and 30° C, avoid
direct sunlight, never use a tumble drier or
direct heat. Do not use a pressure washer.
If required, hinges of metal parts may be
lubricated after cleaning.
WARNING: Failure to follow these instructions
may endanger life.
WARRANTY & REPAIRS
If your CMC product has a defect due to
workmanship or materials, please contact
for warranty information and service.
CMC’s warranty does not cover damages
caused by improper care, improper use,
alterationsandmodications,accidental
damage or the natural breakdown of material
over extended use and time.
Theequipmentshouldnotbemodiedinany
way or altered to allow attachment of addi-
tional parts without the manufacturer’s written
recommendation. If original components are
modiedorremovedfromtheproduct,its
safety aspects may be restricted.
All repair work shall be performed by the
10 MANUAL TEXT

|OUTBACK HARNESS USER MANUAL 19
manufacturer.Allotherworkormodicationsvoid
the warranty and releases CMC from all liability and
responsibility as the manufacturer.
5. COMPATIBILITY
Equipment used with this harness must meet
regulatory requirements in your jurisdiction and/or
country. Verify that this product is compatible with the
other equipment in the system and that its intended
applications meet current standards.
When combining this product with other equipment
and/or using this product in a rescue/fall arrest
system, users must understand the instructions of
all components prior to use and comply with them
to ensure that safety aspects of these items do not
interfere with each other. This product should only
be used in connection with PPE components bearing
the CE-symbol to protect against falls from heights.
WARNING: Danger may arise and functionality may
be compromised by combining other equipment
with this product. User assumes all responsibility
for non-standard use of this product or added
components.
6. HARNESS DONNING
AND FITTING
DONNING THE WAIST BELT
• Attach the Waist Belt in the same manner as a
normalbelt.Itissizedtotinsidemostbeltloops
which is a convenient option but not necessary for
the function of the harness.
ADDING THE LEG LOOPS
• To add the leg loops and create a Type C sit-har-
ness, rotate the Waist Belt until the Waist Belt
Connection Loop is centered in the front.
• Take the Leg Loop Assembly and align it such that
the Ventral D-Ring is closest to the body and the
Leg Loop Girth Hitch is facing away from the body.
• Pass the Ventral D-Ring upward in-between the
Waist Belt Connection Loop and the Waist Belt.
• After the Ventral D-Ring has been passed through
the Waist Belt Connection Loop, grab the Leg Loop
Girth Hitch and pass it over the Ventral D-Ring,
securing it to the Waist Belt.
• Attach the Leg Loops by passing the opened loop
in-between and around each leg and closing the
quick connect buckle.
• Adjustthebucklessothatthelegloopstsnugly
around each leg while still allowing a hand to be
inserted between the leg and the leg loop.
• Ensure the leg loop padding is positioned so that
it covers the inside of the thigh and wraps around
the outermost part of the leg.
ADDING THE TYPE D CHEST HARNESS
• To attach the Type-D Chest Harness, don the
harness by pulling it over the head and passing the
arms through.
• The Sternal Attachment Point should be centered
on the chest.
• Adjustthetofthechestharnessbyholdingthe
vertical chest strap on one side, and pulling on the
tail end of the chest strap on the opposite side until
the harness is comfortably snug around the chest.
Ifthetistootight,simplylifttheCobrabuckleto
loosen the web.
• Take the webbing end of the front lift and pass it
down through the narrow slot in the Ventral D-Ring
and back through the Ventral D-Ring as shown.
• Thread the webbing end through the Cobra
connector and secure the tail with the elastic
Velcro keeper.
• Note: If the optional chest ascender is installed on
the Front Lift, the installation process for the Chest
Harness remains the same.
WARNING: Never us the Type D Chest Harness
without the previously described, proper connec-
tion to the Type C Site Harness. Failure to follow
these instructions may endanger life.
USE OF DIFFERENT BUCKLE TYPES
• Toloosenadjusterbuckles,ipthemup.Toclose,
pull the outbound webbing.
• On quick connect buckles, ensure both wings
snap in place.
Regularly check all closures and adjusting elements
7. OPTIONAL
COMPONENTS
INSTALLATION OF THE OUTBACK™ POUCH
(OPTIONAL)
• The Outback™ Pouch can be attached to the
Waistbelt or any compatible Molle panel.
• Thread the Velcro straps around and behind
the belt or Molle Strap, pass it underneath the
horizontal webbing and fasten to the hook-side
Velcro on the Pouch.
• It may be convenient to position the pouch
upside down with the front panel facing the user
and above the waistbelt when attaching it while
wearing the waistbelt. After fastening the straps as
explained above, the pouch will rotate into proper
carrying position.
INSTALLATION OF THE LEG LOOP REAR
STRAP (OPTIONAL)
The Leg Loop Rear Strap is an optional component
that is designed to hold the leg loops in position. This
strap connects the rear of the leg loops to the belt.
To connect the Leg Loop Rear Strap:
• Insert each lower buckle into the webbing loops
provided on the backside of the leg loops.
• Pass the upper portion of the assembly behind
the waist belt, fold the buckle over and down, and
connect it back to the lower loop to create a con-
nection with the waist belt. Note: the upper loop of
this component is designed to accept the buckle
from the optional Chest Harness Rear Strap.
INSTALLATION OF THE CHEST HARNESS
REAR STRAP (OPTIONAL)
The Chest Harness Rear Strap is an optional
component that can be used to provide a connection
between the rear of the chest harness and the
waistbelt. This strap helps position the chest harness
and keep it from riding up into the user’s neck, es-
pecially when hiking with the harness. When not in
use, it can be stowed in the rear pocket of the chest
harness. To deploy, simply pull it down and extend
it for installation.
To connect the Chest Harness Rear Strap:
Option 1: If the Leg Loop Rear Strap is not installed,
pass the Chest Harness Rear Strap under the rear
of the waistbelt and hook the buckle back on itself to
form a loop around the waistbelt.
Option 2: If the Leg Loop Rear Strap is installed,
connect the Chest Harness Rear Strap to the upper
loop of the Leg Loop Rear Strap.
Adjust the length of the strap to the desired position.
INSTALLATION OF THE CHEST ASCENDER
(OPTIONAL)
The Front Lift is designed to accommodate a Kong
Futura™ Chest Ascender which is attached to the
harness with a 5mm Maillon Rapide Stainless Steel
tri-link connector. The front lift is designed to work
with or without this optional gear and the presence
of this component does not change the way the
harness is connected to the sit harness.
Required materials:
CMC Outback™ Chest Ascender Kit P/N 343020
• Kong Futura™ Chest Ascender
• Maillon Rapide Stainless Steel Delta Quick Link
(1/4”)
• Atom™ Ascender Strap
Required tools:
• 7/16” Wrench
Installation Procedure
• Start with the chest harness separated from the
sit harness.
• Run the chest ascender strap loop over the
front lift.
• Pushthestienedendofthechestascender
strap through the top hole of the chest ascender
and through the lower central eye of the sternal
rigging plate.
• Pushthestienedendunderthetopstrap,over
and back under the bottom strap, and then pass it
under the chest ascender loop itself.
• Install the Delta Quick Link into the loop on the
front lift in a way that the threaded barrel is on the
user’s left side when wearing the harness.
• Tighten the Delta Quick Link with a 7/16” wrench to
a quarter turn beyond hand tightness.
8. TIE-IN POINTS /
CONNECTIONS
SIT HARNESS CONNECTION POINT
Type C Sit Harness: use only the Ventral D-Ring
(highlighted in red) to connect the harness.
WARNING:
• The leg loop assembly must be connected to the
waist belt exactly as shown in this manual to form
a secure tie-in point.
• The Waist Belt Connect Loop (Item 3 in Section 3)
is intended to accept the leg loop assembly with
the rated ventral D-ring per the donning instruc-
tions and is not a rated connection point by itself.
FULL BODY HARNESS
Whenconguredasafullbodyharness,useeither
the Ventral D-Ring or the large eye of the Sternal
Attachment as tie-in points to connect the harness to
a system. (Highlighted in red).
WARNING:
• The connections between the leg loop assembly,
waistbeltandchestharnessmustbecongured
exactly as shown in this manual to form secure
tie-in points.
• Do not use the chest harness alone, it is only
safe to use when connected to the sit harness
assembly.
• The chest ascender and tri-link are only designed
to aid in ascending a rope and are not rated
connection points.
CONNECTING COMPONENTS
Tying In: always verify the knot has been tied cor-
rectly before starting to climb or suspending yourself
in the harness.
To install a belay or rappel system, connect to the
ventral attachment point using a locking carabiner.
Ensure that the carabiner is fully closed and locked
before climbing or suspending in the harness. Take
care to ensure that the carabiner is oriented in a way
that it is loaded along the major axis.
9. ADDITIONAL
INFORMATION
NotiedBodyconductingtheEUtypeexamination
and Product Quality Management according to
Module C2
CMC Rescue, Inc. declares that this article is in
conformity with the essential requirements and the
relevant provisions of EU regulation 2016/425. The
original Declaration of Conformity can be download-
ed at the following website: www.cmcpro.com

20 |CMCPRO.COM
DE
WARNUNG
Aktivitäten, die mit der Verwendung dieser Aus-
rüstung einhergehen, sind grundsätzlich gefährlich.
Für die Verwendung dieses Produkts sind besondere
Kenntnisse und Schulungen erforderlich. Der
Benutzer ist für das eigenes Handeln verantwortlich.
Bevor Sie diesen Gurt verwenden:
• Lesen und verstehen Sie diese Benutzeranweisun-
gen und Warnungen vollständig.
• Machen Sie sich mit den Fähigkeiten und Ein-
schränkungen des Gurtsystems vertraut.
• Der Benutzer muss gewährleisten, dass er oder
siespezischgeschultwurdeinderordnungs-
gemäßen Anwendung des Gurtes, oder unter
direkter Aufsicht einer geschulten oder anderweitig
kompetenten Person, eine Einweisung vor der
Nutzung stattfand.
• Die mit der Nutzung verbundenen Risiken müssen
verstanden und akzeptiert werden.
DIE NICHTBEACHTUNG DIESER WARNUNGEN
KANN ZU SCHWEREN VERLETZUNGEN ODER
ZUM TOD FÜHREN.
Finden Sie die neueste Version dieses Handbuchs
unter cmcpro.com
1. RÜCKVERFOLGBA-
RKEIT &
MARKIERUNGEN
(A) Seil- oder Lanyard- Anschlagpunkt. (B) Zeich-
nung, welche aufzeigt das der Gurt in der Typ D
Kongurationnichtalleinverwendetwerdendarf.(C)
GraschesSymbol,dasdemBenutzerrät,dieimBe-
nutzerhandbuch enthaltenen Informationen zu lesen.
(D) CE-Kennzeichnung und Anzahl des benannten
oziellenAmtes,welchedieProduktiondieserPSA
(E) europäischen Norm EN 12277:2015+A1:2018
des Gurtes kontrolliert hat. (F) Symbol, wie man
justier- und lastentragende- Schnallen befestigt
und sichert. (G) Ort und Methode der Abseil- und
Sicherungsanschlagpunkte (H) Gurtgröße und
Herstellungsjahr(I)Herstelleridentikation(J)
Produktetikettenpositionen am Gurt.
2. ANWENDUNGS-
BEREICH
Diese Ausrüstung ist persönliche Schutzausrüstung
(PPE), die zum Bergsteigen, Seilzugang, Seilrettung
und Aktivitäten wie Klettern verwendet wird. Dieses
Produkt erfüllt die Anforderungen der Verordnung
(EU) 2016/425 über persönliche Schutzausrüstung,
wenn es im Bergsteigen oder Klettern gemäß
(EN12277:2015+A1:2018) verwendet wird. Die
EU-Konformitätserklärung ist unter cmcpro.com
abrufbar. Dieses Produkt darf nicht über seinen
Verwendungszweck hinaus genutzt werden.
VERANTWORTLICHKEIT
Aktivitäten, welche Verwendung dieses Gurtes
bedürfen, sind grundsätzlich gefährlich. Der Benutzer
übernimmt alle Risiken und Verantwortlichkeiten für
Schäden, Verletzungen oder Todesfälle, die während
oder nach der unsachgemäßen Verwendung dieses
Gurtes auftreten können. Dieses Dokument muss
dem Benutzer vom Händler in der Sprache des
jeweiligen Landes zur Verfügung gestellt werden
und muss während bei der Verwendung des Gurtes
gribereitsein.BeachtenSiedieeinschlägigen
nationalen Vorschriften.
Diese Anleitung erklärt die korrekte Verwendung
des Gurtes. Die Warnsymbole informieren über
potenzielle Gefahren im Zusammenhang mit der
Verwendung des Gurtes. Es ist aber nicht möglich,
alle risikoreichen Umstände zu beschreiben. Der
Benutzer ist daher verantwortlich, jede Warnung zu
beachten und den Gurt dem Handbuch entsprechend
zu verwenden. Jeglicher Missbrauch dieser Gurte,
kann zu zusätzlichen Gefahren führen.
Wir empfehlen, dass der Benutzer sich bei jeglichen
Fragen bezüglich der Nutzung oder Anwendung
des Gurtes an CMC direkt wendet. Besuchen Sie
bitte www.cmcpro.com um Aktualisierungen und
zusätzlicheInformationenzunden.
Bevor Sie diesen Gurt verwenden:
• Lesen und verstehen Sie diese Anweisungen und
Warnungen.
• SpezischeAusbildunginderrichtigen
Verwendung ist die Grundvoraussetzung für die
Verwendung des Gurtes.
• Machen Sie sich mit den Fähigkeiten und Ein-
schränkungen des Gurtes vertraut.
• Verstehen Sie die mit der Nutzung verbundenen
Risiken.
• Bereiten Sie einen Rettungsplan vor, um Notfälle
zu bewältigen, die während der Nutzung des
Gurtes auftreten könnten.
• Medizinische Fitness für Höhenaktivitäten ist
unerlässlich, als auch die Fähigkeit die eigene
Sicherheits- und Notfallsituationen zu kontrollieren.
• Überprüfen Sie den Gurt vor und nach der
Verwendung.
WARNUNG: Der Benutzer muss sicherstellen, dass
im Falle eines Absturzes in das PSA-System die
Rettungsofort,sicherundeektiverfolgenkann.Das
bewegungslose Hängen in einem Gurt kann schwere
Verletzungen und sogar zum Tod führen. Vermeiden
Sie es unbedingt, über einen längeren Zeitraum,
ohne zusätzliche Stützung im Gurt zu hängen.
3. STICHWORT-
VERZEICHNISS
(1) Hüftgürtel (2) Hüftgürtel Quick-Connect Schnalle
(3) Hüftgürtel – Verbindungsring (4) Ventral D-Ring
(5) Oberschenkel Gurt (6) Oberschenkel Gurt,
Quick- Connect Schnallen (7) Oberschenkel Gurt
Verbindungsschlaufe (8) Vorderer Anschlagpunkt
(9) Seil Klemme (optional)) (10) Seil Klemme
(optional) Vorderer Justierschnalle (11) Brustgurt (12)
Sternal Anschlagpunkt (13) Schultergurt (14) Ver-
stellschnallen (15) Brustgurt-Zusatzband (optional)
(16) Beinschlaufe-Zusatzband (optional)
4. INSPEKTION
INSPEKTION
Die Sicherheit des Benutzers hängt von der Integrität
der gesamten Ausrüstung ab. Die Gurte sollten vor
der Inbetriebnahme und nach jeder Verwendung
gründlich geprüft werden. Darüber hinaus ist eine de-
taillierte regelmäßige Inspektion durch eine kompe-
tente Person mindestens alle 12 Monate erforderlich
(abhängig von den aktuellen lokalen Vorschriften und
Ihren Nutzungsbedingungen). Befolgen Sie bitte die
Inspektionsverfahren,dieuntercmcpro.comzund-
en sind. Erfassen und speichern Sie die Ergebnisse
derInspektionineinerPrüiste.WenndieInspektion
des Gurtes ein negatives Ergebnis aufweist, sollte
dieser Gurt außer Betrieb genommen und entsprech-
end gekennzeichnet oder zerstört werden, um eine
weitere Verwendung zu verhindern.
LEBENSDAUER / AUSSERBETRIEBNAHME
Der Gurt hat eine Lebensdauer von 10 Jahren,
ab dem auf dem Fertigungsetikett angegebenen
Herstellungsdatum. Die Notwendigkeit der Außer-
betriebnahme ist von der Nutzungsbedingungen,
des Nutzungsniveaus und der Umweltbedingungen
abhängig. Schützen Sie den Gurt vor scharfen
Kanten,oenerFlamme,extremenTemperaturen,
UV-Strahlen, Chemikalien, Ölen, Feuchtigkeit und
mechanischer Beanspruchung. Eine Falllast oder
ein anderes außergewöhnliches Ereignis kann
auch nach einer einmaligen Verwendung die
Ausmusterung des Gurtes nötig machen. Jegliche
Bedenken über die sichere Verwendung des Gurtes
ist Grund für die Ausmusterung. Der Gurt muss dann
entsprechend gekennzeichnet und gegebenenfalls
zerstört werden.
Der Gurt muss ausgemustert werden, wenn:
• Eine Lebensdauer von 10 Jahren erreicht ist.
• Er einer extremen Schock-Last ausgesetzt wurde.
• Er außergewöhnlichen Umständen (scharfe
Kanten, hohe Temperaturen, korrosive Umgebung
usw.) ausgesetzt oder kontaminiert wurde (Che-
mikalien usw.)
• Es besteht kein Inspektion Logbuch oder es beste-
hen Zweifel an seiner Zuverlässigkeit des Gurtes.
• Er hat eine unbekannte Nutzungsgeschichte
• Wenn er aufgrund von Änderungen in der
Gesetzgebung, Normen, technischen Vorschriften
oder Kompatibilität veraltet ist.
VOR JEDER NUTZUNG
• Überprüfen Sie den Gurt auf Verschleißer-
scheinungen, einschließlich struktureller Nähte.
• Prüfen Sie Gurtband auf Beschädigungen und
mechanische Teile auf Risse und Verformungen.
• Stellen Sie sicher, dass die Einstellschnallen
korrekt gefädelt sind und ordnungsgemäß
funktionieren.
• Prüfen Sie, dass die Produktkennzeichnungen
lesbar sind.
• Führen Sie einen Hängtest an einem sicheren
Ort durch, um sicherzustellen, dass der Gurt die
richtige Größe hat, ausreichend angepasst ist und
ein optimales Komfortniveau für den vorgesehenen
Gebrauch hat.
WÄHREND DER NUTZUNG
• Beachten Sie den Zustand des Gurtzeugs und die
Position der verstellbaren Schnallen, um sicher-
zustellen, dass diese sicher befestigt bleiben.
• Überprüfen Sie den Zustand der Befestigung-
spunkte und die Verbindungen zu anderem
Equipment im System.
• Beachten Sie die Umgebungsbedingungen.
Feuchte oder eisige Umgebungen können die
Leichtigkeit der Einstellung des Gurtes und der
Schnallennegativbeeinussen.
LAGERUNG UND TRANSPORT
• Lagerung - An einem kühlen, trockenen, dunklen
Ort aufbewahren. Vermeiden Sie jegliche Che-
mikalien, Feuchtigkeit und direkte Sonnenein-
strahlung. Ohne mechanische Belastung durch
Verklemmen oder Last aufbewahren.
• Transport - Von direkter Sonneneinstrahlung,
Chemikalien, Schmutz und mechanischen
Schäden fernhalten. Zu diesem Zweck sollte eine
Schutztasche oder ein Schutzbehälter verwendet
werden.
• Trocknen - Trocknen sie den Gurt bei Raumtem-
peratur zwischen 10° C und 30° C, vermeiden
Sie direkte Sonneneinstrahlung, verwenden
Sie niemals einen Wäschetrockner oder direkte
Hitzequellen.
• Reinigung – Waschen Sie verschmutzte Produkte
in sauberem warmem Wasser. Gut spülen. Trock-
nen Sie bei Raumtemperatur zwischen 10° C und
30° C, vermeiden Sie direkte Sonneneinstrahlung,
verwenden Sie niemals einen Wäschetrockner
oder direkte Hitze. Verwenden Sie niemals einen
Hochdruckreiniger. Bei Bedarf können bewegliche
Teile der Metallschnallen nach der Reinigung
geschmiert werden.
WARNUNG: Die Nichtbeachtung dieser Anweisun-
gen ist potentiell lebensgefährlich.
GARANTIE & REPARATUREN
Wenn Ihr CMC-Produkt aufgrund von Verarbeitung
oder Materialien einen Defekt aufweist, wenden
Sie sich bitte an den CMC-Kundenservice unter
formationen.
Die Garantie von CMC deckt keine Schäden ab,
welchedurchunsachgemäßePege,unsachgemäße
Verwendung,ÄnderungenundModikationen,
zufällige Beschädigungen oder den natürlichen Ma-
terialabbau über längere Nutzung verursacht werden.
Der Gurt sollte ohne schriftliche Empfehlung des Her-
stellersinkeinerWeisemodiziertodersoverändert
werden, dass zusätzliche Teile angebracht werden
können. Wenn Originalkomponenten geändert
oder aus dem Produkt entfernt werden, besteht ein
zusätzliches Unfall- und Verletzungsrisiko.
Alle Reparaturen sind vom Hersteller durchzuführen.
AlleanderenReparaturenoderModikationen
erlöschen der Garantie und entbindet CMC von jeder
Haftung und Verantwortung als Hersteller.
5. KOMPATIBILITÄT
Table of contents
Languages:
Other CMC Safety Equipment manuals

CMC
CMC HELITACK AIRBAG User manual

CMC
CMC HELITACK HOTSEAT User manual

CMC
CMC Pro Series User manual

CMC
CMC RESCUE & PROTECH PULLEYS User manual

CMC
CMC SQUID 300020 User manual

CMC
CMC KOOTENAY ULTRA PULLEY User manual

CMC
CMC Helitack HotSeat User manual

CMC
CMC PROSWIVEL User manual

CMC
CMC PROSERIES 300221-01 Technical manual

CMC
CMC LEVR Escape System User manual

CMC
CMC ATOM HARNESS User manual

CMC
CMC AZTEK ProSeries User manual

CMC
CMC AZORP User manual

CMC
CMC ANCHOR STRAPS User manual

CMC
CMC ESCAPE ARTIST SYSTEM User manual

CMC
CMC ATOM HARNESS User manual

CMC
CMC PROSWIVEL SWIVABINER User manual
CMC
CMC LEVR Escape System User manual

CMC
CMC ARIZONA VORTEX KIT User manual