manuals.online logo
Brands
  1. Home
  2. •
  3. Brands
  4. •
  5. Crosswater
  6. •
  7. Bathroom Fixture
  8. •
  9. Crosswater MPRO US-PRO241 User manual

Crosswater MPRO US-PRO241 User manual

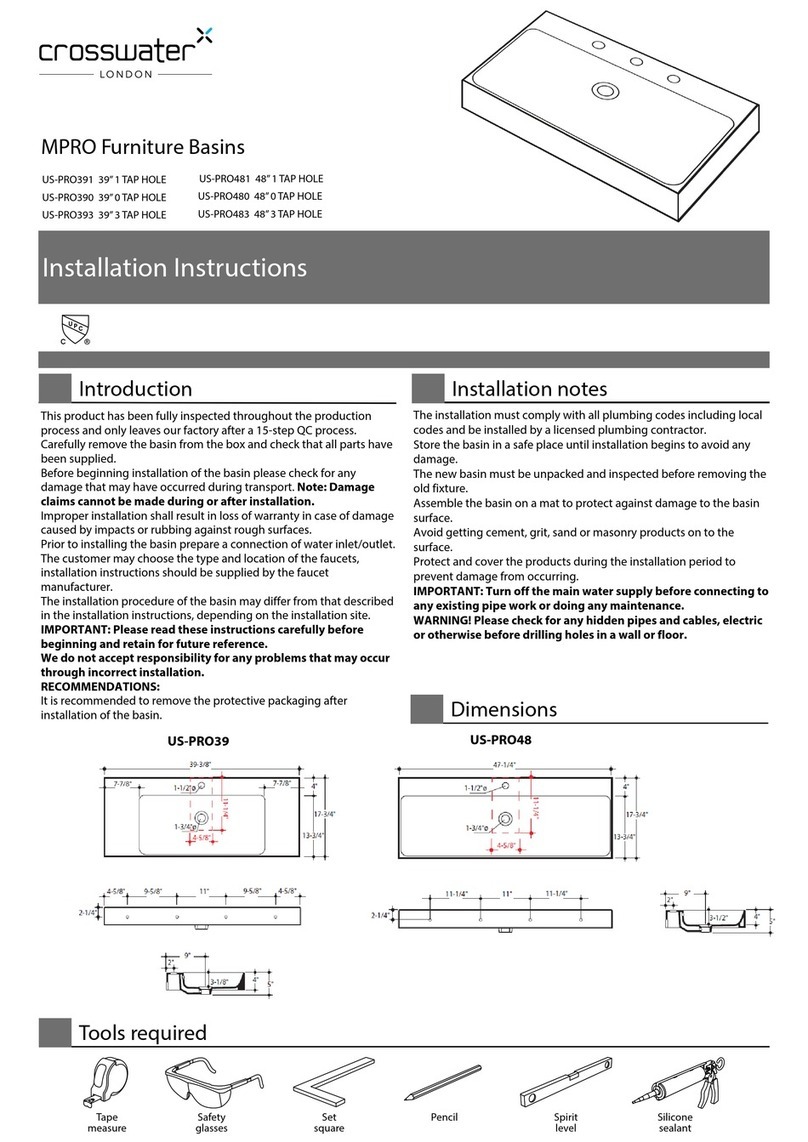
Installation Instructions
Tape
measure
Safety
glasses
Set
square
Pencil Spirit
level
Silicone
sealant
Tools required
Installation notes
The installation must comply with all plumbing codes including local
codes and be installed by a licensed plumbing contractor.
Store the basin in a safe place until installation begins to avoid any
damage.
The new basin must be unpacked and inspected before removing the
old fixture.
Assemble the basin on a mat to protect against damage to the basin
surface.
Avoid getting cement, grit, sand or masonry products on to the surface.
Protect and cover the products during the installation period to
prevent damage from occurring.
IMPORTANT: Turn off the main water supply before connecting to
any existing pipe work or doing any maintenance.
WARNING! Please check for any hidden pipes and cables, electric
or otherwise before drilling holes in a wall or floor.
Dimensions
Introduction
This product has been fully inspected throughout the production
process and only leaves our factory after a 15-step QC process.
Carefully remove the basin from the box and check that all parts have
been supplied.
Before beginning installation of the basin please check for any
damage that may have occurred during transport. Note: Damage
claims cannot be made during or after installation.
Improper installation shall result in loss of warranty in case of damage
caused by impacts or rubbing against rough surfaces.
Prior to installing the basin prepare a connection of water inlet/outlet.
The customer may choose the type and location of the faucets,
installation instructions should be supplied by the faucet manufacturer.
The installation procedure of the basin may differ from that described
in the installation instructions, depending on the installation site.
IMPORTANT: Please read these instructions carefully before
beginning and retain for future reference.
We do not accept responsibility for any problems that may occur
through incorrect installation.
RECOMMENDATIONS:
It is recommended to remove the protective packaging after
installation of the basin.
MPRO Furniture Basins
US-PRO241 24” 1 TAP HOLE
US-PRO240 24” 0 TAP HOLE
US-PRO243 24” 3 TAP HOLE
US-PRO281 28” 1 TAP HOLE
US-PRO280 28” 0 TAP HOLE
US-PRO283 28” 3 TAP HOLE
17-3/4"
4"
13-3/4"
23-5/8"
2-1/4"
11-1/4"
11-1/4"
4-5/8"
3-1/8" 4" 5"
9"
1-3/4"
1-3/4"ø
1-1/2"ø
17-3/4"
4"
13-3/4"
27-1/2"
2"
11"
3-1/8" 4" 5"
8-5/8"
1-3/4"
1-3/4"ø
1-1/2"ø
11-1/4"
4-5/8"
US-PRO24 US-PRO28
2Installation
3Maintenance
lThis installation guide does not include details of waste
connection. Final decision about installation of waste connection
should be taken by a suitably qualified contractor.
lInstall the waste according to the installation instructions supplied
with the waste.
lPlace the basin in desired position making sure the waste hole is
aligned.
lApply sealant to the inside edge and place into position.
WARNING: Do NOT overtighten the waste as this may cause
long-term damage to the basin.
We recommend using a torque wrench to tighten the waste by
using a torque force between 25Nm or 18.5 ft/lb and 50Nm or
36.8 ft/lb.
IMPORTANT:
Crosswater London cannot accept responsibility for any
injuries caused to those attempting to install this basin
without adequate and appropriate tools or resources.
l Remove the basin carefully from the packaging.
l Do not drag the basin over rough surfaces or sharp objects.
Lift and place the basin into position.
lDo not drop the basin!
1Installation - carriage
A simple routine of regular care will keep your vitreous china and fireclay products clean and fresh.
Rinse away any traces of soap and gently dry with a clean soft cloth after each use. A mild detergent, warm water and a soft cloth will remove
normal dirt and soap accumulations from surfaces.
Soft abrasive cleaners may be used on vitreous china and fireclay. Never use abrasive cleaners without water. Do not use caustic cleaners or
disinfectants as they can alter the surface finish and void the warranty.
Do not allow certain materials such as toothpaste, cologne, shaving cream, nail polish remover, vinegar, wine, drain and glass cleaners to
remain on the surface. Prolonged contact can alter surface finishes and void the warranty.
Issue date: 19112020
Warranty - This Crosswater London product is covered by a limited lifetime warranty. For full details, terms and conditions please visit our website.
For further information contact:Crosswater London, 393 Fortune Blvd., Milford, MA 01757
Toll free number: 844-XWATER-1 (844-992-8371) tel: 508-381-0433 fax: 508-381-6068
www.crosswaterlondon.com
email: technical@crosswaterlondon.com
IMPORTANT: Basins are designed for installation with MPRO
vanities.
Basins are not suitable for wall-hung installation without
underside support. It is the responsibility of the installer to
provide adequate support.
Crosswater London cannot be held responsible for inadequate
wall-hung installation.
Mounting hardware for wall-hung installation not supplied.

This manual suits for next models

5

Other Crosswater Bathroom Fixture manuals

Crosswater ISLSC1200 User manual

Crosswater

Crosswater ISLSC1200 User manual

Crosswater PRO945 User manual

Crosswater

Crosswater PRO945 User manual

Crosswater Revive FHX310C User manual

Crosswater

Crosswater Revive FHX310C User manual

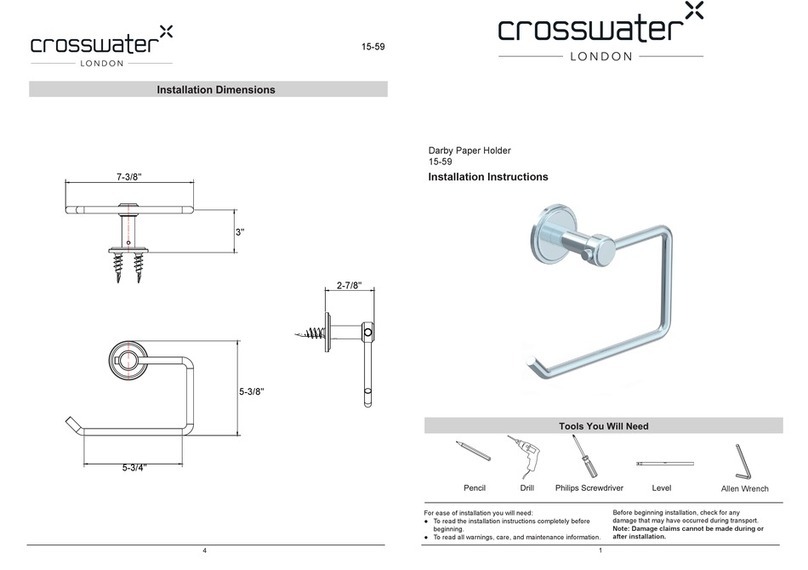
Crosswater Darby 15-59 User manual

Crosswater

Crosswater Darby 15-59 User manual

Crosswater Fenmore 28-58 User manual

Crosswater

Crosswater Fenmore 28-58 User manual

Crosswater Waldorf 31 US-WF80X81 User manual

Crosswater

Crosswater Waldorf 31 US-WF80X81 User manual

Crosswater US-L1 User manual

Crosswater

Crosswater US-L1 User manual

Crosswater Arcade US-ARCA5 User manual

Crosswater

Crosswater Arcade US-ARCA5 User manual

Crosswater Limit LI120WNC User manual

Crosswater

Crosswater Limit LI120WNC User manual

Crosswater Taos 17-14-T User manual

Crosswater

Crosswater Taos 17-14-T User manual

Crosswater MPRO US-PRO391 User manual

Crosswater

Crosswater MPRO US-PRO391 User manual

Crosswater Arcade US-ARCV17 User manual

Crosswater

Crosswater Arcade US-ARCV17 User manual

Crosswater Fenmore 7 28-60 User manual

Crosswater

Crosswater Fenmore 7 28-60 User manual

Crosswater Palmero US-B3CCS User manual

Crosswater

Crosswater Palmero US-B3CCS User manual

Crosswater Leyden 14X-15P-T User manual

Crosswater

Crosswater Leyden 14X-15P-T User manual

Crosswater Drift DR416FC User manual

Crosswater

Crosswater Drift DR416FC User manual

Crosswater SB035B C User manual

Crosswater

Crosswater SB035B C User manual

Crosswater Wisp Series User manual

Crosswater

Crosswater Wisp Series User manual

Crosswater Limit LI110DNC User manual

Crosswater

Crosswater Limit LI110DNC User manual

Crosswater Lazo LA1416FC User manual

Crosswater

Crosswater Lazo LA1416FC User manual

Crosswater Taos 17-59 User manual

Crosswater

Crosswater Taos 17-59 User manual

Crosswater Fenmore 28-51 User manual

Crosswater

Crosswater Fenmore 28-51 User manual

Crosswater Darby 15-51 User manual

Crosswater

Crosswater Darby 15-51 User manual

Popular Bathroom Fixture manuals by other brands

GRE DSALC32W instruction manual

GRE

GRE DSALC32W instruction manual

Glacier bay 67778-0001 Installation and care guide

Glacier bay

Glacier bay 67778-0001 Installation and care guide

Premier 284443 quick start guide

Premier

Premier 284443 quick start guide

Jacuzzi Chelsea Installation, use and maintenance

Jacuzzi

Jacuzzi Chelsea Installation, use and maintenance

Kohler K-2011 installation guide

Kohler

Kohler K-2011 installation guide

Glacier bay HD67499W-6404 Installation and care guide

Glacier bay

Glacier bay HD67499W-6404 Installation and care guide

Fleurco ELERA EL05 installation manual

Fleurco

Fleurco ELERA EL05 installation manual

VIGO Cass VG6044 installation manual

VIGO

VIGO Cass VG6044 installation manual

agape OTTOCENTO ACER0766-R Assembly instruction

agape

agape OTTOCENTO ACER0766-R Assembly instruction

Spectrum Brands Pfister McAllen R89-XMCA Maintenance & Care Guide

Spectrum Brands

Spectrum Brands Pfister McAllen R89-XMCA Maintenance & Care Guide

Conti+ CONSMART CONE4111221109 installation manual

Conti+

Conti+ CONSMART CONE4111221109 installation manual

agape LIMON ILIX425 Assembly instructions

agape

agape LIMON ILIX425 Assembly instructions

BEGA 84 416 quick start guide

BEGA

BEGA 84 416 quick start guide

eisl DX12004PLUS installation instructions

eisl

eisl DX12004PLUS installation instructions

EZee Life CRP0929 quick start guide

EZee Life

EZee Life CRP0929 quick start guide

DURAVIT DuraSystem WD6002 000 000 Mounting instructions

DURAVIT

DURAVIT DuraSystem WD6002 000 000 Mounting instructions

Kohler K-4777 Installation and care guide

Kohler

Kohler K-4777 Installation and care guide

Helvex RM-15 quick start guide

Helvex

Helvex RM-15 quick start guide

manuals.online logo
manuals.online logoBrands
  • About & Mission
  • Contact us
  • Privacy Policy
  • Terms and Conditions

Copyright 2025 Manuals.Online. All Rights Reserved.