manuals.online logo
Brands
  1. Home
  2. •
  3. Brands
  4. •
  5. Digilock
  6. •
  7. Lock
  8. •
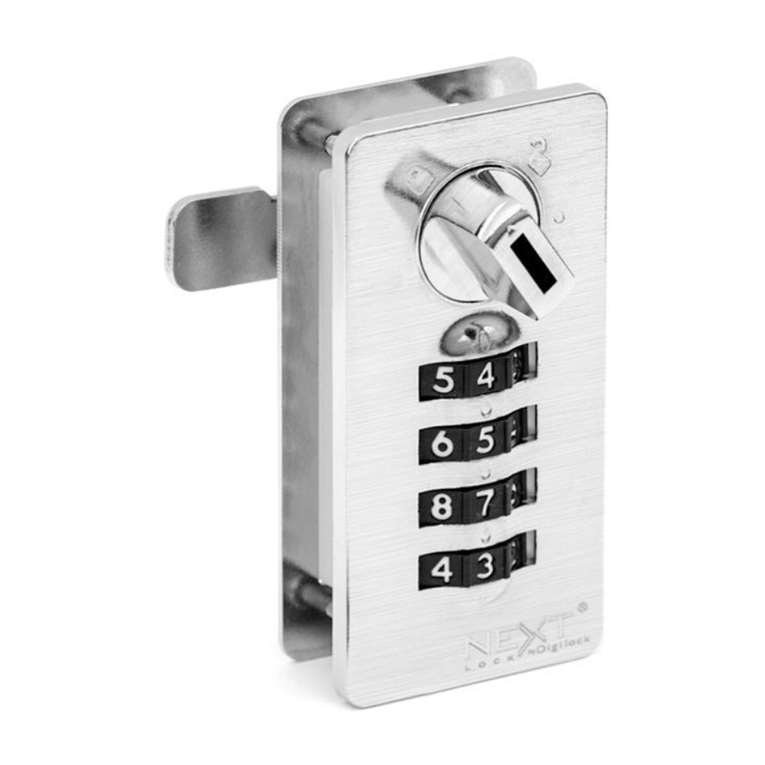
  9. Digilock Next Mech Dial Combo User manual

Digilock Next Mech Dial Combo User manual

Operate with a Combination Operate with a Manager Key
Installation Guide
Mounting
Screws
Screw type
M3×10 ✓
0 – 5 mm
✓
M3×145 – 8 mm
M3×108 – 12 mm
M3×1412 – 16 mm
M3×1816 – 20 mm
Mounting plate
Accommodates door
thickness up to 20 mm Mortise Hole Dimensions
Spacer Requirements
Spacer required* for door
thickness less than 8 mm
Factory default combination 0-0-0-0
Removal keyManager key
Door thickness *Spacer required
R3
77 mm
31.5 mm
min. 6.35 mm
Cam in Locked Position
must overlap Strike
Plate by at least ¼"
(6.35 mm)
Lock Parts
Mounting
Screws
Screw type
M3×10 ✓
0 – 5 mm
✓
M3×145 – 8 mm
M3×108 – 12 mm
M3×1412 – 16 mm
M3×1816 – 20 mm
Mounting plate
Accommodates door
thickness up to 20 mm
Mortise Hole Dimensions
Spacer Requirements
Spacer required* for door
thickness less than 8 mm
Factory default combination 0-0-0-0
Removal keyManager key
Door thickness *Spacer required
R3
77 mm
31.5 mm
min. 6.35 mm
Cam in Locked Position
must overlap Strike
Plate by at least ¼"
(6.35 mm)
Mounting
Screws
Screw type
M3×10 ✓
0 – 5 mm
✓
M3×145 – 8 mm
M3×108 – 12 mm
M3×1412 – 16 mm
M3×1816 – 20 mm
Mounting plate
Accommodates door
thickness up to 20 mm Mortise Hole Dimensions
Spacer Requirements
Spacer required* for door
thickness less than 8 mm
Factory default combination 0-0-0-0
Removal keyManager key
Door thickness *Spacer required
R3
77 mm
31.5 mm
min. 6.35 mm
Cam in Locked Position
must overlap Strike
Plate by at least ¼"
(6.35 mm)
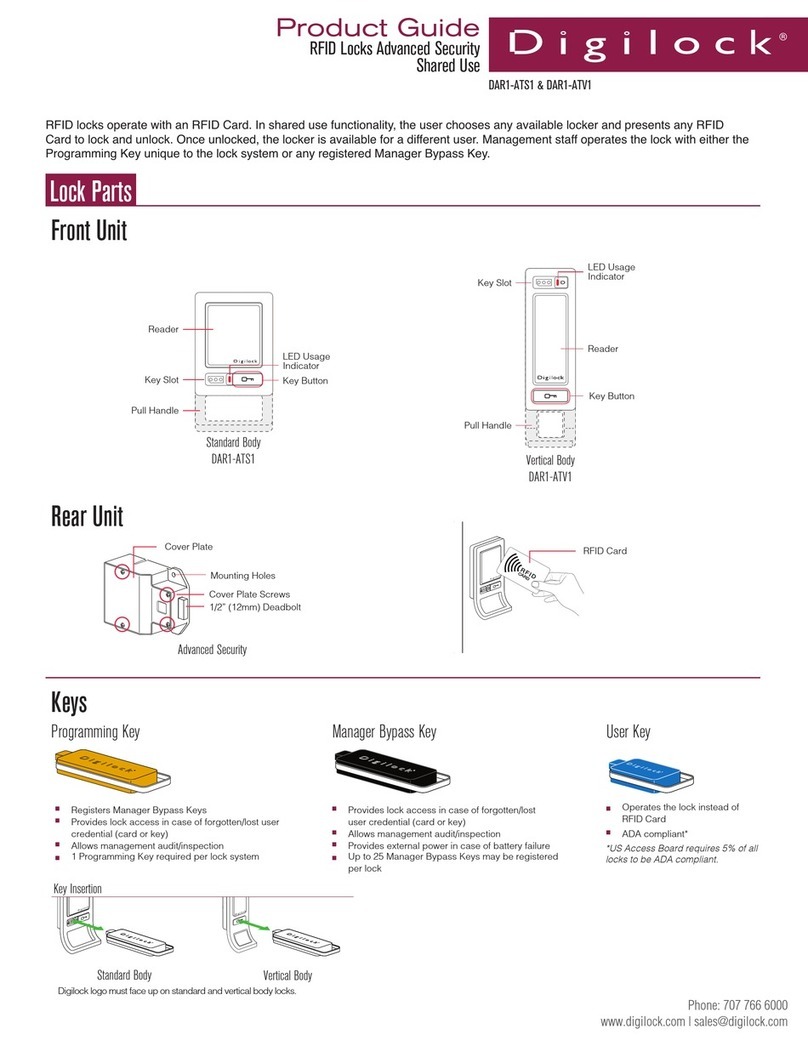
Dial Combo
Shared Use
Product Guide
1. Close the door.
2. Make sure the knob is in the
unlocked position.
3. Set any 4-digit combination.
4. Turn the knob to the locked
position.
5. Scramble the combination.
1. Enter your 4-digit
combination.
2. Turn the knob to the
unlocked position.
3. Open the door.
4. Scramble the combination.
To Lock: To Unlock: To Unlock with Manager Key:
1. Insert the Manager Key.
2. Turn the knob to the
unlocked symbol.
3. Open the door.
Note: The Manager key provides instant access but does not erase
the code. The original code will continue to operate the lock even when
unlocking with the Manager Key.
If opened in error, use the Manager Key to turn the lock to the locked
position.
If the code is forgotten, follow the Reset Combination steps to make the lock
available for another user.
Note “M” for
Manager on key
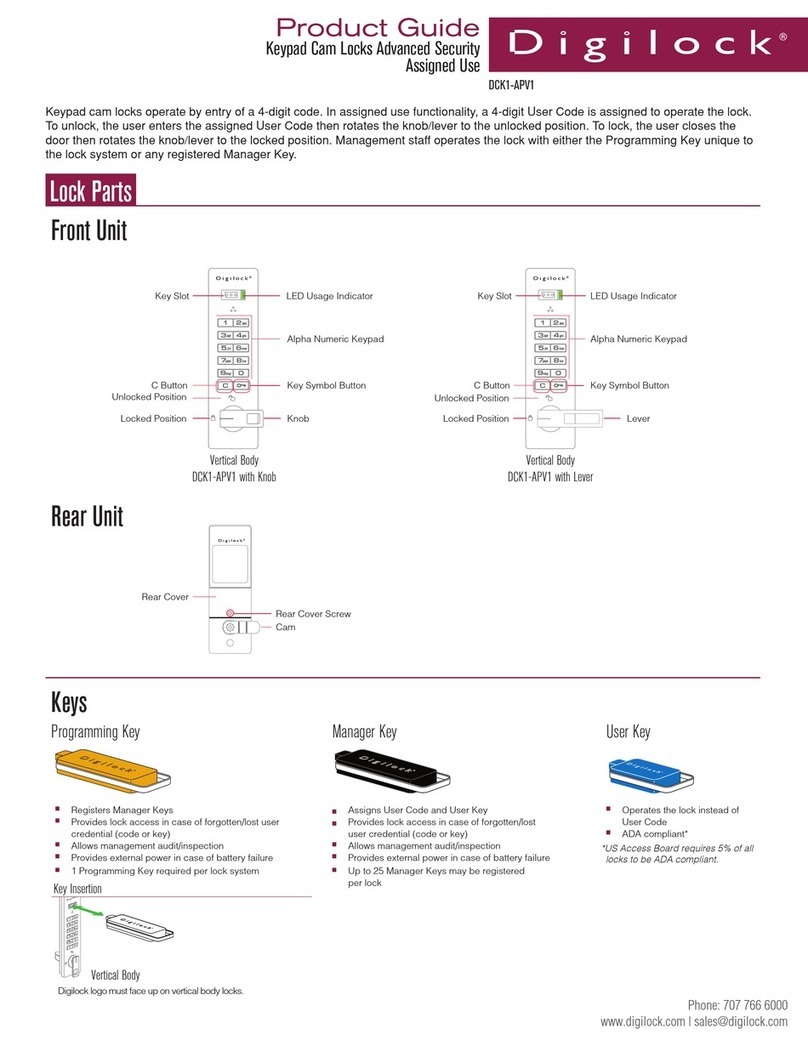
Rear UnitFront Unit
Locked Position
Reset Pin Holes
Key Slot
Unlocked Position
Core Removal
Position
Comibination Dial
Cam
Reset Combination
Mounting
Screws
Screw type
M3×10 ✓
0 – 5 mm
✓
M3×145 – 8 mm
M3×108 – 12 mm
M3×1412 – 16 mm
M3×1816 – 20 mm
Mounting plate
Accommodates door
thickness up to 20 mm Mortise Hole Dimensions
Spacer Requirements
Spacer required* for door
thickness less than 8 mm
Factory default combination 0-0-0-0
Removal keyManager key
Door thickness *Spacer required
R3
77 mm
31.5 mm
min. 6.35 mm
Cam in Locked Position
must overlap Strike
Plate by at least ¼"
(6.35 mm)
Dial Combo
Shared Use
Product Guide
Note “M” on
Manager Key
After opening the door with the Manager Key,
leave the door open and use the Manager
Key to turn the knob to the “Locked”
position. Remove the Manager Key.
Insert the Reset Tool into the four pin holes
on the rear of the unit.
Push in the Reset Tool and simultaneously
turn all dials until they stop.
The final code displayed is the current
code. In this example, the combination was
5-9-9-4.
Remove the Reset Tool and turn the knob
to the unlocked position.
The Dial Combo has been reset and is
ready for use.
Reset Tool
1
4
2
5
3
Phone: 707 766 6000
www.digilock.com | [email protected]PG-NLMD-DEN
Replace Key Set and Core
Mounting
Screws
Screw type
M3×10 ✓
0 – 5 mm
✓
M3×145 – 8 mm
M3×108 – 12 mm
M3×1412 – 16 mm
M3×1816 – 20 mm
Mounting plate
Accommodates door
thickness up to 20 mm Mortise Hole Dimensions
Spacer Requirements
Spacer required* for door
thickness less than 8 mm
Factory default combination 0-0-0-0
Removal keyManager key
Door thickness *Spacer required
R3
77 mm
31.5 mm
min. 6.35 mm
Cam in Locked Position
must overlap Strike
Plate by at least ¼"
(6.35 mm)
051319
Dial Combo
Shared Use
Product Guide
051319
Please contact [email protected] if your Manager or Remove key(s) are lost or stolen to purchase a new set of keys and replacement cores
for all locks.
If your Manager Key was lost or stolen, you can remove lock cores with your existing Removal key. Once you remove the lock cores, contact
[email protected] to purchase a new set of keys and lock cores.
Turn the knob to the unlocked position. Insert the old Removal Key.
Turn the Knob to the Core Removal
Position. The triangle mark on the Knob
will align with the circle mark on the face.
Pull the Removal Key to remove the old
Knob and Core.
Insert the replacement Removal Key into
the old Knob and place the NEW Core on
the Knob. The triangle mark on the knob
should be aligned with the Raised Wafers.
Insert the new Core subassembly into the
lock. The triangle mark on the Knob will
align with the circle mark on the face.
Turn the knob to the unlocked position.
Remove the Replacement Removal Key.
Note “R” on
Removal Key
New Core
Triangle Mark
aligned with
Raised Wafers
21
5
3
64

Other Digilock Lock manuals

Digilock Numeris Versa Mini User manual

Digilock

Digilock Numeris Versa Mini User manual

Digilock NEXTLOCK CUE Series User manual

Digilock

Digilock NEXTLOCK CUE Series User manual

Digilock ADA User Key Owner's manual

Digilock

Digilock ADA User Key Owner's manual

Digilock DK-APS 4G Operating instructions

Digilock

Digilock DK-APS 4G Operating instructions

Digilock Assigned Use RFID Camlock User manual

Digilock

Digilock Assigned Use RFID Camlock User manual

Digilock DAR1-ATS1 User manual

Digilock

Digilock DAR1-ATS1 User manual

Digilock Shared Use RFID Camlock User manual

Digilock

Digilock Shared Use RFID Camlock User manual

Digilock DAR1-APV1 User manual

Digilock

Digilock DAR1-APV1 User manual

Digilock DL330BT User manual

Digilock

Digilock DL330BT User manual

Digilock Next Mech User manual

Digilock

Digilock Next Mech User manual

Digilock DCR1-ATV1 User manual

Digilock

Digilock DCR1-ATV1 User manual

Digilock numeris aspire User manual

Digilock

Digilock numeris aspire User manual

Digilock Numeris Versa Standard User manual

Digilock

Digilock Numeris Versa Standard User manual

Digilock DAK1-APS1 User manual

Digilock

Digilock DAK1-APS1 User manual

Digilock NEXT Sola3 Keypad User manual

Digilock

Digilock NEXT Sola3 Keypad User manual

Digilock DCK1-APV1 User manual

Digilock

Digilock DCK1-APV1 User manual

Digilock DCR1-APV1 User manual

Digilock

Digilock DCR1-APV1 User manual

Digilock Curve User manual

Digilock

Digilock Curve User manual

Digilock NEXT Sola3 Keypad User manual

Digilock

Digilock NEXT Sola3 Keypad User manual

Digilock Lockup M User manual

Digilock

Digilock Lockup M User manual

Digilock Numeris Versa User manual

Digilock

Digilock Numeris Versa User manual

Digilock ATS User manual

Digilock

Digilock ATS User manual

Digilock numeris aspire User manual

Digilock

Digilock numeris aspire User manual

Digilock NEXT Sola3 Touch RFID User manual

Digilock

Digilock NEXT Sola3 Touch RFID User manual

Popular Lock manuals by other brands

KSR KUEBLER ARV-TF633.2 Operating instructions manual

KSR KUEBLER

KSR KUEBLER ARV-TF633.2 Operating instructions manual

CAMDEN CX-92S TDS Series installation instructions

CAMDEN

CAMDEN CX-92S TDS Series installation instructions

Assa Abloy Abloy EL428 manual

Assa Abloy

Assa Abloy Abloy EL428 manual

danalock V3 BT HK SCANDI manual

danalock

danalock V3 BT HK SCANDI manual

Phoenix SELO-A operating instructions

Phoenix

Phoenix SELO-A operating instructions

Igloohome Smart Keybox 2 Installer/user guide

Igloohome

Igloohome Smart Keybox 2 Installer/user guide

Livoo TEA275 user manual

Livoo

Livoo TEA275 user manual

Pinnacle IKONIC DSS003 installation instructions

Pinnacle

Pinnacle IKONIC DSS003 installation instructions

MOB MO8354 user manual

MOB

MOB MO8354 user manual

Cal-Royal SDLP-RND-ADA installation manual

Cal-Royal

Cal-Royal SDLP-RND-ADA installation manual

Roger SL2000E manual

Roger

Roger SL2000E manual

Invacare ProSPIN X4 Assembly, installation and operating instructions

Invacare

Invacare ProSPIN X4 Assembly, installation and operating instructions

Sargent ASSA ABLOY FM7100 Series installation instructions

Sargent

Sargent ASSA ABLOY FM7100 Series installation instructions

Gianni Industries EM-150M Specification sheet

Gianni Industries

Gianni Industries EM-150M Specification sheet

Mottura 3D5 Series Warranty and Installation Instructions

Mottura

Mottura 3D5 Series Warranty and Installation Instructions

Alarm Lock Trilogy DL1200 Mounting and installation instructions

Alarm Lock

Alarm Lock Trilogy DL1200 Mounting and installation instructions

CDVI C3S11 Installation

CDVI

CDVI C3S11 Installation

YLI YM-350W manual

YLI

YLI YM-350W manual

manuals.online logo
manuals.online logoBrands
  • About & Mission
  • Contact us
  • Privacy Policy
  • Terms and Conditions

Copyright 2025 Manuals.Online. All Rights Reserved.