manuals.online logo
Brands
  1. Home
  2. •
  3. Brands
  4. •
  5. E2S
  6. •
  7. Marine Equipment
  8. •
  9. E2S SON2 User manual

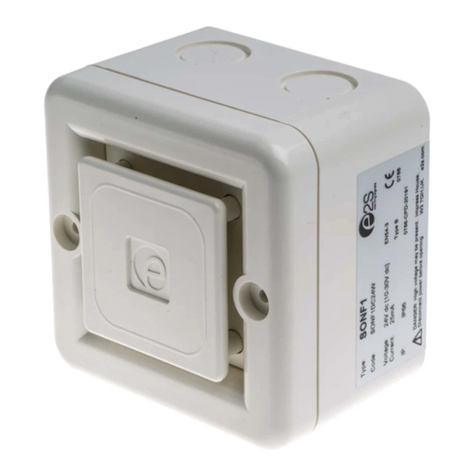
E2S SON2 User manual

Tel:0044(0)2087438880 mail:sales@e-2-s.com Fax :0044(0)2087404200 web: www.e-2-s.com
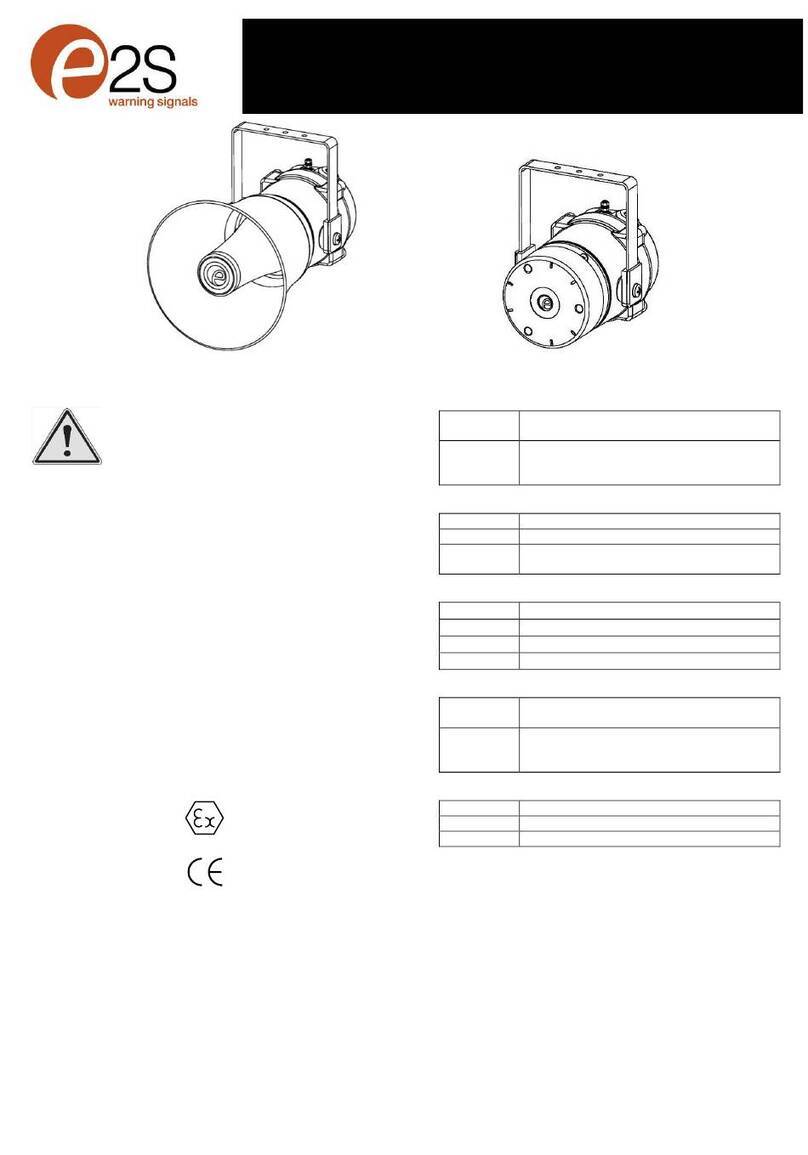
IN S TA L L AT IO N IN S T R U C T IO N S
-+
CS3
Stage 3
L~ N~
S2
Stage 2
S3
Stage 3
S2
Stage 2
24vdc
115, 230vac
•Tone Selection
•Sélection de latonalité
•Tonwahl
•Selezione tono
•Seleção de tons
•Selección Tono
•Valg af tone
•Toonselectie
•Velge tone
•Tonval
SON2 -32 Tone ‘Sonora’
86,00
86,00
64,50
SON2
DC
SON2
98,00
86,00
86,00
Ø6,00
89,50
SON2
AC
•Switch 6 isnot used; Switch 7‘ON’= Intermediate volume; Switch 8 ‘ON’= Max.volume; Switch 7& 8 ‘OFF’= Standard volume.
•Le commutateur6 n’estpas utilisé; Commutateur 7 « MARCHE »(ON) = Volumeintermédiaire ;Commutateur 8 « MARCHE » (ON)=
Volume max. ; Commutateurs7 et 8 «ARRET » (OFF) =Volume standard.
•Schalter6wird nicht verwendet;Schalter 7 „Ein” = mittlereLautstärke;Schalter 8 „Ein”= max. Lautstärke;Schalter7und 8„Aus” = Standard-
Lautstärke
•Interruttore 6 non viene utilizzato; Interruttore 7‘ON’= Volumeintermedio; Interruttore 8 ‘ON’= Volumemassimo;Interruttori7e8‘OFF’=
Volume standard.
•Elinterruptor 6 no se utiliza; Interruptor 7‘ON’ = volumenintermedio;Interruptor8‘ON’= máximo volumen;Interruptor7y8‘OFF’= volumen
estándar.
•Interruptor6não éutilizado; Interruptor7 ‘LIGADO’ = volume intermédio; Interruptor 8‘LIGADO’ = volume máximo; Interruptor 7e 8
‘DESLIGADOS’= volumepadrão.
•Kontakt 6 brugesikke. Kontakt 7aktiveret (“ON”) = mellemvolumen. Kontakt 8aktiveret (“ON”)=højeste volumen.Kontakt 7og 8 deaktiveret
(“OFF”) = standardvolumen.
•Schakelaar 6 wordtniet gebruikt; schakelaar7‘ON’= tussenvolume; Schakelaar 8 ‘ON’=max.volume; Schakelaar 7 & 8‘OFF’=
standaardvolume.
•Bryter 6 erikke i bruk. Bryter7PÅ ( ‘ON’) = mellomhøy lydstyrke.Bryter8 PÅ (‘ON’) = Maks. lydstyrke.;Bryter 7 &8AV (‘OFF’)= Standard
lydstyrke.
•Brytare 6 används ej;Brytare 7 ‘ON’=Mellanvolym; Brytare 8‘ON’=Max.volym; Brytare 7 & 8 ‘OFF’= Standardvolym.
Voltage :24vdc115vac230vac
50/60Hz50/60Hz
Voltage range :+/-25%+/-10%+/-10%
Current mA :20-80mA24mA12mA
1234
4321
ISN0604-A No liabilityisaccepted for any consequenceofthe use ofthisdocument. The technical specification ofthis unit is subject to change withoutnoticedue to ourpolicyof
continual product development. All dimensions are approximate.Thisunit is sold subject to our standard conditions ofsale, acopyof whichis available on request.
>100dB(A)@1m.
ATTENTION
Tone Selection/ switch setting.
•Switch settings areshownin the tone table. Black squaresare theswitch levers in the ON position.
•Les réglages descommutateurs sont indiquéssur le tableau de tonalités. Lescarrésnoirs représentent
les leviersdes commutateurs en position MARCHE(ON).
•Die Schaltereinstellungen sind in der Tabelle der Töneangegeben. Die schwarzenQuadrate
kennzeichnen die Ein-Positionen derSchalter.
•Le impostazioni degli interruttori sonomostrate nella tabelladei segnali acustici. I riquadrineri indicano
le levedegli interruttori nella posizione ON.
•Los ajustesde interruptor se muestran en la tabla detonos. Loscuadros negros representan las
palancas delos interruptores en la posición ON.
•Os ajustes dos interruptores estão indicadosnatabela de sons. Os quadrados pretos indicamque as
alavancas dos interruptoresestão na posição LIGADA.
•Kontaktindstillingerne fremgår af toneskemaet. Etsort feltbetyder,at kontakten er aktiv (“ON”).
•De schakelinstellingen staanvermeld in de toontabel. Zwarte vierkanten zijn de schakelaars in destand
AAN.
•Bryterinnstillinger er beskrevetitonetabellen. De svarte firkanteneindikerer bryterposisjonene i PÅ-
posisjon.
•Brytarinställningarna visasi signaltabellen. Desvarta fyrkanternaär brytarnai ON-läge.
•Disconnect from power source to prevent electrical shock before installing and servicing
•Couper l’alimentation pour empêcher tout choc électriqueavant d’effectuer des travaux d’installation et
d’entretien.
•Vor der Installation undWartung von der Spannungsquelle abnehmen,um elektrischeSchläge zu
vermeiden.
•Prima dell’installazione e della manutenzione spegnere l’alimentazione elettrica per evitare scosse
elettriche.
•Desconecte la alimentación para evitar descargas eléctricas antes de la instalación y mantenimiento
•Antes de instalar oudefazer a manutençãodesligue sempre da alimentaçãoeléctrica para evitar choques
eléctricos.
•Strømmenskalafbrydes vedinstallering og eftersynfor at undgå elektrisk stød.
•Loskoppelen van de elektrische voeding om elektrischeschok vóór installatie enonderhoudte voorkomen.
•Før montering eller vedlikehold, må spenningen koples fra for å unngå strømstøt.
•Brytströmmeninnan installationochunderhåll för att förhindra elektriska stötar stötar.
Switch Stage 2Stage 3
Stage 1Frequency Description.123456 (S2)(S3)
Tone 1340 Hz ContinuousTone 2Tone 5
Tone 2800/1000Hz @ 0.25 sec AlternatingTone 17Tone 5
Tone 3500/1200Hz @ 0.3Hz 0.5 sec SlowWhoopTone 2Tone 5
Tone 4800/1000Hz @ 1HzSweepingTone 6Tone 5
Tone 52400Hz ContinuousTone 3Tone 26
Tone 62400/2900Hz @ 7Hz SweepingTone 7Tone 5
Tone 72400/2900Hz @ 1Hz SweepingTone 10Tone 5
Tone 8500/1200/500Hz @ 0.3Hz SweepingTone 2Tone 5
Tone 91200/500Hz @ 1Hz-DIN / PFEER P.T.A.P.Tone 15Tone 2
Tone 102400/2900Hz @ 2Hz AlternatingTone 7Tone 5
Tone 111000Hz @1HzIntermittentTone 2Tone 5
Tone 12800/1000Hz @ 0.875Hz AlternatingTone 4Tone 5
Tone 132400Hz @1HzIntermittentTone 15Tone 5
Tone 14800Hz0.25sec on, 1 sec off IntermittentTone 4Tone 5
Tone 15800HzContinuousTone 2Tone 5
Tone 16660Hz150mS on, 150mS off IntermittentTone 18Tone 5
Tone 17544Hz(100mS)/440Hz (400mS)-NF S 32-001Tone 2Tone 27
Tone 18660Hz1.8sec on, 1.8sec off IntermittentTone 2Tone 5
Tone 191.4KHz-1.6KHz 1s, 1.6KHz-1.4KHz 0.5s -NFC48-265Tone 2Tone 5
Tone 20660HzContinuousTone 2Tone 5
Tone 21554Hz/440Hz @ 1Hz AlternatingTone 2Tone 5
Tone 22544Hz@0.875 sec. IntermittentTone 2Tone 5
Tone 23800Hz@2Hz IntermittentTone 6Tone 5
Tone 24800/1000Hz @ 50Hz SweepingTone 29Tone 5
Tone 252400/2900Hz @ 50Hz SweepingTone 29Tone 5
Tone 26BellTone 2Tone 15
Tone 27554HzContinuousTone 26Tone 5
Tone 28440HzContinuousTone 2Tone 5
Tone 29800/1000Hz @ 7HzSweepingTone 7Tone 5
Tone 30 420Hz@0.625 sec Australian Alert Tone 32Tone 26
Tone 31660/1200Hz @ 1HzSweepingTone 26Tone 5
Tone 32 500-1200Hz 3.75sec /0.25sec. Australian Evac. Tone 30Tone 26
Other E2S Marine Equipment manuals

E2S E2xS121EG Troubleshooting guide

E2S

E2S E2xS121EG Troubleshooting guide

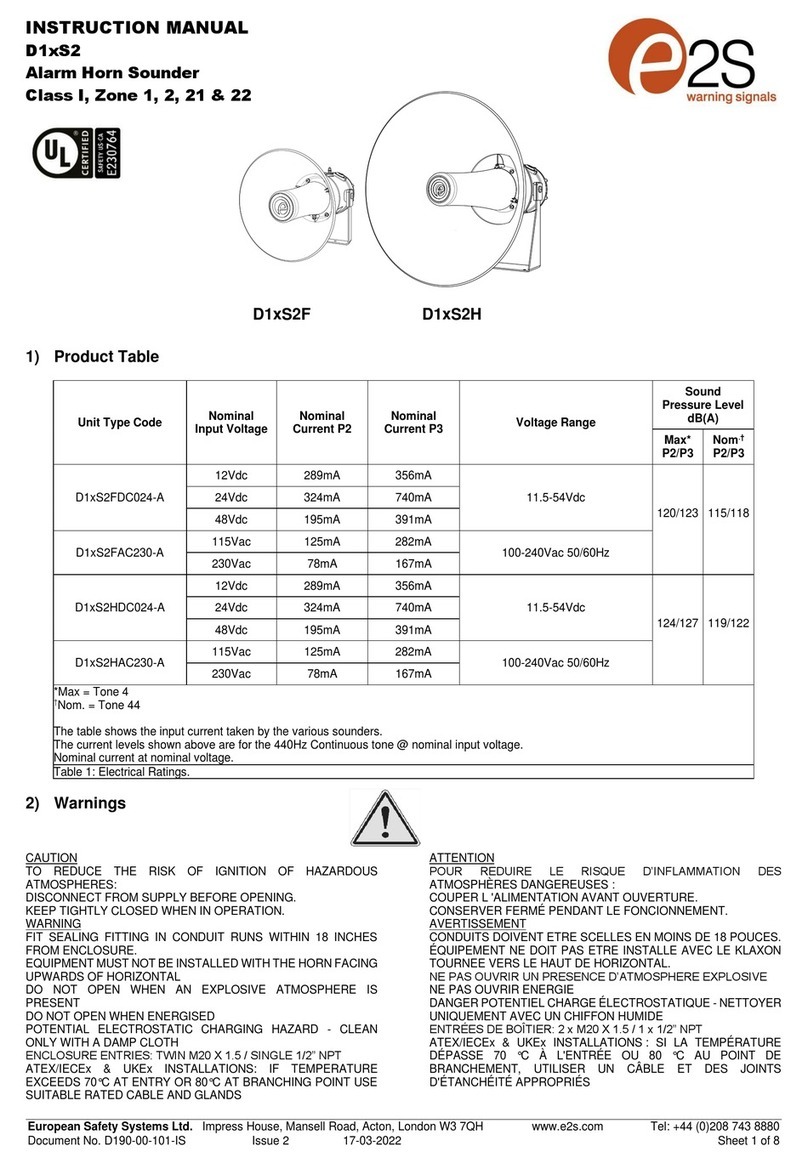
E2S D1xS2HDC024-S User manual

E2S

E2S D1xS2HDC024-S User manual

E2S IS-mA1M User manual

E2S

E2S IS-mA1M User manual

E2S BExH120D User manual

E2S

E2S BExH120D User manual

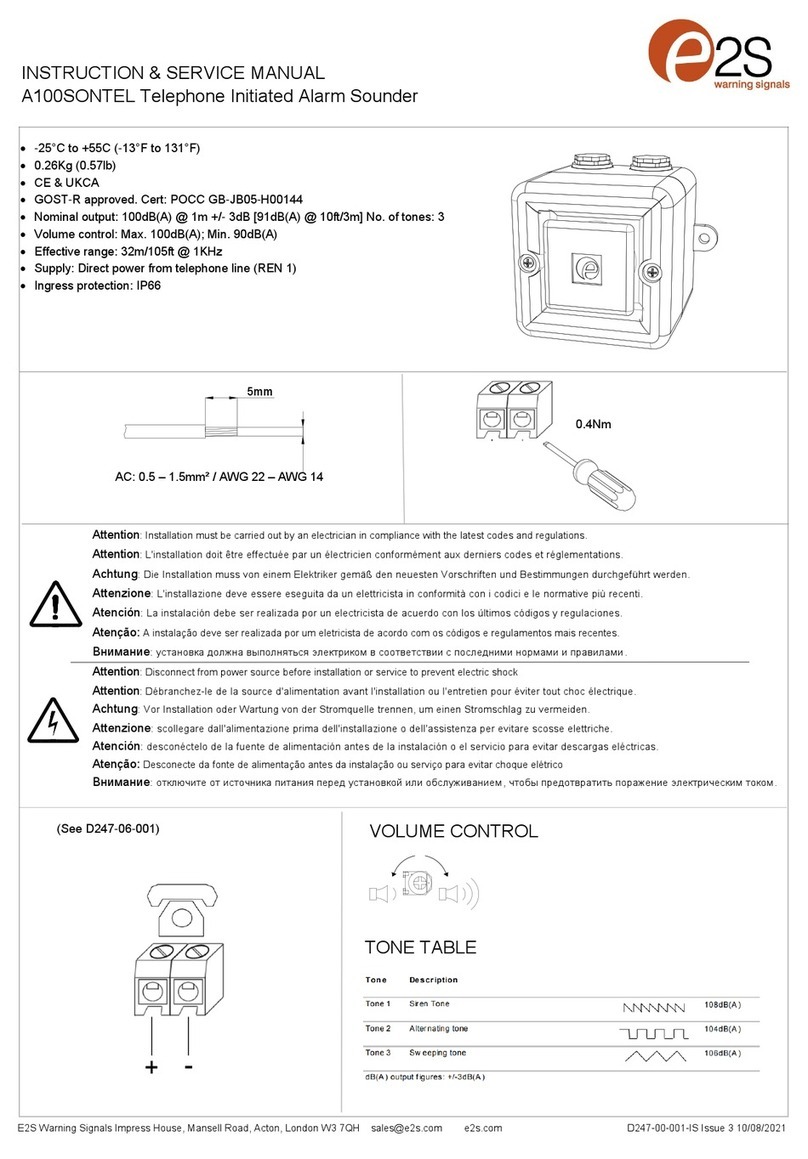
E2S A100SONTEL User manual

E2S

E2S A100SONTEL User manual

E2S MA1 Series User manual

E2S

E2S MA1 Series User manual

E2S GNExS2F User manual

E2S

E2S GNExS2F User manual

E2S SONFL1H Series User manual

E2S

E2S SONFL1H Series User manual

E2S D1xS1 Series User manual

E2S

E2S D1xS1 Series User manual

E2S SONF1 Series User manual

E2S

E2S SONF1 Series User manual

E2S A121 User manual

E2S

E2S A121 User manual

E2S BExS110D User manual

E2S

E2S BExS110D User manual

E2S DL112H User manual

E2S

E2S DL112H User manual

E2S Minialarm IS-mA1 User manual

E2S

E2S Minialarm IS-mA1 User manual

E2S BE DCS110-05D Series User manual

E2S

E2S BE DCS110-05D Series User manual

E2S D1xC1 Series User manual

E2S

E2S D1xC1 Series User manual

E2S E2XS112UL User manual

E2S

E2S E2XS112UL User manual

E2S D2xB1LD2 User manual

E2S

E2S D2xB1LD2 User manual

E2S STExS1 User manual

E2S

E2S STExS1 User manual

E2S GNExS2 User manual

E2S

E2S GNExS2 User manual

E2S Minialarm IS-MA1-R User manual

E2S

E2S Minialarm IS-MA1-R User manual

E2S A100 AlertAlarm User manual

E2S

E2S A100 AlertAlarm User manual

E2S E2 S121UL Series User manual

E2S

E2S E2 S121UL Series User manual

E2S STExS1 User manual

E2S

E2S STExS1 User manual

Popular Marine Equipment manuals by other brands

Raymarine P70 Installation & operation instructions

Raymarine

Raymarine P70 Installation & operation instructions

Simrad TP10 manual

Simrad

Simrad TP10 manual

VDO Logic Close Hauled Installation and operating instructions

VDO

VDO Logic Close Hauled Installation and operating instructions

Roca W12 Mounting instructions

Roca

Roca W12 Mounting instructions

Simrad ES80 Reference manual

Simrad

Simrad ES80 Reference manual

JRC JLN-205MK2 quick reference

JRC

JRC JLN-205MK2 quick reference

TRIGA TR-B200SR-WH Installation and maintenance instructions

TRIGA

TRIGA TR-B200SR-WH Installation and maintenance instructions

Lowrance ActiveTarget 2 installation manual

Lowrance

Lowrance ActiveTarget 2 installation manual

Black cat BATTLE SOUNDER RECEIVER manual

Black cat

Black cat BATTLE SOUNDER RECEIVER manual

Mariner Mercury 225 Service bulletin

Mariner Mercury

Mariner Mercury 225 Service bulletin

Furuno FCV-30 installation manual

Furuno

Furuno FCV-30 installation manual

MRC MCX-5000 Series manual

MRC

MRC MCX-5000 Series manual

MOFLASH SIGNALLING SB150-1 Series INSTALLATION & TECHNICAL INFORMATION

MOFLASH SIGNALLING

MOFLASH SIGNALLING SB150-1 Series INSTALLATION & TECHNICAL INFORMATION

Dual AMCP600W Installation & owner's manual

Dual

Dual AMCP600W Installation & owner's manual

Leroy-Somer Nidec LSA PMR 320 Installation and Maintenance

Leroy-Somer

Leroy-Somer Nidec LSA PMR 320 Installation and Maintenance

jotron Tron 60S user manual

jotron

jotron Tron 60S user manual

Elmdene QUARTZ-1000-G2 instruction sheet

Elmdene

Elmdene QUARTZ-1000-G2 instruction sheet

Kohler GM93516-KP1 installation instructions

Kohler

Kohler GM93516-KP1 installation instructions

manuals.online logo
manuals.online logoBrands
  • About & Mission
  • Contact us
  • Privacy Policy
  • Terms and Conditions

Copyright 2025 Manuals.Online. All Rights Reserved.