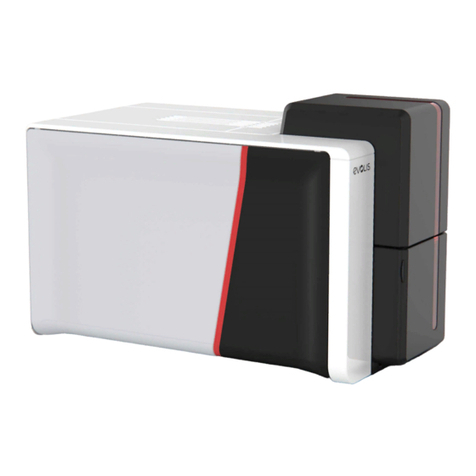
Evolis DUPLIPASS User manual

DUPLIPASS
1
DUPLIPASS
USER GUIDE
Evolis © 2021. All rights reserved.
User-Guide_DUPF_ENG_20211109_A

DUPLIPASS
2
COPYRIGHT
Evolis © 2021. All rights reserved.
Users must observe the copyright regulations applicable in their country. This manual must not be photocopied, translated, reproduced or transmitted,
in whole or in part, for any reason and by any electronic or mechanical means whatsoever without the express written consent of Evolis.
All the information contained in this document is subject to change without prior notice.
Evolis cannot be held liable for any errors that may be found in this manual, or for any loss or damage arising accidentally or as a result of dissemination
or use of this manual.
TRADEMARK
and Evolis High Trust®are trademarks of Evolis. All other trademarks belong to their respective holders.
WARRANTY
For the warranty conditions and limitations, please refer to the website: www.evolis.com>Drivers&Support>Printers>Manuals and Documents.
Please register online at www.evolis.com to receive our special offers and general information.
ENVIRONMENTAL INFORMATION
Evolis is committed to helping the environment by reducing the energy consumption of its products.
RECYCLING OF END-OF-LIFE PRODUCTS
The manufacture of the equipment that you have purchased required the extraction and use of natural resources. It may contain materials that are
hazardous to health and the environment.
To prevent the dispersal of such materials into our environment and reduce the pressure on our natural resources, we recommend that you use
existing collection systems. These systems will appropriately re-use or recycle most of the materials in your end-of-life equipment.
If you need further information on collection, re-use and recycling systems, contact your local or regional waste management body.
Do not hesitate to contact us to find out more by visiting our website at www.evolis.com or by emailing the following address: info@evolis.com.

DUPLIPASS
3
ABOUT YOUR NEW PRINTER
Thank you for choosing an Evolis printer. Using your new printer, you will be able to create a wide variety of high-quality cards and badges which can
be printed in various thicknesses, colours and styles. This printer uses consumables and accessories available from Evolis. For further details, visit
our website at www.evolis.com. This user guide has been developed for the DupliPass printer.
Certifications and declarations of conformity: CE, RoHS, UKCA
Icons on the printer
Evaluation for apparatus only based on altitude not exceeding 2000m, therefore it’s the only operating condition applied for the
equipment. There may be some potential safety hazard if the equipment is used at altitude above 2000m.
Evaluation for apparatus only based on temperate climate condition, therefore it’s the only operating condition applied for the equipment.
There may be some potential safety hazard if the equipment is used in tropical climate region.
Reminder to use existing collection facilities.
Dimensions
(H x l x L) : 147 x 200 x 276 mm
Weight
1.9 kg
Connectivity
USB 2.0 (compatible 1.1 and 3.0), Bluetooth (frequency band from 2400 MHz to 2483.5 MHz with maximal radiated power: 2.951 mW), Wi-Fi (frequency
band from 2400 MHz to 2483.5 MHz with maximal radiated power: 72.44 mW)
Electrical information
• Power supply unit: 100-240 Volts AC, 50-60 Hz, 1.7A
• Printer: 24 Volts DC, 2.71 A
Environnement
• Standard operating temperature: 15°C / 30 °C (59° / 86 °F)
• Humidity: 20% to 65% non-condensing
• Min/max storage temperature: –5°C / +70 °C (23° / 158 °F)
• Storage humidity: 20% to 70% non-condensing
• Operating ventilation: free air
To view all technical specifications, please refer to www.evolis.com.
DUPLIPASS
4
Information providing further details or depth about certain points in the main text.
Indicates that failing to take the recommended action is liable to damage your printer.
NOTE
!
ICONS
The following icons are used in this manual to highlight important information:
A video showing the procedure is available on www.evolis.com website.

DUPLIPASS
5
You will be asked for the full original packaging (outer box, inner wedges and protective bags) in the event that the printer is
returned. If the printer is returned without its original packaging and components are damaged in transit, these components will
nolonger be covered by the warranty. You will be charged for new packaging for shipping the printer back to you.
If any of these components are missing, please contact your Evolis dealer.
Use only the power supply unit supplied with your Evolis printer: CWT type KPL-065M-VI or FSP type FSP060-RAAK3
Use only the USB cable supplied with your Evolis printer.
The Evolis printer must be placed in a dry location, protected from dust and drafts but well-ventilated. Take care to keep your printer
on a flat, sturdy surface able to bear its weight.
1 - GETTING STARTED
UNPACKING
Your printer is supplied with several accessories that we ask you to look at closely.
This list may vary depending on your location.
The printer is shipped in special packaging designed to prevent any damage in transit. If you notice any visible damage, do not hesitate to contact
the shipper and immediately inform your Evolis dealer, who will tell you the procedure to follow.
Evolis takes great care over the quality of its packaging and we ask that you keep this packaging somewhere clean and dry.
Accessories supplied with your printer:
∙ Power supply unit – CWT type KPL-065M-VI or FSP type FSP060-RAAK3
∙ Mains power cable.
∙ USB cable.
!
!
NOTE

DUPLIPASS
6
DESCRIPTION OF THE PRINTER AND ITS FUNCTIONS
A- Card feeder
B- Output hopper
C- Control panel
D- USB sockets (USB A towards USB B)
E- Power cable jack
F- Kensington lock
Card/Ribbon
Printer
Control button
Warning lights

DUPLIPASS
7
The machine should always be disconnected from the power supply (= unplugged) before any work is carried out on it.
G- Thermal print head H - Label with printer serial number.
!

DUPLIPASS
8
Before attempting any maintenance, always ensure that the power cable is unplugged. For your personal safety, ensure that
thecable and power supply unit remain easy to access, especially in the event of an emergency.
INSTALLATION
Connecting the printer
Connection to the power supply
∙Connect the power cable to the power supply unit, then plug the power supply unit connector into
theprinter.
∙Next, plug the end of the power cable into an earthed power socket.
∙The printer is powered on: the control panel lights up showing the printer is working properly. If
the control panel does not lightup, then either installation has not been carried out correctly or the
printer is not working properly. Check the installation.
The printer must be connected to a properly protected and earthed electrical installation.
FI: Laite on liitettävä suojamaadoitus koskettimilla varustettuun pistorasiaan.
NO: Apparatet må tilkoples jordet stikkontakt.
SE: Apparaten skall anslutas till jordat uttag.
DK: Printeren skal tilsluttes til en korrekt beskyttet og jordforbundet el-installtion.
It is recommended to unplug the power cable of your printer at least once a week.
Connecting the USB cable
This cable enables the printer to offer a Bluetooth network.
Plug the USB cable on the two ports (A and B), as indicated on the picture:

DUPLIPASS
9
The printer automatically recognises the ribbon inserted.
Insert the ribbon as shown.
Ribbons
Evolis original High Trust®black ribbons optimise your printer’s operation and avoid causing damage to it. The use of ribbons from other suppliers
is liable to damage your printer and voids the manufacturer’s warranty for the printer.
NOTE
For optimum print quality, Evolis recommends that the printer is fully cleaned every time the ribbon is changed. See the Servicing section of this
manual.
Fitting the ribbon
Open the cover. Close the cover and press until
aclick is heard.
NOTE
A ribbon enables 450 printings as a maximum.

DUPLIPASS
10
For optimum quality, the cards used must be ISO 7810 certified.
Use only the card types recommended by Evolis.
Do not touch the printable surface of the cards in order to preserve print quality.
Do not use cards that have been damaged, folded, embossed or dropped on the floor.
Keep your cards protected from dust.
Cards
Open the card feeder. Insert the cards, 25 cards maximum (0.76 mm thick),
with the side to print upwards.
If the back of the card is pre-printed, make sure that:
- the back side is always downwards
- the top of the card is inserted first
Close the feeder.
NOTE
Loading the cards
25x

DUPLIPASS
11
Removing printed cards
Once the print cycle is complete, the cards are issued into the output hopper below the card feeder. This output hopper is designed to collect the
printed cards.
The printer is equipped with an output hopper with a maximum capacity of 25 cards that are 0.76 mm thick.

DUPLIPASS
12
Installing Famoco device and managing DupliPass application
Switching on Famoco device
Press and hold the Power button for three seconds to switch on the Famoco mobile.
Evolis logo is displayed, then DupliPass application which communicates with the printer through a bluetooth connexion.
Connecting to a WiFi network
1 Go to the dashboard by pressing the volume-up button for three seconds and then release it.
2 In the Connectivity menu, press on Internet. Scroll down and enable the WiFi tab.
3 Now press on the WiFi label to search for the available WiFi network.
Click on the WiFi network name and enter the password. Your mobile is now connected to the WiFi.
Power button
!
The WiFi network will be necessary to install updates of DupliPass and other components of the system, as well as in case of
problem with the Blueetooth appairing.
Volume-up button

DUPLIPASS
13
Changing the language
By default, the application is in the English language. If you want to change the language, go to Options>Language and select the language in
the scroll-down menu.
Standby mode
It is set on 30 minutes.
Pairing the Famoco device with the Bluetooth network
When you receive the device, it is already paired to the printer Bluetooth network.
But in case of device replacement due to failure, you will need to do the pairing again.
1 Go to the dashboard by pressing the volume-up button for three seconds and then release it.
2 In the Connectivity menu, press on Internet. Scroll down and check the Bluetooth tab is enabled.
Press on Bluetooth to display the available devices. Select the network that is called Duplipass_ serialnumberoftheprinter.
3 If no device is displayed, press Pair New Device. Then select the device that is called Duplipass_ serialnumberoftheprinter.
Reminder : check your printer serial number displayed under the machine.
Volume-up button

DUPLIPASS
14
To test pairing, press the menu located on top-right of the application, then on Communication.
Then press on TEST CONNEXION.
By default, Bluetooth option is active.
If the printer is correctly appaired, it make a quick noise.
Check the printer is ready through the tab called Printer status (cards are in the feeder, new ribbon is inserted).
In case of orange status, an alarm is raised but printing is still possible.
In case of red status, printing is not possible: make sure that consumables are inserted and the printer is ready.

DUPLIPASS
15
2 - PRINTING A CARD
!
1Make sure you are connected in Bluetooth or Wifi to your printer (see section called Installation
of the application and pairing).
2Press on SCAN and scan the COVID certificate QR code with your phone.
The QR code is displayed on your phone with the name, first name and date of birth of the COVID
certificate holder.
3Press on the PRINT button of the application.
The screen displays Printing in progress and the card is printed.
NOTE If you try scanning a paper document, make sure it is not crumpled/badly printed/glossy.
To ensure protection of personnal data, it is recommended to destroy:
- the printing ribbon if finished,
- non-compliant cards.
At the end of each printing, the data processed in the printer are automatically deleted.
This way, no data is kept in the application nor the printer.
!
Printing with the Famoco device

DUPLIPASS
16
3 - MAINTENANCE
ROUTINE PRINTER CLEANING
Printer cleaning
In order to get the most from your printer, cleaning is recommended. We recommend regular cleaning of the different printer parts:
card transport rollers and print head.
Do not hesitate to clean the printer in the event of any printing problems.
After a long period of inactivity, dust can get into the rollers and the print head. We therefore advise cleaning before re-use.
If you intend not to use your printer for an extended period, we advise you to use a protective cover, to avoid your printer getting
covered in dust. Please contact your reseller to purchase one.
NOTE
NOTE
!
The "T" cards and Evolis cleaning pens are available at your reseller.

DUPLIPASS
17
Follow the procedure below to ensure you have carried out regular cleaning properly:
Repeatedly running the adhesive card through the printer cleans the cleaning roller in order to maintain print quality and increases the service life of
the print head.
1Open the printer cover.
2Remove the ribbon as shown in the diagram.
3Close the cover and press until you hear a click to confirm that it is fully closed.
1 2 3
Cleaning the printer
Recommended cleaning cycle: whenever the ribbon is changed.
However, we do recommend more regular cleaning if your printer is located in a dusty place or if you use it intensively.
Servicing accessory: saturated "T" shaped card.
NOTE

DUPLIPASS
18
4Remove any cards present in the feeder.
5Double-click the control button before inserting the "T" shaped cleaning card
6Take the "T" shaped cleaning card and insert it in the feeder as shown. The cleaning begins.
7Remove the "T" card.
4 5 67
Please note the "T" shaped card must be used immediately after the bag is opened.
A dry "T" card would not be operational, and may damage your printer.
The "T" card is for single use only. Please use a new card each time you clean.
Cleaning may be also launched from DupliPass application and the Options>Cleaning tab.
After launching the cleaning, please wait for 10 seconds before inserting the T-shaped
card. The Cards/Ribbon light must be blinking (see section Help).
!
NOTE

DUPLIPASS
19
Cleaning the print head
Recommended cleaning cycle: If you notice poor-quality printing or after a period of inactivity.
Servicing accessory: cleaning pen from the Evolis High Trust®brand.
The cleaning pen may be used up to 8 times.
NOTE
!
Unplug the printer from its power supply before cleaning the print head.
Follow the cleaning cycles carefully.
Avoid any contact between the print head and any metal or sharp objects.
Avoid touching the print head directly with your fingers, as this could affect print quality or permanently damage the print head.
You must also protect the print head and its components from any discharge of static electricity.
Follow the procedure below:
1Remove the cover from the cleaning pen.
2Unplug the power supply, open the cover, and find the print head.
3Gently rub the pen from left to right along the print head as indicated for a few seconds.
4Close the cover. Reconnect the printer.
!Warning! As the T-shaped cards, the cleaning pen should not dry out or it would no longer work.
1 2 3 4
NOTE Please wait until the alcohol has completely evaporated before re-connecting the printer.

DUPLIPASS
20
4 - HELP
This section provides a number of suggestions for identifying problems that may arise when using your printer. If you do not manage to solve your
problem, this section also explains how to contact technical support.
WARNINGS AND DIAGNOSIS
Although the printer was designed to work independently, keeping user involvement to a minimum, it may prove useful to be aware of the main
warning messages.
See Section – Description of the Printer and its Functions for further details about the control panel.
OFF
STEADY LIGHT
FLASHING
PRINTER READY
• The control button lights
up.
The printer is ready to
receive data.
PROCESSING
• The printer is receiving
data.
The control button is
flashing.
LEGEND
Table of contents
Other Evolis Printer manuals

Evolis
Evolis badgy 100 User manual

Evolis
Evolis Primacy 2 SE User manual

Evolis
Evolis Zenius User manual

Evolis
Evolis Securion User manual

Evolis
Evolis The Tattoo Rewrite User manual

Evolis
Evolis KC MAX User manual

Evolis
Evolis Tattoo Operator's manual

Evolis
Evolis Primacy User manual

Evolis
Evolis PRIMACY 2 User manual

Evolis
Evolis KU10E User manual

Evolis
Evolis EDIKIO FLEX User manual

Evolis
Evolis TattooRW User manual

Evolis
Evolis Avansia User manual

Evolis
Evolis Avansia User manual

Evolis
Evolis Dualys User manual

Evolis
Evolis Badgy User manual

Evolis
Evolis Elypso User manual

Evolis
Evolis QUANTUM User manual

Evolis
Evolis EDIKIO ACCESS User manual

Evolis
Evolis A5405 User manual