5.2.5 Storage of data
The controller stores data for use with the Motion Terminal (current stroke,
voltage, pressure, temperature, operating time, running performance of booster).
These data remain on the device and are not passed on in any form.
5.2.6 Input modules
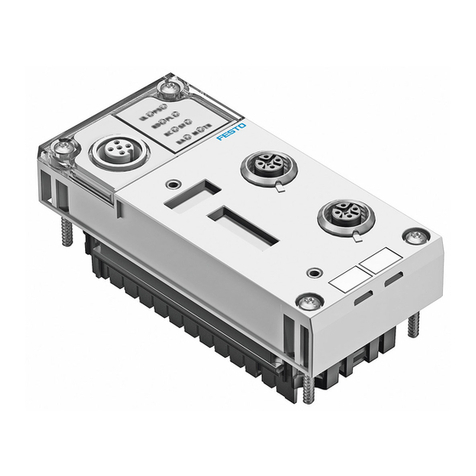
Certain Motion Apps can evaluate digital or analogue sensor signals. The sensors
necessary for this are connected to the CTMM-S1-A/D input modules.
The inputs are evaluated only by the controller of the Motion Terminal. The states
of the inputs cannot be queried directly by the higher-order controller. However,
various Motion Apps in the active state provide the input signals for the higher-
order controller. Manual of the corresponding Motion Apps
è 1.1 Applicable documents.
6 Transport and storage
• Observe specifications for environmental and storage conditions
è 14 Technical data.
7 Assembly
• Assembly in accordance with the assembly instructions CPX, VTEM
è 1.1 Applicable documents.
8 Installation
Ensuring the degree of protection
NOTICE!
Damage due to penetration of moisture.
• To ensure the IP65 degree of protection, use cover caps, blanking plugs, and
inspection covers to seal off unused ports.
8.1 Pneumatic installation
NOTICE!
Pay attention to compressed air quality.
Damage to property or loss of function from lubricated compressed air.
• Operate product only with unlubricated compressed air.
• Observe the requirements for compressed air quality èTechnical data.
NOTICE!
Frozen condensate or moisture
Frozen condensate or moisture may damage the product due to operation at low
temperatures even though it is still within the limits.
• Install a drying unit to remove condensate and moisture.
1. Push tubes into or over the connection of the tube fitting up to the stop.
2. For lock ring fittings or barbed hose fittings:
Pull the lock ring or tubing clip over the tubing connection and tighten.
3. Seal unused ports with blanking plugs.
Ensure pressure compensation
• Release the pressure inside the Motion Terminal through the port (L).
In the spray-protection area
• Screw accompanying silencers into the ports (3), (84) and (L) and tighten
them hand-tight.
In the non-spray-protection area
• The exhaust air at each of the ports (3), (84) and (L) must be removed to a
spray-water-protected area through a fitting and a tube.
Connecting external pilot air
The product can be designed for operation with external pilot air, depending on
the operation.
• Connect the external pilot air supply to the port (14).
8.2 Electrical installation
The electrical installation is divided into the installation of the electronics side of
the CPX terminal and installation of the Motion Terminal VTEM.
WARNING!
Risk of injury due to electric shock.
• For the electric power supply, use PELV circuits that guarantee a reliable elec-
tric disconnection from the mains network.
• Observe IEC 60204-1/EN 60204-1.
• Connect all circuits for the operating and load voltage supply.
NOTICE!
Insecure condition through reduced immunity to interference due to long signal
lines.
• Observe maximum permitted signal line length è 14 Technical data.
8.2.1 Earthing
NOTICE!
Malfunctions from electromagnetic interference because electromagnetic com-
patibility in accordance with EMC Directive was not ensured.
• Connect the product to the earthing potential with low impedance at the
intended connections as described below.
• Observe supplementary instructions in the CPX terminal manual
è 1.1 Applicable documents.
1. Connect the right connection of the functional earth directly to the connection
of the functional earth on the left end plate of the CPX terminal with low
impedance.
2. Connect the functional earth connection on the left end plate of the CPX ter-
minal with low impedance to the earth potential.
8.2.2 Installation of the CPX terminal
• Install the terminal in accordance with the CPX terminal manual
è 1.1 Applicable documents.
8.2.3 Installation of the sensor cables
NOTICE!
Transmission faults due to sensor and power supply lines close to each other.
• To avoid transmission faults, do not install sensor cables close to and parallel
to power supply lines.
• Do not use open cables without terminals.
The requirements for the type (analogue/digital) of sensors are derived from the
specifications of the Motion Apps. Manual of the corresponding Motion App
è 1.1 Applicable documents.
The sensor inputs are assigned to the Motion Apps (valves) by the WebConfig
interface or the higher-order controller.
Permitted sensors for the analogue input module: Festo SDAP.
9 Commissioning
The behaviour of the product during commissioning is largely determined by the
parameterisation of the bus node (fail safe, system idle mode, …).
• Observe information on parameterisation in the manual of the bus node
è 1.1 Applicable documents.
9.1 Prior to commissioning
CAUTION!
Injury due to uncontrolled movement of the actuator technology as a result of
defective setpoint value specifications. Drive might travel to the end position
without braking.
• During parameterisation, observe the exact function of the setpoint value
specifications used.
CAUTION!
Damage due to uncontrolled movement of the actuator technology as a result of
using incorrect sensors. The drive cannot be controlled as intended.
• Use only sensors intended for use with the Motion Terminal VTEM.
NOTICE!
Malfunction due to incomplete installation
• Place only a completely mounted and wired Motion Terminal into operation.
9.1.1 Parameterisation
CAUTION!
Injury through unexpected movement of the actuator technology due to change
of signal statuses and parameters with the CPX-MMI, CPX-FMT, WebConfig
interface or the higher-order controller.
• Keep the range of action of the actuator technology clear.
• Proceed very carefully when parameterising or changing signal statuses.
• Observe the notes on “Force”, “Idle mode” and “Fail safe” in the CPX terminal
manual (P.BE-CPX-SYS-…) as well as in the manual for the CPX-MMI and in the
online help of the CPX-FMT.
The Motion Apps can be parameterised in two different ways:
– Parameterisation by the WebConfig interface of the controller
– Parameterisation by the controller using the cyclical process data
9.1.1.1 Parameterisation by the WebConfig interface of the controller
Factory settings of the controller:
IP address: 192.168.4.2, subnet mask: 255.255.0.0
Password: vtem
The password can be changed via the WebConfig interface.

