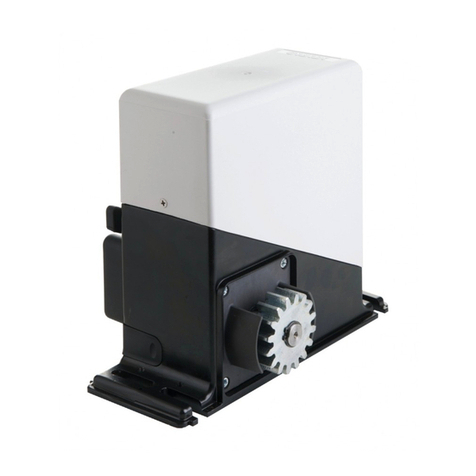
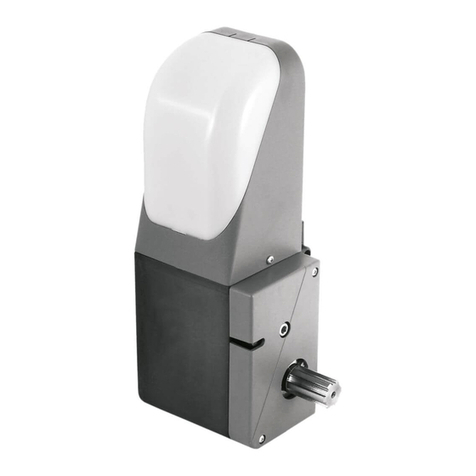
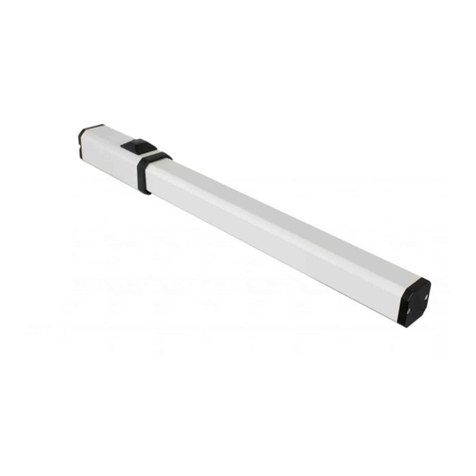
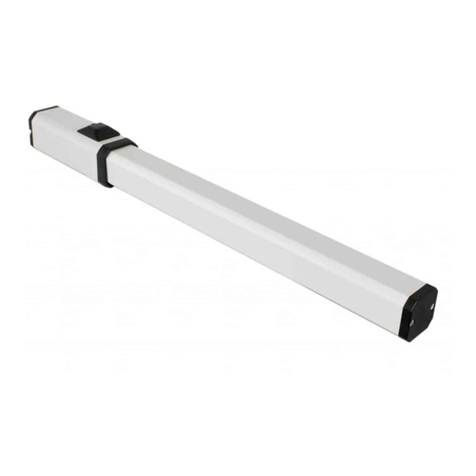
GiBiDi BL233 Guide

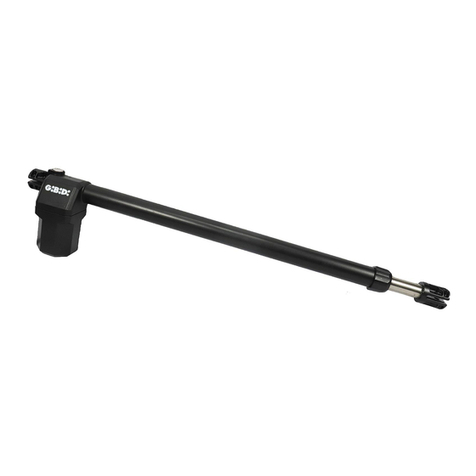
BL230-BL233
BL230 - (13200)
BL233 - (13300)
Operatore elettromeccanico lineare
ISTRUZIONI PER L’INSTALLAZIONE
Electromechanical linear operator
INSTRUCTIONS FOR INSTALLATION
I UK

2BL230-BL233 3
PREMESSA
AVVERTENZE PER L’INSTALLAZIONE
BL230-BL233
• Questo prodotto è stato collaudato in GI.BI.DI. verificando la perfetta corrispondenza delle caratteristiche
alle direttive vigenti.
• La GI.BI.DI. S.r.l. si riserva la facoltà di modificare i dati tecnici senza avviso, in funzione dell'evoluzione
del prodotto.
I
LEGGERE ATTENTAMENTE QUESTO MANUALE PRIMA DI PROCEDERE ALL’INSTALLAZIONE.
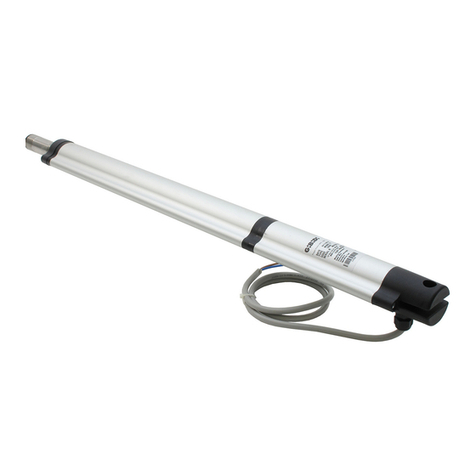
L’operatore BL230-BL233 per cancelli ad ante battenti è un operatore elettromeccanico che trasmette il
movimento all’anta tramite un sistema a vite senza fine.
Prevede il blocco quando il motore non è in funzione, non è necessario pertanto installare serrature per ante fino
a 2,5 m.
• Prima di procedere con l'installazione bisogna predisporre a monte dell'impianto un interruttore magneto-
termico o differenziale con portata massima 10 A. L’interruttore deve garantire una separazione omnipolare dei
contatti, con distanza di apertura di almeno 3 mm.
• Tutti i materiali presenti nell’imballo non devono essere lasciati alla portata dei bambini in quanto potenziali
fonti di pericolo.
• Il costruttore declina ogni responsabilità ai fini del corretto funzionamento dell’automazione nel caso non
vengano utilizzati i componenti e gli accessori di propria produzione e idonei per l’applicazione prevista.
• Al termine dell’installazione verificare sempre con attenzione il corretto funzionamento dell’impianto e dei
dispositivi utilizzati.
• Questo manuale d'istruzioni si rivolge a persone abilitate all’installazione di “apparecchi sotto tensione”,
pertanto si richiede una buona conoscenza della tecnica, esercitata come professione e nel rispetto delle
norme vigenti.
• La manutenzione deve essere eseguita da personale qualificato.
• Prima di eseguire qualsiasi operazione di pulizia o di manutenzione, scollegare l’apparecchiatura dalla rete di
alimentazione elettrica.
• Questo prodotto e stato progettato e costruito esclusivamente per I’utilizzo indicato in questa documentazione.
Usi non indicati in questa documentazione potrebbero essere fonte di danni al prodotto e fonte di pericolo.
• Verificare lo scopo dell’utilizzo finale e assicurarsi di prendere tutte le sicurezze necessarie.
• L’utilizzo dei prodotti e la loro destinazione ad usi diversi da quelli previsti, non è stata sperimentata dal
costruttore, pertanto i lavori eseguiti sono sotto la completa responsabilità dell’installatore.
• Segnalare l’automazione con targhe di avvertenza che devono essere visibili.
• Avvisare l’utente che i bambini o animali non devono giocare o sostare nei pressi del cancello.
• Proteggere adeguatamente i punti di pericolo, per esempio mediante l’uso di una costa sensibile.
• Verificare se l’impianto di terra è realizzato correttamente: collegare tutte le parti metalliche della chiusura
(porte, cancelli, ecc.) e tutti i componenti dell’impianto provvisti di morsetto di terra.
• Usare esclusivamente parti originali per qualsiasi manutenzione o riparazione.
• Non eseguire alcuna modifica ai componenti dell’automazione se non espressamente autorizzata dalla Ditta.
• Utilizzare pressacavi adeguati ad assicurare la corretta connessione meccanica del cablaggio e tali da
mantenere il grado di protezione IP 44.
I
• This product has been tested in Gi.Bi.Di. verifying the perfect correspondence of the characteristics to the
current directives.
• Gi.Bi.Di. S.r.l. reserves the right to modify the technical data without prior notice depending on the product
development.
UK
PLEASE READ CAREFULLY THIS MANUAL BEFORE PROCEEDING WITH THE INSTALLATION.

4 5
AVVERTENZE PER L’UTENTE
PREDISPOSIZIONI ELETTRICHE
DATI TECNICI
In caso di guasto o anomalie di funzionamento staccare l’alimentazione a monte dell’apparecchiatura e chiamare
l’assistenza tecnica.
Verificare periodicamente il funzionamento dei dispositivi di sicurezza.
Le eventuali riparazioni devono essere eseguite da personale specializzato usando materiali originali e certificati.
Il prodotto non deve essere usato da bambini o persone con ridotte capacità fisiche, sensoriali o mentali, oppure
mancanti di esperienza e conoscenza.
Non accedere alla scheda per regolazioni e/o manutenzioni.
ATTENZIONE: IMPORTANTI ISTRUZIONI DI SICUREZZA
E' importante per la sicurezza delle persone seguire queste istruzioni.
Conservare il presente libretto di istruzioni.
ATTENZIONE:
E’ importante che sulla linea di alimentazione venga installato, a monte dell'apparecchiatura, un
interruttore magnetotermico omnipolare con apertura minima dei contatti pari a 3 mm.
I I
BL230-BL233 BL230-BL233
[ ] [ ]
Predisporre l'impianto elettrico come indicato 1a 1b facendo riferimento alle norme vigenti per gli impianti
elettrici ed altre norme nazionali. Tenere nettamente separati i collegamenti di alimentazione di rete dai
collegamenti di servizio (fotocellule, coste sensibili, dispositivi di comando ecc.).
I componenti principali sono:
ÀAntenna: cavo coassiale schermato.
ÁContenitore apparecchiatura elettronica.
ÂElettroserratura: cavo a 2 conduttori da 1mm² (2x1).
ÃSelettore a chiave: cavo a 3 conduttori da 0,5 mm² (3x0,5).
[ ]
ÄOperatori 220 - 230 Vac 1c :
Alimentazione: cavo a 4 conduttori da 1,5 mm² (4x1,5):
grigio = COMUNE; marrone = ALIMENTAZIONE; nero = ALIMENTAZIONE; giallo/verde = MASSA
ÅInterruttore magnetotermico omnipolare con apertura minima dei contatti pari a 3 mm.
Linea di alimentazione all’apparecchiatura 220-230Vac 50-60Hz: cavo a 3 conduttori da 1,5 mm² min. (3x1,5)
(attenersi alle norme vigenti).
ÆSegnalatore a luce lampeggiante a 220V: cavo a 2 conduttori da 1,5 mm² (2x1,5).
ÇScatole di derivazione.
ÈTrasmettitore fotocellula: cavo a 2 conduttori da 0,5 mm² (2x0,5).
ÉRicevitore fotocellula: cavo a 4 conduttori a 0,5 mm² (4x0,5).
BL230Operatore BL233
220/230 V 50-60 Hz
150 W (~1000 N)
0,8 A (~1000 N)
1,5 A max
300 W max
140°C
elettromeccanico irreversibile con vite senza fine
12,5 mF
3000 N (regolabile elettronicamente)
-20°C +60°C
40% (~20°C)
500 mm380 mm
IP 44
5 m3,5 m
2 finecorsa (apertura / chiusura)
4 poli 1400 giri/min
Tipo
Tensione di alimentazione
Potenza assorbita
Corrente assorbita
Potenza max. assorbita
Corrente max. assorbita
Motore elettrico
Condensatore di spunto
Forza max. spinta / trazione
Temperatura di esercizio
Frequenza d’uso
Corsa utile
Grado di protezione
Finecorsa
Lunghezza massima anta
Termoprotezione
AVVERTENZE PRELIMINARI
Verificare che la struttura del cancello sia conforme a quanto previsto dalle normative vigenti e che il movimento
delle ante sia lineare e privo di attriti.
Verifiche preliminari:
• Controllare che la struttura del cancello sia sufficientemente robusta.
In ogni caso l’attuatore deve spingere l’anta in un punto rinforzato.
• Controllare che le ante si muovano manualmente e senza sforzo per tutta la corsa.
[ ]
• Controllare che siano installate le battute di arresto delle ante in apertura e chiusura 1a .
• Se il cancello non è di nuova installazione, controllare lo stato di usura di tutti i componenti, sistemare o
sostituire le parti difettose o usurate.
L’affidabilità e la sicurezza dell’automazione sono direttamente influenzate dallo stato della struttura del cancello.
É

6 7
I I
QUOTE D’INSTALLAZIONE
Se non è possibile mantenere le quote indicate nella tabella, per calcolare misure differenti, considerare quanto
segue:
• Per b = 90° ® A + B = Cu
• Per b > 90° ® A + B < Cu (b max 110°)
• La quota A deve sempre essere maggiore della somma data dalla quota D+d1.
• Nel caso di ante di spessore elevato, con conseguente difficoltà di rispettare la quota D, è possibile
aumentare la quota D e si raccomanda di applicare lo stesso incremento anche alla quota A, rispettando
comunque le regole sopra riportate.
•La differenza tra A e B non deve superare i 50 mm. Differenze superiori causano un movimento dell’anta
non costante (la forza di trazione/spinta e la velocità di movimento variano durante la manovra).
INSTALLAZIONE OPERATORE
[ ]
• Verificare il punto di fissaggio più idoneo per la staffa anteriore dell’operatore 2 e contrassegnarlo.
[ ]
• Con una livella riportare il punto sul pilastro per il fissaggio della staffa posteriore 2.
[ ]
• Individuare il punto di fissaggio della staffa posteriore in funzione delle quote A-B ed E 3.
ATTENZIONE: in presenza di grossi pilastri o muri, affinché le quote A, B, E vengano rispettate si dovrà
[ ]
realizzare una nicchia 4.
Fissaggio della staffa posteriore:
- a saldare se il pilastro è in ferro; (effettuare una verifica dello spessore della colonna: se inferiore a 5 mm
prevedere una piastra di rinforzo di dimensioni tali che le saldature vengano effettuate sulla costa della
[ ]
colonna, vedi 5.
- se il pilastro è in cemento si potrà fissare la staffa con tasselli o murare realizzando un prolungamento
[ ]
adeguato della medesima 6.
• Prendere l’operatore, portare la chiocciola tutta avanti sino al blocco, poi riportarla indietro di 5-10 mm, la
manovra può essere effettuata manualmente sbloccando l’operatore (vedi dispositivo di sblocco).
[ ]
• Fissare la staffa anteriore sull’operatore 7.
• Portare l’anta nella posizione di chiusura contro i fermi meccanici e fissarla con un morsetto.
[ ]
• Montare l’operatore sulla staffa posteriore con il perno in dotazione 8.
• Appoggiare la staffa anteriore nel punto contrassegnato precedentemente al punto 1, con una livella
[ ] [ ]
controllare la messa in piano dell’operatore, segnare il punto esatto di fissaggio della staffa anteriore 2 3 .
• Smontare l’operatore dalla staffa posteriore.
• Smontare la staffa anteriore dell’operatore.
• Fissare la staffa anteriore nel punto contrassegnato.
Fissaggio della staffa anteriore:
- a saldare se il cancello è in ferro; (effettuare una verifica dello spessore del tubolare dove andremo a saldare
la staffa, se inferiore a 5 mm prevedere una piastra di rinforzo di dimensioni tali che le saldature vengano
[ ]
effettuate sulla costa del tubolare 9.
- se il cancello è realizzato con materiale differente dal ferro, si dovrà realizzare una piastra di spessore
pari a 5 mm. Con n°4 fori, saldare la staffa al centro della piastra e fissare il tutto con viti da 8 mm
[ ]
passanti 10 .
• Sbloccare l’operatore (vedi dispositivo di sblocco).
• Montare l’operatore sulle staffe.
• Aprire e chiudere manualmente l’anta, eseguendo la corsa completa di apertura e chiusura. Il movimento
dovrà essere privo di attriti o indurimenti e la chiocciola, sia in apertura che in chiusura, non dovrà raggiungere
il blocco meccanico. Se così non fosse rivedere il posizionamento delle staffe.
[ ]
• Effettuare i collegamenti elettrici tra l’operatore e la centrale seguendo lo schema 1c , utilizzando conduttori
da 1,5 mm².
Si raccomanda di lasciare una lunghezza libera del cavo di almeno 40/50 mm. Per agevolare i
collegamenti elettrici possibile montare provvisoriamente l’operatore sottosopra.
BL230-BL233 BL230-BL233
BL230 90° 170 160 740 120 62 330
bA B C D E Cu
BL230 90° 180 180 740 120 62 360
BL230 110° 130 150 740 90 62 340
BL233 90° 220 200 860 150 62 420
BL233 90° 240 240 872 150 62 477
BL233 110° 180 200 870 120 62 428
PER GARANTIRE IL CORRETTO FUNZIONAMENTO DELL’OPERATORE SI
RACCOMANDA DI RISPETTARE LE QUOTE INDICATE.
E = 62
B
d1
D
Cu
C
A
b
I I
8 9
REGOLAZIONE DEI FINECORSA
DISPOSITIVO DI SBLOCCO
MONTAGGIO ELETTROSERRATURA
VERIFICHE FINALI
MANUTENZIONE
• Togliere alimentazione all’impianto.
[ ] [ ]
• Svitare la vite di fissaggio dalla flangia anteriore 13a e poi estrarla 13b .
[ ]
• Sfilare il profilo coprimicro in alluminio 13c .
• Allentare la vite di blocco del finecorsa, spostare il finecorsa nella posizione desiderata, serrare la vite di
[ ]
blocco del finecorsa 13d .
FUNZIONAMENTO MANUALE
Nel caso sia necessario azionare manualmente il cancello a causa di mancanza di corrente o malfunzionamento
[ ]
dell’automazione, bisogna spostare la linguetta di protezione 12a , inserire l'apposita chiave in dotazione
[ ]
nella serratura, ruotare la chiave in senso orario o antiorario di 90° 12b e tirare verso l’alto la leva di
[ ]
sblocco 12c .
Se la leva viene tirata completamente, l’operatore resta libero senza la necessità di tenere la leva con la
[ ]
mano 12d .
Effettuare manualmente l'operazione di apertura o chiusura delle ante.
Per evitare che l’anta si muova a causa del vento o perché sbilanciata, si consiglia, una volta effettuata la
manovra di emergenza manuale, di ribloccare l’operatore abbassando la leva fino al completo inserimento nella
[ ]
sua sede, ruotare la chiave in senso orario o antiorario di 90° come in 12b , poi estrarre la chiave (la chiave si
può estrarre in un’unica posizione), quindi muovere leggermente l’anta fino a quando non si blocca.
[ ] [ ]
Nel caso sia necessario installare un’elettroserratura, fare riferimento alla 11a 11b :
ÀElettroserratura
ÁPiastra di fissaggio elettroserratura
ÂBocchetta
ÃBattuta per bocchetta
ÄScrocco
ÅCilindro passante (a richiesta)
ÆCancello
Alimentare l’impianto ed eseguire un ciclo completo di apertura e chiusura verificando:
• Il movimento regolare delle ante;
• Il corretto funzionamento dei dispositivi di sicurezza;
• La buona tenuta delle staffe di fissaggio;
• Che il cavo di alimentazione si muova liberamente;
• Che l’insieme del cancello sia conforme alla EN 12453 e alla EN 12445.
Per maggiori dettagli e informazioni sulle normative di riferimento potete collegarvi al sito internet:
www.gibidi.com
Eseguire controlli periodici della struttura del cancello ed in particolare:
• Verificare la perfetta funzionalità delle cerniere;
• Verificare il corretto bilanciamento delle ante. Un’eccesiva inclinazione delle ante aumenta l’usura della staffa
di fissaggio basculante dell’operatore.
La prova si esegue sbloccando l’operatore e verificando che le ante non si muovano da sole;
• Verificare il buon funzionamento dei dispositivi di sicurezza;
• Sbloccare l’operatore e verificare l’assenza di punti di attrito durante l’intera corsa;
• Verificare che non ci siano sporco o detriti sulla vite senza fine, nel caso eseguire una pulizia e quindi
lubrificare la vite senza fine con grasso lubrificante.
Verificare periodicamente la corretta regolazione della forza di spinta dell’operatore e l’efficienza del sistema di
sblocco che permette il funzionamento manuale (vedi paragrafo relativo).
I dispositivi di sicurezza installati sull’impianto devono essere verificati ogni sei mesi.
BL230-BL233 BL230-BL233

I I
10 11
BL230-BL233 BL230-BL233
Ammistratore Delegato
Oliviero Arosio
Dichiarazione di conformità CE
Il fabbricante:
GI.BI.DI.
Via Abetone Brennero, 177/B,
46025 Poggio Rusco (MN) ITALY
dichiara che i prodotti:
OPERATORI LINEARI ELETTROMECCANICI BL230
sono conformi alle seguenti Direttive CEE:
• Direttiva EMC 2004/108/CE e successive modifiche;
e che sono state applicate le seguenti norme armonizzate:
• EN61000-6-1; EN61000-6-3
Data 04/07/2011
S.r.l.
UK
INTRODUCTION
INSTALLATION WARNINGS
The BL230-BL233 operator for swing gates is an electromechanical device that transmits motion to the gate by
means of a worm screw.
It is locked when the motor is not running, and it is therefore not necessary to install locks for leafs up to
2.5 m.
• Before proceeding with installation, fit a magnetothermal or differential switch with a maximum capacity of 10 A
upstream of the system. The switch must guarantee omnipolar separation of the contacts with an opening
distance of at least 3 mm.
• Keep all the materials contained in the packaging away from children, since they pose a potential risk.
• The manufacturer declines all responsibility for improper functioning of the automated device if the original
components and accessories suitable for the specific application are not used.
• After installation, always carefully check proper functioning of the system and the devices used.
• This instruction manual addresses professionals qualified to install “live equipment” and therefore requires
good technical knowledge and installation in compliance with the regulations in force.
• Maintenance must be carried out by qualified personnel.
• Before carrying out any cleaning or maintenance operation, disconnect the control unit from the mains.
• This product has been designed and constructed exclusively for the use indicated in this documentation.
Any other use may cause damage to the product and be a source of danger.
• Check the intended end use and take all the necessary safety precautions.
• Use of the product for purposes different from the intended use has not been tested by the manufacturer,
therefore any work is carried out on full responsibility of the installer.
• Mark the automated device with visible warning plates.
• Warn the user that children or animals should not play or stand near the gate.
• Appropriately protect the danger points, for example, using a sensitive frame.
• Check proper installation of the earthing system: connect all the metal parts of doors, gates, etc. and all the
system components to an earth terminal.
• Exclusively use original spare parts for any maintenance or repair operations.
• Do not modify any components of the automated device unless expressly authorised by Gi.Bi.Di..
• Use suitable cable clamps to ensure that the wiring is properly connected mechanically and such that an
IP44 degree of protection is maintained.

12 13
BL230-BL233 BL230-BL233
UK UK
WARNINGS FOR THE USER
ELECTRICAL EQUIPMENT
In the event of an operating fault or failure, cut the power upstream of the control unit and call Technical
Service.
Periodically check functioning of the safety devices.
Any repairs must be carried out by specialised personnel using original and certified materials.
The product may not be used by children or persons with reduced physical, sensorial or mental capacities, or
lacking experience and knowledge, unless appropriately instructed.
Do not access the circuit board for adjustments and/or maintenance.
CAUTION: IMPORTANT SAFETY INSTRUCTIONS
It is important to follow these instructions in order to safeguard persons.
Keep this instruction booklet.
CAUTION:
It is important that an omnipolar magnetothermal switch, with a minimum contact opening of
3 mm, is fitted upstream of the control unit.
[ ] [ ]
Set up the electric system as shown 1a 1b referring to the electric system regulations and other national
regulations in force. Keep the mains power connections clearly separated from the service connections
(photocells, sensitive frames, control devices, etc.).
The main components are:
ÀAntenna: screened coaxial cable.
ÁElectronic equipment housing.
ÂElectric lock: cable with 2 cores - 1 mm² (2x1).
ÃKey selector; cable with 3 cores - 0.5 mm² (3x0.5).
[ ]
Ä220 - 230 Vac Operators 1c :
Power supply: cable w/ 4 cores - 1,5 mm² (4x1,5):
grey = COMMON; brown = POWER SUPPLY; black = POWER SUPPLY; yellow/green = EARTH
ÅOmnipolar magnetothermal switch with minimum contact opening of 3 mm.
220-230VAC/50-60 Hz power line to the device: cable with 3 cores - 1.5 mm² (3x1.5) (adhere to the
regulations in force).
Æ220V Warning system - flashing light: cable with 2 cores - 1.5 mm² (2x1,5).
ÇShunt boxes.
ÈPhotocell transmitter: cable with 2 cores - 0.5 mm² (2x0.5).
ÉPhotocell receiver: cable with 4 cores - 0.5 mm² (4x0.5).
TECHNICAL DATA
BL230Operator BL233
220/230 V 50-60 Hz
150 W (~1000 N)
0.8 A (~1000 N)
1.5 A max
300 W max
140°C
non-reversible electromechanical with worm screw
12.5 mF
3000 N (electronically adjustable)
-20°C +60°C
40% (~20°C)
500 mm380 mm
IP 44
5 m3.5 m
2 limit switches (open / close)
4 poles 1400 rpm
Type
Supply voltage
Power absorbed
Current absorbed
Max power absorbed
Max current absorbed
Electric motor
Breakaway capacitor
Max thrust / traction force
Operating temperature
Frequency of use
Effective travel
Protection class
Limit switches
Maximum gate length
Thermic
PRELIMINARY WARNINGS
Make sure that the gate structure conforms with current standards and that gate movement is linear and
friction free.
Preliminary checks:
• Make sure that the gate structure is sufficiently sturdy.
In any case, the actuator must operate on a reinforced point on the gate.
• Make sure that the gates move manually without effort over their entire travel.
[ ]
• Make sure that gate opening and closing locator stops are installed 1a .
• If the gate is not a new installation, check the wear status of the hinges and all components; repair or replace
defective or worn components.
The reliability and safety of the automation device are directly affected by the status of the gate structure.
É

14 15
BL230-BL233 BL230-BL233
UK UK
INSTALLATION DIMENSIONS
If it is not possible to maintain the dimensions indicated in the table, different measurements should be
calculated with reference to the following items:
• For b = 90° ® A + B = Cu
• For b > 90° ® A + B < Cu (b max 110°)
• Dimension A must always be greater than the sum of dimensions D+d1.
• In the event of very thick gates, with consequent difficulties in maintaining dimension D, it is possible to
increase dimension D; it is also advisable to increase dimension A by the same amount, in any case
observing the rules indicated above.
•The difference between A and B must not exceed 50 mm; greater differences cause a non-constant door
movement (drive/thrust force and movement speed vary during operation).
BL230 90° 170 160 740 120 62 330
bA B C D E Cu
BL230 90° 180 180 740 120 62 360
BL230 110° 130 150 740 90 62 340
BL233 90° 220 200 860 150 62 420
BL233 90° 240 240 872 150 62 477
BL233 110° 180 200 870 120 62 428
CORRECT OPERATION OF THE SYSTEM REQUIRES THAT THE INDICATED
DIMENSIONS ARE OBSERVED.
E = 62
B
d1
D
Cu
C
A
b
OPERATOR INSTALLATION
[ ]
• Verify and mark the most suitable securing centre for the front bracket of the operator 2.
[ ]
• Use a level to mark the point on the pillar for securing the rear bracket 2.
[ ]
• Identify a securing centre for the rear bracket in relation to dimensions A-B and E 3.
WARNING: if there are large pillars or walls, a niche should be prepared to ensure that dimensions
[ ]
A, B and E are observed 4.
Securing the rear bracket:
- welding for metal pillars; (check the thickness of the column and if less than 5 mm fit a support plate of
[ ]
suitable dimensions so that the welds are made on the edge of the column; see 5.
- if the pillar is in cement, the bracket can be fixed with plugs or masonry by means of an appropriate
[ ]
extension 6.
• Take the operator and move the lead screw fully forwards as far as the block, then back of by 5-10 mm; this
operation can also be performed manually by releasing the operator (see release device).
[ ]
• Fix the front bracket onto the operator 7.
• Place the door in the closed position in relation to the mechanical stops and secure it with a clamp.
[ ]
• Fit the operator on the rear bracket using the pin supplied 8.
• Place the front bracket at the point previously marked at stage 1 and use a level to check the flatness of the
[ ] [ ]
operator; mark the point for exact securing of the front bracket 2 3 .
• Remove the operator from the rear bracket.
• Remove the front bracket of the operator.
• Fix the front bracket at the point marked.
Securing the front bracket:
- welding for metal gates; (check the thickness of the tubular element where the bracket is to be welded; if less
than 5 mm, fit a support plate of suitable dimensions so that the welds are made on the edge of the tubular
[ ]
unit 9.
- for gates in non-metal materials, a 5 mm shim plate is required. With n°4 holes, weld the bracket to the centre
[ ]
of the plate and secure everything with 8 mm through screws 10 .
• Release the operator (see release device).
• Fit the operator on the brackets.
• Open and close the door manually, performing complete opening and closing travel. Movement must be
smooth and the lead screw, for both opening and closing, should not reach the mechanical block. If this is not
the case, review brackets positioning.
[ ]
• Make the electrical connections between the operator and the control unit with reference to the diagram 1c ,
using 1,5 mm² cores.
It is advisable to leave a free cable length of at least 40/50mm. To facilitate electrical connections, the
operator can be temporarily turned upside-down.

14 15
BL230-BL233 BL230-BL233
UK UK
INSTALLATION DIMENSIONS
If it is not possible to maintain the dimensions indicated in the table, different measurements should be
calculated with reference to the following items:
• For b = 90° ® A + B = Cu
• For b > 90° ® A + B < Cu (b max 110°)
• Dimension A must always be greater than the sum of dimensions D+d1.
• In the event of very thick gates, with consequent difficulties in maintaining dimension D, it is possible to
increase dimension D; it is also advisable to increase dimension A by the same amount, in any case
observing the rules indicated above.
•The difference between A and B must not exceed 50 mm; greater differences cause a non-constant door
movement (drive/thrust force and movement speed vary during operation).
BL230 90° 170 160 740 120 62 330
bA B C D E Cu
BL230 90° 180 180 740 120 62 360
BL230 110° 130 150 740 90 62 340
BL233 90° 220 200 860 150 62 420
BL233 90° 240 240 872 150 62 477
BL233 110° 180 200 870 120 62 428
CORRECT OPERATION OF THE SYSTEM REQUIRES THAT THE INDICATED
DIMENSIONS ARE OBSERVED.
E = 62
B
d1
D
Cu
C
A
b
OPERATOR INSTALLATION
[ ]
• Verify and mark the most suitable securing centre for the front bracket of the operator 2.
[ ]
• Use a level to mark the point on the pillar for securing the rear bracket 2.
[ ]
• Identify a securing centre for the rear bracket in relation to dimensions A-B and E 3.
WARNING: if there are large pillars or walls, a niche should be prepared to ensure that dimensions
[ ]
A, B and E are observed 4.
Securing the rear bracket:
- welding for metal pillars; (check the thickness of the column and if less than 5 mm fit a support plate of
[ ]
suitable dimensions so that the welds are made on the edge of the column; see 5.
- if the pillar is in cement, the bracket can be fixed with plugs or masonry by means of an appropriate
[ ]
extension 6.
• Take the operator and move the lead screw fully forwards as far as the block, then back of by 5-10 mm; this
operation can also be performed manually by releasing the operator (see release device).
[ ]
• Fix the front bracket onto the operator 7.
• Place the door in the closed position in relation to the mechanical stops and secure it with a clamp.
[ ]
• Fit the operator on the rear bracket using the pin supplied 8.
• Place the front bracket at the point previously marked at stage 1 and use a level to check the flatness of the
[ ] [ ]
operator; mark the point for exact securing of the front bracket 2 3 .
• Remove the operator from the rear bracket.
• Remove the front bracket of the operator.
• Fix the front bracket at the point marked.
Securing the front bracket:
- welding for metal gates; (check the thickness of the tubular element where the bracket is to be welded; if less
than 5 mm, fit a support plate of suitable dimensions so that the welds are made on the edge of the tubular
[ ]
unit 9.
- for gates in non-metal materials, a 5 mm shim plate is required. With n°4 holes, weld the bracket to the centre
[ ]
of the plate and secure everything with 8 mm through screws 10 .
• Release the operator (see release device).
• Fit the operator on the brackets.
• Open and close the door manually, performing complete opening and closing travel. Movement must be
smooth and the lead screw, for both opening and closing, should not reach the mechanical block. If this is not
the case, review brackets positioning.
[ ]
• Make the electrical connections between the operator and the control unit with reference to the diagram 1c ,
using 1,5 mm² cores.
It is advisable to leave a free cable length of at least 40/50mm. To facilitate electrical connections, the
operator can be temporarily turned upside-down.

16 17
UK UK
BL230-BL233 BL230-BL233
LIMIT SWITCH ADJUSTMENT
RELEASE DEVICE
ELECTRIC LOCK ASSEMBLY
• Isolate the power supply to the system.
[ ] [ ]
• Back off the screw retaining the front adapter 13a and then slide it out 13b .
[ ]
• Slide out the aluminium micro-switch cover profile 13c .
• Slacken the screw locking the limit switch, move the limit switch into the required position and tighten the limit
[ ]
switch lock screw 13d .
MANUAL OPERATION
If the gate had to be operated manually because of a power failure or malfunction of the automation,
[ ]
move the protection tab 12a , insert the specific key supplied into the lock, turn the key clockwise
[ ] [ ]
or anticlockwise by 90° 12b and pull the release lever upwards 12c .
If the lever is completely pulled, the operator remains free without having to hold the lever with the
[ ]
hand 12d .
Manually perform the door opening or closing operation.
To prevent the door moving because of wind or if it is not balanced, it is advisable, after having performed the
emergency manual manoeuvre, to re-lock the operator by lowering the lever until it is fully inserted in its seat,
[ ]
turn the key clockwise or anticlockwise by 90° as shown in 12b , then remove the key (the key can only be
removed when it is in a certain position), then slightly move the door until it locks.
[ ] [ ]
If an electric lock had to be fitted, refer to 11a 11b :
ÀElectric lock
ÁElectric lock securing plate
ÂMouth
ÃMouth locator
ÄLatch
ÅThrough cylinder (optional)
ÆGate
FINAL CHECKS
MAINTENANCE
Power up the system and perform a complete opening and closing cycle, checking:
• Smooth doors movement;
• Correct operation of the safety devices;
• Good seal of the securing brackets;
• The power supply cable moves freely;
• The overall gate system must conform with EN 12453 and EN 12445 regulations.
For more details and information about reference regulations, you can visit the Internet site:
www.gibidi.com
Perform periodic controls of the gate structure and in particular:
• Make sure the hinges function perfectly;
• Verify correct door balancing. Excessive door slant increases wear of the operator counterweight/
counterspring securing bracket.
The test is performed by releasing the operator and checking that the doors do not move on their own;
• Verify correct operation of the safety devices;
• Release the operator and make sure there are no friction points over the entire travel;
• Make sure that there is no dirt or litter in the worm screw, otherwise clean and then lubricate the worm screw
with lubricant grease.
Periodically verify the correct adjustment of the operator thrust force and the efficiency of the release system
used for manual operation (see relative paragraph).
The safety devices installed on the system must be checked every six months.

18 19
UK
BL230-BL233 BL230-BL233
NOTE / NOTES
Managing Director
Oliviero Arosio
CE Declaration of conformity
The manufacturer
GI.BI.DI.
Via Abetone Brennero, 177/B,
46025 Poggio Rusco (MN) ITALY
declares that the products
ELECTROMECHANICAL LINEAR OPERATORS BL230
are in conformity with the following EEC Directives:
• EMC Directive 2004/108/CE and subsequent amendments;
and that the following harmonised standards have been applied:
• EN61000-6-1; EN61000-6-3
Date 04/07/2011
:
S.r.l.
:

GI.BI.DI. S.r.l.
46025 Poggio Rusco (MN) - ITALY
Tel. +39.0386.52.20.11
Fax +39.0386.52.20.31
E-mail: [email protected]
Numero Verde: 800.290156
Via Abetone Brennero, 177/B
w w w . g i b i d i . c o m
Cod. AIC5261 - 07/2011 - Rev. 00
This manual suits for next models
1
Table of contents
Languages:
Other GiBiDi Gate Opener manuals
Popular Gate Opener manuals by other brands

Comunello
Comunello FORT 3500 Installation and user manual

MISTER MENUISERIE
MISTER MENUISERIE MOTORISATIONPLUS SOLAR Instructions and warnings for installation and use

CAME
CAME KR302 installation manual

CAB
CAB HD.18 AC Operating instructions and spare parts catalogue

CAME
CAME 806LA-0050 manual

DACE
DACE DURASLIDE SOLO manual

BFT
BFT MICHELANGELO Installation and user manual

Beninca
Beninca BULL 20T Operating instructions and spare parts catalogue

Casanoov
Casanoov HICKER B200 manual

CAME
CAME A 3024 N installation manual

GATEXPERT
GATEXPERT INDUS-E Series user manual

Motorline professional
Motorline professional OL1500 User's and installer's manual