manuals.online logo
Brands
  1. Home
  2. •
  3. Brands
  4. •
  5. Grandview
  6. •
  7. Projection Screen
  8. •
  9. Grandview LF-PP series User manual

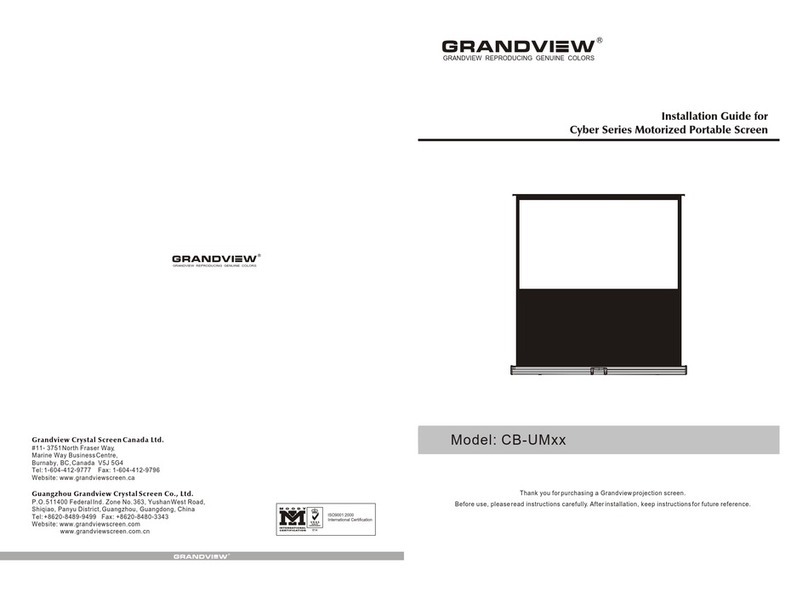
Grandview LF-PP series User manual

Model:LF-PPxx
GRANDVIEW REPRODUCING GENUINE COLORS
Thank you for purchasing a Grandview projection screen.
Before use, please read instructions carefully. After installation, store instructions for future reference.
Installation Guide for
Large-flat Series Ultimate Permanent Cinema Screen
GRANDVIEW REPRODUCING GENUINE COLORS
ISO9001:2000
International Certification
Grandview Crystal Screen Canada Ltd.
#11- 3751 North Fraser Way,
Marine Way Business Centre,
Burnaby, BC, Canada V5J 5G4
Tel: 1-604-412-9777 Fax: 1-604-412-9796
Website: www.grandviewscreen.ca
Guangzhou Grandview Crystal Screen Co., Ltd.
P.O. 511400 Federal Ind. Zone No. 363, Yushan West Road,
Shiqiao, Panyu District, Guangzhou, Guangdong, China
Tel: +8620-8489-9499 Fax: +8620-8480-3343
Website: www.grandviewscreen.com
www.grandviewscreen.com.cn
1
Description
Accessories
Top and Bottom Tension Bars (2 )pcs Side Tension Bars (2 )pcs
Top and Bottom Frame Pieces (2pcs)
Side Frame Pieces (2 )pcs
Fixing Lu gs
Instruction Manual(1 )pc
Corner Bra cke ts Scr ews (4 )pcs
Brackets
Side Frame Pieces
Top and Bottom Frame Pieces
Fabric
Additional Sheet (Total Fixing Lugs Quantities)
5x40 mm Screws with
Anchors (8, not included)
5x10mm Screws (8 )pcs
Fixing Lug
Brackets
※:Two More Fixing Lugs For Each Screen
30
38
38
44
44
92
24
100
28
106
28
120
4:3
16:9
150 180 200
\32
48
28
Qty
Format
pcs
pcs
\ \
52
1. Take out frame from box and lay on flat surface ( 3). Take out all additional parts.Figure
2. Slide fixing lugs into grooves on reverse side of frame ( 4&5) and align with arrows (Note: Arrows
are approximate).
Figure
3. Loosen corner bracket screws and slide into frame grooves. Carefully align frame corner to 90 degrees
and fasten with screws. Repeat for each corner (Figure 6-7).
This projection screen should be installed at the best possible viewing position for the audience. Front
projection (Figure 1) and Rear projection (Figure 2). Install according to material chosen.
Installation
Figure 3
Side Frame Pieces
Top and Bottom Frame Pieces
Figure 4 Figure 5
Fixing Lugs
Aluminum corner
connector piece
Side Frame Pieces
Top and Bottom
Frame Pieces
Figure 6 Figure 7
Figure 1Figure 2
Ignoring the safety warnings may
lead to injuries and/or damaging
the product.
Fixtures should be installed in a secure
place to avoid accidents or the screen
falling.
Please contact your local dealer for
repairs or maintenance. Please contact
our company if you have any further
questions. Avoid taking apart the
fixtures yourself. Loose parts may
cause the screen to fall.
Warnings
Do not take apart and replace with unknown parts. If there are any problems, please contact your local dealer.
Product specifications are subject to change.
When installing, make sure it is facing forward. The back of the screen will be labeled with a sticker.
Please read the following as any damage to the screen surface will affect the quality of the picture:
1.The frame is made with lightweight aluminum. Please handle with care.
2.Avoid contact or touching the screen surface as it may cause scratches or tears.
3.Do not write or draw on the surface.
4.Clean the screen with a soft cloth and lukewarm water. Do not use any detergent or cleaning products.
5.Use a cotton cloth to carefully wipe off the dust on the frame to prevent any damages
6.If it is not in use for a long period of time, cover the screen to shut out dust and dirt.
To prevent unnecessary damage, the operating and maintenance of the screen should be done by adults.
Opening the case, the frame has indentations on surface because of packaging in a dry case for a long
time. This is a normal phenomenon and the screen can be used normally. Please stay the screen in a
normal condition that the indentations can be naturally removed. Recovery time will be changed in 1-15
days because of the air humidity, If you want to remove these indentations quickly, please use half-wet
solution.
Methods: Sprinkle water on the surface that can remove the indentations.
34
4. Unfold screen fabric and insert tension bars. Use the long bar for the top & bottom and the short bar
for sides. Be careful not to poke the fabric (Figure 8-10).
5. Align fixing lugs with arrows. Using the tension bar, pull fabric eyelets over fixing lugs. Do top side
first then rotate clockwise (Figure 11-15).
6. Adjust screen to ensure that it is flat and smooth.
7. Align brackets to desired width and measure. Drill two, or four holes (If using 4 brackets) in wall at
measured width. Insert 5x40mm screws for studded wall, or 5x40mm screws + anchors for drywall
without studs and hang (Figure 16-17).
Figure9Figure10
Figure8
6mm Tension Bars
Figure14 Figure15Figure13
Figure11 Figure12
Figure16 Figure17
8. Insert 6x12mm screws to fasten the brackets to the top and bottom frames. 9(Figure 18-1 )
Figure18
Figure19

Other Grandview Projection Screen manuals

Grandview SkyShow Series User manual

Grandview

Grandview SkyShow Series User manual

Grandview DIAS DI-M Series User manual

Grandview

Grandview DIAS DI-M Series User manual

Grandview Edge R3 PE-L Series Instruction Manual

Grandview

Grandview Edge R3 PE-L Series Instruction Manual

Grandview Dynamique R3 User manual

Grandview

Grandview Dynamique R3 User manual

Grandview Motorised Rising Screen User manual

Grandview

Grandview Motorised Rising Screen User manual

Grandview FC-FHP-MF Series User manual

Grandview

Grandview FC-FHP-MF Series User manual

Grandview GVFA100V User manual

Grandview

Grandview GVFA100V User manual

Grandview HideAway HH3 User manual

Grandview

Grandview HideAway HH3 User manual

Grandview Sky-Show User manual

Grandview

Grandview Sky-Show User manual

Grandview Edge R2 Series User manual

Grandview

Grandview Edge R2 Series User manual

Grandview FC-FH-MI II Series User manual

Grandview

Grandview FC-FH-MI II Series User manual

Grandview GRIP084V User manual

Grandview

Grandview GRIP084V User manual

Grandview LF-VMF-77 User manual

Grandview

Grandview LF-VMF-77 User manual

Grandview FC-FH-MF II Series User manual

Grandview

Grandview FC-FH-MF II Series User manual

Grandview CB-UY92 User manual

Grandview

Grandview CB-UY92 User manual

Grandview Smart Screen User manual

Grandview

Grandview Smart Screen User manual

Grandview CB-MIRC User manual

Grandview

Grandview CB-MIRC User manual

Grandview CR-Pxx User manual

Grandview

Grandview CR-Pxx User manual

Grandview Legacy Series User manual

Grandview

Grandview Legacy Series User manual

Grandview Large Sky-Show User manual

Grandview

Grandview Large Sky-Show User manual

Grandview GRUC070V User manual

Grandview

Grandview GRUC070V User manual

Grandview Edge R7 User manual

Grandview

Grandview Edge R7 User manual

Grandview Deluxe Pull Down User manual

Grandview

Grandview Deluxe Pull Down User manual

Grandview Large Stage MAIII User manual

Grandview

Grandview Large Stage MAIII User manual

Popular Projection Screen manuals by other brands

Remaco BKT-M595 installation guide

Remaco

Remaco BKT-M595 installation guide

MAUL 64065 manual

MAUL

MAUL 64065 manual

Elite Screens isf CineWhite UHD-B Sable Frame B2 Series user guide

Elite Screens

Elite Screens isf CineWhite UHD-B Sable Frame B2 Series user guide

Da-Lite Deluxe Insta-theater Instruction book

Da-Lite

Da-Lite Deluxe Insta-theater Instruction book

HELGI VIDEO MOTORE PROJECTION SCREEN Instruction and maintenance

HELGI

HELGI VIDEO MOTORE PROJECTION SCREEN Instruction and maintenance

Celexon Ceiling Recessed Electric Professional Plus operating instructions

Celexon

Celexon Ceiling Recessed Electric Professional Plus operating instructions

Elite Screens Starling Tab-Tension 2 Series user guide

Elite Screens

Elite Screens Starling Tab-Tension 2 Series user guide

Kindermann Cineroll Electric Mounting instruction

Kindermann

Kindermann Cineroll Electric Mounting instruction

SCREENLINE Living manual

SCREENLINE

SCREENLINE Living manual

DQE MC5032 instructions

DQE

DQE MC5032 instructions

Da-Lite DESIGNER DA-TAB ELECTROL Instruction book

Da-Lite

Da-Lite DESIGNER DA-TAB ELECTROL Instruction book

FrSky FLD-02 instruction manual

FrSky

FrSky FLD-02 instruction manual

FONESTAR PPEL-43200-BA instruction manual

FONESTAR

FONESTAR PPEL-43200-BA instruction manual

Elite Screens TE100HC2 Comparison chart

Elite Screens

Elite Screens TE100HC2 Comparison chart

Kimex SLIM Series user manual

Kimex

Kimex SLIM Series user manual

HKS Euroscreen Diplomat Tab Tension manual

HKS

HKS Euroscreen Diplomat Tab Tension manual

Classic Exhibits Perfect 10 VK-1400 manual

Classic Exhibits

Classic Exhibits Perfect 10 VK-1400 manual

TMI Products Save-T SCREEN-PRO installation instructions

TMI Products

TMI Products Save-T SCREEN-PRO installation instructions

manuals.online logo
manuals.online logoBrands
  • About & Mission
  • Contact us
  • Privacy Policy
  • Terms and Conditions

Copyright 2025 Manuals.Online. All Rights Reserved.