01 55 53 33 94 00
Ext. 5804, 5805 y 5806 (0133) 36 19 01 13
Comunícate:
Participa en nuestros
cursos gratuitos
de capacitación.
(0181) 83 33 57 67
(0181) 83 33 61 78
In Guadalajara:
Contact:
Enter our free
training courses.
In Monterrey:
En la Ciudad de México:
In Mexico City:
En Monterrey:
En Guadalajara:
HELVEX, S. A. DE C.V. Calzada Coltongo 293, Col. Industrial Vallejo 02300 Del. Azcapotzalco, México, D.F. Tel. (55) 53-33-94-00.
Es muy importante seguir las siguientes instrucciones para conservar los
acabados de los productos HELVEX, con brillo y en perfecto estado:
1. Utilice únicamente agua y un paño limpio.
2. No utilice fibras, polvos, abrasivos, ni productos químicos.
3. No utilice objetos punzo-cortantes para limpiar los acabados.
4. Se recomienda realizar la limpieza de su producto diariamente.
Nota: Vea nuestros tips en la pag. www.helvex.com.mx
It is very important to follow the instructions below to preserve HELVEX products
finishes, shiny and in perfect condition:
1. Use only water and a clean cloth.
2. Do not use fibers, powders, abrasives, or chemicals.
3. Do not use sharp objects to clean the finish.
4. It is recommended to clean your product daily.
Note: See our tips on: www.helvex.com.mx
Recomendaciones de Limpieza / Cleaning Recommendations
+ caliente
+ fría
16
+ cold
+ hot
Problema / Problem Causa / Case Solución / Solution
La válvula principal de agua se encuentra cerrada. /
The main water valve is closed. Abra la válvula principal de agua. / Open the main water valve.
El cartucho se encuentra cerrado. / The cartridge is
closed.
Abra el cartucho levantando la palanca (pag. 4, operación). / Open
the cartridge by lifting the lever (p. 4 operation) .
Basura obstruyendo entradas del cartucho. / Garbage
obstructing cartridge entrances.
Retire el cartucho (pag. 3 cambio de cartucho) y límpielo. / Remove
the cartridge (page 3 changing cartridge) and clean.
La presión de operación no es la adecuada. / The
operating pressure is not adequate.
Revise que los requerimientos mínimos de operación sean de 1
kg/cm². / Check that the minimum operating requirements are 1
kg/cm².
Hay fuga entre el cuerpo armado y
el cartucho. / There is leakage
between the body and the cartridge
assembly.
Posiblemente no esté acentando bien el cartucho en
el fondo del cuerpo armado. / Possibly not acentando
well the cartridge body at the bottom of armed.
Apretar bien la tuerca (pag. 2, paso 3). / Tighten the nut (page 2, step
3).
El maneral está flojo. / The handle
is loose.
El opresor no está apretado. / The oppressor is not
tight.
Utilice la llave allen y apriete firmemente. (pag. 3, paso 12). / Use the
allen wrench and tighten. (page 3 step 12).
No sale agua. / No water.
Existe poco flujo de agua. / There
is some water flow.
Para abrir y cerrar el flujo de agua levante y baje el
maneral, para ajustar la temperatura, gire a la
izquierda para calentar y derecha para enfriar. / To
open and close the water flow up and donw the
handle, to ajust the water temperature, turn left for hot
and right for cold.
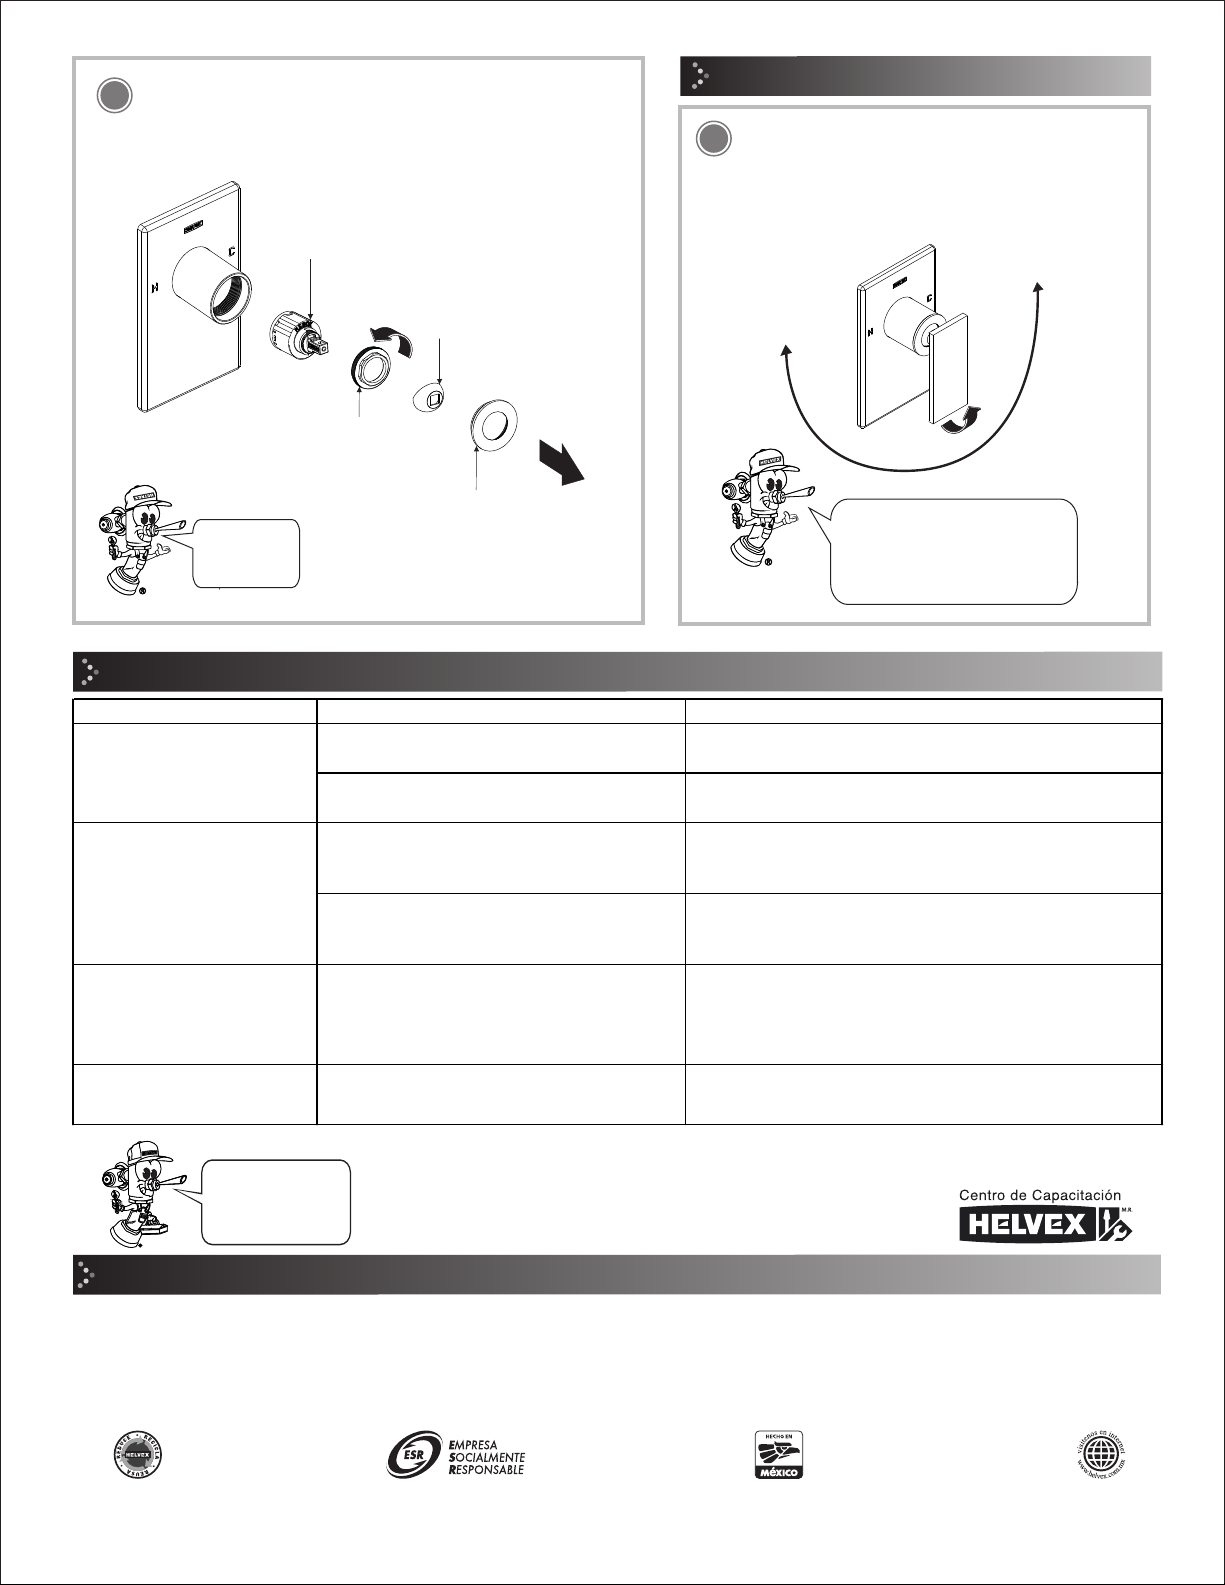
abrir
open
4
Para abrir el flujo de agua
levante la palanca y baje para
cerrar. / To open the flow lift
and handle and down it to
close.
Posibles Causas y Soluciones / Troubleshooting
Operación / Operation
Apretar bien la tuerca (pag. 3 paso 8 ). / Tighten the nut (page 3,
step 8)
Utilice la llave allen y apriete firmemente (pag. 3 paso 13 ). / Use
the hex key and tighten. (page 3, step 13)
El opresor no está apretado. / The setscrew is not
tight.
Desensamble el cuerpo del portacartucho, retire el cartucho viejo y
reemplácelo. / Disassemble the body of the cartridge holder,
remove the old cartridge and replace.
15
Arme
nuevamente.
/ Reassamble
cartucho
/ cartridge
chapetón / escutcheon
tuerca / nut
chapeton tapa /
escutcheon cap
Cause / Cause