manuals.online logo
Brands
  1. Home
  2. •
  3. Brands
  4. •
  5. Helvex
  6. •
  7. Bathroom Fixture
  8. •
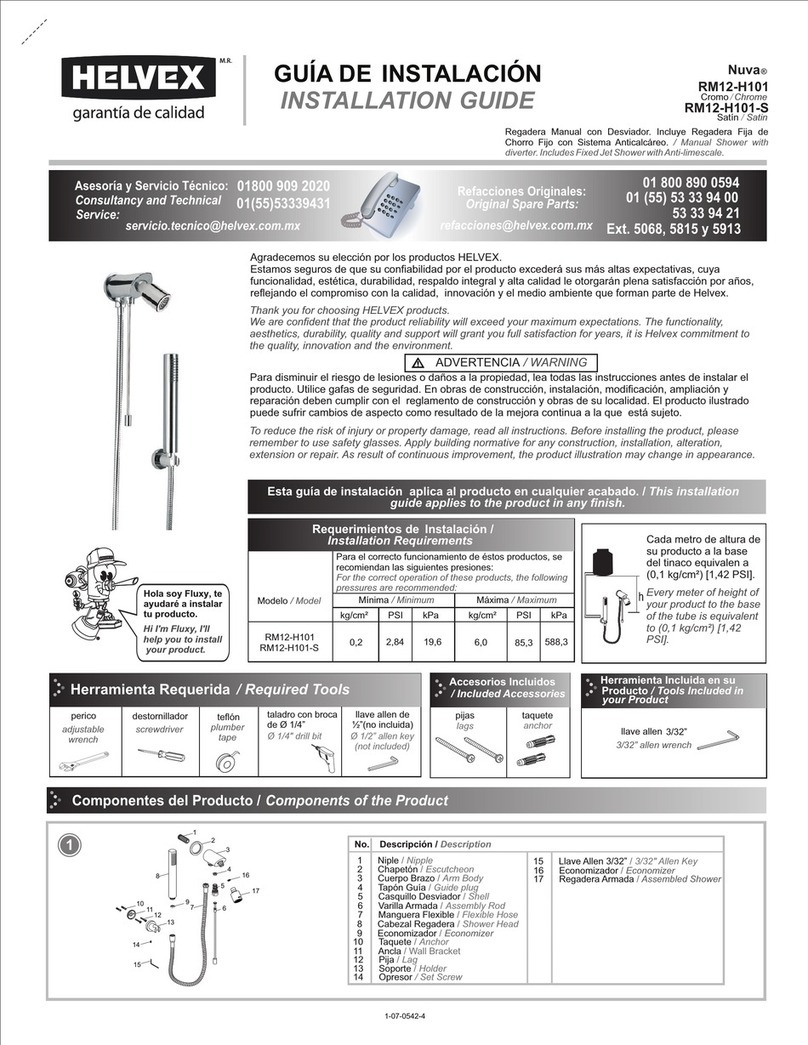
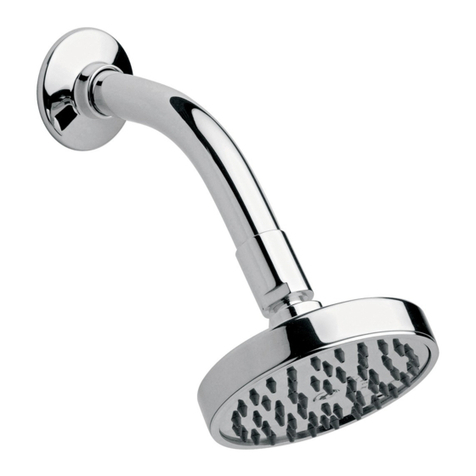
  9. Helvex TAZF NAO I PARED S-TZF-P User manual

Helvex TAZF NAO I PARED S-TZF-P User manual

perico taladro c/brocas para
concreto Ø 2” y Ø 7/8”
concrete drill
Ø 2” and Ø 7/8”
adjustable
wrench
Herramienta Requerida / Required Tools
Accesorios Incluidos en su Producto / Accessories included in the Product
INSTALLATION GUIDE
GUÍA DE INSTALACIÓN
1-06-0960-2
Hola soy Fluxy, te
ayudaré a instalar
tu producto.
Hi I'm Fluxy, I'll
help you to install
your product.
[email protected]
Original Parts:
Consultancy and Technical
01(55)53339431
01800 909 2020 01 (55) 53 33 94 00
Refacciones Originales:
Asesoría y Servicio Técnico:
Ext. 5068, 5913 y 4815
Service:
53 33 94 21
01 800 890 0594
[email protected]
S-TZF-P
Soporte para Taza TZF NAO I
PARED Ajustable para Dos Alturas /
TAZF NAO I PARED Holder
Adjustable to Two Heights
plantilla
template
lápiz
pencil
flexómetro
flexometer
kit de bujes y
cubretornillos
bushings and
screw covers kit
taquete expansivo con
tornillo y rondana de ½”
taquete with screw expansive
and washer ½ "
kit de rondanas
y tuercas
washers and
nuts kit
esparragos Ø 5/8”-11
a Ø 5/8”-11 sparagus
tubo - PVC Ø110mm
pipe - PVC Ø110mm
cuello flexible para
sanitario 100 mm
gooseneck 100 mm
sanitary
cople
coupling
17”
15,5”
17”
15,5”
NIVEL DE PISO DE CONCRETO
(PISO FIRME SIN ACABADO)
POSICIÓN PARA ANCLAS DEL SOPORTE
DEL LADO DE LAS RANURAS
POSICIÓN PARA ANCLAS DE FIJACIÓN
DE LOS BARRENOS DEL SOPORTE
Para disminuir el riesgo de lesiones o daños a la propiedad, lea todas las instrucciones antes de instalar el
producto. Utilice gafas de seguridad. En obras de construcción, instalación, modificación, ampliación y
reparación deben cumplir con el reglamento de construcción y obras de su localidad. El producto ilustrado puede
sufrir cambios de aspecto como resultado de la mejora continua a la que está sujeto.
Agradecemos su elección por los productos HELVEX.
Estamos seguros de que su confiabilidad por el producto excederá sus más altas expectativas, cuya
funcionalidad, estética, durabilidad, respaldo integral y alta calidad le otorgarán plena satisfacción por años,
reflejando el compromiso con la calidad, innovación y el medio ambiente que forman parte de Helvex.
To reduce the risk of injury or property damage, read all instructions before installing the product. Please
remember to use safety glasses. In construction, installation, alteration, extension and repair, the rules of
constructions must be applied. As result of continuous improvement, the illustration product may change in
appearance.
ADVERTENCIA / WARNING
Esta guía de instalación aplica al producto en cualquier acabado. / This installation
guide applies to the product in any finish.
Thank you for choosing HELVEX products.
We are confident that the product reliability will exceed your maximum expectations. The functionality, aesthetics,
durability, quality and support will grant you full satisfaction for years, it is Helvex commitment to the quality,
innovation and the environment.
Dimensiones del Soporte / Dimensions of Support
2
Alturas Recomendadas
/ Recommended Heights
NPT
Nivel de Piso Terminado
Finished Floor Level
pared con
acabado final
wall finish
43,2
(17”)
629
(24,75”)
70
(2,8”)
337
(13,27”)
365
(14,4”)
158,7 (6,25”)
ó / or
196,8 (7,75)
229
(9,0”)
191
(7,5”) 394 (15,5”)*
ó / or
431 (17”)*
NOTA: Se recomienda instalar el soporte S-TZF-P con l taza TZF NAO I PARED para lograr las dimensiones que se muestran. NOTE: It is recommended to install the S-TZF-P
l cup holder with TZF NAO I PARED to achieve the dimensions shown.
Instalación del Soporte en la Parte Posterior del Muro / Installation Support the Back Wall
Coloque la plantilla como se muestra y marque los barrenos para después perforar el muro y el piso. / Place the template as shown and mark the
holes and then drill the wall and floor.
3
Muro de concreto
Concrete wall
acabado final
wall finish
adhesivo
adhesive
muro
wall
acabado final
wall finish
adhesivo
adhesive
tablaroca
drywall
Muro falso (tablaroca)
drywall (sheetrock)
2
Para barrenar el muro o la tablaroca, utilice una broca (no incluida) de Ø 2” y una broca (no incluida) de Ø 7/8” para barrenar el piso. / To drill the wall or drywall, use a drill bit (not
included) Ø 2” and a drill (not included) Ø 7/8" bore the floor.
1Vista Lateral
Side View
292
(11,5”)
229
(9,0”)
432
(17,0”)
158,7
(6,25”)
432
(17,0”)
196,8
(7,75”)
38
(1,5”)
457,2
(18,0”)
121
(4,8”)
190
(7,5”)
146
(5,75”)
Vista Frontal
Front View
*Altura recomendada
*Recommended height
NPT
114,5
(4,5”)
4Trace y marque la media distancia
entre los barrenos inferiores, para
posteriormente hacer un barreno de Ø
4 ½ en el muro o tablaroca. / Trace
and mark the average distance
between the lower holes, and later
make a Ø 4 ½ hole in the wall or drywall
.
191
(7,5”)
(Nivel de Piso Terminado)
(Finished Floor Level)
5Inserte los taquetes expansivos
(incluidos) en el piso. / Insert fastener
anchors (included) on the floor.
taquete
expansivo
expansion
plugs
6Arme el soporte, de acuerdo a la altura
requerida asegurando la brida en la
parte interna de los soportes laterales y
enroscando los espárragos (incluidos)
apretando firmemente las tuercas y
tornillos (incluidos). / Assemble the
stand, position the flange on the inside
of the side supports and screwing the
studs (included) by tightening the nuts
(included).
8 Conecte los aditamentos (no incluidos) para acompletar la
instalación. / Connect the hardware (not included) for acomplete
installation.
7Coloque el soporte en posición, fije insertando las rondanas
(incluidas) y enroscando los tornillos (incluidos). Verifique la
rigidez del soporte apretando firmemente los tornillos y tuercas. /
Place the bracket in place, set by inserting washers (included)
and threading the screws (included). Check the rigidity of the
support tightening the bolts and nuts.
9Presente el tubo de PVC (incluido) y verifique que sobresalga 10
mm a partir del acabado final (corte el tubo si es necesario). Al
cumplir con la medida coloque adhesivo e insértelo en la brida.
Los espárragos deben sobresalir 6,5 cm a partir del acabado final
(corte los espárragos si es nesecario). / Present PVC tube
(included) and verify that protrudes 10 mm from the end finish (cut
the pipe if necessary). Adhering to the place as adhesive and insert
into the flange. The studs should protrude 6.5 cm from the end (cut
the asparagus if nesecario) finish.
10 Inserte las tuercas (incluidas), asegurándose que las rondanas
queden a paño del acabado final. / Insert nuts (included), making
sure the washers are flush finishing.
tubo de PVC
PVC pipe
pared con
acabado final
wall finish
rondana
washer
tuerca
nut
acabado final
wall finish
rondana
washer
acabado final
wall finish
3
Ø 4 ½”
10 mm
(0,3”)
6,5 cm
(2,6”)
espárrago
sparagus
tuerca
nut
tuerca
nut
soporte lateral
side support
brida
flange
½”
tornillo
screw
rondana
washer
tornillo
screw
tornillo
screw
brida
flange
aditamentos
no incluidos
attachments
not included
4
01 55 53 33 94 00
Ext. 5804, 5805 y 5806 (0133) 36 19 01 13
Comunícate:
Participa en nuestros
cursos gratuitos
de capacitación.
(0181) 83 33 57 67
(0181) 83 33 61 78
In Guadalajara:
Contact:
Enter our free
training courses.
In Monterrey:
En la Ciudad de México:
In Mexico City:
En Monterrey:
En Guadalajara:
Recomendaciones de Limpieza / Cleaning Recommendations
Posibles Causas y Soluciones / Possible Causes and Solutions
Problema / Problem Causa / Cause Solución / Solution
Existe filtración en la base
de la taza. / There
filtration toilet base.
No acopló correctamente la taza en el cuello flexible. /
No toilet properly coupled to the flexible neck.
Acople correctamente la taza en cuello flexible. / Attach the
toilet properly in the flexible neck.
La taza se mueve. /
Toilete Moves.
No está correctamente apretado el soporte. / Is not
properly tightened the bracket.
Apriete firmemente las uniones del soporte así como la fijación
al piso. / Tighten unions support and attachment to the floor.
11 Inserte los bujes para espárragos
(incluidos y el cuello flexible para
sanitario. / Insert stud bushings
(including sanitary and flexible neck.
12 Inserte la taza en los espárragos, coloque
el buje (incluido) y la rondana con cuerda.
Fije apretando alternadamente las
tuercas (incluidas), finalmente enrosque
las cubiertas (incluidas). / Insert the cup
asparagus, place the bushing (included)
and lock with rope. Set alternately
tightening the screws (included) finally
screw covers (included).
13
cuello flexible
flexible neck
taza
toilet
pared con
acabado
final
wall finish
espárrago
stud bolt
buje
hub
tuerca
nut
rondana
washer
cubierta
cover
Aplique silicón antihongos en la
periferia de la taza. / Apply antifungal
silicone on the periphery of the toilet.
HELVEX, S. A. DE C. V. Calzada Coltongo # 293, Col. Industrial Vallejo, Del. Azcapotzalco, C. P. 02300, Ciudad de México.
Es muy importante seguir las siguientes instrucciones para conservar los
acabados de los productos HELVEX, con brillo y en perfecto estado:
1. Utilice únicamente agua y un paño limpio.
2. No utilice fibras, polvos, abrasivos, ni productos químicos.
3. No utilice objetos punzo-cortantes para limpiar los acabados.
4. Se recomienda realizar la limpieza de su producto diariamente.
Visite nuestras páginas www.helvex.com.mx para México y www.helvex.com
para el mercado Internacional
It is very important to follow the instructions below to preserve HELVEX products
finishes, shiny and in perfect condition:
1. Use only water and a clean cloth.
2. Do not use fibers, powders, abrasives, or chemicals.
3. Do not use sharp objects to clean the finish.
4. It is recommended to clean your product daily.
Visit our pages www.helvex.com.mx for Mexico and www.helvex.com
for the International market.
Other Helvex Bathroom Fixture manuals

Helvex Premier II E-941 User manual

Helvex

Helvex Premier II E-941 User manual

Helvex E-710 User manual

Helvex

Helvex E-710 User manual

Helvex E-940 User manual

Helvex

Helvex E-940 User manual

Helvex B-305-S User manual

Helvex

Helvex B-305-S User manual

Helvex MG MOJAVE TDS2 User manual

Helvex

Helvex MG MOJAVE TDS2 User manual

Helvex RM-14 User manual

Helvex

Helvex RM-14 User manual

Helvex Maxima 20105 User manual

Helvex

Helvex Maxima 20105 User manual

Helvex TV-302 User manual

Helvex

Helvex TV-302 User manual

Helvex LV LUCERNA 1 User manual

Helvex

Helvex LV LUCERNA 1 User manual

Helvex Premier 15105 User manual

Helvex

Helvex Premier 15105 User manual

Helvex SS-1 User manual

Helvex

Helvex SS-1 User manual

Helvex 110-32 User manual

Helvex

Helvex 110-32 User manual

Helvex H-500 User manual

Helvex

Helvex H-500 User manual

Helvex Nuva 9104 User manual

Helvex

Helvex Nuva 9104 User manual

Helvex Vertika MR-1001 User manual

Helvex

Helvex Vertika MR-1001 User manual

Helvex H-500 User manual

Helvex

Helvex H-500 User manual

Helvex TV-201 User manual

Helvex

Helvex TV-201 User manual

Helvex UTR-038 User manual

Helvex

Helvex UTR-038 User manual

Helvex Vertika 16104 User manual

Helvex

Helvex Vertika 16104 User manual

Helvex PREMIER H3005-TR035-EB User manual

Helvex

Helvex PREMIER H3005-TR035-EB User manual

Helvex H-900 User manual

Helvex

Helvex H-900 User manual

Helvex Explora HOT-105-45 User manual

Helvex

Helvex Explora HOT-105-45 User manual

Helvex Clásica II 206 User manual

Helvex

Helvex Clásica II 206 User manual

Helvex UH-3301-WA User manual

Helvex

Helvex UH-3301-WA User manual

Popular Bathroom Fixture manuals by other brands

NRS M40338 User instructions

NRS

NRS M40338 User instructions

Spectrum Brands Pfister Courant F-048-CO Quick installation guide

Spectrum Brands

Spectrum Brands Pfister Courant F-048-CO Quick installation guide

Bobrick B-822 G Series Instruction for installation and maintenance

Bobrick

Bobrick B-822 G Series Instruction for installation and maintenance

Rubi VISO RAF21XDK Installation

Rubi

Rubi VISO RAF21XDK Installation

Sanela 92021 Instructions for use

Sanela

Sanela 92021 Instructions for use

BELLOSTA Pascal 1010 Installation instruction

BELLOSTA

BELLOSTA Pascal 1010 Installation instruction

Tuscany 672-4150 installation instructions

Tuscany

Tuscany 672-4150 installation instructions

Grohe New Tempesta Cosmopolitan Series quick start guide

Grohe

Grohe New Tempesta Cosmopolitan Series quick start guide

comfortel stella 2423 owner's manual

comfortel

comfortel stella 2423 owner's manual

ThermaGlass Modena MOD-6036-80 Quick start quide

ThermaGlass

ThermaGlass Modena MOD-6036-80 Quick start quide

IFO 6861 Operating and maintenance instruction

IFO

IFO 6861 Operating and maintenance instruction

Sensea DOCCE 3276200157586 Assembly, Use, Maintenance Manual

Sensea

Sensea DOCCE 3276200157586 Assembly, Use, Maintenance Manual

CIFIAL 3215002 Assembly and instruction manual

CIFIAL

CIFIAL 3215002 Assembly and instruction manual

Bossini MANHATTAN L00890 installation instructions

Bossini

Bossini MANHATTAN L00890 installation instructions

Signature Hardware PROVINCETOWN 949098 quick start guide

Signature Hardware

Signature Hardware PROVINCETOWN 949098 quick start guide

AmazonBasics B07RS44KQN Welcome guide

AmazonBasics

AmazonBasics B07RS44KQN Welcome guide

TORTU TOX117-S installation guide

TORTU

TORTU TOX117-S installation guide

THG PARIS G00.219T installation instructions

THG PARIS

THG PARIS G00.219T installation instructions

manuals.online logo
manuals.online logoBrands
  • About & Mission
  • Contact us
  • Privacy Policy
  • Terms and Conditions

Copyright 2025 Manuals.Online. All Rights Reserved.