manuals.online logo
Brands
  1. Home
  2. •
  3. Brands
  4. •
  5. hygena
  6. •
  7. Indoor Furnishing
  8. •
  9. hygena 249/8201 User manual

hygena 249/8201 User manual

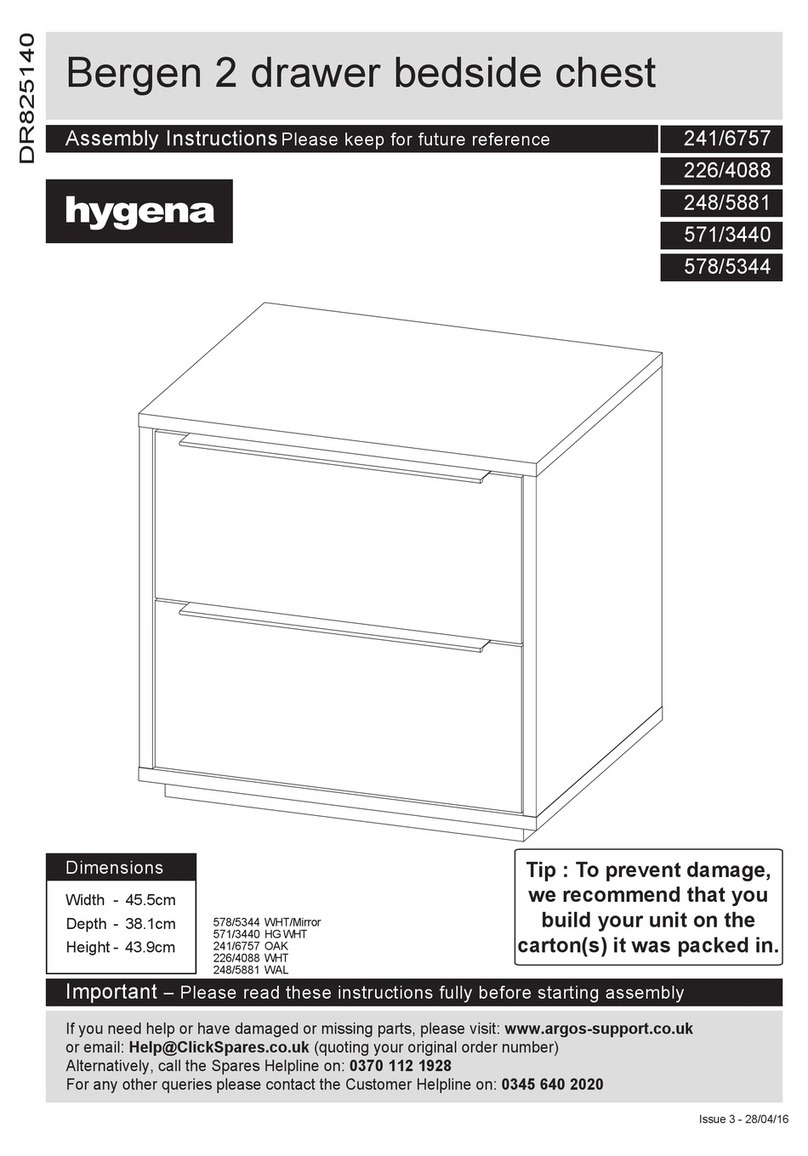
Bergen 2 drawer internal chest 150/180
Dimensions
Width - 64cm
Depth - 38.7cm
Height - 40.1cm
Assembly Instructions- Please keep for future reference 249/8201
Tip : To prevent damage,
we recommend that you
build your unit on the
carton(s) it was packed in.
Important–Please read these instructions fully before starting assembly
Alternatively, call the Spares Helpline on: 0370 112 1928
For any other queries please contact the Customer Helpline on: 0345 640 2020
If you need help or have damaged or missing parts, please visit: www.argos-support.co.uk
or email: [email protected] (quoting your original order number)
DR8250220
Issue 4 - 11/01/16
2
Safety and Care Advice
Important –Please read these instructions fully before starting assembly
Note: if required the next
page can be cut out and used
as reference throughout the
assembly. Keep this page with
these instructions for future
reference.
• Check you have all the
components and tools listed on
the following pages.
plastic bags and separate them
into their groups.
• Keep children and animals
away from the work area, small
parts could choke if swallowed.
• Make sure you have enough
space to layout the parts before
starting.
• During assembly do not stand
or put weight on the product,
this could cause damage.
• Assemble the item as close
room) as possible.
• Assemble on a soft level
surface to avoid damaging the
• Parts of the assembly will be
easier with 2 people.
• To reduce
the likelihood of
damaging your
product please
ensure that your
power drill is set on a low torque
setting.
• Only clean using a damp cloth
and mild detergent, do no use
bleach or abrasive cleaners.
• From time to time check that
there are no loose screws on
this unit.
• This product should not be
discarded with household waste.
Take to your local authority
waste disposal centre.
Care and maintenance
Skin contact: Remove
contamination by washing with
soap and water. This procedure
should also be followed prior to
eating and drinking.
Eye contact: Rinse immediately
with clean water for 15 minutes
and seek medical advice.
If swallowed: Seek medical
advice immediately.
Glue safety - Take care when using glue, please follow the advice below
• Assemble all parts and bolts
loosely during assembly, only
once the product is complete
should you fully tighten the bolts
• Regularly check and ensure
tightend properly.
Handy Hints
3
Left side
(38.6 x 37cm)
1
P2878
Right side
(38.6 x 37cm)
2
P2877
Top
(64 x 38.7cm)
3
P1764
Drawerfront x 2
(62 x 15.7cm)
4
P4468
Drawer Back x 2
(57.3 x 12cm)
6
LA163509
Plinth
(60.7 x 6cm)
5
P7036
Left Drawer Side x 2
(35 x 12cm)
7
LA163709
Right Drawer Side x 2
(35 x 12cm)
8
LA163809
Drawer Base x 2
(58.3 x 34.3cm)
10
BO353009
Folded Back
(61.3 x 39.3cm)
9
BO340933
For damaged or missing parts, please visit:
www.argos-support.co.uk or email: [email protected]
Please check you have all the panels listed below
Components - Panels
Runner x 4
4
Ruler - Use this ruler to help correctly identify the screws
0 5 10 15 20 25 30 35 40 45 50 55 60 65 70 75 80 85 90 95 100 110 115 120 125 130 135 140 145 150 155 160 165 170
105
The screws length is measured from the head to the point (30mm screw shown).
Tools required
Scissors
Setsquare
Locking screw x 8 (5x24mm)
BFK1011 CFK1010
A
E
Nail x 30
FFK1515
D
Wood dowel x 4 (8x30mm)
H
FK1411
Large locking nut x 4 (15x12mm) Small locking nut x 4 (12x10mm)
I
FK1012
15mm 12mm
G
K
Glue x 1
JFA1510
Nail holder x 1
Furniture glide x 4
FK1415
FK1233 PM16951
FK1301
10mm Fixing screw drawer x 8
9mm Screw x 4
FK1981
Drawerbase support x 8
FK1250
L
Phillips screwdriver
(medium & large)
Flatblade screwdriver
(medium)
Small
hammer
Ruler/tape
measure
0 10 20 30 40 50 60 70 80 90 100 110 120 130 140 150
0 1 2 3 4 5 6
Eye protection
(when using a
hammer or drill)
1/1
Please check you have all the fittings listed below
For damaged or missing parts, please visit:
www.argos-support.co.uk or email: [email protected]
Components - Fittings
Note: The quantities below are the correct amount to complete the assembly. In some cases more fittings
may be supplied than are required.
2x
Assembly Instructions
5
Step 1
Prepare the locking
screws
a:
Screw 2 locking srewsB
into the holes shown on
the back of each drawer
front 4.
Note: Tighten metal
dowels up fully against the
panels.
b: Prepare the drawer
sides
Insert a small locking nut
Cinto the hole on left
drawer side 7and right
drawerside8.
Make sure the ‘arrow’ on
Cis pointing towards the
hole in the edge of 7
and 8.
Put drop of glue Jin the
6 holes of drawersides
7and 8before sliding
them onto the dowels of
drawerback 6. Slide
drawerbase 0in the
grooves of the drawer-unit.
c: Turn the drawer wrap
assembly over and push
onto the drawer front 4.
Use a phillips or flatblade
screwdriver, that is a good
fit, to turn 24mm locking nut
Cas far as it will go
- more than 1/2 turn.
4
C
C
7
8
10
J
6
4
C
a:
b:
2x
2x
c:
2x
I
I
I
I
6
Assembly Instructions
Step 1 continued
finishing the drawers
d: Turn over drawer and
slide Drawerbase supports
Iin corner as shown and
fix them, using the attached
screws .
x: xx
b: Slide top of runners
back.
Fix through 3rd hole of
runner Land pre-drilled
hole of left side 1using
10mm fixing screw drawer
D.
Repeat a and b on right
sidepanel 2
d:
a:
b:
A
A
D
D
L
L
1
L
D
1
L
L
D
D
Attaching runners
Step 2
a: Slide top of runners L
foreward and fix on left side
1as shown using 10mm
fixing screw drawer D.
Insert 2 Large locking nuts
Ainto left side 1
where shown.
R
E
1
Finished
front edge
Finished
front edge
1
7
Assembly Instructions
Step 3
Insert fittings on top
Step 4
Insert fittings on plinth
Step 5
Assemble the chest
a: Put drop of glue J
into side-holes 1and2
Slide the sides onto the
plinth 5.
Screw 24mm locking
screws Binto top 3.
Note: Insert 24mm locking
screw Bas far as shown.
Do not over tighten.
B
3
3
B
B
B
B
Put drop of glue Jin the 4
holes of plinth 5.
Then put dowels Einto
the holes of plinth 5.
J
a:
J
E
E
5
E
E
5
1
2
Assembly Instructions
Step 5 continued
b: Attaching top
Position top 3onto left
1and right 2side .
Use a screwdriver to turn
locking nuts Aclockwise
to lock.
c: Fitting back panel
Attach foldy back 9to
back of the chest using
nails Fand hammer.
Use nailholder Hto hold
nails Fvertical and at the
correct distance as you
secure the foldy back 9.
Nails Fshould be spaced
about 150mm apart.
Place the Furniture glides
Kstrategically as shown
underneath the sides 1
and 2with a
small hammer.
M
A
A
1
2
3
Important:
Chest MUST
be ‘square’
when back is
attached.
H
F
F
9
K
K
K
K
b:
Finished
front edge
Unfinished
back edge
c:
8
Assembly Instructions
Assembly is complete.
If you need help or have damaged or missing parts, call the Customer Helpline:
Argos 03456 400 800
Step 6
a: Pull runners Lout.
Slide drawers onto runners
so they butt up against
back of the drawerfront 4.
b: Fix through drawersides
7and 8into runners L
using 9mm screws G.
c: Finish.
b:
a:
c:
9
Inserting drawers
1st small
threaded hole
C

Other hygena Indoor Furnishing manuals

hygena 1664672 User manual

hygena

hygena 1664672 User manual

hygena Valencia 656/5800 User manual

hygena

hygena Valencia 656/5800 User manual

hygena Valencia User manual

hygena

hygena Valencia User manual

hygena Valencia 656/5776 User manual

hygena

hygena Valencia 656/5776 User manual

hygena Berkeley User manual

hygena

hygena Berkeley User manual

hygena 357/0537 User manual

hygena

hygena 357/0537 User manual

hygena 459/1553 User manual

hygena

hygena 459/1553 User manual

hygena 6166560 User manual

hygena

hygena 6166560 User manual

hygena Luna TV Unit 464/9883 Datasheet

hygena

hygena Luna TV Unit 464/9883 Datasheet

hygena Amparo 600/1443 User manual

hygena

hygena Amparo 600/1443 User manual

hygena Berkeley 411/9681 User manual

hygena

hygena Berkeley 411/9681 User manual

hygena Matrix Large Sideboard User manual

hygena

hygena Matrix Large Sideboard User manual

hygena Amparo 633/3290 User manual

hygena

hygena Amparo 633/3290 User manual

hygena 462/5670 User manual

hygena

hygena 462/5670 User manual

hygena Tallboy 833/4448 User manual

hygena

hygena Tallboy 833/4448 User manual

hygena Bergen SHELF PACK User manual

hygena

hygena Bergen SHELF PACK User manual

hygena Bergen 557/2911 User manual

hygena

hygena Bergen 557/2911 User manual

hygena Monza User manual

hygena

hygena Monza User manual

hygena Amparo 600/1443 User manual

hygena

hygena Amparo 600/1443 User manual

hygena Luna Nest Of Tables User manual

hygena

hygena Luna Nest Of Tables User manual

hygena Amparo 633/3252 User manual

hygena

hygena Amparo 633/3252 User manual

hygena Monza User manual

hygena

hygena Monza User manual

hygena Valencia 656/5824 User manual

hygena

hygena Valencia 656/5824 User manual

hygena 496/5110 User manual

hygena

hygena 496/5110 User manual

Popular Indoor Furnishing manuals by other brands

BROSA OSTRO Assembly guide

BROSA

BROSA OSTRO Assembly guide

SPIELTEK 100 Series user manual

SPIELTEK

SPIELTEK 100 Series user manual

Eurotech CONC2.0DSWB-BLK Assembly instructions

Eurotech

Eurotech CONC2.0DSWB-BLK Assembly instructions

FURNITUREBOX BELGRAVIA CHAIR Assembly guide

FURNITUREBOX

FURNITUREBOX BELGRAVIA CHAIR Assembly guide

VIPACK ERIK ERBE9014 Assembly instructions

VIPACK

VIPACK ERIK ERBE9014 Assembly instructions

Flokk HAG Creed Communication Assembly guide and User Guide

Flokk

Flokk HAG Creed Communication Assembly guide and User Guide

FourStarGroup 11223134C manual

FourStarGroup

FourStarGroup 11223134C manual

Costway CB10475 manual

Costway

Costway CB10475 manual

Blanco BLANCOMERIDIAN 157-135 Specification sheet

Blanco

Blanco BLANCOMERIDIAN 157-135 Specification sheet

DIR ADONIS DOUBLE 6202-2G instruction manual

DIR

DIR ADONIS DOUBLE 6202-2G instruction manual

Courtyard Creations KTS127W-WM Assembly instructions

Courtyard Creations

Courtyard Creations KTS127W-WM Assembly instructions

American Standard LEXINGTON 2037.100 installation instructions

American Standard

American Standard LEXINGTON 2037.100 installation instructions

Linon SPC-20372 Assembly instructions

Linon

Linon SPC-20372 Assembly instructions

StudioDesk BEAT 2.0 Series Assembly manual

StudioDesk

StudioDesk BEAT 2.0 Series Assembly manual

RST Benson OP-AWCLBOTTO-BEN Assembly instructions

RST

RST Benson OP-AWCLBOTTO-BEN Assembly instructions

siena GARDEN 380.867 Assembly instruction

siena GARDEN

siena GARDEN 380.867 Assembly instruction

Dedeman NUBIA NO2F Assembling Instruction

Dedeman

Dedeman NUBIA NO2F Assembling Instruction

Tenzo 7706 Assembly instruction

Tenzo

Tenzo 7706 Assembly instruction

manuals.online logo
manuals.online logoBrands
  • About & Mission
  • Contact us
  • Privacy Policy
  • Terms and Conditions

Copyright 2025 Manuals.Online. All Rights Reserved.