manuals.online logo
Brands
  1. Home
  2. •
  3. Brands
  4. •
  5. iDataLink
  6. •
  7. Automobile Accessories
  8. •
  9. iDataLink Maestro RR User manual

iDataLink Maestro RR User manual

NOTICE: Automotive Data Solutions Inc. (ADS) recommends having this installation performed by a certified technician. Logos and trademarks used here in
are the properties of their respective owners.
WARNING
Pressing the printer icon or “quick printing” this document will print
all of the guides in this compilation.
Open the Bookmarks menu and find your vehicle OR scroll
down until you find the install guide for your vehicle.
Print only the pages for your vehicle using the advanced
options in the Print menu.
Install your Maestro RR according to the guide for your vehicle.
HOW TO USE THIS INSTALL GUIDE
1
2
3
SELECT VEHICLE
PRINT PAGES NEEDED
ELECTRONICS
Click here for:
Radar Installation Guides
2014-2017
Jeep Grand Cherokee
INSTALL GUIDE
RETAINS STEERING WHEEL CONTROLS, FACTORY AMPLIFIER, AND MORE!
NOTICE: Automotive Data Solutions Inc. (ADS) recommends having this installation performed by a certified technician. Logos and trademarks used here
in are the properties of their respective owners.
PRODUCTS REQUIRED
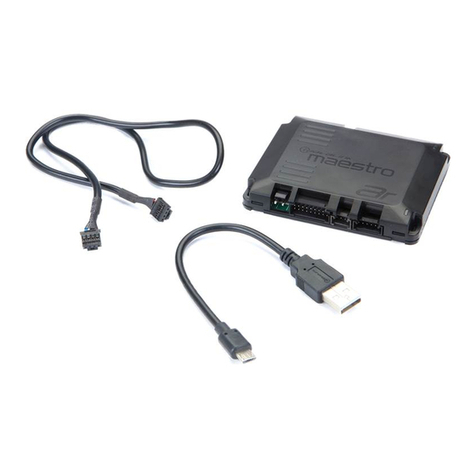
iDatalink Maestro RR or RR2 Radio Replacement Interface
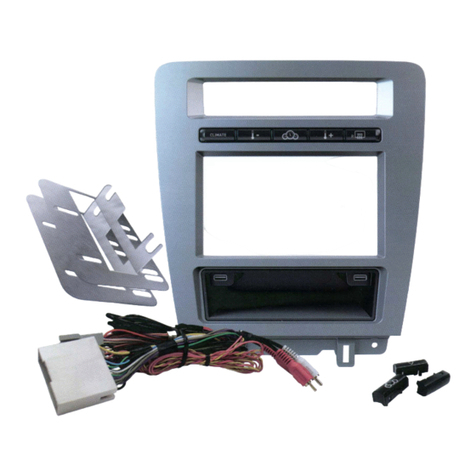
iDatalink Maestro JGC1 Dash Kit
iDatalink compatible radio
PROGRAMMED FIRMWARE
ADS-RR(SR)-CHR03-DS
ADDITIONAL RESOURCES
Maestro RR2 Programmable Outputs Guide
OR
OPTIONAL ACCESSORIES
ACC-NAV1
ACC-NAV2
HRN-ANT-SAT1
ACC-SP1
ADS-RR(SR)-JGC1-DS-IG-EN maestro.idatalink.com
Jeep Grand Cherokee 2014-2017
Automotive Data Solutions Inc. © 2020 2
WELCOME
NEED HELP?
Congratulations on the purchase
of your iDatalink Maestro RR Radio
replacement solution. You are
now a few simple steps away from
enjoying your new car radio with
enhanced features.
Before starting your installation,
please ensure that your iDatalink
Maestro module is programmed
with the correct firmware for your
vehicle and that you carefully review
the install guide.
Please note that Maestro RR will
only retain functionalities that
were originally available in the
vehicle.
TABLE OF CONTENTS
Installation Instructions 3
Wiring Diagram 6
Troubleshooting Table 7
1 866 427-2999
maestro.idatalink.com/support
www.12voltdata.com/forum
[email protected]
ADS-RR(SR)-JGC1-DS-IG-EN maestro.idatalink.com
Jeep Grand Cherokee 2014-2017
Automotive Data Solutions Inc. © 2020 3
Fig. 1.3
Fig. 1.5
Fig. 1.4
Fig. 1.6
Fig. 1.1 Fig. 1.2
Fig. 1.9
Fig. 1.11
Fig. 1.10
Fig. 1.7 Fig. 1.8
INSTALLATION INSTRUCTIONS
1
DASH DISASSEMBLY
1. Using a panel tool, remove the radio bezel from the dash.
Disconnect the wiring harness on the back of the OEM
panel. (Fig. 1.1)
2. Remove (4) phillips screws holding the OEM radio in the
dash. Disconnect the radio and remove it. (Fig. 1.2)
3. Remove the (3) 7mm bolts that hold the module to the
backof the radio cavity. In some cases, in order for the new
radio to fit, this module must be relocated. (Fig. 1.3)
4. Remove the 3 knobs on the front of the bezel by pulling
straight upward. Take care not to lose the small parts
inside the knobs. Remove the vents from the OEM bezel by
gently prying the tabs; set aside. (Fig. 1.4)
5. Remove the (8) torx screws securing the back panel of the
climate controls. Remove the back panel. (Fig. 1.5)
6. Unclip the factory climate circuit board and set aside.
Remove the (14) remaining torx screws that secure the
factory radio buttons. Remove the buttons from the panel.
(Fig. 1.6)
DASH KIT ASSEMBLY
7. If your vehicle has silver trim, remove the gold trim and
attach the silver trim to the JGC1 with the (18) T8 torx
screws and (17) phillips screws.
8. Choose the climate control trim piece from the JGC1 kit
that lines up with your OEM climate buttons. Install the
trim into the main bezel using (7) torx screws. (Fig. 1.7)
9. Reinstall the circuit board, making sure it clips back
in properly. Secure the board with the (8) supplied torx
screws. Reinstall the knobs on the front of the climate
circuit board. (Fig. 1.8)
10. Locate the back cover in the JGC1 kit that fits your climate
controls then secure it with (4) torx screws (Fig. 1.9)
11. Install the OEM vents into the JGC1.
12. Attach the supplied metal brackets to the plastic trim ring,
using (2) phillips screws on each side, as shown. (Fig. 1.10)
13. Snap the trim ring and metal brackets to the back of the
JGC1 bezel. Unbox the aftermarket radio, line up the radio
to the desired depth, attach the radio to the metal brackets,
and then remove the radio and trim ring from the bezel. Set
aside. (Fig. 1.11)
ADS-RR(SR)-JGC1-DS-IG-EN maestro.idatalink.com
Jeep Grand Cherokee 2014-2017
Automotive Data Solutions Inc. © 2020 4
Fig. 2.2
Fig. 2.3
Fig. 2.4Fig. 2.0
Fig. 2.1
INSTALLATION INSTRUCTIONS
1
MEDIA PORT REPLACEMENT
1. Remove the torx set-screw securing the shifter. Using a
panel tool, pry the center console/shifter bezel upward.
Disconnect and remove. (Fig. 2.0)
(Center console type 2) Using a pry tool, gently remove the
top section of the shifter then remove the single torx screw
securing it in place. (Fig. 2.1)
2. Remove (4) 7mm screws securing the bottom of the pocket,
and (2) screws at the top. Unplug the connector at the top
of the pocket. (Fig. 2.2)
3. Pull the tray. Unplug the 4 connectors from the back of the
media hub (behind the tray) and remove the tray. (Fig. 2.3)
4. Remove (4) torx screws from the media hub and remove it.
Replace the media hub with the usb ports supplied with the
JGC1. Reasemble in reverse order. (Fig. 2.4)
ADS-RR(SR)-JGC1-DS-IG-EN maestro.idatalink.com
Jeep Grand Cherokee 2014-2017
Automotive Data Solutions Inc. © 2020 5
INSTALLATION INSTRUCTIONS
MAKE CONNECTIONS (refer to wiring diagram)
STEP 1
• Locate aftermarket radio’s main harness.
• Connect the wires shown on the next page from
aftermarket radio main harness to the JGC1 T-harness and
match the wire functions.
STEP 2
• Determine if the vehicle has a factory amplifier. Look for
badges on the door panels and dash that indicate the
presence of an amplifier (ex: Alpine).
If the vehicle DOES NOT have a factory amplifier:
• Plug the female GREEN connector to the male GREEN
connector of your JGC1 T-harness.
• Plug the female WHITE connector to the male WHITE
connector of your JGC1 T-harness.
If the vehicle DOES have a factory amplifier:
• Plug the female GREEN connector to the male WHITE
connector of your JGC1 T-harness.
• Plug the female WHITE connector to the male GREEN
connector of your JGC1 T-harness.
STEP 3
• Connect the factory harness to the JGC1 T-harness.
STEP 4
• Plug the aftermarket radio harnesses into the aftermarket
radio.
• Plug the backup camera RCA into the aftermarket radio (if
applicable).
• Plug the RSE cable into the aftermarket radio (AV in).
• Plug the Data cable to the data port of the aftermarket
radio.
• Insert the Audio cable into the iDatalink 3.5 mm audio jack
of the aftermarket radio.
NOTE:
Note: When using a Pioneer radio, please ensure that
there is nothing plugged into the W/R port of the radio.
1
STEP 5
• Connect all the harnesses to the Maestro RR module then
test your installation.
• If the vehicle is equipped with OEM parking assist, lane
departure, or other safety systems, the ADS-SP1 is
required: Plug the ADS-SP1 the Maestro RR.
If you are not using this speaker, the radio will mute when
the parking assist is active. If you are using this speaker,
the parking assist chimes will play through the external
speaker and the radio will not mute unless the settings are
changed in the radio.
STEP 6
• Install the aftermarket radio and JGC1 kit into the dash,
then test your installation.
ADS-RR(SR)-JGC1-DS-IG-EN maestro.idatalink.com
Jeep Grand Cherokee 2014-2017
Automotive Data Solutions Inc. © 2020 6
1
BACKUP CAMBACKUP CAM
RSERSE
WIRING DIAGRAM
STEP 1
STEP 2
STEP 3
STEP 4
STEP 5
MAESTRO RR MODULE
WHITE - LF SPEAKER (+)
WHITE/BLACK - LF SPEAKER (-)
GRAY - RF SPEAKER (+)
GRAY/BLACK - RF SPEAKER (-)
GREEN - LR SPEAKER (+)
GREEN/BLACK - LR SPEAKER (-)
PURPLE/BLACK - RR SPEAKER (-)
YELLOW - 12V (+)
BLACK - GROUND
RED - ACCESSORY (+)
GREEN WHITE
WHITE GREEN
CONNECTIONS WITH AMP
CONNECTIONS WITHOUT AMP
ORANGE - ILLUMINATION (+)
PURPLE/WHITE - REVERSE LIGHT (+)
LTGREEN - E-BRAKE (-)
BLUE/WHITE - AMP. TURN ON (+)
MAIN
HARNESS
DATA
CABLE
AUDIO
CABLE
PURPLE - RR SPEAKER (+)
CONNECT TO
AFTERMARKET RADIO
DUR1 T-HARNESS
FACTORY RADIO
HARNESS WIRES FROM
VEHICLE
PINK - VEHICLE SPEED
YELLOW/BLACK - FOOT BRAKE
GREEN GREEN
WHITEWHITE
BLACK
RCA CABLES
SPEAKER*
*OPTIONAL
ACCESSORY
READ NOTE IN
INSTALLATION
INSTRUCTIONS
SECTION
AV IN
STEERING WHEEL
CONTROL CABLE
NOT REQUIRED
STEP 6
BLACK
ADS-RR(SR)-JGC1-DS-IG-EN maestro.idatalink.com
Jeep Grand Cherokee 2014-2017
Automotive Data Solutions Inc. © 2020 7
TROUBLESHOOTING TABLE
PROBLEM SOLUTION
The radio is not turning on. Ensure the 2-pin black connectors on the JGC1 harness are connected as
shown in step 2 of the guide.
Gauges do not work, radio shows OBD2 Error 1 or Error 2. Ensure the 2-pin black connectors on the JGC1 harness are connected as
shown in step 2 of the guide.
Reset the RR.
The light on the Maestro is blinking RED TWICE. Ensure the 4-pin data cable is connected between the radio and the RR, and
that it is plugged into the black port on the Maestro RR. The red and blue
ports on the RR should be empty.
Make sure the correct radio model and serial number were entered during
the flash. Verify the radio’s serial number entered during the flash matches
what is listed on the radio screen. This can be found in the settings of the
radio, listed as Device Id, Device Number, or Serial Number.
The light on the Maestro is flashing RED ONCE. There is no firmware on the module; flash the RR module.
MAESTRO RR RESET PROCEDURE:
Turn the key to the OFF position, then disconnect all connectors from the module.
Press and hold the module’s programming button and connect all the connectors back to the module. Wait, the module’s LED will flash RED rapidly (this may
take up to 10 seconds).
Release the programming button. Wait, the LED will turn solid GREEN for 2 seconds to show the reset was successful.
TECHNICAL ASSISTANCE
Phone: 1-866-427-2999
Email: maestr[email protected]
Web: maestro.idatalink.com/support add www.12voltdata.com/forum/
IMPORTANT: To ensure proper operation, the aftermarket radio needs to have the latest firmware from the manufacturer. Please visit the radio
manufacturer’s website and look for any updates pertaining to your radio.
ELECTRONICS
Click here for:
Radar Installation Guides
2018-2020
Jeep Grand Cherokee
INSTALL GUIDE
RETAINS STEERING WHEEL CONTROLS, FACTORY AMPLIFIER, AND MORE!
NOTICE: Automotive Data Solutions Inc. (ADS) recommends having this installation performed by a certified technician. Logos and trademarks used here
in are the properties of their respective owners.
PRODUCTS REQUIRED
iDatalink Maestro RR or RR2 Radio Replacement Interface
iDatalink Maestro JGC1 Dash Kit
iDatalink compatible radio
PROGRAMMED FIRMWARE
ADS-RR(SR)-CHR03-DS
ADDITIONAL RESOURCES
Maestro RR2 Programmable Outputs Guide
OR
OPTIONAL ACCESSORIES
ACC-NAV1
ACC-NAV2
HRN-ANT-SAT1
ACC-SP1
ADS-RR(SR)-JGC1-DS-IG-EN maestro.idatalink.com
Jeep Grand Cherokee 2018-2020
Automotive Data Solutions Inc. © 2020 2
WELCOME
NEED HELP?
Congratulations on the purchase
of your iDatalink Maestro RR Radio
replacement solution. You are
now a few simple steps away from
enjoying your new car radio with
enhanced features.
Before starting your installation,
please ensure that your iDatalink
Maestro module is programmed
with the correct firmware for your
vehicle and that you carefully review
the install guide.
Please note that Maestro RR will
only retain functionalities that
were originally available in the
vehicle.
TABLE OF CONTENTS
Installation Instructions 3
Wiring Diagram 6
Troubleshooting Table 7
1 866 427-2999
maestro.idatalink.com/support
www.12voltdata.com/forum
[email protected]
ADS-RR(SR)-JGC1-DS-IG-EN maestro.idatalink.com
Jeep Grand Cherokee 2018-2020
Automotive Data Solutions Inc. © 2020 3
Fig. 1.3
Fig. 1.5
Fig. 1.4
Fig. 1.6
Fig. 1.1 Fig. 1.2
Fig. 1.9
Fig. 1.11
Fig. 1.10
Fig. 1.7 Fig. 1.8
INSTALLATION INSTRUCTIONS
DASH DISASSEMBLY
1. Using a panel tool, remove the radio bezel from the dash.
Disconnect the wiring harness on the back of the OEM
panel. (Fig. 1.1)
2. Remove (4) phillips screws holding the OEM radio in the
dash. Disconnect the radio and remove it. (Fig. 1.2)
3. Remove the (3) 7mm bolts that hold the module to the
backof the radio cavity. In some cases, in order for the new
radio to fit, this module must be relocated. (Fig. 1.3)
4. Remove the 3 knobs on the front of the bezel by pulling
straight upward. Take care not to lose the small parts
inside the knobs. Remove the vents from the OEM bezel by
gently prying the tabs; set aside. (Fig. 1.4)
5. Remove the (8) torx screws securing the back panel of the
climate controls. Remove the back panel. (Fig. 1.5)
6. Unclip the factory climate circuit board and set aside.
Remove the (14) remaining torx screws that secure the
factory radio buttons. Remove the buttons from the panel.
(Fig. 1.6)
2
DASH KIT ASSEMBLY
7. If your vehicle has silver trim, remove the gold trim and
attach the silver trim to the JGC1 with the (18) T8 torx
screws and (17) phillips screws.
8. Choose the climate control trim piece from the JGC1 kit
that lines up with your OEM climate buttons. Install the
trim into the main bezel using (7) torx screws. (Fig. 1.7)
9. Reinstall the circuit board, making sure it clips back
in properly. Secure the board with the (8) supplied torx
screws. Reinstall the knobs on the front of the climate
circuit board. (Fig. 1.8)
10. Locate the back cover in the JGC1 kit that fits your climate
controls then secure it with (4) torx screws (Fig. 1.9)
11. Install the OEM vents into the JGC1.
12. Attach the supplied metal brackets to the plastic trim ring,
using (2) phillips screws on each side, as shown. (Fig. 1.10)
13. Snap the trim ring and metal brackets to the back of the
JGC1 bezel. Unbox the aftermarket radio, line up the radio
to the desired depth, attach the radio to the metal brackets,
and then remove the radio and trim ring from the bezel. Set
aside. (Fig. 1.11)
ADS-RR(SR)-JGC1-DS-IG-EN maestro.idatalink.com
Jeep Grand Cherokee 2018-2020
Automotive Data Solutions Inc. © 2020 4
Fig. 2.2
Fig. 2.3
Fig. 2.4Fig. 2.0
Fig. 2.1
INSTALLATION INSTRUCTIONS
MEDIA PORT REPLACEMENT
1. Remove the torx set-screw securing the shifter. Using a
panel tool, pry the center console/shifter bezel upward.
Disconnect and remove. (Fig. 2.0)
(Center console type 2) Using a pry tool, gently remove the
top section of the shifter then remove the single torx screw
securing it in place. (Fig. 2.1)
2. Remove (4) 7mm screws securing the bottom of the pocket,
and (2) screws at the top. Unplug the connector at the top
of the pocket. (Fig. 2.2)
3. Pull the tray. Unplug the 4 connectors from the back of the
media hub (behind the tray) and remove the tray. (Fig. 2.3)
4. Remove (4) torx screws from the media hub and remove it.
Replace the media hub with the usb ports supplied with the
JGC1. Reasemble in reverse order. (Fig. 2.4)
2
ADS-RR(SR)-JGC1-DS-IG-EN maestro.idatalink.com
Jeep Grand Cherokee 2018-2020
Automotive Data Solutions Inc. © 2020 5
INSTALLATION INSTRUCTIONS
MAKE CONNECTIONS (refer to wiring diagram)
STEP 1
• Locate aftermarket radio’s main harness.
• Connect the wires shown on the next page from
aftermarket radio main harness to the JGC1 T-harness and
match the wire functions.
STEP 2
• Determine if the vehicle has a factory amplifier. Look for
badges on the door panels and dash that indicate the
presence of an amplifier (ex: Alpine).
If the vehicle DOES NOT have a factory amplifier:
• Plug the female GREEN connector to the male GREEN
connector of your JGC1 T-harness.
• Plug the female WHITE connector to the male WHITE
connector of your JGC1 T-harness.
If the vehicle DOES have a factory amplifier:
• Plug the female GREEN connector to the male WHITE
connector of your JGC1 T-harness.
• Plug the female WHITE connector to the male GREEN
connector of your JGC1 T-harness.
STEP 3
• Connect the factory harness to the JGC1 T-harness.
STEP 4
• Connect the supplied harness to the JGC1 T-harness and
plug the white connectors into the vehicle’s can junction,
located in the driver’s side dash.
STEP 5
• Plug the aftermarket radio harnesses into the aftermarket
radio.
• Plug the backup camera RCA into the aftermarket radio (if
applicable).
• Plug the RSE cable into the aftermarket radio (AV in).
• Plug the Data cable to the data port of the aftermarket
radio.
2
• Insert the Audio cable into the iDatalink 3.5 mm audio jack
of the aftermarket radio.
NOTE:
Note: When using a Pioneer radio, please ensure that
there is nothing plugged into the W/R port of the radio.
STEP 6
• Connect all the harnesses to the Maestro RR module then
test your installation.
• If the vehicle is equipped with OEM parking assist, lane
departure, or other safety systems, the ADS-SP1 is
required: Plug the ADS-SP1 the Maestro RR.
If you are not using this speaker, the radio will mute when
the parking assist is active. If you are using this speaker,
the parking assist chimes will play through the external
speaker and the radio will not mute unless the settings are
changed in the radio.
STEP 7
• Install the aftermarket radio and JGC1 kit into the dash,
then test your installation.
ADS-RR(SR)-JGC1-DS-IG-EN maestro.idatalink.com
Jeep Grand Cherokee 2018-2020
Automotive Data Solutions Inc. © 2020 6
2
BACKUP CAMBACKUP CAM
RSERSE
WIRING DIAGRAM
STEP 1
STEP 2
STEP 3
STEP 5
STEP 6
MAESTRO RR MODULE
WHITE - LF SPEAKER (+)
WHITE/BLACK - LF SPEAKER (-)
GRAY - RF SPEAKER (+)
GRAY/BLACK - RF SPEAKER (-)
GREEN - LR SPEAKER (+)
GREEN/BLACK - LR SPEAKER (-)
PURPLE/BLACK - RR SPEAKER (-)
YELLOW - 12V (+)
BLACK - GROUND
RED - ACCESSORY (+)
GREEN WHITE
WHITE GREEN
CONNECTIONS WITH AMP
CONNECTIONS WITHOUT AMP
ORANGE - ILLUMINATION (+)
PURPLE/WHITE - REVERSE LIGHT (+)
LTGREEN - E-BRAKE (-)
BLUE/WHITE - AMP. TURN ON (+)
MAIN
HARNESS
DATA
CABLE
AUDIO
CABLE
PURPLE - RR SPEAKER (+)
CONNECT TO
AFTERMARKET RADIO
DUR1 T-HARNESS
FACTORY RADIO
HARNESS WIRES FROM
VEHICLE
PINK - VEHICLE SPEED
YELLOW/BLACK - FOOT BRAKE
YELLOW/BROWN
RED/BROWN
GREEN GREEN
WHITEWHITE
N.C.
BLACK
DRIVER SIDE DASH
BLACK
RCA CABLES
SPEAKER*
*OPTIONAL
ACCESSORY
READ NOTE IN
INSTALLATION
INSTRUCTIONS
SECTION
STEP 4 CAN JUNCTION CONNECTOR
STEERING WHEEL
CONTROL CABLE
NOT REQUIRED
STEP 7
AV IN
ADS-RR(SR)-JGC1-DS-IG-EN maestro.idatalink.com
Jeep Grand Cherokee 2018-2020
Automotive Data Solutions Inc. © 2020 7
TROUBLESHOOTING TABLE
PROBLEM SOLUTION
The radio is not turning on. Ensure the 2-pin black connectors on the JGC1 harness are connected as
shown in step 2 of the guide.
Gauges do not work, radio shows OBD2 Error 1 or Error 2. Ensure the 2-pin black connectors on the JGC1 harness are connected as
shown in step 2 of the guide.
Reset the RR.
The light on the Maestro is blinking RED TWICE. Ensure the 4-pin data cable is connected between the radio and the RR, and
that it is plugged into the black port on the Maestro RR. The red and blue
ports on the RR should be empty.
Make sure the correct radio model and serial number were entered during
the flash. Verify the radio’s serial number entered during the flash matches
what is listed on the radio screen. This can be found in the settings of the
radio, listed as Device Id, Device Number, or Serial Number.
The light on the Maestro is flashing RED ONCE. There is no firmware on the module; flash the RR module.
MAESTRO RR RESET PROCEDURE:
Turn the key to the OFF position, then disconnect all connectors from the module.
Press and hold the module’s programming button and connect all the connectors back to the module. Wait, the module’s LED will flash RED rapidly (this may
take up to 10 seconds).
Release the programming button. Wait, the LED will turn solid GREEN for 2 seconds to show the reset was successful.
TECHNICAL ASSISTANCE
Phone: 1-866-427-2999
Email: maestr[email protected]
Web: maestro.idatalink.com/support add www.12voltdata.com/forum/
IMPORTANT: To ensure proper operation, the aftermarket radio needs to have the latest firmware from the manufacturer. Please visit the radio
manufacturer’s website and look for any updates pertaining to your radio.
QUICK
START
GUIDE
FOR
CAR
RADIO
INSTALLATION
KITS
I
GUIDE
DE
DEMARRAGE
RAPIDE
POUR
KITS
D'INSTALLATION
AUTORADIO
I I
GUIA
DE
INICIO
RAPIDO
PARA
KITS
DE
INSTALACION
DE
AUTORRADIO
WEB-PROGRAMMING
STEPS
A\
THIS
PRODUCT
REQUIRES
THE
INSTALLATION
OF
~
A
MAESTRO
RR
(ADS
-
MRR)
MODULE
SOLD
SEPARATELY
G)
CD
G)
CD
®
INSTALL
THE
WEB
LINK
PLUGIN
!FOR
PC
ONLY)
Go
to
idatalinkmaestro.com/plugin a
nd
follow the
in
s
tall
ation step
s.
Rev
ie
w the System Requirements
b
efo
re
ins
tall
i
ng
. Macintosh not supported.
REGISTER
A
WEBLINK
ACCOUNT
Go to idatalinkmaestro.com/register
an
d complete
the
re
gi
s
tr
ation
pr
ocess. A confi
rmat
i
on
email wi
ll
be
sent to you req
ui
ri
ng
validat
io
n.
CONNECT
THE
MODULE
TO
YOUR
PC
Use the included mini
USB
cable to connect
yo
ur
iDatalink Maest
ro
RR
module
to
yo
ur
P
C.
WEBLINK
PROGRAMMING
Go
to idatalinkmaestro.com/login. E
nter
yo
ur
u
se
rname and passwo
rd,
th
en click OK. Follow the
in
stall
ation steps
in
Weblink
until
your mo
dul
e is
flashed, then do
wnl
oa
d yo
ur
install guide. Be sure
to
select the dash kit
as
an accessory
in
step 4.
COMPLETE
VEHICLE-SPECIFIC
INSTALLATION
Fo
ll
ow the steps in your insta
ll
gu
ide a
nd
complete
the installat
io
n.
ADS
recommends having your
iDatalink Maestro products installed
by
a certified
technician.
~
~
::::..
·-
ETAPES
DE
PROGRAMMATION
WEB
A\
CE
PRODUIT
NECESSITE
L'INSTALLATION
,
D'UN
MODULE
~
MAESTRO
RR
(ADS-MRR)
VENDU
SEPAREMENT
G)
CD
G)
CD
®
INSTALLEZ
LE
PLUGIN
WEB
LINK
IPC
SEULEMENTl
All
ez
aidatalinkmaestro.com/plugin et suivez les
etap
es
d'insta
ll
ation. Verifiez les exigences systeme
avant ['insta
ll
ati
on.
Macintosh n'est pas supporte.
INSCRIVEZ
·
VOUS
A
WEB
LINK
All
ez
aidatalinkmaestro.com/register et terminez
le
processus d'inscription.
Un
co
u
rriel
de
confirmation
vous sera envoye pour
va
lidation.
BRANCHEZ
LE
MODULE
A
VOTRE
PC
Utilisez le mini-cab
le
US
B
fo
urni po
ur
branch
er
votre
module iDatalink Maestro
RR
avotre
PC.
PROGRAMMATION
WEBLINK
Allez a idatalinkmaestro.com/login. Entrez votre
nom d'utilisateur et votre mot de passe,
pu
is
cliquez
sur
O
K.
Suiv
ez
l
es
etap
es
d'installation dans
W
eb
link jusqu·a
ce
qu
e votre module soit flashe, puis
telechargez votre guide d
'i
nsta
ll
ation. Assurez-vous
de selectionner le kit de tableau de bord comme
accessoire al'etape 4.
INSTALLATION
COMPLETE
DU
VtHICULE
Suiv
ez
les etap
es
de votre guide d
'i
nsta
ll
ati
on
et
terminez ['installation.
ADS
recommande que vos
iDatalink Maestro soient installes par un technicien
certifie.
~maestro
-
PASOS
DE
PROGRAMACION
WEB
A\
ESTE
PRODUCTO
REQUIERE
LA
INSTALACION
DEL
MODULO
~
MAESTRO
RR
[ADS
-
MRR)
VEN
DIDO
POR
SEPARADO
G)
CD
G)
CD
®
INSTALE
EL
COMPLEMENTO
WEBLINK
IS6LO
PC)
Vaya
a idatalinkmaestro.com/plugin y siga los pasos
de
instalacion. Compruebe los requisites del sistema
antes
de
la
instalacion. Macintosh
no
es compatible.
REGISTRESE
A
WEBLINK
Vaya
a idatalinkmaestro.com/register y complete
el proceso
de
registro.
Se
le
enviara
un
correo
electronico
de
confirmacion para
su
validacion.
CONECTE
EL
M6DULO
A
SU
PC
Utili
ce
el
ca
ble mini USB suministrado para conectar
su
modulo iDatalink Maestro RR a su
PC
.
PROGRAMACl6N
WEBLINK
V
aya
a idatalinkmaestro.com/login. lntroduzca
su
nombre
de
usuario y contraseiia y haga clic
en
O
K.
Siga
los pasos
de
in
stalacion en Enlace
we
b hasta
que
su
modulo
se
muestr
a,
luego descargue
la
gufa
de
instalacion. Asegurese de seleccionar el kit
del
panel
de
instrumentos como accesorio en
el
paso 4.
INSTALACl6N
COMPLETA
PARA
SU
VEHICULO
Si
ga l
as
pasos
de
la
gufa de instalacion y complete
la instalacion.
ADS
recomienda que
su
productos
iDatalink Maestro sea instalado por
un
tecnico
certificado.
0
LIMITED
1-YEAR
WARRANTY
Automotive Data Solutions Inc. ("ADS"]
warrants
to the
original
purchaser
that
this product
shall
be
free of defects
in
material
a,nd
workmanship
under
normal
use and
circumstances,
for
the period of one
(1]
year as of the
original
date of purchase.
In
the event of any product malfunction during the Warranty
period, the
original
purchaser
must
return to the Authorized
Dealer where
it
was originally purchased
with
the original
proof
of
purchase. If a malfunction is detected, the Authorized
Dealer
will
elect to repair
or
replace the product at its
discretion. Labor costs may be applicable and are at the
discretion ofthe Authorized Dealer.
ADS
is not responsible
for
any damages whatsoever, including
but
not
limited
to any consequential damages, incidental
damages
for
loss of time, loss of earnings, commercial loss of
economic opportunity and the like
that
may
or
may not have
resulted
from
the installation
or
operation of an iDatalink
Maestro product.
GARANTIE
LIMITEE
DE
1
AN
Automotive Data Solutions Inc. (ADS] garantit al'acheteur
original
que
ce
produit est exempt de defauts dans les
materiaux et dans la fabrication, et
ce,
dans des conditions
normales d'utilisation,
pour
une periode de un
(1]
an
a
partir
de
la
date d'achat originale.
Si
le produit ne fonctionne pas correctement alors
qu'il
est
encore sous garantie, l'acheteur
original
doit
retourner
chez
le
detaillant autorise
ou
il
a achete son produit avec la
preuve d'achat originale.
Si
le detaillant autorise detecte une
quelconque anomalie,
il
reparera ou de remplacera le produit,
et
ce,
a
sa
discretion. Des frais de main d'oeuvre peuvent
s·appliquer et sont ala discretion du detaillant autorise.
ADS
n'accepte aucune responsabilite pour
tout
dommage,
y compris, sans s·y limiter, aux dommages consecutifs,
dommages indirects, dommages
pour
pertes de temps,
pour
pertes
de
revenus,
pour
pertes commerciales, pour pertes de
possibilites economiques qui pourraient
ou
non avoir resulte
de
['installation
ou
du fonctionnement d'un produit iDatalink
Maestro.
·
GARANTIA
LIMITADA
POR
1
ANO
Automotive Data Solutions Inc. ("ADS"] garantiza al comprador
original que este producto
no
presentara ningun defecto
relacionado con sus materiales o
su
fabricaci6n, bajo
condiciones normales de uso, durante un
[1)
ano a
partir
de la fecha original de compra.
En
caso de que el producto presente alguna falla durante
el
perfodo de Garantfa,
el
comprador original debera remitirse
al
Distribuidor Autorizado donde lo compr6, llevando consigo
la prueba de compra original. Si
se
determina que
el
producto
presenta una falla, el DistribuidorAutorizado podra
decidir
si
reparara O reemplazara
el
producto, segun SU criterio.
Si
esta
situaci6n genera costos
por
mano de obra, estos responderan
al
criterio
del
DistribuidorAutorizado.
ADS
nose
hace responsable
por
ningun tipo de danos,
incluyendo, pero sin
limitarse
a,
danos consecuenciales,
danos indirectos producto de la perdida de tiempo, la perdida
de ingresos, la perdida comercial de una oportunidad
econ6mica y otros
similares
que puedan haber resultado o
no
de la instalaci6n de un producto iDatalink Maestro.
NE
ED
HELP
?
BES
O
IN
O'
AID
E?
l
NE
CES
IT
AA
YUO
A?
C
877.212.6169

Other manuals for Maestro RR

12

Other iDataLink Automobile Accessories manuals

iDataLink BLADE-AL-HK4-EN User manual

iDataLink

iDataLink BLADE-AL-HK4-EN User manual

iDataLink maestro Rr User manual

iDataLink

iDataLink maestro Rr User manual

iDataLink maestro Rr User manual

iDataLink

iDataLink maestro Rr User manual

iDataLink Maestro AR User manual

iDataLink

iDataLink Maestro AR User manual

iDataLink maestro Rr User manual

iDataLink

iDataLink maestro Rr User manual

iDataLink maestro Rr User manual

iDataLink

iDataLink maestro Rr User manual

iDataLink maestro Rr User manual

iDataLink

iDataLink maestro Rr User manual

iDataLink maestro Rr User manual

iDataLink

iDataLink maestro Rr User manual

iDataLink Maestro RR User manual

iDataLink

iDataLink Maestro RR User manual

iDataLink maestro Rr User manual

iDataLink

iDataLink maestro Rr User manual

iDataLink maestro Rr User manual

iDataLink

iDataLink maestro Rr User manual

iDataLink maestro mus1 User manual

iDataLink

iDataLink maestro mus1 User manual

iDataLink BLADE-AL(TB)-TL2 User manual

iDataLink

iDataLink BLADE-AL(TB)-TL2 User manual

iDataLink ADS-MRR2 User manual

iDataLink

iDataLink ADS-MRR2 User manual

iDataLink maestro Rr User manual

iDataLink

iDataLink maestro Rr User manual

iDataLink maestro Rr User manual

iDataLink

iDataLink maestro Rr User manual

iDataLink Maestro RR User manual

iDataLink

iDataLink Maestro RR User manual

iDataLink ADS-TBSL-FM-EN User manual

iDataLink

iDataLink ADS-TBSL-FM-EN User manual

iDataLink maestro Rr User manual

iDataLink

iDataLink maestro Rr User manual

iDataLink Maestro RR User manual

iDataLink

iDataLink Maestro RR User manual

iDataLink maestro Rr User manual

iDataLink

iDataLink maestro Rr User manual

iDataLink ADS-ALCA User manual

iDataLink

iDataLink ADS-ALCA User manual

iDataLink maestro Rr User manual

iDataLink

iDataLink maestro Rr User manual

iDataLink maestro Rr User manual

iDataLink

iDataLink maestro Rr User manual

Popular Automobile Accessories manuals by other brands

Yakima K1040 instructions

Yakima

Yakima K1040 instructions

Dometic SMRTSTACRV Installation and operation manual

Dometic

Dometic SMRTSTACRV Installation and operation manual

Lift Tek SZ21 quick guide

Lift Tek

Lift Tek SZ21 quick guide

Steinhof K-034 FITTING AND OPERATION MANUAL

Steinhof

Steinhof K-034 FITTING AND OPERATION MANUAL

Boyo VTM43TCA user manual

Boyo

Boyo VTM43TCA user manual

awave AW-V650 user guide

awave

awave AW-V650 user guide

Aldor Automotive FOR1TRSU Assembly manual

Aldor Automotive

Aldor Automotive FOR1TRSU Assembly manual

K-Mate BTC008L user manual

K-Mate

K-Mate BTC008L user manual

Satellic OBU Handbook

Satellic

Satellic OBU Handbook

Classic Accessories Fairway Deluxe Technical manual

Classic Accessories

Classic Accessories Fairway Deluxe Technical manual

Safe Fleet Prime Design AAL-8003 manual

Safe Fleet

Safe Fleet Prime Design AAL-8003 manual

pewag forstgrip Mounting instruction

pewag

pewag forstgrip Mounting instruction

Crux DKGM-49 manual

Crux

Crux DKGM-49 manual

VBG Onspot Mounting instruction/Spare Parts List

VBG

VBG Onspot Mounting instruction/Spare Parts List

IOTuning IOPEDAL instruction manual

IOTuning

IOTuning IOPEDAL instruction manual

Curt Manufacturing 52042 installation manual

Curt Manufacturing

Curt Manufacturing 52042 installation manual

Webasto Black Forest ThrowBack Top installation instructions

Webasto

Webasto Black Forest ThrowBack Top installation instructions

Easylife HF380 instruction manual

Easylife

Easylife HF380 instruction manual

manuals.online logo
manuals.online logoBrands
  • About & Mission
  • Contact us
  • Privacy Policy
  • Terms and Conditions

Copyright 2025 Manuals.Online. All Rights Reserved.