manuals.online logo
Brands
  1. Home
  2. •
  3. Brands
  4. •
  5. iDataLink
  6. •
  7. Automobile Accessories
  8. •
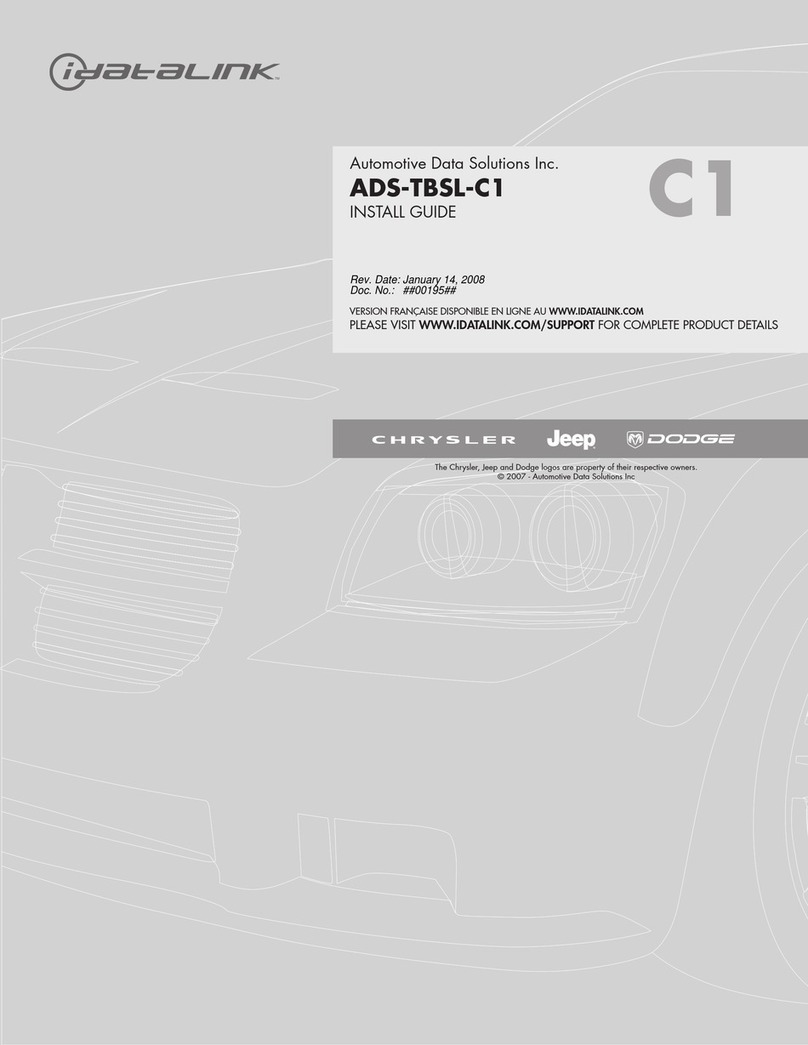
  9. iDataLink maestro Rr User manual

iDataLink maestro Rr User manual

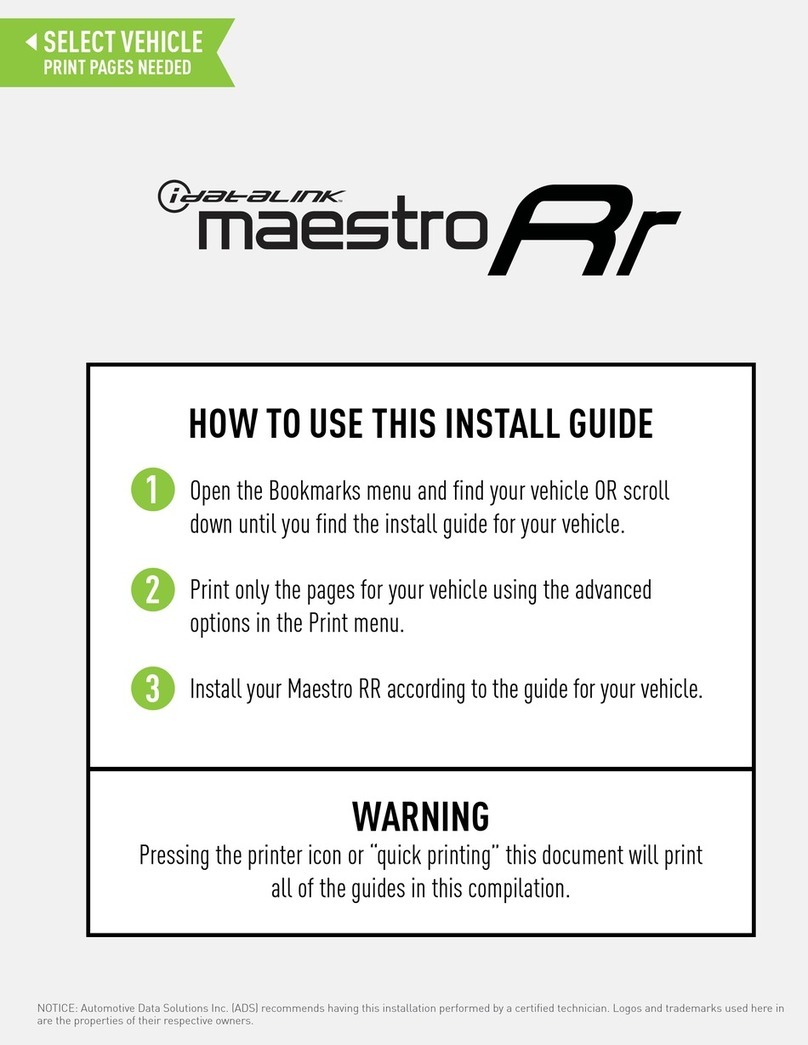
NOTICE: Automotive Data Solutions Inc. (ADS) recommends having this installation performed by a certified technician. Logos and trademarks used here in
are the properties of their respective owners.
WARNING
Pressing the printer icon or “quick printing” this document will print
all of the guides in this compilation.
Open the Bookmarks menu and find your vehicle OR scroll
down until you find the install guide for your vehicle.
Print only the pages for your vehicle using the advanced
options in the Print menu.
Install your Maestro RR according to the guide for your vehicle.
HOW TO USE THIS INSTALL GUIDE
1
2
3
SELECT VEHICLE
PRINT PAGES NEEDED
20182023
JEEP WRANGLER JL
WITH 5" RADIO
INSTALL GUIDE
RETAINS STEERING WHEEL CONTROLS AND MORE!
NOTICE: Automotive Data Solutions Inc. (ADS) recommends having this installation performed by a certified technician. Logos and trademarks used here
in are the properties of their respective owners.
PRODUCTS REQUIRED
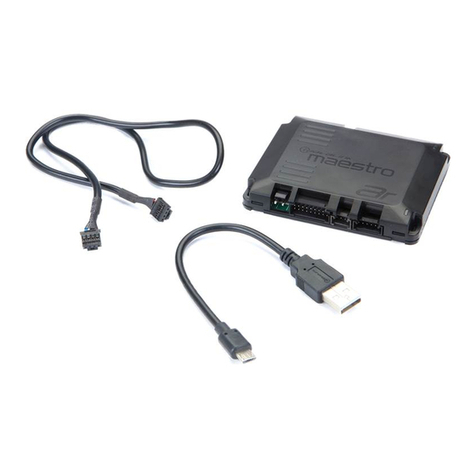
iDatalink Maestro RR or RR2 Radio Replacement Interface
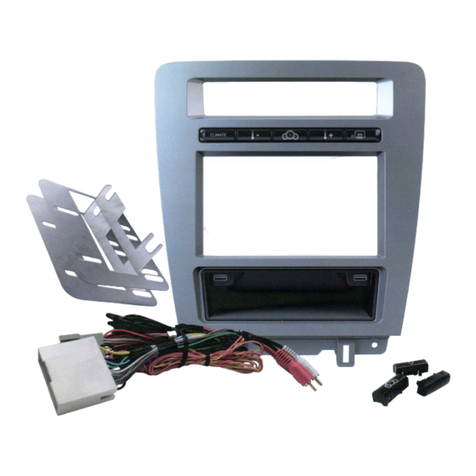
iDatalink Maestro CH3 Installation Harness
PROGRAMMED FIRMWARE
ADS-RR(SR)-CHR03-AS
ADDITIONAL RESOURCES
Maestro RR2 Programmable Outputs Guide
OR
ACCESSORIES
ACC-SP1
ADS-RR(SR)-CHR03-AS-IG-EN maestro.idatalink.comAutomotive Data Solutions Inc. © 2023 2
JEEP WRANGLER JL WITH 5" RADIO 20182023
WELCOME
Congratulations on the purchase
of your iDatalink Maestro RR Radio
replacement solution. You are
now a few simple steps away from
enjoying your new car radio with
enhanced features.
Before starting your installation,
please ensure that your iDatalink
Maestro module is programmed
with the correct firmware for your
vehicle and that you carefully review
the install guide.
Please note that Maestro RR will
only retain functionalities that
were originally available in the
vehicle.
TABLE OF CONTENTS
Installation Instructions 3
Wiring Diagram 4
Radio Wire Reference Chart 5
Module Diagnostics 6
Troubleshooting Table 7
NEED HELP?
1 866 427-2999
[email protected]
ADS-RR(SR)-CHR03-AS-IG-EN maestro.idatalink.comAutomotive Data Solutions Inc. © 2023 3
JEEP WRANGLER JL WITH 5" RADIO 20182023
NOTE: Factory backup camera is NOT retained.
STEP 1
• Unbox the aftermarket radio and locate its main harness.
• Connect the wires shown on the next page from
aftermarket radio main harness to the CH3 T-harness and
match the wire functions.
Note: only connect purple/white wire to radio reverse input or
module damage will occur.
STEP 2
• Determine if the vehicle has a factory amplifier. Look for
badges on the radio, door panels and dash that indicate the
presence of an amplifier (ex: Alpine).
If the vehicle DOES NOT have a factory amplifier:
• Plug the female GREEN connector to the male GREEN
connector of your CH3 T-harness.
• Plug the female WHITE connector to the male WHITE
connector of your CH3 T-harness.
If the vehicle DOES have a factory amplifier:
• Plug the female GREEN connector to the male WHITE
connector of your CH3 T-harness.
• Plug the female WHITE connector to the male GREEN
connector of your CH3 T-harness.
• Remove the factory radio.
STEP 3
• Connect the factory harness to the CH3 T-harness.
STEP 4
• If using a T-harness VER_1.7 and up: Connect the black
2-pin connector from the extension cable to the CH3 main
harness. Route the white ends to the CAN junction block in
vehicle (see wiring diagram for location). Unplug any one of
the 2-pin white connectors in it. Insert the male white end
from the Maestro harness into the junction block and plug
the factory 2-pin connector back into the Maestro female
white 2-pin.
• If using a T-harness VER_1.6 or earlier: Connect OBDII
cable to CH3 main harness, cut and remove the OBDII
connector from the cable. Route the wires to the CAN
junction block in vehicle (see wiring diagram for location)..
Connect Red/Brown wire to vehicle CANH (pin 1) and
Yellow/Brown to vehicle CANL (pin 2), of CAN junction
connector. Note: do not cut vehicle wires.
STEP 5
• Plug the aftermarket radio harnesses into the aftermarket
radio.
• Connect either the blue/yellow wire (Kenwood/JVC) or the
3.5mm to the steering control input of the radio.
STEP 6
• Connect all the harnesses to the Maestro RR module then
test your installation.
• If the vehicle is equipped with OEM parking assist and no
factory amplifier:
Plug the ACC-SP1 into the Maestro RR.
4
INSTALLATION INSTRUCTIONS P1 /1
ADS-RR(SR)-CHR03-AS-IG-EN maestro.idatalink.comAutomotive Data Solutions Inc. © 2023 4
JEEP WRANGLER JL WITH 5" RADIO 20182023
N.C.
BACKUP CAMBACKUP CAM
CARGO CAMCARGO CAM
N.C.
2
1
4
4
3
18
18
10
10
3
4
3
2
2
4
4
2
4
4
52
2
2
16
2
STEP 4
LOCATION: BEHIND GLOVE BOX
WIRING DIAGRAM
STEP 6
MAIN
HARNESS
CH3 T-HARNESS
WIRES FROM
VEHICLE
MAESTRO RR MODULE
STEERING WHEEL
CONTROL CABLE
AUDIO
CABLE
DATA
CABLE
NOT REQUIRED
SPEAKER*
*REQUIRED ACCESSORY
In vehicles without OEM amplifier,
with OEM parking sensors
RED
STEP 1
STEP 2
STEP 3
STEP 5
WHITE - LF SPEAKER (+)
WHITE/BLACK - LF SPEAKER (-)
GRAY - RF SPEAKER (+)
GRAY/BLACK - RF SPEAKER (-)
GREEN - LR SPEAKER (+)
GREEN/BLACK - LR SPEAKER (-)
PURPLE/BLACK - RR SPEAKER (-)
YELLOW - 12V (+)
BLACK - GROUND
RED - ACCESSORY (+)
GREEN WHITE
WHITE GREEN
CONNECTIONS WITH AMP
CONNECTIONS WITHOUT AMP
ORANGE - ILLUMINATION (+)
PURPLE/WHITE - REVERSE LIGHT (+) *
LTGREEN - E-BRAKE (-)
BLUE/WHITE - AMP. TURN ON (+)
PURPLE - RR SPEAKER (+)
FACTORY RADIO
HARNESS
PINK - VEHICLE SPEED (CONNECT IF THERE IS A MATCH)
YELLOW/BLACK - FOOT BRAKE (CONNECT IF THERE IS A MATCH)
GREEN GREEN
WHITEWHITE
WHITEWHITE
* ONLY CONNECT TO RADIO REVERSE INPUT
OR MODULE DAMAGE WILL OCCUR
OR
CAN JUNCTION BLOCK (GREEN)
BLACK
BLACK
UNPLUG
BLACK
UNPLUG ANY OF THE 2-PIN CONNECTORS IN THE CAN
JUNCTION BLOCK.
INSERT THE MALE WHITE CONNECTOR FROM EXTENSION
HARNESS INTO THE JUNCTION BLOCK.
CONNECT THE FACTORY 2 PIN CONNECTOR INTO THE
EXTENSION HARNESS FEMALE WHITE 2-PIN CONNECTOR.
CUT AND DISCARD
YELLOW/BROWN
RED/BROWN
CAN JUNCTION CONNECTOR
HARNESS VERSION 1.7 +
HARNESS VERSION 1.6 -
N.C.
N.C.
CONNECT TO
AFTERMARKET RADIO
NOTE: DO NOT CUT VEHICLE WIRES
ADS-RR(SR)-CHR03-AS-IG-EN maestro.idatalink.comAutomotive Data Solutions Inc. © 2023 5
JEEP WRANGLER JL WITH 5" RADIO 20182023
RADIO WIRE REFERENCE CHART
Wire
Description Polarity Wire Color on Maestro
T-Harness
Wire Color on Alpine
cable
Wire Color on Kenwood/
JVC cable
Wire Color on Pioneer
cable
Wire Color on Sony
cable
Illumination (+) Orange N/A Orange/White Orange/White Orange
Reverse Light (+) Purple/White Orange/White Purple/White Purple/White Purple/White
E-Brake (-) Lt Green Yellow/Blue Lt Green Lt Green Lt Green
Foot Brake (+) Yellow/Black Yellow/Black N⁄A N⁄A N/A
VSS (vehicle speed sensor) (DATA) Pink Green/White Pink Pink N/A
ADS-RR(SR)-CHR03-AS-IG-EN maestro.idatalink.comAutomotive Data Solutions Inc. © 2023 6
JEEP WRANGLER JL WITH 5" RADIO 20182023
MODULE DIAGNOSTICS
VIDEO HELP Installation, product information, vehicle specific videos.
VERIFY FLASH Last flash information, steering control configuration, vehicle information.
WEBLINK Software to program module.
LED 1 LED 2
LED 1
PROGRAMMING BUTTON
LED 1
Module/Firmware
status
LED 2 (RR2)
Bluetooth activity
LED STATUS DIAGNOSTIC
• or •RED or GREEN
flashing
LED flashes 1 or more times, either red or green, when a steering wheel
button is pressed : normal operation.
•1 RED flash Module has no firmware.
Flash module using Weblink Desktop and log in. Do NOT use DEMO MODE.
•1 GREEN flash After radio boots up : Normal operation.
•3 GREEN flashes Bluetooth is activated.
Turns off after one minute: Normal operation.
• • OFF Normal operation (inactive).
ADS-RR(SR)-CHR03-AS-IG-EN maestro.idatalink.comAutomotive Data Solutions Inc. © 2023 7
JEEP WRANGLER JL WITH 5" RADIO 20182023
TROUBLESHOOTING TABLE
PROBLEM SOLUTION
On a phone call, you cannot hear the call, but the caller can
hear you.
Make sure that the 4-pin green and white connectors in the harness are plugged in
correctly as stated in step 2.
Steering wheel controls do not work but LED on the Maestro
does blink when steering wheel buttons are pressed.
Ensure the blue 4-pin steering wheel control cable is connected between the Maestro and
the radio. The radio will use either the 3.5mm jack OR the blue/yellow wire, not both.
Connect the 3.5mm jack from the Maestro blue 4-pin cable to the radio’s 3.5mm port
(labeled steering, remote, or wheel). If no such port exists, wire the blue/yellow to blue/
yellow (Kenwood/JVC) or to the radio’s Key 1 wire (brands not listed/other) and secure the
3.5mm jack. It will not be used.
Verify the buttons are set up in the flash. If any button is set to “none” for “press once”,
it will do nothing. “Hold” column can be left as none and the “press once” function will
operate with one press and when holding the button.
Refer to radio’s owner’s manual to verify if the radio has this function:
• JVC/Kenwood : Steering Wheel Control (ON/OFF): choose ON
• Nakamichi : if model is listed, ensure PAC mode is on. If “other”, learn the buttons in
the radio steering wheel menu.
• Sony : Steering Wheel Control (Custom/Preset): choose Preset. If phone buttons do
not operate properly, flash the module as Pioneer – 2009 and newer with BT. Then select
“custom” instead of “preset” and learn the buttons in the radio menu.
• Other brands – radio should have a steering wheel menu to learn the buttons. You may
have to select type A/B/C/1/2/3 and try learning again if buttons are not saving. Refer to
radio manufacturer’s tech support for further advice if not learning properly.
The light on the Maestro is flashing RED ONCE. There is no firmware on the module; flash the RR module.
The radio does not turn ON at all. Make sure the 2-pin connectors in the harness are connected as stated in step 2.
If work was done under the driver’s dash, like replacing the speaker, ensure the CAN
connector on the back of the driver’s speaker is plugged back in.
If you have a multimeter, turn the key on and check for DC voltage at the maestro’s heavy
gauge 3-pin plug (red, yellow, and black wires). The Maestro must be plugged in to get an
accurate measurement. If there is 12 volts on the red and yellow, the Maestro is working
correctly and sending power out to turn on the radio. If no voltage on either, check the
inline fuse and then the vehicle’s fuse for the radio circuit.
The radio stays ON. Make sure the 2-pin connectors in the harness are connected as stated in step 2.
MAESTRO RR RESET PROCEDURE:
Turn the key to the OFF position, then disconnect all connectors from the module.
Press and hold the module’s programming button and connect all the connectors back to the module. Wait, the module’s LED will flash RED rapidly (this may
take up to 10 seconds).
Release the programming button. Wait, the LED will turn solid GREEN for 2 seconds to show the reset was successful.
TECHNICAL ASSISTANCE
Phone: 1-866-427-2999
Email: maestr[email protected]
IMPORTANT: To ensure proper operation, the aftermarket radio needs to have the latest firmware from the manufacturer. Please visit the radio
manufacturer’s website and look for any updates pertaining to your radio.
20192023
RAM 1500 CLASSIC
WITH 3" OR 5" RADIO
INSTALL GUIDE
RETAINS STEERING WHEEL CONTROLS AND MORE!
NOTICE: Automotive Data Solutions Inc. (ADS) recommends having this installation performed by a certified technician. Logos and trademarks used here
in are the properties of their respective owners.
PRODUCTS REQUIRED
iDatalink Maestro RR or RR2 Radio Replacement Interface
iDatalink Maestro CH3 Installation Harness
PROGRAMMED FIRMWARE
ADS-RR(SR)-CHR03-AS
ADDITIONAL RESOURCES
Maestro RR2 Programmable Outputs Guide
OR
ACCESSORIES
ACC-SP1
ADS-RR(SR)-CHR03-AS-IG-EN maestro.idatalink.comAutomotive Data Solutions Inc. © 2023 2
RAM 1500 CLASSIC WITH 3" OR 5" RADIO 20192023
WELCOME
Congratulations on the purchase
of your iDatalink Maestro RR Radio
replacement solution. You are
now a few simple steps away from
enjoying your new car radio with
enhanced features.
Before starting your installation,
please ensure that your iDatalink
Maestro module is programmed
with the correct firmware for your
vehicle and that you carefully review
the install guide.
Please note that Maestro RR will
only retain functionalities that
were originally available in the
vehicle.
TABLE OF CONTENTS
Installation Instructions 3
Wiring Diagram 4
Radio Wire Reference Chart 5
Module Diagnostics 6
Troubleshooting Table 7
NEED HELP?
1 866 427-2999
[email protected]
ADS-RR(SR)-CHR03-AS-IG-EN maestro.idatalink.comAutomotive Data Solutions Inc. © 2023 3
RAM 1500 CLASSIC WITH 3" OR 5" RADIO 20192023
NOTE:
This firmware is only intended for the 3” or 5” radio trim
and cannot retain the OEM settings menus. To retain
the OEM settings menus, you must use an iDatalink
compatible radio.
Factory backup camera is NOT retained.
STEP 1
• Unbox the aftermarket radio and locate its main harness.
• Connect the wires shown on the next page from
aftermarket radio main harness to the CH3 T-harness and
match the wire functions.
Note: only connect purple/white wire to radio reverse input or
module damage will occur.
STEP 2
• Determine if the vehicle has a factory amplifier. Look for
badges on the radio, door panels and dash that indicate the
presence of an amplifier (ex: Alpine).
If the vehicle DOES NOT have a factory amplifier:
• Plug the female GREEN connector to the male GREEN
connector of your CH3 T-harness.
• Plug the female WHITE connector to the male WHITE
connector of your CH3 T-harness.
If the vehicle DOES have a factory amplifier:
• Plug the female GREEN connector to the male WHITE
connector of your CH3 T-harness.
• Plug the female WHITE connector to the male GREEN
connector of your CH3 T-harness.
• Remove the factory radio.
STEP 3
• Connect the factory harness to the CH3 T-harness.
STEP 4
• If using a T-harness VER_1.7 and up: Connect the black
2-pin connector from the extension cable to the CH3 main
harness. Route the white ends to the CAN junction block in
vehicle (see wiring diagram for location). Unplug any one of
the 2-pin white connectors in it. Insert the male white end
from the Maestro harness into the junction block and plug
the factory 2-pin connector back into the Maestro female
white 2-pin.
• If using a T-harness VER_1.6 or earlier: Connect OBDII
cable to CH3 main harness, cut and remove the OBDII
connector from the cable. Route the wires to the CAN
junction block in vehicle (see wiring diagram for location)..
Connect Red/Brown wire to vehicle CANH (pin 1) and
Yellow/Brown to vehicle CANL (pin 2), of CAN junction
connector. Note: do not cut vehicle wires.
STEP 5
• Plug the aftermarket radio harnesses into the aftermarket
radio.
• Connect either the blue/yellow wire (Kenwood/JVC) or the
3.5mm to the steering control input of the radio.
STEP 6
• Connect all the harnesses to the Maestro RR module then
test your installation.
• If the vehicle is equipped with OEM parking assist and no
factory amplifier:
Plug the ACC-SP1 into the Maestro RR.
2
INSTALLATION INSTRUCTIONS P1 /1
ADS-RR(SR)-CHR03-AS-IG-EN maestro.idatalink.comAutomotive Data Solutions Inc. © 2023 4
RAM 1500 CLASSIC WITH 3" OR 5" RADIO 20192023
N.C.
BACKUP CAMBACKUP CAM
CARGO CAMCARGO CAM
N.C.
2
1
5
4
3
18
18
10
10
3
4
3
2
2
4
4
2
4
4
52
2
2
16
2
STEP 4
LOCATION: DRIVER SIDE DASH
WIRING DIAGRAM
STEP 6
MAIN
HARNESS
CH3 T-HARNESS
WIRES FROM
VEHICLE
MAESTRO RR MODULE
STEERING WHEEL
CONTROL CABLE
AUDIO
CABLE
DATA
CABLE
NOT REQUIRED
SPEAKER*
*REQUIRED ACCESSORY
In vehicles without OEM amplifier,
with OEM parking sensors
RED
STEP 1
STEP 2
STEP 3
STEP 5
WHITE - LF SPEAKER (+)
WHITE/BLACK - LF SPEAKER (-)
GRAY - RF SPEAKER (+)
GRAY/BLACK - RF SPEAKER (-)
GREEN - LR SPEAKER (+)
GREEN/BLACK - LR SPEAKER (-)
PURPLE/BLACK - RR SPEAKER (-)
YELLOW - 12V (+)
BLACK - GROUND
RED - ACCESSORY (+)
GREEN WHITE
WHITE GREEN
CONNECTIONS WITH AMP
CONNECTIONS WITHOUT AMP
ORANGE - ILLUMINATION (+)
PURPLE/WHITE - REVERSE LIGHT (+) *
LTGREEN - E-BRAKE (-)
BLUE/WHITE - AMP. TURN ON (+)
PURPLE - RR SPEAKER (+)
FACTORY RADIO
HARNESS
PINK - VEHICLE SPEED (CONNECT IF THERE IS A MATCH)
YELLOW/BLACK - FOOT BRAKE (CONNECT IF THERE IS A MATCH)
GREEN GREEN
WHITEWHITE
WHITEWHITE
* ONLY CONNECT TO RADIO REVERSE INPUT
OR MODULE DAMAGE WILL OCCUR
OR
CAN JUNCTION BLOCK (GREEN)
BLACK
BLACK
UNPLUG
BLACK
UNPLUG ANY OF THE 2-PIN CONNECTORS IN THE CAN
JUNCTION BLOCK.
INSERT THE MALE WHITE CONNECTOR FROM EXTENSION
HARNESS INTO THE JUNCTION BLOCK.
CONNECT THE FACTORY 2 PIN CONNECTOR INTO THE
EXTENSION HARNESS FEMALE WHITE 2-PIN CONNECTOR.
CUT AND DISCARD
YELLOW/BROWN
RED/BROWN
CAN JUNCTION CONNECTOR
HARNESS VERSION 1.7 +
HARNESS VERSION 1.6 -
N.C.
N.C.
CONNECT TO
AFTERMARKET RADIO
NOTE: DO NOT CUT VEHICLE WIRES
ADS-RR(SR)-CHR03-AS-IG-EN maestro.idatalink.comAutomotive Data Solutions Inc. © 2023 5
RAM 1500 CLASSIC WITH 3" OR 5" RADIO 20192023
RADIO WIRE REFERENCE CHART
Wire
Description Polarity Wire Color on Maestro
T-Harness
Wire Color on Alpine
cable
Wire Color on Kenwood/
JVC cable
Wire Color on Pioneer
cable
Wire Color on Sony
cable
Illumination (+) Orange N/A Orange/White Orange/White Orange
Reverse Light (+) Purple/White Orange/White Purple/White Purple/White Purple/White
E-Brake (-) Lt Green Yellow/Blue Lt Green Lt Green Lt Green
Foot Brake (+) Yellow/Black Yellow/Black N⁄A N⁄A N/A
VSS (vehicle speed sensor) (DATA) Pink Green/White Pink Pink N/A
ADS-RR(SR)-CHR03-AS-IG-EN maestro.idatalink.comAutomotive Data Solutions Inc. © 2023 6
RAM 1500 CLASSIC WITH 3" OR 5" RADIO 20192023
MODULE DIAGNOSTICS
VIDEO HELP Installation, product information, vehicle specific videos.
VERIFY FLASH Last flash information, steering control configuration, vehicle information.
WEBLINK Software to program module.
LED 1 LED 2
LED 1
PROGRAMMING BUTTON
LED 1
Module/Firmware
status
LED 2 (RR2)
Bluetooth activity
LED STATUS DIAGNOSTIC
• or •RED or GREEN
flashing
LED flashes 1 or more times, either red or green, when a steering wheel
button is pressed : normal operation.
•1 RED flash Module has no firmware.
Flash module using Weblink Desktop and log in. Do NOT use DEMO MODE.
•1 GREEN flash After radio boots up : Normal operation.
•3 GREEN flashes Bluetooth is activated.
Turns off after one minute: Normal operation.
• • OFF Normal operation (inactive).
ADS-RR(SR)-CHR03-AS-IG-EN maestro.idatalink.comAutomotive Data Solutions Inc. © 2023 7
RAM 1500 CLASSIC WITH 3" OR 5" RADIO 20192023
TROUBLESHOOTING TABLE
PROBLEM SOLUTION
On a phone call, you cannot hear the call, but the caller can
hear you.
Make sure that the 4-pin green and white connectors in the harness are plugged in
correctly as stated in step 2.
Steering wheel controls do not work but LED on the Maestro
does blink when steering wheel buttons are pressed.
Ensure the blue 4-pin steering wheel control cable is connected between the Maestro and
the radio. The radio will use either the 3.5mm jack OR the blue/yellow wire, not both.
Connect the 3.5mm jack from the Maestro blue 4-pin cable to the radio’s 3.5mm port
(labeled steering, remote, or wheel). If no such port exists, wire the blue/yellow to blue/
yellow (Kenwood/JVC) or to the radio’s Key 1 wire (brands not listed/other) and secure the
3.5mm jack. It will not be used.
Verify the buttons are set up in the flash. If any button is set to “none” for “press once”,
it will do nothing. “Hold” column can be left as none and the “press once” function will
operate with one press and when holding the button.
Refer to radio’s owner’s manual to verify if the radio has this function:
• JVC/Kenwood : Steering Wheel Control (ON/OFF): choose ON
• Nakamichi : if model is listed, ensure PAC mode is on. If “other”, learn the buttons in
the radio steering wheel menu.
• Sony : Steering Wheel Control (Custom/Preset): choose Preset. If phone buttons do
not operate properly, flash the module as Pioneer – 2009 and newer with BT. Then select
“custom” instead of “preset” and learn the buttons in the radio menu.
• Other brands – radio should have a steering wheel menu to learn the buttons. You may
have to select type A/B/C/1/2/3 and try learning again if buttons are not saving. Refer to
radio manufacturer’s tech support for further advice if not learning properly.
Illumination or foot brake output does not function. Ensure the white 2 pin CAN junction connectors in step 4 are plugged into the 2-row
green CAN junction connector, not the 1-row one
The light on the Maestro is flashing RED ONCE. There is no firmware on the module; flash the RR module.
The radio does not turn ON at all. Make sure the 2-pin connectors in the harness are connected as stated in step 2.
If you have a multimeter, turn the key on and check for DC voltage at the maestro’s heavy
gauge 3-pin plug (red, yellow, and black wires). The Maestro must be plugged in to get an
accurate measurement. If there is 12 volts on the red and yellow, the Maestro is working
correctly and sending power out to turn on the radio. If no voltage on either, check the
inline fuse and then the vehicle’s fuse for the radio circuit.
The radio stays ON. Make sure the 2-pin connectors in the harness are connected as stated in step 2.
MAESTRO RR RESET PROCEDURE:
Turn the key to the OFF position, then disconnect all connectors from the module.
Press and hold the module’s programming button and connect all the connectors back to the module. Wait, the module’s LED will flash RED rapidly (this may
take up to 10 seconds).
Release the programming button. Wait, the LED will turn solid GREEN for 2 seconds to show the reset was successful.
TECHNICAL ASSISTANCE
Phone: 1-866-427-2999
Email: maestr[email protected]
IMPORTANT: To ensure proper operation, the aftermarket radio needs to have the latest firmware from the manufacturer. Please visit the radio
manufacturer’s website and look for any updates pertaining to your radio.
20132017
RAM 1500
WITH 3" OR 5" RADIO
INSTALL GUIDE
RETAINS STEERING WHEEL CONTROLS AND MORE!
NOTICE: Automotive Data Solutions Inc. (ADS) recommends having this installation performed by a certified technician. Logos and trademarks used here
in are the properties of their respective owners.
PRODUCTS REQUIRED
iDatalink Maestro RR or RR2 Radio Replacement Interface
iDatalink Maestro CH3 Installation Harness
PROGRAMMED FIRMWARE
ADS-RR(SR)-CHR03-AS
ADDITIONAL RESOURCES
Maestro RR2 Programmable Outputs Guide
OR
ACCESSORIES
ACC-SP1
ADS-RR(SR)-CHR03-AS-IG-EN maestro.idatalink.comAutomotive Data Solutions Inc. © 2023 2
RAM 1500 WITH 3" OR 5" RADIO 20132017
WELCOME
Congratulations on the purchase
of your iDatalink Maestro RR Radio
replacement solution. You are
now a few simple steps away from
enjoying your new car radio with
enhanced features.
Before starting your installation,
please ensure that your iDatalink
Maestro module is programmed
with the correct firmware for your
vehicle and that you carefully review
the install guide.
Please note that Maestro RR will
only retain functionalities that
were originally available in the
vehicle.
TABLE OF CONTENTS
Installation Instructions 3
Wiring Diagram 4
Radio Wire Reference Chart 5
Module Diagnostics 6
Troubleshooting Table 7
NEED HELP?
1 866 427-2999
[email protected]
ADS-RR(SR)-CHR03-AS-IG-EN maestro.idatalink.comAutomotive Data Solutions Inc. © 2023 3
RAM 1500 WITH 3" OR 5" RADIO 20132017
NOTE:
This firmware is only intended for the 3” or 5” radio trim
and cannot retain the OEM settings menus. To retain
the OEM settings menus, you must use an iDatalink
compatible radio.
STEP 1
• Unbox the aftermarket radio and locate its main harness.
• Connect the wires shown on the next page from
aftermarket radio main harness to the CH3 T-harness and
match the wire functions.
Note: only connect purple/white wire to radio reverse input or
module damage will occur.
STEP 2
• Determine if the vehicle has a factory amplifier. Look for
badges on the radio, door panels and dash that indicate the
presence of an amplifier (ex: Alpine).
If the vehicle DOES NOT have a factory amplifier:
• Plug the female GREEN connector to the male GREEN
connector of your CH3 T-harness.
• Plug the female WHITE connector to the male WHITE
connector of your CH3 T-harness.
If the vehicle DOES have a factory amplifier:
• Plug the female GREEN connector to the male WHITE
connector of your CH3 T-harness.
• Plug the female WHITE connector to the male GREEN
connector of your CH3 T-harness.
• Remove the factory radio.
STEP 3
• Connect the factory harness to the CH3 T-harness.
STEP 4
• Plug the aftermarket radio harnesses into the aftermarket
radio.
• Connect either the blue/yellow wire (Kenwood/JVC) or the
3.5mm to the steering control input of the radio.
• Connect the backup camera RCA cable into the
aftermarket radio (if equipped).
STEP 5
• Connect all the harnesses to the Maestro RR module then
test your installation.
• If the vehicle is equipped with OEM parking assist and no
factory amplifier:
Plug the ACC-SP1 into the Maestro RR.
1
INSTALLATION INSTRUCTIONS P1 /1
ADS-RR(SR)-CHR03-AS-IG-EN maestro.idatalink.comAutomotive Data Solutions Inc. © 2023 4
RAM 1500 WITH 3" OR 5" RADIO 20132017
BACKUP CAMBACKUP CAM
CARGO CAMCARGO CAM
1
N.C.
4
3
4
4
2
4
4
18
18
10
10
3
4
3
52
2
2
16
2
2
2
2
WHITE - LF SPEAKER (+)
WHITE/BLACK - LF SPEAKER (-)
GRAY - RF SPEAKER (+)
GRAY/BLACK - RF SPEAKER (-)
GREEN - LR SPEAKER (+)
GREEN/BLACK - LR SPEAKER (-)
PURPLE/BLACK - RR SPEAKER (-)
YELLOW - 12V (+)
BLACK - GROUND
RED - ACCESSORY (+)
ORANGE - ILLUMINATION (+)
PURPLE/WHITE - REVERSE LIGHT (+) *
LTGREEN - E-BRAKE (-)
BLUE/WHITE - AMP. TURN ON (+)
PURPLE - RR SPEAKER (+)
PINK - VEHICLE SPEED (CONNECT IF THERE IS A MATCH)
YELLOW/BLACK - FOOT BRAKE (CONNECT IF THERE IS A MATCH)
* ONLY CONNECT TO RADIO REVERSE INPUT
OR MODULE DAMAGE WILL OCCUR
WIRING DIAGRAM
STEP 1
STEP 2
STEP 3
STEP 4
STEP 5
GREEN WHITE
WHITE GREEN
CONNECTIONS WITH AMP
CONNECTIONS WITHOUT AMP
MAIN
HARNESS
CH3 T-HARNESS
FACTORY RADIO
HARNESS
WIRES FROM
VEHICLE
GREEN GREEN
WHITEWHITE
MAESTRO RR MODULE
AUDIO
CABLE
DATA
CABLE
NOT REQUIRED
WHITEWHITE
BLACKBLACK
SPEAKER*
*REQUIRED ACCESSORY
In vehicles without OEM amplifier,
with OEM parking sensors
N.C. IF EQUIPPED
STEERING WHEEL
CONTROL CABLE
OR
CONNECT TO
AFTERMARKET RADIO
ADS-RR(SR)-CHR03-AS-IG-EN maestro.idatalink.comAutomotive Data Solutions Inc. © 2023 5
RAM 1500 WITH 3" OR 5" RADIO 20132017
RADIO WIRE REFERENCE CHART
Wire
Description Polarity Wire Color on Maestro
T-Harness
Wire Color on Alpine
cable
Wire Color on Kenwood/
JVC cable
Wire Color on Pioneer
cable
Wire Color on Sony
cable
Illumination (+) Orange N/A Orange/White Orange/White Orange
Reverse Light (+) Purple/White Orange/White Purple/White Purple/White Purple/White
E-Brake (-) Lt Green Yellow/Blue Lt Green Lt Green Lt Green
Foot Brake (+) Yellow/Black Yellow/Black N⁄A N⁄A N/A
VSS (vehicle speed sensor) (DATA) Pink Green/White Pink Pink N/A

Other manuals for maestro Rr

48

Other iDataLink Automobile Accessories manuals

iDataLink maestro Rr User manual

iDataLink

iDataLink maestro Rr User manual

iDataLink ADS-MRR2 User manual

iDataLink

iDataLink ADS-MRR2 User manual

iDataLink maestro Rr User manual

iDataLink

iDataLink maestro Rr User manual

iDataLink Maestro RR User manual

iDataLink

iDataLink Maestro RR User manual

iDataLink maestro Rr User manual

iDataLink

iDataLink maestro Rr User manual

iDataLink maestro Rr User manual

iDataLink

iDataLink maestro Rr User manual

iDataLink maestro Rr User manual

iDataLink

iDataLink maestro Rr User manual

iDataLink Maestro RR User manual

iDataLink

iDataLink Maestro RR User manual

iDataLink ADS-TBSL-C1 User manual

iDataLink

iDataLink ADS-TBSL-C1 User manual

iDataLink maestro Rr User manual

iDataLink

iDataLink maestro Rr User manual

iDataLink ADS-ALCA User manual

iDataLink

iDataLink ADS-ALCA User manual

iDataLink maestro Pr 2 User manual

iDataLink

iDataLink maestro Pr 2 User manual

iDataLink maestro Rr User manual

iDataLink

iDataLink maestro Rr User manual

iDataLink Maestro K150 User manual

iDataLink

iDataLink Maestro K150 User manual

iDataLink maestro Rr User manual

iDataLink

iDataLink maestro Rr User manual

iDataLink Maestro RR User manual

iDataLink

iDataLink Maestro RR User manual

iDataLink Maestro RR User manual

iDataLink

iDataLink Maestro RR User manual

iDataLink SUB9 User manual

iDataLink

iDataLink SUB9 User manual

iDataLink maestro SW User manual

iDataLink

iDataLink maestro SW User manual

iDataLink maestro Rr User manual

iDataLink

iDataLink maestro Rr User manual

iDataLink Maestro AR User manual

iDataLink

iDataLink Maestro AR User manual

iDataLink ADS-AL-CH4 User manual

iDataLink

iDataLink ADS-AL-CH4 User manual

iDataLink maestro Rr User manual

iDataLink

iDataLink maestro Rr User manual

iDataLink maestro Rr User manual

iDataLink

iDataLink maestro Rr User manual

Popular Automobile Accessories manuals by other brands

Yakima K1040 instructions

Yakima

Yakima K1040 instructions

Dometic SMRTSTACRV Installation and operation manual

Dometic

Dometic SMRTSTACRV Installation and operation manual

Lift Tek SZ21 quick guide

Lift Tek

Lift Tek SZ21 quick guide

Steinhof K-034 FITTING AND OPERATION MANUAL

Steinhof

Steinhof K-034 FITTING AND OPERATION MANUAL

Boyo VTM43TCA user manual

Boyo

Boyo VTM43TCA user manual

awave AW-V650 user guide

awave

awave AW-V650 user guide

Aldor Automotive FOR1TRSU Assembly manual

Aldor Automotive

Aldor Automotive FOR1TRSU Assembly manual

K-Mate BTC008L user manual

K-Mate

K-Mate BTC008L user manual

Satellic OBU Handbook

Satellic

Satellic OBU Handbook

Classic Accessories Fairway Deluxe Technical manual

Classic Accessories

Classic Accessories Fairway Deluxe Technical manual

Safe Fleet Prime Design AAL-8003 manual

Safe Fleet

Safe Fleet Prime Design AAL-8003 manual

pewag forstgrip Mounting instruction

pewag

pewag forstgrip Mounting instruction

Crux DKGM-49 manual

Crux

Crux DKGM-49 manual

VBG Onspot Mounting instruction/Spare Parts List

VBG

VBG Onspot Mounting instruction/Spare Parts List

IOTuning IOPEDAL instruction manual

IOTuning

IOTuning IOPEDAL instruction manual

Curt Manufacturing 52042 installation manual

Curt Manufacturing

Curt Manufacturing 52042 installation manual

Webasto Black Forest ThrowBack Top installation instructions

Webasto

Webasto Black Forest ThrowBack Top installation instructions

Easylife HF380 instruction manual

Easylife

Easylife HF380 instruction manual

manuals.online logo
manuals.online logoBrands
  • About & Mission
  • Contact us
  • Privacy Policy
  • Terms and Conditions

Copyright 2025 Manuals.Online. All Rights Reserved.