manuals.online logo
Brands
  1. Home
  2. •
  3. Brands
  4. •
  5. iDataLink
  6. •
  7. Automobile Accessories
  8. •
  9. iDataLink maestro Rr User manual

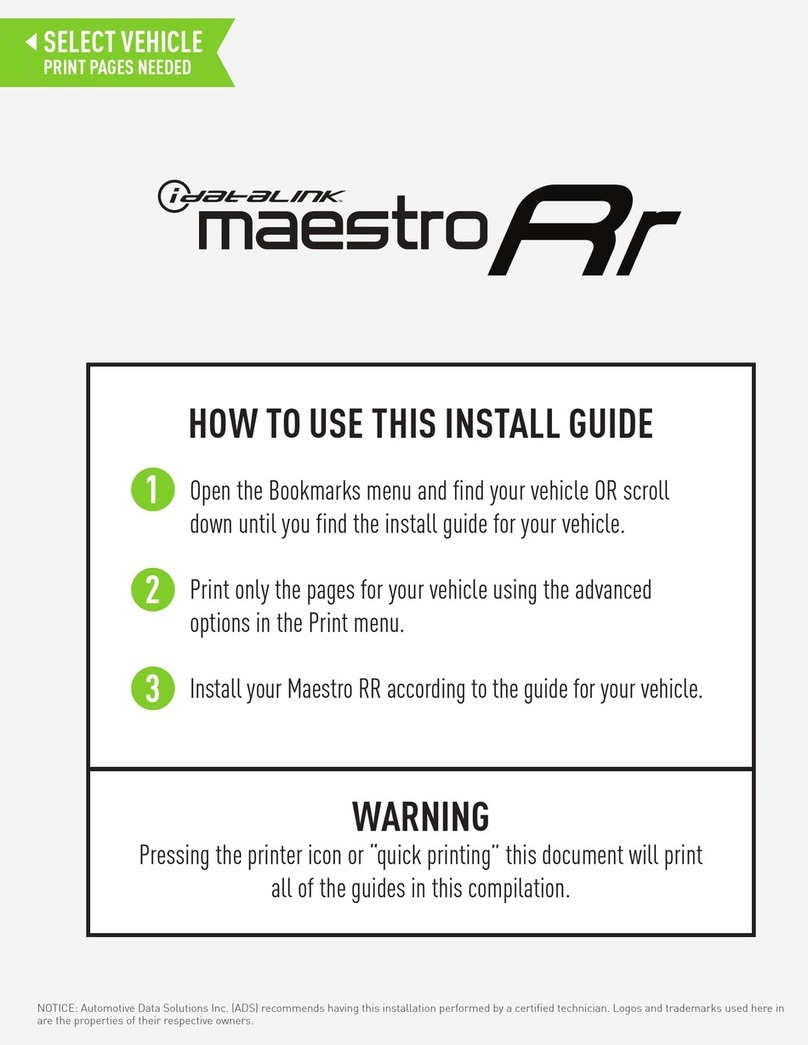
iDataLink maestro Rr User manual

NOTICE: Automotive Data Solutions Inc. (ADS) recommends having this installation performed by a certified technician. Logos and trademarks used here in
are the properties of their respective owners.
AVERTISSEMENT
En appuyant sur l’icône d’impression ou sur “impression rapide”, tous les
guides d’installation inclus dans cette compilation seront alors imprimés.
Ouvrez le menu des signets et trouvez votre véhicule OU défilez vers
le bas jusqu’à ce que vous trouviez le guide d’installation pour votre
véhicule.
Imprimez uniquement les pages concernant votre véhicule en les
inscrivant dans les paramètres d’impression (menu PRINT).
Installez le Maestro RR en vous référant au guide de votre véhicule.
COMMENT UTILISER CE GUIDE D’INSTALLATION
1
2
3
TROUVEZ VOTRE VÉHICULE
IMPRIMEZ LES PAGES REQUISES
NOTICE: Automotive Data Solutions Inc. (ADS) recommends having this installation performed by a certified technician. Logos and trademarks used here in
are the properties of their respective owners.
WARNING
Pressing the printer icon or “quick printing” this document will print
all of the guides in this compilation.
Open the Bookmarks menu and find your vehicle OR scroll
down until you find the install guide for your vehicle.
Print only the pages for your vehicle using the advanced
options in the Print menu.
Install your Maestro RR according to the guide for your vehicle.
HOW TO USE THIS INSTALL GUIDE
1
2
3
SELECT VEHICLE
PRINT PAGES NEEDED
OPTIONAL ACCESSORIES
None
PROGRAMMED FIRMWARE
ADS-RR(SI)-HYU01-DS
PRODUCTS REQUIRED
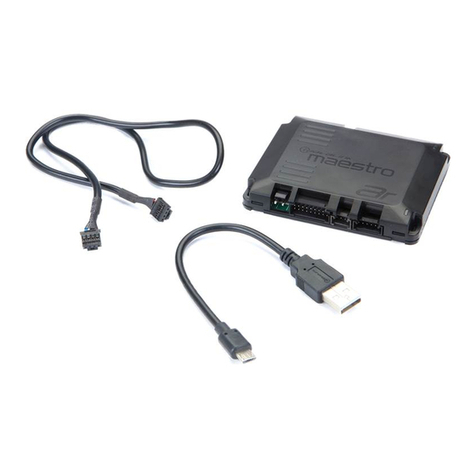
iDatalink Maestro RR Radio Replacement Interface
iDatalink Compatible Radio
INSTALL GUIDE
HYUNDAI ACCENT
BASE 20122016
retains steering wheel controls and adds gauges
NOTICE: Automotive Data Solutions Inc. (ADS) recommends having this installation performed by a certified technician. Logos and trademarks used here
in are the properties of their respective owners.
ADS-RR(SI)-HYU01-DS maestro.idatalink.com
hyundai accent Base 2012-2016
Automotive Data Solutions Inc. © 2016 2
WELCOME
NEED HELP?
Congratulations on the purchase
of your iDatalink Maestro RR Radio
replacement solution. You are
now a few simple steps away from
enjoying your new car radio with
enhanced features.
Before starting your installation,
please ensure that your iDatalink
Maestro module is programmed
with the correct firmware for your
vehicle and that you carefully review
the install guide.
Please note that Maestro RR will
only retain functionalities that
were originally available in the
vehicle.
1 866 427-2999
[email protected]
maestro.idatalink.com/support
www.12voltdata.com/forum
TABLE OF CONTENTS
Wiring Diagram 3
Vehicle Wire Reference Chart 4
ADS-RR(SI)-HYU01-DS maestro.idatalink.com
hyundai accent Base 2012-2016
Automotive Data Solutions Inc. © 2016 3
543 2 110 9 8 7 6
17 16 15 14 1322 21
12 11
24 23 20 19 18
A
H
G
A
G
H
1
10 11 12 13 14 15 16
1234567 8
9
NOT CONNECTED
OBDII CONNECTOR
LOCATED UNDER DRIVER SIDE DASH
MAESTRO RR MODULE
CONNECT TO
AFTERMARKET RADIO
B- LOCATED BEHIND RADIO
SWI 1
SWI 1
SWI FEED
SWI FEED
PURPLE/RED -
PURPLE/RED - SWI CIRCUIT 1 INPUT
BLACK/WHITE -
BLACK/WHITE - SWI GROUND FEED (-) OUTPUT
WIRES FROM
VEHICLE
STEP 1
STEP 2
STEP 3
STEP 4
WIRING DIAGRAM
NOT CONNECTED
YELLOW - 12V (+) INPUT
BLACK - GROUND
GRAY/RED - ACCESSORY (+) INPUT
BLACK
BLACK
RED
RED
YELLOW
YELLOW
NOTE: PIN SIDE VIEW. CONNECT TO TWISTED WIRES BEHIND CONNECTOR.
BROWN/RED - CANH
BROWN/YELLOW - CANL
CANH
CANH
CANL
CANL
ADS-RR(SI)-HYU01-DS maestro.idatalink.com
hyundai accent Base 2012-2016
Automotive Data Solutions Inc. © 2016 4
VEHICLE WIRE REFERENCE CHART
Wire
Description
Connector
Name
Connector
Color
Connector
Type Position Wire Color Polarity Wire
Location
CanH A ~ 16 pin 06 Green (DATA) OBDII connector, under driver side dash
CanL A ~ 16 pin 14 Orange (DATA) OBDII connector, under driver side dash
SWI 1 B ~ 24 pin 04 Yellow/Orange (DATA) Behind radio
SWI Feed B ~ 24 pin 17 Orange (-) Behind radio
OPTIONAL ACCESSORIES
None
PROGRAMMED FIRMWARE
ADS-RR(SI)-HYU01-DS
PRODUCTS REQUIRED
iDatalink Maestro RR Radio Replacement Interface
iDatalink Compatible Radio
INSTALL GUIDE
HYUNDAI AZERA
BASE 20062011
retains steering wheel controls and adds gauges
NOTICE: Automotive Data Solutions Inc. (ADS) recommends having this installation performed by a certified technician. Logos and trademarks used here
in are the properties of their respective owners.
ADS-RR(SI)-HYU01-DS maestro.idatalink.com
hyundai azera Base 2006-2011
Automotive Data Solutions Inc. © 2016 2
WELCOME
NEED HELP?
Congratulations on the purchase
of your iDatalink Maestro RR Radio
replacement solution. You are
now a few simple steps away from
enjoying your new car radio with
enhanced features.
Before starting your installation,
please ensure that your iDatalink
Maestro module is programmed
with the correct firmware for your
vehicle and that you carefully review
the install guide.
Please note that Maestro RR will
only retain functionalities that
were originally available in the
vehicle.
1 866 427-2999
[email protected]
maestro.idatalink.com/support
www.12voltdata.com/forum
TABLE OF CONTENTS
Wiring Diagram 3
Vehicle Wire Reference Chart 4
ADS-RR(SI)-HYU01-DS maestro.idatalink.com
hyundai azera Base 2006-2011
Automotive Data Solutions Inc. © 2016 3
65
8
7
14
13
16 15
2 14 3
10 912 11
18 1720 19
A
H
G
A
G
H
3
10 11 12 13 14 15 16
1234567 8
9
NOT CONNECTED
OBDII CONNECTOR
LOCATED UNDER DRIVER SIDE DASH
MAESTRO RR MODULE
CONNECT TO
AFTERMARKET RADIO
C- LOCATED BEHIND RADIO
SWI 1
SWI 1
SWI FEED
SWI FEED
PURPLE/RED -
PURPLE/RED - SWI CIRCUIT 1 INPUT
BLACK/WHITE -
BLACK/WHITE - SWI GROUND FEED (-) OUTPUT
WIRES FROM
VEHICLE
STEP 1
STEP 2
STEP 3
STEP 4
WIRING DIAGRAM
NOT CONNECTED
YELLOW - 12V (+) INPUT
BLACK - GROUND
GRAY/RED - ACCESSORY (+) INPUT
BLACK
BLACK
RED
RED
YELLOW
YELLOW
NOTE: PIN SIDE VIEW. CONNECT TO TWISTED WIRES BEHIND CONNECTOR.
BROWN/RED - CANH
BROWN/YELLOW - CANL
CANH
CANH
CANL
CANL
ADS-RR(SI)-HYU01-DS maestro.idatalink.com
hyundai azera Base 2006-2011
Automotive Data Solutions Inc. © 2016 4
VEHICLE WIRE REFERENCE CHART
Wire
Description
Connector
Name
Connector
Color
Connector
Type Position Wire Color Polarity Wire
Location
CanH A ~ 16 pin 06 Black (DATA) OBDII connector, under driver side dash
CanL A ~ 16 pin 14 Yellow (DATA) OBDII connector, under driver side dash
SWI 1 C ~ 20 pin 05 White (DATA) Behind radio
SWI Feed C ~ 20 pin 06 White/Black (-) Behind radio
OPTIONAL ACCESSORIES
None
PROGRAMMED FIRMWARE
ADS-RR(SI)-HYU01-DS
PRODUCTS REQUIRED
iDatalink Maestro RR Radio Replacement Interface
iDatalink Compatible Radio
INSTALL GUIDE
HYUNDAI ELANTRA
BASE 20072010
retains steering wheel controls and adds gauges
NOTICE: Automotive Data Solutions Inc. (ADS) recommends having this installation performed by a certified technician. Logos and trademarks used here
in are the properties of their respective owners.
ADS-RR(SI)-HYU01-DS maestro.idatalink.com
hyundai elantra Base 2007-2010
Automotive Data Solutions Inc. © 2016 2
WELCOME
NEED HELP?
Congratulations on the purchase
of your iDatalink Maestro RR Radio
replacement solution. You are
now a few simple steps away from
enjoying your new car radio with
enhanced features.
Before starting your installation,
please ensure that your iDatalink
Maestro module is programmed
with the correct firmware for your
vehicle and that you carefully review
the install guide.
Please note that Maestro RR will
only retain functionalities that
were originally available in the
vehicle.
1 866 427-2999
[email protected]
maestro.idatalink.com/support
www.12voltdata.com/forum
TABLE OF CONTENTS
Wiring Diagram 3
Vehicle Wire Reference Chart 4
ADS-RR(SI)-HYU01-DS maestro.idatalink.com
hyundai elantra Base 2007-2010
Automotive Data Solutions Inc. © 2016 3
65
8
7
14
13
16 15
2 14 3
10 912 11
18 1720 19
A
H
G
A
G
H
3
10 11 12 13 14 15 16
1234567 8
9
NOT CONNECTED
OBDII CONNECTOR
LOCATED UNDER DRIVER SIDE DASH
MAESTRO RR MODULE
CONNECT TO
AFTERMARKET RADIO
C- LOCATED BEHIND RADIO
SWI 1
SWI 1
SWI FEED
SWI FEED
PURPLE/RED -
PURPLE/RED - SWI CIRCUIT 1 INPUT
BLACK/WHITE -
BLACK/WHITE - SWI GROUND FEED (-) OUTPUT
WIRES FROM
VEHICLE
STEP 1
STEP 2
STEP 3
STEP 4
WIRING DIAGRAM
NOT CONNECTED
YELLOW - 12V (+) INPUT
BLACK - GROUND
GRAY/RED - ACCESSORY (+) INPUT
BLACK
BLACK
RED
RED
YELLOW
YELLOW
NOTE: PIN SIDE VIEW. CONNECT TO TWISTED WIRES BEHIND CONNECTOR.
BROWN/RED - CANH
BROWN/YELLOW - CANL
CANH
CANH
CANL
CANL
ADS-RR(SI)-HYU01-DS maestro.idatalink.com
hyundai elantra Base 2007-2010
Automotive Data Solutions Inc. © 2016 4
VEHICLE WIRE REFERENCE CHART
Wire
Description
Connector
Name
Connector
Color
Connector
Type Position Wire Color Polarity Wire
Location
CanH A ~ 16 pin 06 White (DATA) OBDII connector, under driver side dash
CanL A ~ 16 pin 14 Yellow (DATA) OBDII connector, under driver side dash
SWI 1 C ~ 20 pin 05 Green (DATA) Behind radio
SWI Feed C ~ 20 pin 06 Black (-) Behind radio
OPTIONAL ACCESSORIES
None
PROGRAMMED FIRMWARE
ADS-RR(SI)-HYU01-DS
PRODUCTS REQUIRED
iDatalink Maestro RR Radio Replacement Interface
iDatalink Compatible Radio
INSTALL GUIDE
HYUNDAI ELANTRA
BASE 20112016
retains steering wheel controls and adds gauges
NOTICE: Automotive Data Solutions Inc. (ADS) recommends having this installation performed by a certified technician. Logos and trademarks used here
in are the properties of their respective owners.
ADS-RR(SI)-HYU01-DS maestro.idatalink.com
hyundai elantra Base 2011-2016
Automotive Data Solutions Inc. © 2016 2
WELCOME
NEED HELP?
Congratulations on the purchase
of your iDatalink Maestro RR Radio
replacement solution. You are
now a few simple steps away from
enjoying your new car radio with
enhanced features.
Before starting your installation,
please ensure that your iDatalink
Maestro module is programmed
with the correct firmware for your
vehicle and that you carefully review
the install guide.
Please note that Maestro RR will
only retain functionalities that
were originally available in the
vehicle.
1 866 427-2999
[email protected]
maestro.idatalink.com/support
www.12voltdata.com/forum
TABLE OF CONTENTS
Wiring Diagram 3
Vehicle Wire Reference Chart 4
ADS-RR(SI)-HYU01-DS maestro.idatalink.com
hyundai elantra Base 2011-2016
Automotive Data Solutions Inc. © 2016 3
543 2 110 9 8 7 6
17 16 15 14 1322 21
12 11
24 23 20 19 18
A
H
G
A
G
H
1
10 11 12 13 14 15 16
1234567 8
9
NOT CONNECTED
OBDII CONNECTOR
LOCATED UNDER DRIVER SIDE DASH
MAESTRO RR MODULE
CONNECT TO
AFTERMARKET RADIO
B- LOCATED BEHIND RADIO
SWI 1
SWI 1
SWI FEED
SWI FEED
PURPLE/RED -
PURPLE/RED - SWI CIRCUIT 1 INPUT
BLACK/WHITE -
BLACK/WHITE - SWI GROUND FEED (-) OUTPUT
WIRES FROM
VEHICLE
STEP 1
STEP 2
STEP 3
STEP 4
WIRING DIAGRAM
NOT CONNECTED
YELLOW - 12V (+) INPUT
BLACK - GROUND
GRAY/RED - ACCESSORY (+) INPUT
BLACK
BLACK
RED
RED
YELLOW
YELLOW
NOTE: PIN SIDE VIEW. CONNECT TO TWISTED WIRES BEHIND CONNECTOR.
BROWN/RED - CANH
BROWN/YELLOW - CANL
CANH
CANH
CANL
CANL
ADS-RR(SI)-HYU01-DS maestro.idatalink.com
hyundai elantra Base 2011-2016
Automotive Data Solutions Inc. © 2016 4
VEHICLE WIRE REFERENCE CHART
Wire
Description
Connector
Name
Connector
Color
Connector
Type Position Wire Color Polarity Wire
Location
CanH A ~ 16 pin 06 White (DATA) OBDII connector, under driver side dash
CanL A ~ 16 pin 14 Yellow (DATA) OBDII connector, under driver side dash
SWI 1 B ~ 24 pin 04 Brown (DATA) Behind radio
SWI Feed B ~ 24 pin 17 Green (-) Behind radio
OPTIONAL ACCESSORIES
None
PROGRAMMED FIRMWARE
ADS-RR(SI)-HYU01-DS
PRODUCTS REQUIRED
iDatalink Maestro RR Radio Replacement Interface
iDatalink Compatible Radio
INSTALL GUIDE
HYUNDAI ELANTRA TOURING
BASE 20072012
retains steering wheel controls and adds gauges
NOTICE: Automotive Data Solutions Inc. (ADS) recommends having this installation performed by a certified technician. Logos and trademarks used here
in are the properties of their respective owners.
ADS-RR(SI)-HYU01-DS maestro.idatalink.com
hyundai elantra touring Base 2007-2012
Automotive Data Solutions Inc. © 2016 2
WELCOME
NEED HELP?
Congratulations on the purchase
of your iDatalink Maestro RR Radio
replacement solution. You are
now a few simple steps away from
enjoying your new car radio with
enhanced features.
Before starting your installation,
please ensure that your iDatalink
Maestro module is programmed
with the correct firmware for your
vehicle and that you carefully review
the install guide.
Please note that Maestro RR will
only retain functionalities that
were originally available in the
vehicle.
1 866 427-2999
[email protected]
maestro.idatalink.com/support
www.12voltdata.com/forum
TABLE OF CONTENTS
Wiring Diagram 3
Vehicle Wire Reference Chart 4
ADS-RR(SI)-HYU01-DS maestro.idatalink.com
hyundai elantra touring Base 2007-2012
Automotive Data Solutions Inc. © 2016 3
65
8
7
14
13
16 15
2 14 3
10 912 11
18 1720 19
A
H
G
A
G
H
3
10 11 12 13 14 15 16
1234567 8
9
NOT CONNECTED
OBDII CONNECTOR
LOCATED UNDER DRIVER SIDE DASH
MAESTRO RR MODULE
CONNECT TO
AFTERMARKET RADIO
C- LOCATED BEHIND RADIO
SWI 1
SWI 1
SWI FEED
SWI FEED
PURPLE/RED -
PURPLE/RED - SWI CIRCUIT 1 INPUT
BLACK/WHITE -
BLACK/WHITE - SWI GROUND FEED (-) OUTPUT
WIRES FROM
VEHICLE
STEP 1
STEP 2
STEP 3
STEP 4
WIRING DIAGRAM
NOT CONNECTED
YELLOW - 12V (+) INPUT
BLACK - GROUND
GRAY/RED - ACCESSORY (+) INPUT
BLACK
BLACK
RED
RED
YELLOW
YELLOW
NOTE: PIN SIDE VIEW. CONNECT TO TWISTED WIRES BEHIND CONNECTOR.
BROWN/RED - CANH
BROWN/YELLOW - CANL
CANH
CANH
CANL
CANL

Other manuals for maestro Rr

48

Other iDataLink Automobile Accessories manuals

iDataLink Maestro AR User manual

iDataLink

iDataLink Maestro AR User manual

iDataLink maestro Rr User manual

iDataLink

iDataLink maestro Rr User manual
iDataLink maestro Pr 2 User manual

iDataLink

iDataLink maestro Pr 2 User manual

iDataLink Maestro RR User manual

iDataLink

iDataLink Maestro RR User manual

iDataLink Maestro RR User manual

iDataLink

iDataLink Maestro RR User manual

iDataLink maestro Rr User manual

iDataLink

iDataLink maestro Rr User manual

iDataLink maestro Rr User manual

iDataLink

iDataLink maestro Rr User manual
iDataLink maestro Rr User manual

iDataLink

iDataLink maestro Rr User manual

iDataLink Maestro RR User manual

iDataLink

iDataLink Maestro RR User manual

iDataLink ADS-MRR2 User manual

iDataLink

iDataLink ADS-MRR2 User manual

iDataLink maestro Rr User manual

iDataLink

iDataLink maestro Rr User manual

iDataLink maestro Rr User manual

iDataLink

iDataLink maestro Rr User manual

iDataLink SUB9 User manual

iDataLink

iDataLink SUB9 User manual

iDataLink maestro Rr User manual

iDataLink

iDataLink maestro Rr User manual

iDataLink ADS-TBSL-FM-EN User manual

iDataLink

iDataLink ADS-TBSL-FM-EN User manual

iDataLink maestro Rr User manual

iDataLink

iDataLink maestro Rr User manual

iDataLink ADS-ALCA User manual

iDataLink

iDataLink ADS-ALCA User manual

iDataLink ADS-AL-CH4 User manual

iDataLink

iDataLink ADS-AL-CH4 User manual

iDataLink Maestro RR User manual

iDataLink

iDataLink Maestro RR User manual

iDataLink Maestro RR User manual

iDataLink

iDataLink Maestro RR User manual

iDataLink maestro Rr User manual

iDataLink

iDataLink maestro Rr User manual

iDataLink maestro Rr User manual

iDataLink

iDataLink maestro Rr User manual
iDataLink maestro Rr User manual

iDataLink

iDataLink maestro Rr User manual

iDataLink maestro Rr User manual

iDataLink

iDataLink maestro Rr User manual
Popular Automobile Accessories manuals by other brands

Cruz Evo Rack E28-158 Assembly instructions

Cruz

Cruz Evo Rack E28-158 Assembly instructions

Nokia CK-600 Product sheet

Nokia

Nokia CK-600 Product sheet

Prime Design VRR3-GM31G-ST Assembly instructions

Prime Design

Prime Design VRR3-GM31G-ST Assembly instructions

Sintrones VBOX-3600 user manual

Sintrones

Sintrones VBOX-3600 user manual

Cequent Rola 59504 manual

Cequent

Cequent Rola 59504 manual

ISDT ESC70 user manual

ISDT

ISDT ESC70 user manual

Standby L54 manual

Standby

Standby L54 manual

Prorack K586 Fitting instructions

Prorack

Prorack K586 Fitting instructions

Menabo ACONCAGUA installation instructions

Menabo

Menabo ACONCAGUA installation instructions

Dakota Digital Retrotech RTX-68D-STD Instrument Installation

Dakota Digital

Dakota Digital Retrotech RTX-68D-STD Instrument Installation

Scosche WDQ2M manual

Scosche

Scosche WDQ2M manual

Cruz Evo Rack Module E30 Assembly instructions

Cruz

Cruz Evo Rack Module E30 Assembly instructions

JCROffroad DIY-XJ-F-WN Assembly instructions

JCROffroad

JCROffroad DIY-XJ-F-WN Assembly instructions

Cruz Rafter Assembly instructions

Cruz

Cruz Rafter Assembly instructions

Pacbrake 10475 installation manual

Pacbrake

Pacbrake 10475 installation manual

DEI 010220 Product instructions

DEI

DEI 010220 Product instructions

banks iDash 1.8 owner's manual

banks

banks iDash 1.8 owner's manual

Prime Design URX-001-E Assembly instructions

Prime Design

Prime Design URX-001-E Assembly instructions

manuals.online logo
manuals.online logoBrands
  • About & Mission
  • Contact us
  • Privacy Policy
  • Terms and Conditions

Copyright 2025 Manuals.Online. All Rights Reserved.