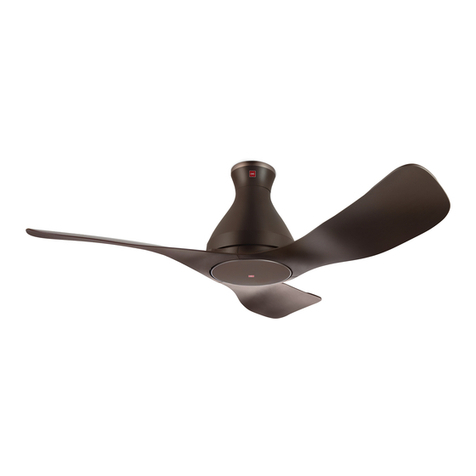
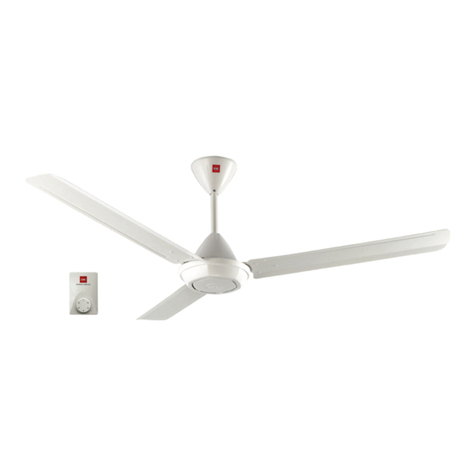
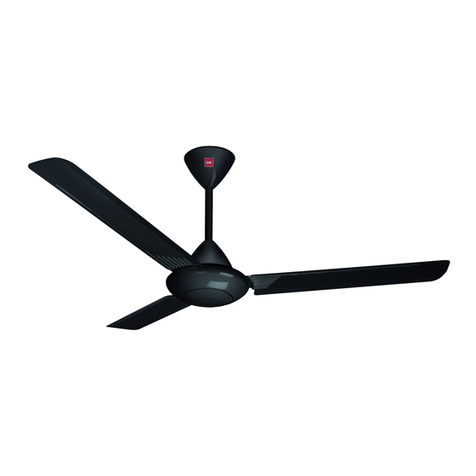
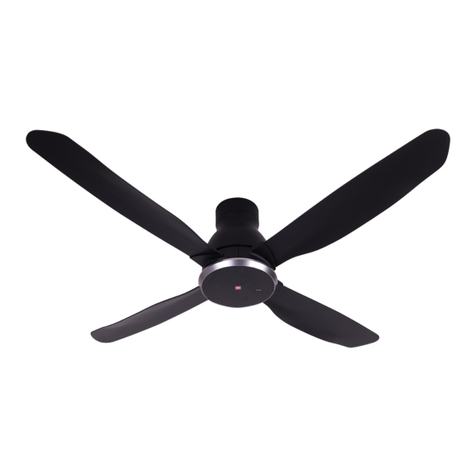
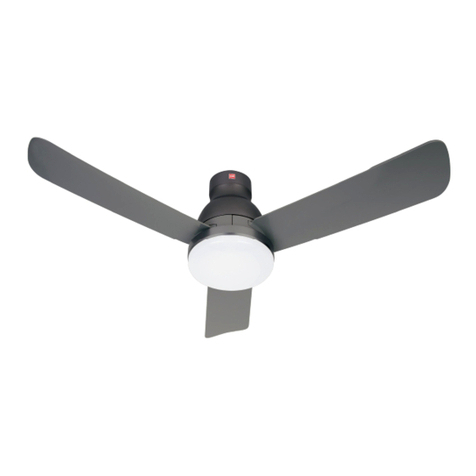
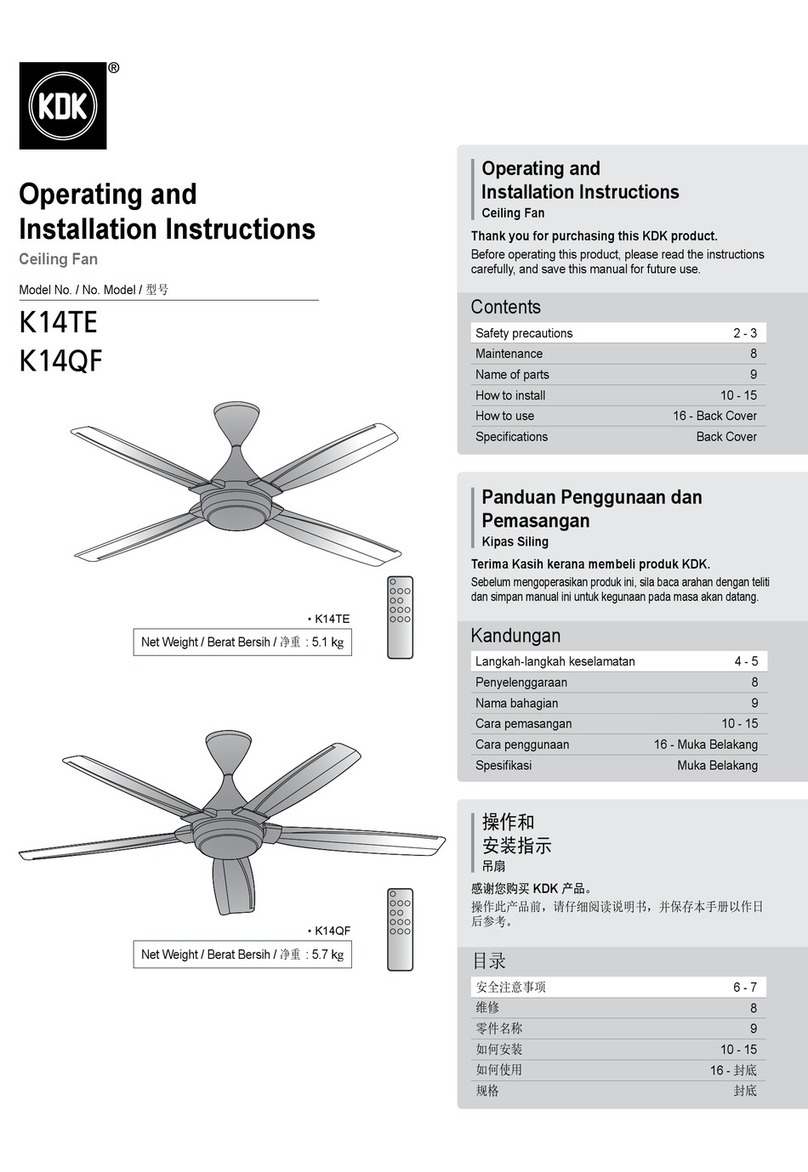
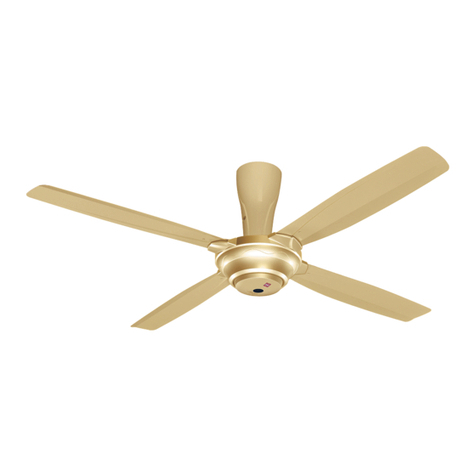
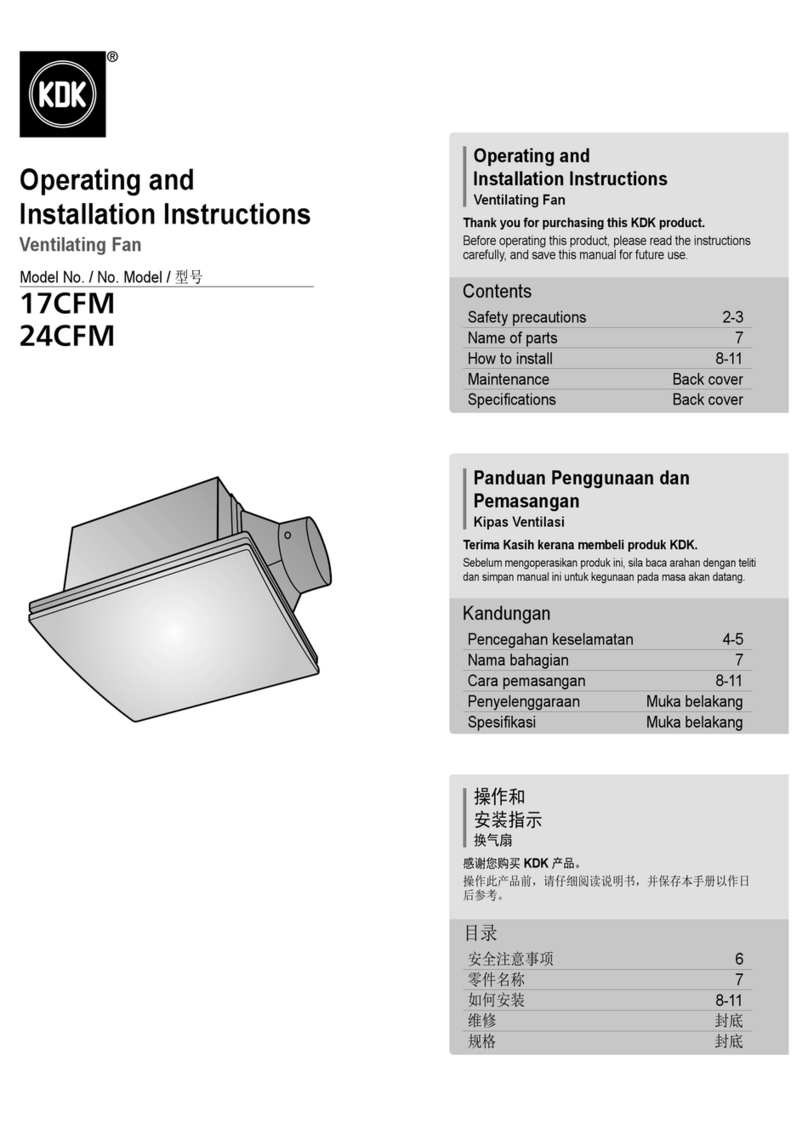
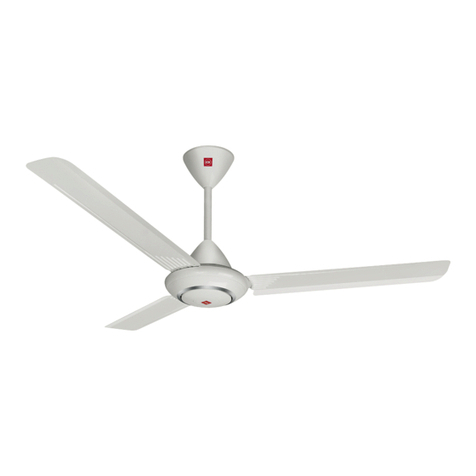
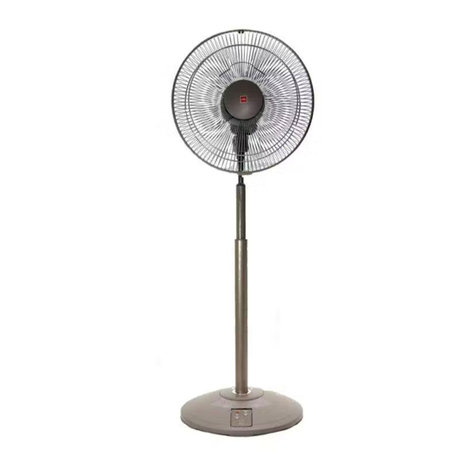
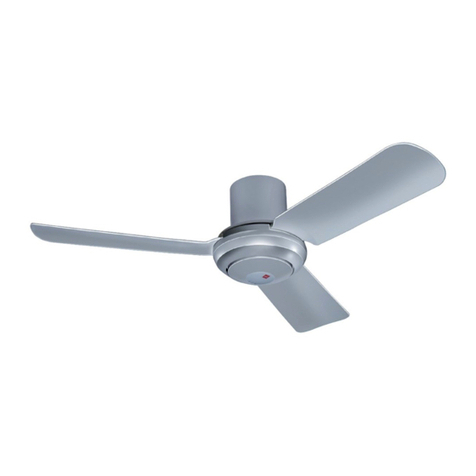
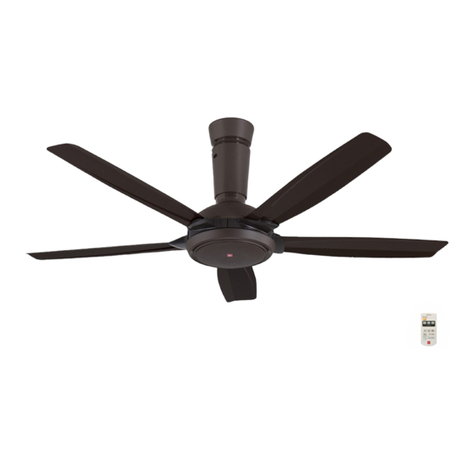
KDK K14XF User manual

Panduan Penggunaan dan
Pemasangan
Kipas Siling
Terima Kasih kerana membeli produk KDK.
Sebelum mengoperasikan produk ini, sila baca arahan dengan teliti
dan simpan manual ini untuk kegunaan pada masa akan datang.
Safety precautions 2-3
Maintenance 8
Name of parts 9
How to install 10-22
How to use 23-26
Specifications 27
Contents
ᬃ֒ૂ
ᆿ㻻⽰
䉘ᛞ䍣Ҧ KDK ӝȾ
操作此产品前,请仔细阅读说明书,并保存本手册以作日
后参考。
安全注意事项 6-7
维修 8
零件名称 9
如何安装 10-22
如何使用 23-26
规格 27
目录
Pencegahan keselamatan 4-5
Penyelenggaraan 8
Nama bahagian 9
Cara pemasangan 10-22
Cara penggunaan 23-26
Spesifikasi 27
Kandungan
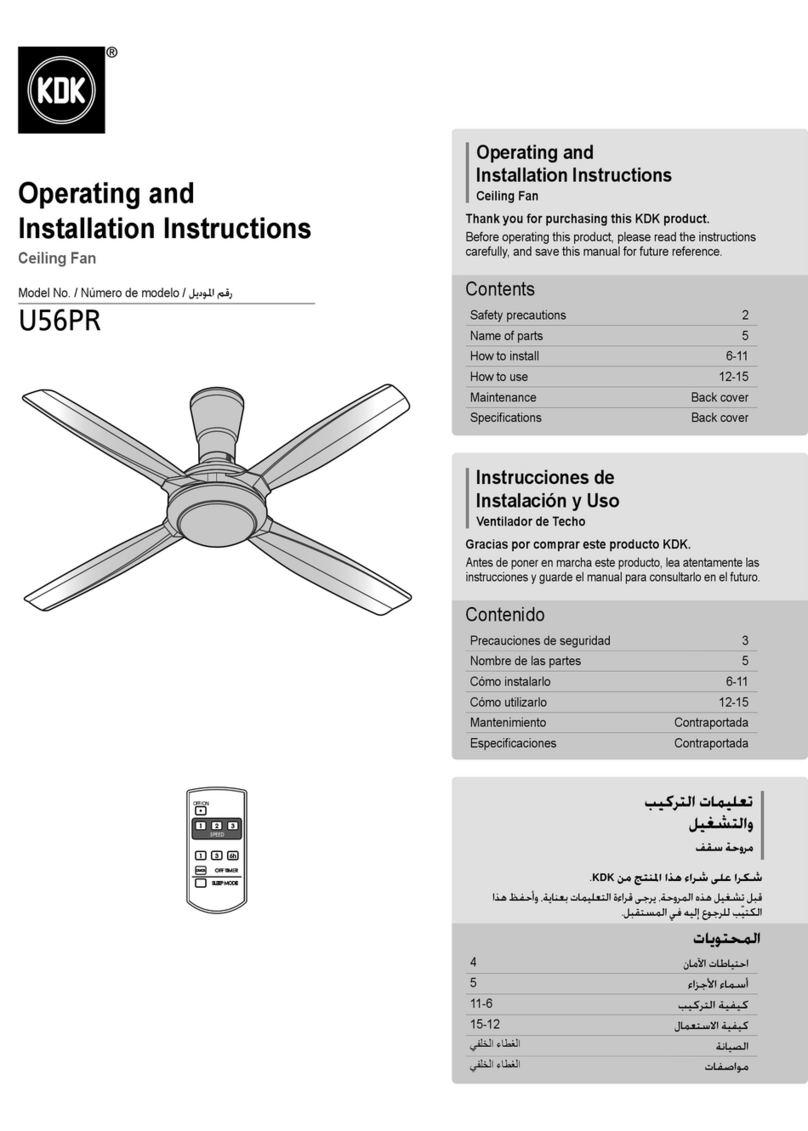
Operating and
Installation Instructions
Ceiling Fan
Thank you for purchasing this KDK product.
Before operating this product, please read the instructions
carefully, and save this manual for future reference.
Model No. / No. Model / 型号
,9'
,,'
Operating and
Installation Instructions
Ceiling Fan
Nett Weight / Berat Bersih /
净重
: 5.2
kg
• K14XF
Nett Weight / Berat Bersih /
净重
: 5.2
kg
• K14KF

2
WARNING
To avoid the possibility of causing injury to users or damage to properties, please follow all the explanations written below.
This symbol denotes an action that is COMPULSORY.
This symbol denotes an action that is PROHIBITED.
WARNING
A state that may be caused by the mishandling of products, which, if not avoided,
may lead to the possibility of death or serious injury of users.
CAUTION
A state that may be caused by the mishandling of products, which, if not avoided,
may result in the injury of users or property damage.
Safety precautions Always follow these instructions
Follow strictly all the instructions given in this
manual for installation.
Electrical and installation work needs to be
performed by a qualified individual.
Installation error can cause fire, electrical shock,
injury or Ceiling Fan to drop.
Switch off the power supply and wait until the
Blades is fully static, before cleaning or doing
any maintenance jobs.
Can cause injury or electrical shock if Ceiling Fan
move suddenly.
Kindly refer to your authorized dealer for repairing
or maintenance.
Tighten the Blade Screws firmly using a
screwdriver.
(250-300 N•cm)
Can cause injury if Blade drops.
Ensure that the ceiling hook can sustain more
than 10 times the Ceiling Fan weight.
Can cause injury if Ceiling Fan drops.
Stop using the Ceiling Fan when any
abnormality or failure occurs and turn “OFF”
the Miniature Circuit Breaker (MCB).
Risk of smoke, fire, electrical shock or Ceiling Fan
drops.
Please contact your authorized dealer for repairing
or maintenance.
Dismantle the broken or damaged Ceiling Fan.
Can cause injury if Ceiling Fan drops.
If unusual oscillating movement is observed,
immediately stop using the Ceiling Fan and
contact the manufacturer, its service agent or
suitably qualified persons.
Can cause injury if Ceiling Fan drops.
Do not install the Ceiling Fan at oily and dusty
places.
Can cause fire, short circuit and electrical shock.
Do not install the Ceiling Fan near flammable
areas such as a gas cooker.
Can cause fire, short circuit and electrical shock.
Do not install the Ceiling Fan near chemicals
and
alkaline.
Can cause fire, short circuit and electrical shock.
Do not damage the wire during installation e.g.
deform due to heat, twist, bend, etc.
Can cause fire, short circuit and electrical shock.
Do not use power supply other than rated
voltage mentioned.
Overheating can cause electrical shock and fire.
Do not insert any metal items in the battery area
with the Battery.
Can cause fire, short circuit and electrical shock.
Do not hang onto the Ceiling Fan.
Can cause injury if Ceiling Fan drops.
Do not use modified part other than original
supplied part.
Can cause injury if Ceiling Fan drops.
Do not bypass and short circuit the Safety
Switch.
Can cause fire, electrical shock, injury and Ceiling
Fan to drop.
Do not disassemble the Ceiling Fan unless
stated by this manual.
Must use only supplied parts.
Can cause fire, electrical shock, injury or Ceiling
Fan to drop.
Do not touch the Ceiling Fan while it is
operating.
Can cause injury, damage and Ceiling Fan to drop.
Do not sprinkle water to Ceiling Fan or do not
wet the Ceiling Fan.
Can cause fire, short circuit and electrical shock.
Do not install the Ceiling Fan at a wet, high
temperature and high humidity area such as
shower room.
If an electrical current leakage occurs, it can cause
electrical shock or fire easily.

3
CAUTION
Safety precautions Always follow these instructions
To avoid the possibility of causing injury to
users or damage to properties, please follow
all the explanation written in this manual. The
manufacturer will not be responsible for any
accidents or injuries caused by defective,
deficient installation or installation which does
not follow the instruction manual.
Can cause the injury of users or property damage.
This appliance is not intended for use by
persons (including children) with reduced
physical, sensory or mental capabilities, or lack
of experience and knowledge, unless they have
been given supervision or instruction concerning
use of the appliance by a person responsible for
their safety. Children should be supervised to
ensure that they do not play with the appliance.
Can cause the injury of users or property damage.
Ceiling Fan must be mounted above 2.3 m from
the floor and 1 m from the wall to the Blade.
Can cause unstable air flow and affect the Ceiling
Fan to wobble.
Can cause injury if Ceiling Fan drops.
Refer to Step 8 on page 22 for the measurement
method.
After installation make sure the Ceiling Fan does
not wobble extremely.
Can cause injury if Ceiling Fan drops.
Replace all the Blades if any of them breaks or
cracks.
Can cause injury if Ceiling Fan drops due to
wobbling.
The mounting of the suspension system shall be
performed by the manufacturer, its service agent
or suitably qualified persons.
Can cause injury if Ceiling Fan drops.
The Ceiling Fan suspension system should be
examined at least once every two years.
Can cause the injury of users or property damage.
The replacement of parts of the safety
suspension system device shall be performed
by the manufacturer, its service agent or suitably
qualified persons.
Can cause the injury of users or property damage.
This product is for in house use only. Do not
install at a windy places.
Can cause rust, discolour, damage or injury.
Do not install at places where there is high
vibration and impact.
Can cause injury if Ceiling Fan drops.
Avoid fixing inside dome ceiling.
Can cause unstable air flow and affect the Ceiling
Fan to wobble.
Can cause injury if Ceiling Fan drops.
Wipe away dirt with a clean soft cloth, ordinary
soap and water to keep the Ceiling Fan clean. Do
not use solvents (gasoline, petroleum, thinner,
benzine, alcohol, cleaning powder, alkaline
detergent) or any other chemicals.
Can cause plastic part deformation or metal
corrosion.
Can cause injury if parts drop.
Safety precautionsPencegahan keselamatan
ᆿޞ⌞ᝅӁ亯

4
Untuk mengelakkan kemungkinan berlakunya kecederaan kepada pengguna atau kerosakan harta benda, sila patuhi semua
penerangan yang dinyatakan di bawah.
Simbol ini menunjukkan perbuatan yang WAJIB DILAKUKAN.
Simbol ini menunjukkan perbuatan yang DILARANG.
AMARAN
Keadaan yang mungkin disebabkan oleh kecuaian dalam mengendalikan produk,
yang mana, jika tidak dielakkan, boleh mengakibatkan kematian atau kecederaan
parah kepada pengguna.
AWAS
Keadaan yang mungkin disebabkan oleh kecuaian dalam mengendalikan produk,
yang mana, jika tidak dielakkan, boleh mengakibatkan kecederaan kepada
pengguna atau kerosakan harta benda.
AMARAN
Pencegahan keselamatan Sentiasa mengikuti arahan berikut
Jangan pasang Kipas Siling berhampiran dengan
bahan kimia dan alkali.
Boleh menyebabkan kebakaran, litar pintas dan kejutan
elektrik.
Elakkan kerosakan pada dawai semasa pemasangan
contohnya, dawai berubah bentuk kerana panas,
terpulas, bengkok, dsb.
Boleh menyebabkan kebakaran, litar pintas dan kejutan
elektrik.
Jangan gunakan bekalan kuasa selain dari voltan
yang telah ditetapkan.
Pemanasan yang terlampau boleh menyebabkan kejutan
elektrik dan kebakaran.
Jangan masukkan sebarang logam kedalam ruang
bateri bersama-sama Bateri.
Boleh menyebabkan kebakaran, litar pintas dan kejutan
elektrik.
Jangan bergantung pada Kipas Siling.
Boleh menyebabkan kecederaan jika Kipas Siling
terjatuh.
Jangan guna bahagian yang telah diubahsuai selain
daripada bahagian yang dibekalkan.
Boleh menyebabkan kecederaan jika Kipas Siling
terjatuh.
Jangan pintas dan litar pintas Suis Keselamatan.
Boleh menyebabkan kebakaran, kejutan elektrik,
kecederaan dan Kipas Siling terjatuh.
Jangan buka sebarang bahagian-bahagian Kipas
Siling melainkan dinyatakan di dalam panduan ini.
Hendaklah menggunakan bahagian-bahagian yang
dibekalkan sahaja.
Boleh menyebabkan kebakaran, kejutan elektrik,
kecederaan atau Kipas Siling terjatuh.
Jangan sentuh Kipas Siling ketika ia sedang
beroperasi.
Boleh menyebabkan kecederaan, kerosakan dan Kipas
Siling terjatuh.
Jangan percikkan air ke Kipas Siling atau, jangan
basahkan Kipas Siling.
Boleh menyebabkan kebakaran, litar pintas dan kejutan
elektrik.
Jangan pasang di tempat yang basah, bersuhu tinggi
dan berkelembapan tinggi seperti di dalam bilik air.
Jika terdapat kebocoran arus elektrik, kejutan elektrik
atau kebakaran mudah berlaku.
Sila rujuk kepada semua arahan yang diberikan
dalam panduan ini untuk pemasangan.
Kerja elektrikal dan kerja pemasangan mesti
dilakukan oleh orang yang bertauliah.
Kesilapan pemasangan boleh menyebabkan kebakaran,
kejutan elektrik, Kipas Siling terjatuh atau kecederaan.
Putuskan bekalan kuasa dan tunggu sehingga Bilah
Kipas berhenti sepenuhnya, sebelum membersihkan
atau membuat kerja penyelenggaraan.
Boleh menyebabkan kecederaan atau kejutan elektrik jika
Kipas Siling bergerak secara tiba-tiba.
Sila rujuk pada wakil penjual anda untuk membaiki atau
penyelenggaraan.
Ketatkan Skru Bilah Kipas dengan kukuh
menggunakan pemutar skru. (250-300 N•cm)
Boleh menyebabkan kecederaan jika Bilah Kipas terjatuh.
Pastikan cangkuk siling boleh menanggung beban 10
kali ganda berat Kipas Siling.
Boleh menyebabkan kecederaan jika Kipas Siling
terjatuh.
Berhenti menggunakan Kipas Siling apabila
mendapati apa-apa keganjilan atau kegagalan berlaku
dan putar Pemutus Litar Miniatur (MCB) kepada
“OFF”.
Risiko asap, kebakaran, kejutan elektrik atau Kipas Siling
terjatuh.
Sila hubungi wakil penjual anda untuk membaiki atau
penyelenggaraan.
Tanggalkan Kipas Siling yang patah atau yang
mengalami kerosakan.
Boleh menyebabkan kecederaan jika Kipas Siling
terjatuh.
Jika berlaku pergerakan berayun yang luar biasa,
berhenti menggunakan Kipas Siling dengan segera
dan hubungi pengilang, ejen servis atau individu
yang bertauliah.
Boleh menyebabkan kecederaan jika Kipas Siling
terjatuh.
Elakkan memasang Kipas Siling di tempat berminyak
dan berhabuk.
Boleh menyebabkan kebakaran, litar pintas dan kejutan
elektrik.
Jangan pasang Kipas Siling di kawasan yang
berhampiran dengan barang mudah terbakar seperti
dapur gas.
Boleh menyebabkan kebakaran, litar pintas dan kejutan
elektrik.

5
AWAS
Pencegahan keselamatan Sentiasa mengikuti arahan berikut
Untuk mengelakkan kemungkinan berlaku
kecederaan kepada pengguna atau kerosakan
harta benda, sila patuhi semua arahan yang
dinyatakan dalam panduan ini. Pengilang tidak akan
bertanggungjawab sekiranya berlaku sebarang
kemalangan atau kecederaan yang disebabkan oleh
kesilapan pemasangan atau pemasangan yang tidak
mengikut buku panduan.
Boleh menyebabkan kecederaan kepada pengguna atau
kerosakan harta benda.
Peralatan ini tidak direka untuk digunakan oleh
individu (termasuk kanak-kanak) yang mempunyai
kecacatan anggota, deria atau kebolehan mental, atau
kurang pengalaman dan pengetahuan, melainkan
mereka telah diberikan pemerhatian atau panduan
mengenai penggunaan peralatan ini oleh individu
yang bertanggungjawab mengenai keselamatan
mereka. Kanak-kanak mestilah diberi pemerhatian
untuk memastikan mereka tidak bermain dengan
peralatan ini.
Boleh menyebabkan kecederaan kepada pengguna atau
kerosakan harta benda.
Kipas Siling mesti dipasang lebih daripada 2.3 m dari
lantai dan jarak 1 m dari dinding ke Bilah Kipas.
Boleh menyebabkan ketidakstabilan aliran angin dan
mengakibatkan Kipas Siling bergoyang.
Boleh menyebabkan kecederaan jika Kipas Siling
terjatuh.
Rujuk Langkah 8 pada muka surat 22 untuk kaedah
pengukuran.
Selepas pemasangan, pastikan Kipas Siling tidak
terlampau goyang.
Boleh menyebabkan kecederaan jika Kipas Siling
terjatuh.
Gantikan kesemua Bilah Kipas jika salah satu
daripadanya patah atau retak.
Boleh menyebabkan kecederaan jika Kipas Siling terjatuh
akibat goyangan.
Pemasangan sistem gantungan hendaklah dilakukan
oleh pengilang, ejen servis atau individu yang
bertauliah.
Boleh menyebabkan kecederaan jika Kipas Siling
terjatuh.
Disarankan memeriksa sistem gantungan Kipas
Siling sekurang-kurangnya sekali setiap dua tahun.
Boleh menyebabkan kecederaan kepada pengguna atau
kerosakan harta benda.
Penggantian bahagian peranti sistem gantungan
keselamatan hendaklah dilakukan oleh pengilang,
ejen servis atau individu yang bertauliah.
Boleh menyebabkan kecederaan kepada pengguna atau
kerosakan harta benda.
Produk ini adalah untuk kegunaan dalam rumah
sahaja. Jangan pasang di tempat yang berangin.
Boleh menyebabkan karat, warna luntur, kerosakan atau
kecederaan.
Jangan pasang di tempat yang terdapat getaran dan
hentakan tinggi.
Boleh menyebabkan kecederaan jika Kipas Siling
terjatuh.
Elakkan memasang di siling berbentuk kubah.
Boleh menyebabkan aliran udara yang tidak stabil dan
mempengaruhi Kipas Siling untuk bergoyang.
Boleh menyebabkan kecederaan jika Kipas Siling
terjatuh.
Lapkan kotoran dengan menggunakan kain yang
bersih dan lembut, sabun biasa dan air untuk
mengekalkan kebersihan kipas. Jangan gunakan
pelarut (gasolin, petrol, pencair, benzin, alkohol,
serbuk pencuci, detergen alkali) atau bahan kimia
lain.
Boleh menyebabkan kerosakan bahagian plastik atau
besi berkarat.
Boleh menyebabkan kecederaan jika komponen terjatuh.
Safety precautionsPencegahan keselamatan
ᆿޞ⌞ᝅӁ亯

6
为避免导致使用者受伤或财物损坏的可能性,请遵守以下所述的所有指示。
此符号表示有关行为是
ᕭᙝ
ᕭᙝ的。
此符号表示有关行为是
㻡⾷↘
㻡⾷↘的。
䆜 错误操作产品造成的结果,若不避免可能导致使用者死亡或严重受伤。
⌞ᝅ 错误操作产品造成的结果,若不避免可能导致用户受伤或财物损失。
䆜
ᆿޞ⌞ᝅӁ亯 ࣗᗻ䚫ᗠԛс⽰
ᆿ㻻ᰬ䈭ћṲ൦䚫ᆾᵢᢁ߂ᡶ㔏Ⲻᡶᴿ⽰Ⱦ
⭫㓵䞃㓵ૂᆿ㻻ᐛ֒ᗻ亱⭧㜳㜒ԱⲺӰ䘑㺂Ⱦ
安装错误可以导致火灾、触电、受伤或吊扇掉落。
ᢡᡌ䘑㺂Ա㔪ؤᐛ֒ࢃθީ䰣ᡶᴿ⭫Ⓠᒬㅿᖻ
㘲ᇂޞ䶏↘Ⱦ
若吊扇突然移位,可以导致受伤或触电。
请向您的经销商咨询有关修理或维修的详情。
ֵ⭞㷰ѓ䎭ᆆሼ㘲㷰ѓ䬷㍝Ⱦ(250-300 N•cm)
若扇翼掉落会导致受伤。
⺤ᇐཟ㣧ᶵ䫟ᆆԛᢵ䎻䗽Ⲻ 10 ك䠃䠅Ⱦ
若吊扇掉落会导致受伤。
ᖉ⭕Աᔸᑮᡌ᭻䳒ᰬθڒ↘ֵ⭞ᒬީ
䰣ćOFFĈᗤශᯣ䐥ಞδMCBεȾ
可能有烟雾、火灾、触电或掉落的风险 。
请向您的经销商咨询有关修理或维修的详情。
䲚ᦕᡌᦕඅҼⲺȾ
若吊扇掉落会导致受伤。
㤛⧦уሱᑮⲺ᩼ࣞθ䈭ڒ↘ֵ⭞ᒬ㚊㌱
䙖Ƚ
ެᵃࣗԙ⨼ᡌ㊱ղⲺᴿ䍺ṲӰȾ
若吊扇掉落会导致受伤。
䚵ރሼᆿ㻻൞⋯㞱ཐⲺ൦ᯯȾ
这可以导致火灾、短路和触电。
࠽ᆿ㻻൞➚≊⚬ㅿ᱉⟹൦䱺䘇Ⱦ
这可以导致火灾、短路和触电。
࠽ሼᆿ㻻൞ᆜૂ⻧ᙝ⢟䱺䘇Ⱦ
这可以导致火灾、短路和触电。
䚵ރ൞ᆿ㻻ᰬᦕඅ⭫㓵θׁྸഖ✣䠅ȽᢣᴨȽᕥᴨ䙖
ᡆⲺᖘㅿㅿȾ
这可以导致火灾、短路和触电。
࠽ֵ⭞ᵢᮽᇐⲺ仓ᇐ⭫ুԛཌⲺ⭫ⓆȾ
过热可导致触电和火灾。
࠽ᣀ䠇ኔ⢟։ф⭫⊖ж䎭᭴ޛ⭫⊖㖤᭴༺Ⱦ
这可以导致火灾、短路和触电。
࠽ᛢᤸ൞рȾ
若吊扇掉落会导致受伤。
у㾷ֵ⭞ؤ᭯䗽Ⲻ䴬Ԭ䲚Ҽ䞃༽䴬ԬȾ
若吊扇掉落会导致受伤。
࠽ሯᆿޞᔶީ䘑㺂㔋䚉ૂ⸣䐥Ⱦ
可以导致火灾、触电、受伤和吊扇掉落。
䈭䲚θ䲚䶔↚䈪᱄Ҝ⽰Ⱦ
务必只使用附带的零件。
可以导致火灾、触电、受伤或吊扇掉落。
䈭൞↙൞ᬃ֒Ⲻᰬُ䀜Ⱦ
可以导致受伤、损坏和吊扇掉落。
࠽⍈≪Ⱦᡌ㘻θ࠽ᔺ⒵Ⱦ
这可以导致火灾、短路和触电。
࠽ሼᆿ㻻ӄ▤⒵Ƚ儎儎⒵ᓜⲺ൦ᯯθׁ
ྸ⎪ᇚȾ
若发生漏电,这很容易会导致触电或火灾。

7
⌞ᝅ
ᆿޞ⌞ᝅӁ亯 ࣗᗻ䚫ᗠԛс⽰
Ѱ䚵ރሲ㠪⭞ᡭ՚ᡌ䍘⢟ᦕඅⲺ㜳ᙝθ䈭䚫ᆾ
ᵢ䈪᱄ҜޝⲺᡶᴿ⽰Ⱦ䙖ሯԱഖу↙⺤Ⲻ
ᆿ㻻ᡌу
➝䈪᱄Ҝ⽰Ⲻᆿ㻻ᡶ䙖ᡆⲺԱᝅཌૂᦕ՚ሼу
䍕Ա䍙ԱȾ
可能会造成使用者受伤害或财产损失。
䲚䶔⭧ᆿޞⴇᣚӰቧᵢӝ䘑㺂ⴇᡌሲθࡏ
䓡։
ȽᇎᡌᲰ࣑ᴿࣕ㜳䳒⻃㘻θᡌ㘻㕰҅ީ㔅僂ૂ
⸛䇼Ⲻ
Ӱ༡δᤢݵㄛε䈭ֵ⭞ᵢ⭫ಞȾѰҼ⺤ؓᒪᒲⲺ
ቅᆟу⧟↚⭫ಞθԌԢ䈛ࡦⴇȾ
可能会造成使用者受伤害或财产损失。
ᗻ亱᧑൞⿱൦䶘㠩ቇ 2.3 ㊩ԛрⲺ儎ᓜθ㙂㘲
ᗻ亱⿱ᔶ 1 ㊩ԛрȾ
可以导致不稳定气流和吊扇摇晃。
若吊扇掉落会导致受伤。
请参阅步骤 8 第 22 页的测量方法。
ᆿ㻻ᇂ∋θ䈭⺤ؓуՐ䗽ᓜᱹȾ
若吊扇掉落会导致受伤。
㤛Աж⡽㘲ᯣҼᡌ࠰⧦㻸Ⰻθ䈭ᴪᦘᡶᴿ㘲Ⱦ
如果发生摇晃,可能导致吊扇掉落并造成损伤。
ᛢᤸ㌱㔕Ⲻᆿ㻻ᓊ⭧䙖Ƚެᵃࣗԙ⨼ᡌ䘸Ⲻ
ᴿ䍺ṲӰᢝ㺂Ⱦ
若吊扇掉落会导致受伤。
ᔰ䇤∅њᒪ㠩ቇỶḛᛢᤸ㌱㔕ж⅗Ⱦ
可能会造成使用者受伤害或财产损失。
ᆿޞᛢᤸ㌱㔕㻻㖤Ⲻ䜞Ԭᴪᦘᓊ⭧䙖θެᵃࣗԙ
⨼ᡌ䘸Ⲻᴿ䍺ṲӰᢝ㺂Ⱦ
可能会造成使用者受伤害或财产损失。
ᵢӝבᇚֵ⭞Ⱦ࠽ᆿ㻻൞ཐ伄Ⲻ൦ᯯȾ
可导致生锈、退色、损坏或受伤。
࠽ᆿ㻻൞儎ᥥࣞᕭᓜૂ儎ߨ࠱ᕭᓜⲺ൦ᯯȾ
若吊扇掉落会导致受伤。
䚵ރᆿ㻻൞഼京ཟ㣧ᶵȾ
可以导致不稳定气流和吊扇摇晃。
若吊扇掉落会导致受伤。
⭞ᒨ߶Ⲻ䖥ᐹȽᲤ䙐㛛Ⲹૂ≪ᣯৱ⊗䘯ԛؓᤷⲺ
⌷Ⱦ࠽ֵ⭞⓬ࡸδ⊳⋯Ƚ⸩⋯Ƚ〶䠀ࡸȽ㤥Ƚ
䞈㋴Ƚৱ⊗㊿ૂ⻧ᙝ⍍⏚ࡸεᡌԱެԌᆜ⢟Ⱦ
这可导致塑料部件变形或金属腐蚀。
若零件掉落,则可能导致受伤。
Safety precautionsPencegahan keselamatan
ᆿޞ⌞ᝅӁ亯

8
1
Check the Ceiling Fan condition
annually. If a problem occurs,
stop using the Ceiling Fan. Then
refer to authorized dealer.
Check point:
Loosened screws, safety wire
condition, motor shaft damage, etc.
2
Ensure Safety Switch in good
condition.
• Refer to Step 1 on page 10 for
details.
If a problem occurs, stop using
the Ceiling Fan. Then refer to
authorized dealer.
1
∅ᒪỶḛⲺ⣬߫Ⱦྸ࠰⧦䰤
从θڒ↘ֵ⭞ᴿީȾ❬䍞䈘
ᦾᵹ㔅䬶Ⱦ
Ỷḛ⛯φ
螺丝松脱、保险线状况、发动机转
动轴损坏等等。
2
⺤ؓᆿޞᔶީ༺ӄ㢥ླ⣬ᘷȾ
• 详细信息参阅第 10 页步骤 1。
ྸ࠰⧦䰤从θڒ↘ֵ⭞ᴿީ
Ⱦ
❬䍞䈘ᦾᵹ㔅䬶Ⱦ
1
Periksa keadaan Kipas Siling
sekali setahun. Jika masalah
berlaku, berhenti menggunakan
Kipas Siling. Kemudian rujuk
kepada wakil penjual.
Pemeriksaan:
Skru longgar, keadaan wayar
keselamatan, kerosakan aci motor,
dsb.
2
Pastikan Suis Keselamatan dalam
keadaan baik.
• Rujuk Langkah 1 pada muka surat
10 untuk maklumat.
Jika masalah berlaku, berhenti
menggunakan Kipas Siling.
Kemudian rujuk wakil penjual.
3
Keep the Ceiling Fan clean.
Wipe away dirt with a clean
soft cloth, ordinary soap and
water. Wipe it again to dry it.
Do not use solvents (gasoline,
petroleum, thinner, benzine,
alcohol, cleaning powder,
alkaline detergent) or any other
chemicals.
• Do not bend the Blade while
cleaning.
4
Do not paint the Blades. If
damaged, order a new set
of Blades (3 pieces) from an
authorized dealer.
5
When referring to an authorized
dealer, show these instructions
to them so that maintenance will
be done correctly.
6
If the product is broken or
damaged, remove it from the
ceiling and replace with new.
This is to avoid the Ceiling Fan
drops.
7
The Ceiling Fan suspension
system should be examined at
least once every two years.
3
ؓᤷ⌷Ⱦ⭞ᒨ߶Ⲻ䖥ᐹȽᲤ
䙐㛛Ⲹૂ≪ᣯৱ⊗䘯Ⱦ߃ᣯж⅗ሼ
ҁᣯᒨȾ࠽ֵ⭞⓬ࡸδ⊳⋯Ƚ⸩
⋯Ƚ〶䠀ࡸȽ㤥Ƚ䞈㋴Ƚৱ⊗㊿ૂ
⻧ᙝ⍍⏚ࡸεᡌԱެԌᆜ⢟
Ⱦ
• 清洗扇翼时请切勿折弯扇翼。
4
࠽Ѱ㘲⎸┼Ⱦ㤛㘲ᦕඅҼθ䈭
ᦾᵹ㔅䬶䇘䍣᯦Ⲻ㘲δ3 ⡽εȾ
5
ᖉᛞ䍞䈘ᦾᵹ㔅䬶ᰬθ䈭ԌԢ
࠰⽰↚⽰ԛԌԢ↙⻰൦䘑㺂㔪
ؤȾ
6
㤛ӝᐨᣎᯣᡌᦕඅθ䈭Ԅཟ㣧ᶵ
р䲚θ❬ᦘр᯦ⲺȾ
䘏ᱥѰҼ䱨↘ᦿ㩳Ⱦ
7
ᔰ䇤∅њᒪ㠩ቇỶḛᛢᤸ㌱㔕
ж⅗Ⱦ
3
Kekalkan kebersihan Kipas
Siling. Mengelap kotoran dengan
menggunakan kain yang bersih
dan lembut, sabun biasa dan
air. Lapkan sekali lagi untuk
mengeringkannya. Jangan
gunakan pelarut (gasolin, petrol,
pencair, benzin, alkohol, serbuk
pencuci, detergen alkali)
atau bahan kimia lain.
• Jangan bengkokkan Bilah Kipas
ketika membersih.
4
Jangan cat Bilah Kipas. Sekiranya
terdapat kerosakan, pesan set
Bilah Kipas baru (3 unit) daripada
wakil penjual.
5
Apabila merujuk kepada wakil
penjual, tunjukkan arahan
ini kepada mereka agar
penyelenggaraan yang betul dapat
dijalankan.
6
Jika produk pecah atau rosak,
sila tanggalkannya dari siling dan
gantikan dengan kipas baru. Ini
adalah untuk mengelakkan Kipas
Siling terjatuh.
7
Disarankan supaya sistem
gantungan Kipas Siling diperiksa
sekurang-kurangnya setiap dua
tahun sekali.
Safety Switch / Suis Keselamatan / 安全开关
Switch Lever / Tuil Suis / 开关杆
Wrong Position /
Posisi Salah /
错误位置
Correct Position /
Posisi Betul /
正确位置
Maintenance Penyelenggaraan 㔪ؤ

9
Parts piece(s)
AUpper Canopy (K14XF)……… 1
BPipe Assembly ……………… 1
CLower Canopy (K14XF)……… 1
DCanopy (K14KF) ……………… 2
EMotor Unit …………………… 1
FBlade Assembly ……………… 3
GBatteries AAA / R03 / LR03 … 2
HRemote Control ……………… 1
IRemote Control Holder Set … 1
■
Attention:
• Do not place the Ceiling Fan directly on
the floor.
Can cause scratches to the product.
• Do not disassemble or remove the Pipe
from the Motor.
■
⮏ᝅφ
• 切勿把吊扇直接放置在地上。
这可导致产品被刮花。
• 切勿拆除或从发动机拆下导管。
■
Perhatian:
• Jangan letak Kipas Siling di atas lantai.
Boleh menyebabkan kesan calar pada
produk.
• Jangan tanggalkan atau keluarkan Paip
daripada Motor.
■
Note:
• The illustrations in this manual are for
explanation purposes only and may differ
from the actual unit.
■
༽⌞φ
• 本手册中的插图仅用于说明,可能与实际
组件有所不同。
■
Nota:
• Ilustrasi pada buku panduan ini adalah
untuk tujuan penerangan sahaja dan
mungkin berbeza dari unit asal.
I
G H
A
F
C
B
D
B
•
• K14KF
•
• K14XF
Bahagian-bahagian unit
ASengkuap Atas (K14XF) …… 1
BPemasangan Paip …………… 1
CSengkuap Bawah (K14XF) … 1
DSengkuap (K14KF)…………… 2
EUnit Motor……………………… 1
FPemasangan Bilah Kipas…… 3
GBateri AAA / R03 / LR03 …… 2
HAlat Kawalan Jauh …………… 1
ISet Pemegang Alat Kawalan
Jauh …………………………… 1
䴬Ԭ Ԭ
Aр㖟ⴌ(K14XF) ……………… 1
Bሲ㇗㓺Ԭ………………………… 1
Cс㖟ⴌ (K14XF) ……………… 1
D㖟ⴌ (K14KF) ………………… 2
Eࣞᵰ㓺Ԭ……………………… 1
F㘲㓺Ԭ………………………… 3
G⭫⊖AAA / R03 / LR03 ……… 2
H䚛ಞ…………………………… 1
I䚛ಞരᇐಞ㓺Ԭ……………… 1
WARNING
Do not use modified part other
than original supplied part.
Can cause injury if the Ceiling
Fan drops.
AMARAN
Jangan guna bahagian yang
telah diubahsuai selain
daripada bahagian yang
dibekalkan.
Boleh menyebabkan kecederaan
jika Kipas Siling terjatuh.
䆜
䆜
у㾷ֵ⭞ؤ᭯䗽Ⲻ䴬Ԭ䲚Ҽ
䞃༽䴬ԬȾ
若吊扇掉落会导致受伤。
E
E
Name of parts Nama bahagian 䴬Ԭ〦
Name of partsNama bahagian
䴬Ԭ〦

■Install Pipe Assembly
to Motor Unit
■Pasangkan Pemasangan
Paip Pada Motor Unit
CAUTION
Do not remove the Switch
Lever at Pipe.
Fix the Pipe correctly to the
Motor Shaft.
Can cause product not operate
if Switch has not been pressed
down.
Do not press Switch with
other object, except using the
Switch Lever given.
Can cause fire, explosion, short
circuit and electrical shock.
Can cause injury if the Ceiling
Fan drops.
1Before installing the Pipe Assembly
Bto the Motor Unit E, remove
the supplied Ellipse Bolt d1 , the P-R
Washers d2 , the Spring Washer d3 ,
the Hexa Nut d4 and the Cotter Pin
d5 from Pipe Assembly as shown.
2Fix the Pipe Bto the Motor Shaft
aas shown below.
Make sure that the Pipe hole and the
Motor Shaft hole are aligned.
Then, ensure the Switch bis
pushed by Switch Lever c.
1Sebelum menyambung Pemasangan
Paip Bpada Unit Motor E,
keluarkan Bolts Elips d1 , Sesendal
P-R d2 , Sesendal Pegas d3 , Nat
Heksagon d4 dan Cemat Baji d5
yang dibekalkan seperti yang
ditunjukkan.
2Pasang Paip Bke Aci Motor a
seperti yang ditunjukkan di bawah.
Pastikan lubang Paip dan lubang Aci
Motor adalah sejajar.
Kemudian, pastikan Suis bditolak
oleh Tuil Suis c.
1
൞ᆿ㻻ሲ㇗㓺Ԭ
൞ᆿ㻻ሲ㇗㓺Ԭ
B
ՐⲺࣞᵰ㓺
ՐⲺࣞᵰ㓺
Ԭ
E
ࡖ䲚ᡶᨆבⲺὣ഼㷰ṉࡖ
ࡖ䲚ᡶᨆבⲺὣ഼㷰ṉࡖ
䲚ᡶᨆבⲺὣ഼㷰ṉ
䲚ᡶᨆבⲺὣ഼㷰ṉ
d1
, P-R
ാ
ാ
d2
,
ᕯ㉝ാ
ᕯ㉝ാ
d3
,
ޣ䀈ᖘ㷰ᑳ
ޣ䀈ᖘ㷰ᑳ
d4
ૂᔶ䬶
ૂᔶ䬶
d5
㇗ཝՐྸഴᡶ⽰Ⱦ
㇗ཝՐྸഴᡶ⽰Ⱦ
2
ྸсഴᡶ⽰ሲ㇗
ྸсഴᡶ⽰ሲ㇗
B
ᆿ㻻㠩ࣞᵰ
ᆿ㻻㠩ࣞᵰ
ࣞ䖪
ࣞ䖪
a
Ⱦ
⺤ؓሲ㇗ᆊૂࣞᵰ䖢ࣞ䖪ᆊሯ
⺤ؓሲ㇗ᆊૂࣞᵰ䖢ࣞ䖪ᆊሯ
喆Ⱦ❬θ⺤ؓᔶީ
喆Ⱦ❬θ⺤ؓᔶީ
b
⭧ᔶީᵼ
⭧ᔶީᵼ
c
᧞ࣞȾ
᧞ࣞȾ
■
■
ᆿ㻻ሲ㇗㓺Ԭ㠩ࣞᵰ
ᆿ㻻ሲ㇗㓺Ԭ㠩ࣞᵰ
㓺Ԭ
㓺Ԭ
AWAS
Jangan tanggalkan Tuil Suis
pada Paip.
Pasangkan Paip dengan betul ke
Aci Motor.
Boleh menyebabkan produk
tidak beroperasi jika Suis tidak
ditekan ke bawah.
Jangan tekan Suis dengan
objek lain, kecuali
menggunakan Tuil Suis yang
diberikan.
Boleh menyebabkan kebakaran,
letupan, litar pintas dan kejutan
elektrik.
Boleh menyebabkan kecederaan
jika Kipas Siling terjatuh.
⌞ᝅ
⌞ᝅ
࠽䲚ሲ㇗рⲺᔶީᵼȾ
࠽䲚ሲ㇗рⲺᔶީᵼȾ
将导管正确地使固定发动机
转动轴。
若没压下开关可导致产品无
法操作。
䲚Ҽֵ⭞ᶛᴿⲺᔶᵼԛཌθ
䲚Ҽֵ⭞ᶛᴿⲺᔶᵼԛཌθ
࠽фެԌђ㾵ᰬ᧞ᔶީȾ
࠽фެԌђ㾵ᰬ᧞ᔶީȾ
这可能导致火灾、爆炸、短路
及电击。
落会导致受伤。
3Fix the Pipe and the Motor Assembly
with the Ellipse Bolt d1 , the P-R
Washers d2 , the Spring Washer d3 ,
the Hexa Nut d4 and the Cotter Pin
d5 .
The Slit eposition of the Ellipse
Bolt should be at top and bottom.
Bend the Cotter Pin d5 at last as
shown.
3Pasang Paip dan Pemasangan Motor
dengan Bolts Elips d1 , Sesendal
P-R d2 , Sesendal Pegas d3 , Nat
Heksagon d4 dan Cemat Baji d5 .
Kedudukan Celahan eBolt Elips
yang seharusnya di atas dan bawah.
Bengkokkan Cemat Baji d5 akhirnya
seperti yang ditunjukkan.
3
ֵ⭞㓺㻻ሲ㇗фࣞᵰ㓺Ԭὣ഼㷰
ֵ⭞㓺㻻ሲ㇗фࣞᵰ㓺Ԭὣ഼㷰
ṉ
d1
, P-R
ാ
ാ
d2
,
ᕯ㉝ാ
ᕯ㉝ാ
d3
,
ޣ䀈ᖘ㷰ᑳ
ޣ䀈ᖘ㷰ᑳ
d4
ૂᔶ䬶
ૂᔶ䬶
d5
Ⱦ
㷰ṉⲺ㕓䳏
㷰ṉⲺ㕓䳏
e
ᗻ亱փӄ京䜞
ᗻ亱փӄ京䜞
ᓋ䜞Ⱦ
ᓋ䜞Ⱦ
ᴶᡶ⽰ᣎᕥᔶ䬶
ᴶᡶ⽰ᣎᕥᔶ䬶
d5
Ⱦ
1
K14XF
1
B
a
BB
cb
d1 d2
d3 d4 d5
2
10
How to install Cara pemasangan ྸᆿ㻻

3
d1
e
d2 d3 d4 d5
d5
11
How to install Cara pemasangan ྸᆿ㻻
WARNING
Ensure that the Pipe has been
fully tightened to the Motor
Shaft. (Bolt tightening torque
is 800 ~ 1200 N·cm). And the
Cotter Pin must be fixed into
the Bolt hole and bent.
Can cause injury if the Ceiling
Fan drops.
AMARAN
Pastikan Paip telah diketatkan
sepenuhnya pada Aci Motor.
(Kilas pengetatan bolt ialah
800 ~ 1200 N·cm). Dan Cemat
Baji mestilah dimasukkan
ke dalam lubang Bolt dan
dibengkokkan.
Boleh menyebabkan kecederaan
jika Kipas Siling terjatuh.
䆜
䆜
⺤ᇐሼሲ㇗䬷㍝㠩ࣞᵰ䖢ࣞ
⺤ᇐሼሲ㇗䬷㍝㠩ࣞᵰ䖢ࣞ
䖪Ⱦ
䖪Ⱦ
(
㷰ṉᢣ㍝䖢䐓ᱥ
㷰ṉᢣ㍝䖢䐓ᱥ
800 ~
1200 N·cm)
Ⱦ㙂ъᔶ䬶ᗻ
Ⱦ㙂ъᔶ䬶ᗻ
亱ᨈޛ㷰ṉᆊ❬ᣎᕥȾ
亱ᨈޛ㷰ṉᆊ❬ᣎᕥȾ
若吊扇掉落会导致受伤。
4Remove the Safety Wire Screw f
at the Motor Shaft a. Fix the Safety
Wire gfirmly to the Motor Shaft
awith Safety Wire Screw f.
Tighten the Safety Wire Screw f.
4Tanggalkan Skru Wayar Keselamatan
fpada Aci Motor a. Pasangkan
Wayar Keselamatan gdengan kuat
pada Aci Motor adengan Skru
Wayar Keselamatan f.
Ketatkan Skru Wayar Keselamatan
f.
4
ᔶ䖢ࣞ䖪
ᔶ䖢ࣞ䖪
a
рⲺؓ䲟㓵㷰ѓ
рⲺؓ䲟㓵㷰ѓ
f
Ⱦ
ֵ⭞ؓ䲟㓵㷰ѓ
ֵ⭞ؓ䲟㓵㷰ѓ
f
ሼؓ䲟㓵
ሼؓ䲟㓵
g
രᇐӄ䖢ࣞ䖪
രᇐӄ䖢ࣞ䖪
a
Ⱦ
䬷㍝ؓ䲟㓵㷰ѓ
䬷㍝ؓ䲟㓵㷰ѓ
f
Ⱦ
(a) 40~45°
4
g
a
f
g
ff
g
How to installCara pemasangan
ྸᆿ㻻

5Connect the Power Cord hto
the 3 pin Terminal i.
5Sambungkan Kord Kuasa h
kepada Terminal 3 Pin i.
5
䘔⭫㔼
䘔⭫㔼
h
㠩
3
䪾ㄥᆆ
䪾ㄥᆆ
i
Ⱦ
WARNING
Make sure all the Terminals
are connected correctly by a
competent personnel to avoid
electrical hazards.
Make sure all the wires must
be fully insert and the 3 pin
Terminal screw is firmly
tightened.
Can cause fire, electrical shock,
Ceiling Fan drops and injuries.
AMARAN
Pastikan semua Terminal
disambung dengan betul oleh
kakitangan yang kompeten
untuk mengelakkan bahaya
elektrik.
Pastikan semua wayar mesti
dimasukkan sepenuhnya dan
skru Terminal 3 pin diketatkan
dengan kuat.
Boleh menyebabkan kebakaran,
kejutan elektrik, Kipas Siling
jatuh dan kecederaan.
䆜
䆜
䈭㜳㜒ԱⲺӰ⺤ᇐᡶᴿㄥ
䈭㜳㜒ԱⲺӰ⺤ᇐᡶᴿㄥ
ᆆᐨ↙⺤൦䘔ԛ䚵ރ⭫≊
ᆆᐨ↙⺤൦䘔ԛ䚵ރ⭫≊
ধ䲟Ⱦ
ধ䲟Ⱦ
⺤ؓᡶᴿ⭫㓵䜳ᗻ亱ᇂޞᨈ
⺤ؓᡶᴿ⭫㓵䜳ᗻ亱ᇂޞᨈ
ޛθᒬъ
ޛθᒬъ
3
䪾ㄥᆆ㷰ѓᐨᤝ
䪾ㄥᆆ㷰ѓᐨᤝ
㍝Ⱦ
㍝Ⱦ
这可导致火灾、电击、吊扇掉
落及受伤。
Check point after installation Pemeriksaan Selepas
Pemasangan
All wires are connected correctly by a
competent personnel.
The Ellipse Bolt, P-R Washers,
Spring Washer and Hexa Nut are
firmly tightened and the Cotter Pin is
inserted and bent for safety reason.
The Safety Wire Screw is firmly
tightened.
The Switch Lever press the Switch.
ᆿ㻻Ⲻ䠃⛯Ỷḛ
ᆿ㻻Ⲻ䠃⛯Ỷḛ
Neutral (blue) / Neutral (biru) / 零线 (蓝色)
Live (brown) / Hidup (coklat) / 火线 (棕色)
Earth (green/yellow) / Bumi (hijau/kuning) /
地线 (绿色/黄色)
Semua wayar disambungkan oleh
kakitangan kompeten.
Bolt Elips, Sesendal P-R, Sesendal
Pegas dan Nat Heksagon diketatkan
dengan kuat dan Cemat Baji
dimasukkan dan dibengkokkan atas
sebab keselamatan.
Skru Wayar Keselamatan diketatkan
dengan kuat.
Suis Tuil menekan Suis.
所有电线必须由能胜任的人员正
确 。
基于安全理由, 椭圆螺栓, P-R 垫
圈, 弹簧垫圈及六角形螺帽已锁紧,
而开口销已插入并折弯。
保险线螺丝己锁紧。
开关杆按压开关。
Neutral (blue) /
Neutral (biru) /
零线 (蓝色)
Live (brown) /
Hidup (coklat) /
火线 (棕色)
Earth (green/yellow) /
Bumi (hijau/kuning) /
地线 (绿色/黄色)
5
h
i
12
How to install Cara pemasangan ྸᆿ㻻
WARNING
The Safety Wire must be fixed
correctly and connected at all
time.
Can cause injury if the Ceiling
Fan drops.
Ensure that the angle (a) keeps
40-45 degree and the safety
wire does not touch the Motor
surface.
AMARAN
Wayar Keselamatan mestilah
dipasang dengan betul dan
tersambung pada setiap masa.
Boleh menyebabkan kecederaan
jika Kipas Siling terjatuh.
Pastikan bahawa sudut (a)
kekal 40-45 darjah dan wayar
keselamatan tidak menyentuh
permukaan Motor.
䆜
䆜
ؓ䲟㓵ᗻ亱↙⺤൦ᆿ㻻ᒬ൞Ա
ؓ䲟㓵ᗻ亱↙⺤൦ᆿ㻻ᒬ൞Ա
ᰬُ䜳䘔Ⱦ
ᰬُ䜳䘔Ⱦ
若吊扇掉落会导致受伤。
确保角度
(a)
保持
40-45
度,
保险线不接触发动机表面。

K14KF
CAUTION
Do not remove the Switch
Lever at Pipe.
Fix the Pipe correctly to the
Motor Shaft.
Can cause product not operate
if Switch has not been pressed
down.
Do not press Switch with
other object, except using the
Switch Lever given.
Can cause fire, explosion, short
circuit and electrical shock.
Can cause injury if the Ceiling
Fan drops.
AWAS
Jangan tanggalkan Tuil Suis
pada Paip.
Pasangkan Paip dengan betul ke
Aci Motor.
Boleh menyebabkan produk
tidak beroperasi jika Suis tidak
ditekan ke bawah.
Jangan tekan Suis dengan
objek lain, kecuali
menggunakan Tuil Suis yang
diberikan.
Boleh menyebabkan kebakaran,
letupan, litar pintas dan kejutan
elektrik.
Boleh menyebabkan kecederaan
jika Kipas Siling terjatuh.
⌞ᝅ
⌞ᝅ
࠽䲚ሲ㇗рⲺᔶީᵼȾ
࠽䲚ሲ㇗рⲺᔶީᵼȾ
将导管正确地使固定发动机
转动轴。
若没压下开关可导致产品无
法操作。
䲚Ҽֵ⭞ᶛᴿⲺᔶᵼԛཌθ
䲚Ҽֵ⭞ᶛᴿⲺᔶᵼԛཌθ
࠽фެԌђ㾵ᰬ᧞ᔶީȾ
࠽фެԌђ㾵ᰬ᧞ᔶީȾ
这可能导致火灾、爆炸、短路
及电击。
落会导致受伤。
3Fix the Pipe and the Motor Assembly
with the Ellipse Bolt d1 , the P-R
Washers d2 , the Spring Washer d3 ,
the Hexa Nut d4 and the Cotter Pin
d5 .
The Slit eposition of the Ellipse
Bolt should be at top and bottom.
Bend the Cotter Pin d5 at last as
shown.
3Pasang Paip dan Pemasangan Motor
dengan Bolts Elips d1 , Sesendal
P-R d2 , Sesendal Pegas d3 , Nat
Heksagon d4 dan Cemat Baji d5 .
Kedudukan Celahan eBolt Elips
yang seharusnya di atas dan bawah.
Bengkokkan Cemat Baji d5 akhirnya
seperti yang ditunjukkan.
3
ֵ⭞㓺㻻ሲ㇗фࣞᵰ㓺Ԭὣ഼㷰
ֵ⭞㓺㻻ሲ㇗фࣞᵰ㓺Ԭὣ഼㷰
ṉ
d1
, P-R
ാ
ാ
d2
,
ᕯ㉝ാ
ᕯ㉝ാ
d3
,
ޣ䀈ᖘ㷰ᑳ
ޣ䀈ᖘ㷰ᑳ
d4
ૂᔶ䬶
ૂᔶ䬶
d5
Ⱦ
㷰ṉⲺ㕓䳏
㷰ṉⲺ㕓䳏
e
ᗻ亱փӄ京䜞
ᗻ亱փӄ京䜞
ᓋ䜞Ⱦ
ᓋ䜞Ⱦ
ᴶᡶ⽰ᣎᕥᔶ䬶
ᴶᡶ⽰ᣎᕥᔶ䬶
d5
Ⱦ
1Before installing the Pipe Assembly
Bto Motor Unit E, remove the
supplied Ellipse Bolt d1 , the P-R
Washers d2 , the Spring Washer d3 ,
the Hexa Nut d4 and the Cotter Pin
d5 from Pipe Assembly as shown.
2Fix the Pipe Bto the Motor Shaft
aas shown below.
Make sure that the Pipe hole and the
Motor Shaft hole are aligned.
Then, ensure the Switch bis
pushed by Switch Lever c.
1Sebelum menyambung Pemasangan
Paip Bpada Unit Motor E,
keluarkan Bolts Elips d1 , Sesendal
P-R d2 , Sesendal Pegas d3 , Nat
Heksagon d4 dan Cemat Baji d5
yang dibekalkan seperti yang
ditunjukkan.
2Pasang Paip Bke Aci Motor a
seperti yang ditunjukkan di bawah.
Pastikan lubang Paip dan lubang Aci
Motor adalah sejajar.
Kemudian, pastikan Suis bditolak
oleh Tuil Suis c.
1
൞ᆿ㻻ሲ㇗㓺Ԭ
൞ᆿ㻻ሲ㇗㓺Ԭ
B
ՐⲺࣞᵰ㓺
ՐⲺࣞᵰ㓺
Ԭ
E
ࡖ䲚ᡶᨆבⲺὣ഼㷰ṉࡖ
ࡖ䲚ᡶᨆבⲺὣ഼㷰ṉࡖ
䲚ᡶᨆבⲺὣ഼㷰ṉ
䲚ᡶᨆבⲺὣ഼㷰ṉ
d1
, P-R
ാ
ാ
d2
,
ᕯ㉝ാ
ᕯ㉝ാ
d3
,
ޣ䀈ᖘ㷰ᑳ
ޣ䀈ᖘ㷰ᑳ
d4
ૂᔶ䬶
ૂᔶ䬶
d5
㇗ཝՐྸഴᡶ⽰Ⱦ
㇗ཝՐྸഴᡶ⽰Ⱦ
2
ྸсഴᡶ⽰ሲ㇗
ྸсഴᡶ⽰ሲ㇗
B
ᆿ㻻㠩ࣞᵰ
ᆿ㻻㠩ࣞᵰ
ࣞ䖪
ࣞ䖪
a
Ⱦ
⺤ؓሲ㇗ᆊૂࣞᵰ䖢ࣞ䖪ᆊሯ
⺤ؓሲ㇗ᆊૂࣞᵰ䖢ࣞ䖪ᆊሯ
喆Ⱦ❬θ⺤ؓᔶީ
喆Ⱦ❬θ⺤ؓᔶީ
b
⭧ᔶީᵼ
⭧ᔶީᵼ
c
᧞ࣞȾ
᧞ࣞȾ
3
d1
d2 d3
d4
d5 ed5
1
a
B
B B cb
2
d1
d2
d3
d4
d5
13
How to install Cara pemasangan ྸᆿ㻻
How to installCara pemasangan
ྸᆿ㻻

14
WARNING
Ensure that the Pipe has been
fully tightened to the Motor
Shaft. (Bolt tightening torque
is 800 ~ 1200 N·cm). And the
Cotter Pin must be fixed into
the Bolt hole and bent.
Can cause injury if the Ceiling
Fan drops.
AMARAN
Pastikan Paip telah diketatkan
sepenuhnya pada Aci Motor.
(Kilas pengetatan bolt ialah
800 ~ 1200 N·cm). Dan Cemat
Baji mestilah dimasukkan
ke dalam lubang Bolt dan
dibengkokkan.
Boleh menyebabkan kecederaan
jika Kipas Siling terjatuh.
䆜
䆜
⺤ᇐሼሲ㇗䬷㍝㠩ࣞᵰ䖢ࣞ
⺤ᇐሼሲ㇗䬷㍝㠩ࣞᵰ䖢ࣞ
䖪Ⱦ
䖪Ⱦ
(
㷰ṉᢣ㍝䖢䐓ᱥ
㷰ṉᢣ㍝䖢䐓ᱥ
800 ~
1200 N·cm)
Ⱦ㙂ъᔶ䬶ᗻ
Ⱦ㙂ъᔶ䬶ᗻ
亱ᨈޛ㷰ṉᆊ❬ᣎᕥȾ
亱ᨈޛ㷰ṉᆊ❬ᣎᕥȾ
若吊扇掉落会导致受伤。
4Connect the Power Cord hto
the 3 pin Terminal i.
4Sambungkan Kord Kuasa h
kepada Terminal 3 Pin i.
4
䘔⭫㔼
䘔⭫㔼
h
㠩
3
䪾ㄥᆆ
䪾ㄥᆆ
i
Ⱦ
WARNING
Make sure all the Terminals
are connected correctly by a
competent personnel to avoid
electrical hazards.
Make sure all the wires must
be fully insert and the 3 pin
Terminal screw is firmly
tightened.
Can cause fire, electrical shock,
Ceiling Fan drops and injuries.
AMARAN
Pastikan semua Terminal
disambung dengan betul oleh
kakitangan yang kompeten
untuk mengelakkan bahaya
elektrik.
Pastikan semua wayar mesti
dimasukkan sepenuhnya dan
skru Terminal 3 pin diketatkan
dengan kuat.
Boleh menyebabkan kebakaran,
kejutan elektrik, Kipas Siling
jatuh dan kecederaan.
䆜
䆜
䈭㜳㜒ԱⲺӰ⺤ᇐᡶᴿㄥ
䈭㜳㜒ԱⲺӰ⺤ᇐᡶᴿㄥ
ᆆᐨ↙⺤൦䘔ԛ䚵ރ⭫≊
ᆆᐨ↙⺤൦䘔ԛ䚵ރ⭫≊
ধ䲟Ⱦ
ধ䲟Ⱦ
⺤ؓᡶᴿ⭫㓵䜳ᗻ亱ᇂޞᨈ
⺤ؓᡶᴿ⭫㓵䜳ᗻ亱ᇂޞᨈ
ޛθᒬъ
ޛθᒬъ
3
䪾ㄥᆆ㷰ѓᐨᤝ
䪾ㄥᆆ㷰ѓᐨᤝ
㍝Ⱦ
㍝Ⱦ
这可导致火灾、电击、吊扇掉
落及受伤。
Neutral (blue) /
Neutral (biru) /
零线 (蓝色)
Live (brown) /
Hidup (coklat) /
火线 (棕色)
Earth (green/yellow) /
Bumi (hijau/kuning) /
地线 (绿色/黄色)
4
h
i
How to install Cara pemasangan ྸᆿ㻻

Check point after installation Pemeriksaan Selepas
Pemasangan
All wires are connected correctly by a
competent personnel.
The Ellipse Bolt, P-R Washers,
Spring Washer and Hexa Nut are
firmly tightened and the Cotter Pin is
inserted and bent for safety reason.
The Safety Wire Screw is firmly
tightened.
The Switch Lever press the Switch.
ᆿ㻻Ⲻ䠃⛯Ỷḛ
ᆿ㻻Ⲻ䠃⛯Ỷḛ
Neutral (blue) / Neutral (biru) / 零线 (蓝色)
Live (brown) / Hidup (coklat) / 火线 (棕色)
Earth (green/yellow) / Bumi (hijau/kuning) / 地线 (绿色/黄色)
Semua wayar disambungkan oleh
kakitangan kompeten.
Bolt Elips, Sesendal P-R, Sesendal
Pegas dan Nat Heksagon diketatkan
dengan kuat dan Cemat Baji
dimasukkan dan dibengkokkan atas
sebab keselamatan.
Skru Wayar Keselamatan diketatkan
dengan kuat.
Suis Tuil menekan Suis.
所有电线必须由能胜任的人员正
确 。
基于安全理由, 椭圆螺栓, P-R 垫
圈, 弹簧垫圈及六角形螺帽已锁紧,
而开口销已插入并折弯。
保险线螺丝己锁紧。
开关杆按压开关。
■
Install Blade to Motor Unit
■
Memasang Bilah Kipas
pada Unit Motor
■
■
ᆿ㻻㘲㓺Ԭ㠩ࣞᵰ
ᆿ㻻㘲㓺Ԭ㠩ࣞᵰ
2
15
How to install Cara pemasangan ྸᆿ㻻
How to installCara pemasangan
ྸᆿ㻻
12
j
E
DO
NOT
REMOVE
3
F
k
DO
NOT
REMOVE
4
F
E
DO
NOT
REMOVE
k
F
j
5
zEz
• K14XF • K14KF
1Put the Motor Unit Eon the round
portion of the PACK B zas shown
to assemble the Blade Assembly
F.
2Remove the Blade Screws j
(6 pieces, silver colour) from the
Motor Assembly E.
3Assemble the Blade Ftowards to
the Cover Hook k.
4Pull the Blade Fin the direction as
shown to lock the Blade.
5Tighten the Blade Ffirmly with the
Blade Screws j(silver colour).
Each Blade use 2 pieces of screws.
For reference, tightening torque is
250-300 N•cm.
1Letakkan Unit Motor Edi atas
bahagian bulatan pada PACK B z
untuk Pemasangan Bilah Kipas F
seperti yang ditunjukkan.
2Tanggalkan Skru Bilah j
(6 keping, berwarna perak) dari
Pemasangan Motor E.
3Pasangkan Bilah Fke arah
Cangkuk Penutup k.
4Tarik Bilah Fmengikut arah
dalam rajah yang ditunjukkan untuk
mengunci Bilah.
5Ketatkan Bilah Fdengan Skru
Bilah j(berwarna perak).
Setiap Bilah menggunakan 2 batang
Skru.
Untuk rujukan, kilas pengetatan
adalah 250-300 N•cm.
1
ྸഴᡶ⽰ሼࣞᵰ㓺Ԭ
ྸഴᡶ⽰ሼࣞᵰ㓺Ԭ
E
㖤ӄ
㖤ӄ
PACK B z
Ⲻ഼ᖘ䜞࠼ԛᆿ㻻
Ⲻ഼ᖘ䜞࠼ԛᆿ㻻
㘲㓺Ԭ
㘲㓺Ԭ
F
Ⱦ
2
Ԅࣞᵰ㓺Ԭ
Ԅࣞᵰ㓺Ԭ
E
䲚㘲㷰ѓ
䲚㘲㷰ѓ
j
(6
,
䬬㢨
䬬㢨)
Ⱦ
3
ሼ㘲
ሼ㘲
F
㻻ޛ㖟䫟ᆆ
㻻ޛ㖟䫟ᆆ
k
Ⱦ
4
ྸഴᡶ⽰ᯯࣞԛ䬷ᇐ㘲
ྸഴᡶ⽰ᯯࣞԛ䬷ᇐ㘲
F
㓺ԬȾ
㓺ԬȾ
5
ֵ⭞㘲㷰ѓ
ֵ⭞㘲㷰ѓ
j
ሼ㘲
ሼ㘲
F
䬷㍝
䬷㍝
(
䬬㢨
䬬㢨)
Ⱦ
∅Ѡ㘲ֵ⭞
∅Ѡ㘲ֵ⭞ 2
㷰ѓȾ
㷰ѓȾ
ӻב৸㘹Ⲻᤝ㍝䖢⸟Ѱ
ӻב৸㘹Ⲻᤝ㍝䖢⸟Ѱ 250-300
N•cm
Ⱦ

Check point after installation Pemeriksaan Selepas
Pemasangan
The Blade Screws (6 pieces) for securing
the Blade Assembly are tightly screwed.
ᆿ㻻Ⲻ䠃⛯Ỷḛ
ᆿ㻻Ⲻ䠃⛯Ỷḛ
The Blade hole must lock to Cover Hook.
Skru Bilah (6 batang) untuk mengikat
Pemasangan Bilah diskrukan dengan
ketat.
Lubang Bilah mestilah mengunci
pada Cangkuk Penutup.
用于固定扇翼组件的扇翼螺丝
(6 枚) 已锁紧。
扇翼孔必须定至罩钩子。
DO
NOT
REMOVE
DO
NOT
REMOVE
DO
NOT
REMOVE
CAUTION
The Blade must be fixed
correctly.
Can cause no air flow.
Can cause injury if the Blade
drops.
Tighten the Blade Screws
firmly using a screwdriver.
Can cause injury if the Blade
drops.
AWAS
Pemasangan Bilah Kipas
mestilah dipasang dengan
betul.
Boleh menyebabkan tiada arus
angin.
Boleh menyebabkan kecederaan
jika Bilah Kipas terjatuh.
Ketatkan Skru Bilah Kipas
dengan kuat menggunakan
pemutar skru.
Boleh menyebabkan kecederaan
jika Bilah terjatuh.
⌞ᝅ
⌞ᝅ
ᗻ亱↙⺤
ᗻ亱↙⺤
䬷㍝
䬷㍝
㘲
㘲
这会导致沒有气流。
若扇翼掉落会导致受伤。
⭞㷰ѓ䎭ᆆሼ㘲㷫ѓ䬷⾣Ⱦ
⭞㷰ѓ䎭ᆆሼ㘲㷫ѓ䬷⾣Ⱦ
若扇翼掉落会导致受伤。
K14XF
1Pull out the Safety Wire gfrom the
Pipe Bas shown.
Remove the Safety Wire Screw f
from the Pipe and keep it for Step 4-
3on page 18.
Remove the Lower Canopy Screw
lfrom the Pipe.
1Tarik keluar Wayar Keselamatan
gdari Paip Bseperti yang
ditunjukkan.
Tanggalkan Skru Wayar
Keselamatan fdari Paip dan
simpan skru ini untuk Langkah 4- 3
pada muka surat 18.
Tanggalkan Skru Sengkuap Bawah
ldari Paip.
■Install Canopy ■Memasang Sengkuap
1
ྸഴᡶ⽰ሼؓ䲟㓵
ྸഴᡶ⽰ሼؓ䲟㓵
g
Ԅሲ㇗
Ԅሲ㇗
B
࠰Ⱦ
࠰Ⱦ
㠠ሲ㇗䲚ؓ䲟㓵㷰ѓ
㠠ሲ㇗䲚ؓ䲟㓵㷰ѓ
f
ૂؓᆎ
ૂؓᆎ
䘏ӑ㷰ѓԛבㅢ
䘏ӑ㷰ѓԛבㅢ 18
享Ⲻ↛僚
享Ⲻ↛僚
4-
3
Ⱦ
㠠ሲ㇗䲚с㖟ⴌ㷰ѓ
㠠ሲ㇗䲚с㖟ⴌ㷰ѓ
l
Ⱦ
■
■
ᆿ㻻㖟ⴌ
ᆿ㻻㖟ⴌ
3
16
1gf
l
B
How to install Cara pemasangan ྸᆿ㻻

2Pull down Lower Canopy Cuntil it
stop and fix to Pipe Bfirmly with
Lower Canopy Screw las shown.
3Insert the Upper Canopy Ato the
Pipe Band pull it down until it
stop at the top of Lower Canopy C.
• Do not tighten the Upper Canopy
Screw m.
2Tarik turun Sengkuap Bawah C
sehingga ia terhenti dan pasang
pada Paip Bdengan kuat dengan
Skru Sengkuap Bawah lseperti
yang ditunjukkan.
3Masukkan Sengkuap Atas A
pada Paip Bdan tarik ke bawah
sehingga ia terhenti di bahagian
atas Sengkuap Bawah C.
• Jangan ketatkan Skru Sengkuap Atas
m.
2
ྸഴᡶ⽰сс㖟ⴌ
ྸഴᡶ⽰сс㖟ⴌ
C
㠩с㖟
㠩с㖟
ⴌڒ↘ֵ⭞с㖟ⴌ㷰ѓ
ⴌڒ↘ֵ⭞с㖟ⴌ㷰ѓ
l
ሼሲ㇗
ሼሲ㇗
B
⢘⢘രᇐȾ
⢘⢘രᇐȾ
3
ሼр㖟ⴌ
ሼр㖟ⴌ
A
ᨈޛሲ㇗
ᨈޛሲ㇗
B
❬ሼ
❬ሼ
р㖟ⴌс㠩ڒ↘൞с㖟ⴌ
р㖟ⴌс㠩ڒ↘൞с㖟ⴌ
C
Ⲻ京䜞Ⱦ
Ⲻ京䜞Ⱦ
• 不要拧紧上罩盖螺丝
m
。
Check point after installation Pemeriksaan Selepas
Pemasangan
Insert the Upper Canopy to the Pipe
Assembly. Do not tightened the screw.
ᆿ㻻Ⲻ䠃⛯Ỷḛ
ᆿ㻻Ⲻ䠃⛯Ỷḛ
The Lower Canopy is securely screwed.
Masukkan Sengkuap Atas ke dalam
Pemasangan Paip. Jangan ketatkan
skru.
Sengkuap Bawah dipasang skru
dengan selamat.
将上罩盖嵌入导管组件。切勿锁
紧螺丝。
下罩盖已锁紧。
1Take out the C-Hook nfrom the
Part Set and hook to the Ceiling
Hook o.
2Take the Ceiling Fan Set and hook
the Pipe Bto the C-Hook nwhich
was hooked to the Ceiling Hook.
Align the C-Hook nparallel with
the Pipe hole and slot the Ceiling
Fan Pipe to the C-Hook.
Hold the wires as shown.
1Keluarkan Cangkuk-C ndari Part
Set dan sangkutkan pada Cangkuk
Siling o.
2Ambil Set Kipas Siling dan
sangkutkan Paip Bpada
Cangkuk-C nyang disangkut pada
Cangkuk Siling.
Laraskan Cangkuk-C nselari
dengan lubang Paip dan sangkutkan
Cangkuk-C pada Paip Kipas Siling.
Genggam wayar-wayar seperti yang
ditunjukkan.
1
Ԅ䴬Ԭ㓺ᤵ࠰䫟ᆆ
Ԅ䴬Ԭ㓺ᤵ࠰䫟ᆆ C
n
❬䫟㠩
❬䫟㠩
ཟ㣧ᶵ䫟ᆆ
ཟ㣧ᶵ䫟ᆆ
o
Ⱦ
2
ᤵ࠰㓺Ԭᒬሼሲ㇗
ᤵ࠰㓺Ԭᒬሼሲ㇗
B
䫟㠩ᐨ
䫟㠩ᐨ
䫟ࡦཟ㣧ᶵ䫟ᆆⲺ䫟ᆆ
䫟ࡦཟ㣧ᶵ䫟ᆆⲺ䫟ᆆ C
n
Ⱦ
ሼ䫟ᆆ
ሼ䫟ᆆ C
n
фሲ㇗ᆊᒩ㺂ሯ
фሲ㇗ᆊᒩ㺂ሯ
❬ሼሲ㇗᭴ޛ䫟ᆆ
❬ሼሲ㇗᭴ޛ䫟ᆆ C
Ⱦ
֒Ѱᡶ⽰ᨗօ⭫㓵Ⱦ
֒Ѱᡶ⽰ᨗօ⭫㓵Ⱦ
■
Install to Ceiling
■
Memasang ke Siling
■
■
ᆿ㻻㠩ཟ㣧ᶵ
ᆿ㻻㠩ཟ㣧ᶵ
4
17
2 3
B
C
CC
A
B
l
m
1
2
• K14XF
• K14KF
n
o
n
B
How to install Cara pemasangan ྸᆿ㻻
How to installCara pemasangan
ྸᆿ㻻
2
n
B
B
B

Check point after installation Pemeriksaan Selepas
Pemasangan
Ensure the Ceiling Fan is securely fixed
on to the Ceiling Hook.
ᆿ㻻Ⲻ䠃⛯Ỷḛ
ᆿ㻻Ⲻ䠃⛯Ỷḛ
The Safety Wire is securely fixed onto the
Ceiling Hook and screwed to the Pipe.
Pastikan Kipas Siling dipasang dalam
keadaan selamat pada Cangkuk
Siling.
Pastikan Wayar Keselamatan
ditetapkan dengan selamat pada
Cangkuk Siling dan diskrukan pada
Pemasangan Paip.
确定吊扇已稳定地安装在天花板
钩子上。
安全线已稳固地定位于天花板钩
子并已锁紧至导管。
CAUTION
Ensure that the Ceiling Hook
can sustain more than 10
times the Ceiling Fan weight.
Can cause injury if the Ceiling
Fan drops.
Ensure that the Ceiling Fan
is not tilted so that the Blade
does not touch the ceiling
during installation.
Can cause injury if the Ceiling
Fan drops.
AWAS
Pastikan Cangkuk Siling boleh
menanggung beban 10 kali
ganda berat Kipas Siling.
Boleh menyebabkan kecederaan
jika Kipas Siling terjatuh.
Pastikan Kipas Siling tidak
disengetkan supaya Bilah
Kipas tidak terkena pada siling
ketika pemasangan.
Boleh menyebabkan kecederaan
jika Kipas Siling terjatuh.
⌞ᝅ
⌞ᝅ
⺤ᇐཟ㣧ᶵ䫟ᆆԛᢵ䎻䗽
⺤ᇐཟ㣧ᶵ䫟ᆆԛᢵ䎻䗽
Ⲻ
Ⲻ
10
ك䠃䠅Ⱦ
ك䠃䠅Ⱦ
若吊扇掉落会导致受伤。
⺤ؓуٴᯒֵ⡽൞ᆿ
⺤ؓуٴᯒֵ⡽൞ᆿ
㻻ぁѣу䀜р䲆Ⱦ
㻻ぁѣу䀜р䲆Ⱦ
若吊扇掉落会导致受伤。
18
3Arrange and tie the Safety Wire as
shown.
Firmly screw the Safety Wire g
onto the Pipe Bby using the
Safety Wire Screw fwhich was
removed in step 3- 1on page 16.
3Susun dan ikat Wayar Keselamatan
seperti yang ditunjukkan.
Pasangkan Wayar Keselamatan g
dengan menggunakan Skru Wayar
Keselamatan fpada Paip Byang
ditanggalkan dalam Langkah 3- 1
pada muka surat 16.
3
ྸഴᡶ⽰ᧈࡍ㌱㔇ؓ䲟㓵Ⱦ
ྸഴᡶ⽰ᧈࡍ㌱㔇ؓ䲟㓵Ⱦ
ֵ⭞൞↛僚
ֵ⭞൞↛僚 3-
1
ㅢ
16
享䲚Ⲻؓ
享䲚Ⲻؓ
䲟㓵㷰ѓ
䲟㓵㷰ѓ
f
ሼؓ䲟㓵
ሼؓ䲟㓵
g
⢘⢘൦
⢘⢘൦
䬷൞ሲ㇗
䬷൞ሲ㇗
B
рȾ
рȾ
CAUTION
The safety wire must be fixed
correctly.
Can cause injury if the Ceiling
Fan drops.
AWAS
Wayar Keselamatan mesti
dipasang dengan betul pada
Paip.
Boleh menyebabkan kecederaan
jika Kipas Siling terjatuh.
⌞ᝅ
⌞ᝅ
ؓ䲟㓵ᗻ亱↙⺤൦ᆿ㻻㠩ሲ
ؓ䲟㓵ᗻ亱↙⺤൦ᆿ㻻㠩ሲ
㇗Ⱦ
㇗Ⱦ
若吊扇掉落会导致受伤。
3
• K14XF
• K14KF
B B B B
B B B B
gggg
gggg
f
f
How to install Cara pemasangan ྸᆿ㻻

Connect the wires to the house’s
supply line according to diagram as
shown.
Please use splice when using
terminal (not supplied) for
installation.
Sambungkan wayar kepada bekalan
rumah seperti gambarajah.
Sila gunakan sambat jika membuat
pemasangan pada terminal
(tidak dibekalkan).
■
Wiring instruction
■
Panduan pendawaian
ྸഴᡶ⽰ሼ⭫㓵䘔㠩ᇬ䠂Ⲻ⭫Ⓠ
ྸഴᡶ⽰ሼ⭫㓵䘔㠩ᇬ䠂Ⲻ⭫Ⓠ
㓵Ⱦ
㓵Ⱦ
ֵ⭞ㄥᆆ䘑㺂ᆿ㻻ᰬ䈭ֵ⭞ཪ
ֵ⭞ㄥᆆ䘑㺂ᆿ㻻ᰬ䈭ֵ⭞ཪ
(
уᨆב
уᨆב
)
Ⱦ
■
■
䞃㓵⽰
䞃㓵⽰
5
Wiring diagram / Litar pendawaian / ⭫㓵ഴ
Connecting to the power supply / Sambungan ke bekalan kuasa / ⭫Ⓠ䘔
Ceiling Fan / Kipas Siling / 吊扇 Wall Switch (OFF / ON) /
Suis Dinding (TUTUP / BUKA) /
墙壁开关按钮(关 / 开)
Rated voltage is mentioned on product. /
Kadar voltan dinyatakan pada produk. /
产品上注明额定电压。
Blue (Neutral) / Biru (Neutral) / 蓝色(零线)
Brown (Live) /
Coklat (Hidup) /
棕色(火线)
Green/Yellow (Earth) /
Hijau/Kuning (Bumi) /
绿色/黄色(地线)
Earth / Bumi / 地线
Double poles single throw switch
(Breaker Switch) /
Suis lontaran tunggal dwikutub
(Suis Pemutus) /
双极单投开关
(断路开关)
Only direct connection to wall switch is allowed.
Please refer to figure below.
Hanya pemasangan arus elektrik terus ke suis dinding dibenarkan.
Sila rujuk gambarajah di bawah.
只准许直接把电源连接于本吊扇。
请参考下图。
Motor /
Motor /
ࣘᵪ
Ceiling Fan / Kipas Siling / ᡷ
Brown (Live) / Coklat (Hidup) / ἅ㢢˄⚛㓯˅
Source / Sumber / ⭥Ⓚ
Blue (Neutral) / Biru (Neutral) / 㬍㢢˄䴦㓯˅
*UHHQYellow (Earth) /
+LMDX.XQLQJ%XPL
㔯㢢Ь哴㢢˄ൠ㓯˅
Black / Hitam / 唁㢢
Main PCB /
Papan Litar Utama /
ѫঠࡧ⭥䐟ᶯ
Terminal /
Terminal /
㓸ㄟ
Thermal Fuse /
Fius Haba /
✝⟄э
Blue / Biru / 㬍㢢
Brown /
Coklat /
ἅ㢢
Switch /
Suis /
ᔰޣ
Red / Merah / 㓒㢢
White /
Putih /
ⲭ㢢
19
Ceiling / Siling / 天花板
Splice /
Sambat /
接头
Ceiling / Siling / 天花板
• K14KF• K14XF
Neutral (blue) /
Neutral (biru) /
零线 (蓝色)
Live (brown) /
Hidup (coklat) /
火线 (棕色)
Earth (green/yellow) /
Bumi (hijau/kuning) /
地线 (绿色/黄色)
How to install Cara pemasangan ྸᆿ㻻
How to installCara pemasangan
ྸᆿ㻻

Dimmer switch /
Suis ‘dimmer’ /
调光开关
Regulator /
Pengawal Kelajuan /
调节器
Power supply /
Bekalan kuasa elektrik /
电源
Connect directly /
Penyambungan terus /
直接连接
Dimmer switch /
Suis ‘dimmer’ /
调光开关
Power supply /
Bekalan kuasa elektrik /
电源
Connect directly /
Penyambungan terus /
直接连接
Regulator /
Pengawal Kelajuan /
调节器
■
Attention:
It is recommended to user, to install
an OFF/ON switch on the wall for
the Ceiling Fan, replacing existing
regulator or new regulator point. If your
Remote Control missing or misplaced,
the Ceiling Fan can be switched on at
pre-set speed 2.
■
⮏ᝅφ
建议用户将吊扇的 OFF/ON 开关安
装在墙壁上,替換現有的调节器或新
的调节点,若您的溫控器不见了,吊
扇可以以预设速度
2
开启。
■
Perhatianφ
Pengguna disyorkan supaya memasang
suis OFF/ON di dinding untuk Kipas
Siling bagi mengganti pengawal
kelajuan lama atau titik pengatur baru.
Jika Unit Alat Kawalan Jauh anda
hilang atau salah letak, Kipas Siling
boleh beroperasi pada kelajuan yang
ditetapkan iaitu kelajuan 2.
WARNING
Electrical wiring must be done
by a competent personnel.
Can cause fire, electrical shock,
Ceiling Fan drops and injuries.
This product is not provided
with a cord and plug or with
other means for connection to
the supply.
When connecting or changing
the power cord or lead wire,
it must be performed by a
qualified person in order to
avoid a hazard.
Please use 227IEC53(RVV)
or thickness of tube 1 mm
or above. (If there are other
requirements such as
the diameter of lead wire,
please use according to the
regulation of the country).
Can cause fire or electrical
shock.
This product should be
installed with a double poles
single throw switch (Breaker
Switch) with minimun 3 mm
contact gap in the fixed
installation circuit.
Do not connect this Ceiling
Fan to dimmer switch or
regulator.
It can damage the Ceiling Fan.
Should there be a dimmer
switch, disconnect it and
reconnect the wiring as shown
above.
AMARAN
Pendawaian elektrik mesti
dipasang oleh orang yang
bertauliah.
Boleh menyebabkan kebakaran,
kejutan elektrik, Kipas Siling
jatuh dan kecederaan.
Produk ini tidak dilengkapi
dengan wayar dan palam
atau apa-apa yang boleh
memutuskan sambungan
dengan bekalan kuasa. Untuk
mengelakkan sebarang
kecederaan, pemasangan
wayar dan palam mesti
dilakukan oleh orang yang
berkelayakan. Gunakan
227IEC53(RVV) atau tiub yang
berketebalan lebih dari 1
mm. (Keperluan lain seperti
diameter wayar, sila gunakan
mengikut peraturan negara-
negara berkenaan).
Boleh menyebabkan kebakaran
atau kejutan elektrik.
Produk ini harus dipasang
dengan suis lontaran tunggal
dwikutub (Suis Permutus)
dengan ruang sentuhan
sekurang-kurangnya 3 mm di
litar pemasangan tetap.
Jangan pasangkan Kipas
Siling ini kepada suis dimmer
atau alat pengawal kelajuan.
Boleh merosakkan Kipas
Siling.
Sekiranya terdapat
pemasangan suis ‘dimmer’
atau alat pengawal kelajuan,
putuskan sambungannya
dan sambungkan semula
pendawaian seperti di atas.
䆜
䆜
⭫㓵䞃㓵ᐛ֒ᗻ亱⭧ᴿ䍺Ṳ
⭫㓵䞃㓵ᐛ֒ᗻ亱⭧ᴿ䍺Ṳ
ⲺӰ䘑㺂Ⱦ
ⲺӰ䘑㺂Ⱦ
这可导致火灾、电击、吊扇掉
落及受伤。
ᵢӝуᨆב⭫㔼ૂᨈཪᡌ䘔
ᵢӝуᨆב⭫㔼ૂᨈཪᡌ䘔
⭫ⓆⲺެᆹ㻻㖤Ⱦ
⭫ⓆⲺެᆹ㻻㖤Ⱦ
䘔ᡌᴪᦘ⭫㔼ᡌ⭫㓵ᰬᗻ
䘔ᡌᴪᦘ⭫㔼ᡌ⭫㓵ᰬᗻ
亱⭧ᴿ䍺ṲⲺӰ䘑㺂ԛ䚵
亱⭧ᴿ䍺ṲⲺӰ䘑㺂ԛ䚵
ރধ䲟Ⱦ
ރধ䲟Ⱦ
䈭ֵ⭞
䈭ֵ⭞
227IEC53(RVV)
ᡌᓜ
ᡌᓜ
䎻䗽
䎻䗽
1
∡㊩Ⲻሲ㇗Ⱦ
∡㊩Ⲻሲ㇗Ⱦ
(
ެᆹ㾷
ެᆹ㾷
≸
,
ׁྸ⭫㓵ᖺㅿㅿ
ׁྸ⭫㓵ᖺㅿㅿ
,
䈭䚫ᆾ
䈭䚫ᆾ
ީളᇬⲺᶗׁ
ީളᇬⲺᶗׁ
)
Ⱦ
Ⱦ
可能会导致火灾或触电。
↚ӝᗻ亱൞രᇐᆿ㻻⭫䐥р
↚ӝᗻ亱൞രᇐᆿ㻻⭫䐥р
㻻р䀜⭫䰪䳏Ѱᴶቇ
㻻р䀜⭫䰪䳏Ѱᴶቇ
3
3
∡㊩Ⲻ
∡㊩Ⲻ
ᶷঋᣋᔶީ
ᶷঋᣋᔶީ
(
(
ᯣ䐥ᔶީ
ᯣ䐥ᔶީ
)
)
Ⱦ
Ⱦ
࠽ሼ↚䘔㠩䈹ݿᔶީ
࠽ሼ↚䘔㠩䈹ݿᔶީ
ᡌ䈹㢸ಞȾ
ᡌ䈹㢸ಞȾ
这会损坏吊扇。
㤛ᴿ䈹ݿᔶީᡌ䈹㢸ಞ䈭
㤛ᴿ䈹ݿᔶީᡌ䈹㢸ಞ䈭
➝рഴ䲚❬䠃᯦䘔Ⱦ
➝рഴ䲚❬䠃᯦䘔Ⱦ
20
How to install Cara pemasangan ྸᆿ㻻
This manual suits for next models
1
Table of contents
Other KDK Fan manuals
Popular Fan manuals by other brands

emerio
emerio FN-114201.1 instruction manual

Greenheck
Greenheck DC Installation, operation and maintenance manual

Faro Barcelona
Faro Barcelona andros installation guide

Supra
Supra KALIS manual

Vent-Axia
Vent-Axia Solo Series Fitting and wiring instructions

Hunter
Hunter 42826-01 Owner's guide and installation manual

HAMPTON BAY
HAMPTON BAY Colby owner's manual

Ruck Ventilatoren
Ruck Ventilatoren ISOR EC Series Assembly instruction

AGI
AGI AIRLANCO General Industrial Series Installation, operation and maintenance manual

RP LIGHTING
RP LIGHTING 1072-PC installation guide

Trotec
Trotec TFV 30 S Original instructions

Kambrook
Kambrook Arctic KFA837 Instruction booklet