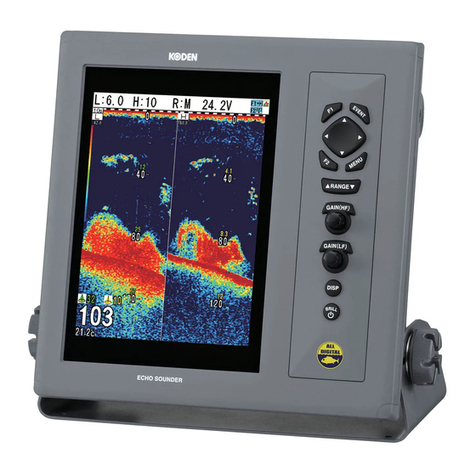
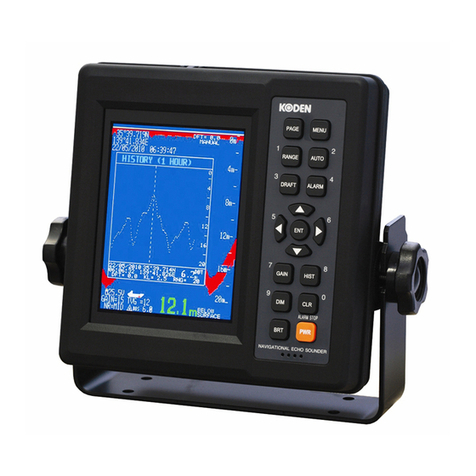
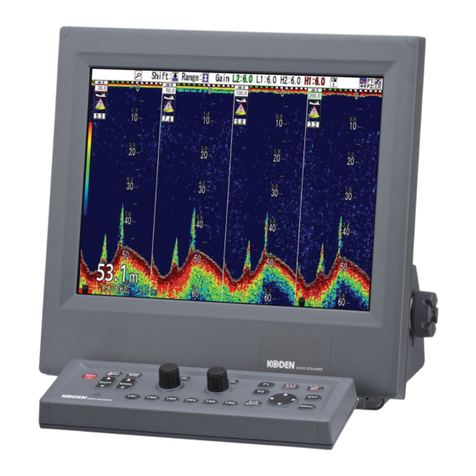
Koden CVR-010 User manual


CVR-010 Revision History
0093101002-02
CVR-010 Operation Manual
Doc No. 0093101002
Document Revision History
No. Doc. No-Rev. No. Date Revised
(Y/M/D)
Revised Content
0 0093101002-00 2011/03/01 First edition
1 0093101002-01 2012/02/02 7.7.1. Introduction
2 0093101002-02 2013/11/22 13.3.5. Connections to ALARM ACK Connector
3
4
5
6
7
8
9
10
Document No. Revised Version Norm
When part of the document needs to be revised, the document has advanced revision number.
The document No. is indicated at the lower right side on the cover and at the left or right side of the
footer region of each page.
© 2011-2013 Koden Electronics Co., Ltd.All rights reserved.
No part of this publication may be reproduced, transmitted, translated in any from by any means
without the written permission of Koden Electronics Co., Ltd. The technical descriptions contained in
this publication are subject to change without notice. Koden assumes no responsibility for any errors,
incidentals or consequential damages caused by misinterpretation of the descriptions contained in
this publication.


CVR-010
GENERAL SAFETY WARNINGS
General Safety Warnings – 1/2
(1) THE REAR PANEL TRANSDUCER CONNECTOR RECEPTACLE IS
EMITTING EXTREMELY HIGH VOLTAGE RADIO–FREQUENCY PULSES
WHEN THE EQUIPMENT IS TURNED ON.
THE CONNECTOR IS COVERED WITH A SCREW–LOCKED
PROTECTIVE RUBBER CAP WHEN THE EQUIPMENT IS INITIALLY
DELIVERED.
TO AVOID COMING INTO CONTACT ACCIDENTALLY WITH ANY OF THE
CONNECTOR PINS, BE SURE TO PLACE THE PROTECTIVE CAP OVER
THE RECEPTACLE WHENEVER THE TRANSDUCER IS UNPLUGGED.
LOCK THE CAP USING THE TWO SCREWS ATTACHED.
(2) TO COMPLY WITH THE RELEVANT WHEEL–MARK TYPE APPROVAL
REGULATIONS, THE EQUIPMENT MUST BE OPERATED USING ONE
OF THE TRANSDUCERS SPECIFIED IN THIS MANUAL. OPERATION
WITH A TRANSDUCER OTHER THAN A SPECIFIED ONE IS NOT
OFFICIALLY APPROVED, AND THE RESULTS OBTAINED WITH SUCH A
TRANSDUCER MUST NOT BE USED FOR NAVIGATIONAL PURPOSES.
(3) THE ACCURACY OF THE ON–SCREEN DEPTH READOUT IS
AFFECTED BY WATER TEMPERATURE, SALINITY, DEPTH AND
OTHER UNDERWATER CONDITIONS AS WELL AS THE SHIP’S
ROLL AND PITCH, HEEL AND TRIM.
TAKE THESE POSSIBLE ERROR–CAUSING FACTORS INTO
CONSIDERATION WHEN USING THE DEPTH READOUT, SUCH AS
WHEN NAVIGATING SHALLOW AREAS OR IN APPLICATIONS
WHERE ACCURATE DEPTH READING IS CRITICAL.
(4) DURING SHALLOW WATER OPERATION, THE EQUIPMENT MAY
OCCASIONALLY READ TWICE THE ACTUAL DEPTH BY LOCKING
ONTO THE *1SECOND BOTTOM ECHO.
THE DIGITAL DEPTH READOUT SHOULD ALWAYS BE COMPARED
WITH THE GRAPHIC BOTTOM INDICATION OR WITH SOUNDINGS
DATA IN OFFICIAL NAUTICAL CHARTS TO DETERMINE THE TRUE
DEPTH.
TOTAL RELIANCE ON THE DIGITAL READOUT ALONE FOR DEPTH
INFORMATION IS DANGEROUS AND MUST BE AVOIDED.
*1See paragraph 7.4.2 for more information on the second bottom echo.
i

CVR-010
GENERAL SAFETY WARNINGS
ii
General Safety Warnings – 2/2
(5) WITH A TRANSDUCER DRAFT ENTERED, THE ON–SCREEN DIGITAL
READOUT SHOWS THE DEPTH FROM THE WATERLINE AND NOT
FROM THE TRANSDUCER FACE OR FROM THE SHIP’S KEEL.
GREAT CARE SHOULD, THEREFORE, BE TAKEN IN USING THE
DEPTH READOUT WHEN NAVIGATING SHALLOW WATER AREAS. BE
SURE TO SET THE DEPTH REFERENCE TO “BELOW SURFACE”
(DBS) TO AVOID ANY MISUNDERSTANDING.
See paragraph 8.2 for more information on transducer draft.
(6) WHEN THE DEPTH REFERENCE INDICATION IS SET TO “BELOW
KEEL,” BE SURE TO ENTER THE APPROPRIATE KEEL OFFSET TO
AVOID ANY MISUNDERSTANDING ABOUT THE DEPTH READOUT.
See paragraph 8.10.7.3 for more information on keel offset.
(7) DO NOT SWITCH THE EQUIPMENT ON WITH THE TRANSDUCER
OUT OF WATER, SUCH AS WHILE THE VESSEL IS DRY–DOCKED,
OR THE TRANSDUCER’S CERAMIC CRYSTALS MAY BE DAMAGED
IRREPARABLY.
(8) THE DISPLAY CABINET IS NOT WEATHERIZED FOR OUTDOOR
INSTALLATION OR OPERATION. ANY DAMAGE CAUSED,
WHETHER DIRECTLY OR INDIRECTLY, THROUGH WATER
INGRESSION IS NOT COVERED BY THE MANUFACTURER’S OR
DEALER’S WARRANTY.
(9) NEITHER THE MANUFACTURER NOR ITS DEALER IS LIABLE
FOR LOSS OF LIFE, BODILY INJURY OR DAMAGE TO THE
PROPERTY ARISING FROM THE USE OF THIS EQUIPMENT OR
FROM BEING UNABLE, FOR ANY REASON, TO OPERATE THIS
EQUIPMENT.
< CAUTION >
Environmental Safety – Equipment Disposal
The display cabinet and the transducer are considered
environmentally safe in their original, assembled forms.
However, if either unit is to be discarded for any reason,
ensure full compliance with all pertinent national/local
regulations/ordinances, and contact your dealer or the
manufacturer for assistance or instructions before disposing
of it.

CVR-010
List of Contents
(continued on next page)
iii
List of Contents Page
1. List of Figures and Tables 1
2. List of Abbreviations 3
3. Password–Protecting the Menu Settings
3.1. Introduction 5
3.2. Setting a Password 5
3.3. Changing or Removing the Password 6
4. Standard Components and Parts Supplied 7
5. Product Description 8
6. Specifications
6.1. General Specifications 10
6.2. Echo Sounder Specifications 10
7. Basic Operating Instructions
7.1. Interpreting Navigation Sounder Screen 14
7.2. Control Panel Functions 19
7.3. Selecting Depth Ranges
7.3.1. Manual Selection 26
7.3.2. Automatic Selection (Automatic Mode of Operation) 27
7.4. Interpreting Echo Display
7.4.1. Bottom Echo in Full Colors 28
7.4.2. Multiple Bottom Echoes 29
7.4.3. Other Echoes 30
7.5. Adjusting Receiver Gain Level Manually 31
7.6. Adjusting TVG Level Manually 31
7.7. Retrieving Soundings Data History
7.7.1. Introduction 33
7.7.2. Displaying HISTORY Window 33
7.7.3. Retrieving Data Registered at Specific Date/Time 34
7.7.4. Reviewing Detailed Soundings Data History via LOG Window 35
7.8. Alarms
7.8.1. Introduction 36
7.8.2. Acknowledging Active Alarms 36
7.8.3. Depth Alarm 37
7.8.4. Bottom–Missing Alarm 38
7.8.5. Power Failure (Low Voltage) Alarm 39
7.8.6. Power Removal/Shutoff Alarm 39
8. Advanced Settings
8.1. Introduction 40
8.2. Entering Transducer Draft
8.2.1. Introduction 40
8.2.2. Draft Entering Procedure 41
8.3. Selecting Depth Reference Indications
8.3.1. Introduction 42
8.3.2. Selection Procedure 42
8.4. Echo Threshold Adjustment
8.4.1. Introduction 43
8.4.2. Adjusting Echo Threshold Level 43
8.5. Reducing Noise Interference 44
8.6. White–Line Adjustment
8.6.1. Introduction 44
8.6.2. Adjusting White–Line Level 45
8.7. Selecting Time Passage Scales 46
8.8. Activating Echo Sounder Simulator 47
8.9. Selecting Types of Echo Display 48
8.10. Installation Settings
8.10.1. Introduction 49
8.10.2. Changing Echo Color Assignments 50
8.10.3. Selecting Depth Readout Units 52

CVR-010
List of Contents
iv
8.10.4. Selecting Echo Dynamic Ranges 53
8.10.5. Entering Time Offset for Local Standard Time Readout 54
8.10.6. Setting Date and Time 55
8.10.7. Making Transducer–Related Settings 56
8.11. Selecting Data Outputs 58
8.12. Enabling Bottom–Missing Alarm 59
8.13. Selecting Depth Readout Response Times
8.13.1. Introduction 60
8.13.2. Selection Procedure 60
8.14. Turning off Keypress Beep 61
9. Making Settings via SYSTEM MENU
9.1. Introduction 62
9.2. Selecting Background Colors 62
9.3. Performing Self–Diagnostic Function 63
9.4. Outputting Stored Data 63
9.5. Selecting Intervals for Data Output from Memory 63
9.6. Selecting Menu Languages 64
9.7. Selecting AUTO TVG Characteristics for 50 & 200 kHz Transducers 64
10. Outputting Stored Data for PC–based Applications
10.1. Introduction 65
10.2. Data Output Format 65
10.3. Outputting Stored Data
10.3.1. Introduction 66
10.3.2. Selecting Output Intervals 66
10.3.3. Uploading Stored Data 67
11. User–Level Trouble Shooting
11.1. Introduction 68
11.2. Depth Readout 68
11.3. Automatic range selection 69
11.4. Bottom Echo Appearance 69
11.5. Alarms 70
11.6. Soundings Data History Window 70
11.7. Settings through Menu System 71
11.8. Date/Time Indication 71
11.9. GPS–Derived Data Outputs 71
12. User–Level Maintenance Instructions
12.1. Maintenance on the Equipment Cabinet 72
12.2. Maintenance on Electrical Connections 72
12.3. Maintenance on The Transducer 72
12.4. Servicing the Equipment 72
12.5. Temporary Display of A–Scope 73
13. Installation Instructions
13.1. Equipment Cabinet Installation
13.1.1. General Precautions 74
13.1.2. Mounting 74
13.2. Transducer Installation
13.2.1. General Precautions 75
13.2.2. Choosing Installation Location 76
13.2.3. Matched Transducers 77
13.2.4. Selection of AUTO TVG Response Characteristics for Transducers 77
13.2.5. Transducer Dimensions 78
13.3. Electrical Connections
13.3.1. Introduction 80
13.3.2. Power Supply Connections 81
13.3.3. Connections to Transducer 82
13.3.4. Connections through Digital I/O Interface Connectors 84
13.3.5. Connections to ALARM ACK Connector 93
13.3.6. Connections to ALARM OUT Connector 94
14. Recommended Spare Parts 95

CVR-010
List of Figures and Tables
(continued on next page)
1
1. List of Figures and Tables
Figure No. Description Page
3–1 Password Entry Window 5
3–2 Entering Password 5
3–3 Password Initialization Window 6
3–4 Changing/Removing Password – Step (1) 6
3–5 Changing/Removing Password – Step (2) 6
7–1 Typical Full–Color Echogram Display 14
7–2 Initial Assignments of Echo Colors 15
7–3 Time Marker Interval – Example 16
7–4 One–Minute Time Calibrations 17
7–5 Relative Location of Transducer 18
7–6 Control Panel 19
7–7 Indication of Activating Range Selection Function – Example 20
7–8 On–Screen Operating Parameter Indication – Example 20
7–9 Parameter Indication in Manual Control Mode – Example 21
7–10 MAIN MENU 22
7–11 Parameter Indication in AUTO and MANUAL Control Modes – Example 23
7–12 Variable Range Marker – Example 24
7–13 Soundings History Window – Example 25
7–14 Depth Range Arrangement 26
7–15 Automatic Depth Range Selection – Example 27
7–16 On–Screen Indication of Automatic Control Mode 27
7–17 Initial Assignments of Bottom Echo Colors 28
7–18 Initial Echo Dynamic Range 28
7–19 Display of Multiple Bottom Echoes 29
7–20 Typical Display of Shallow Water Echoes 30
7–21 Parameter Indication for Manual Gain Adjustment 31
7–22 Adjusting TVG Level – Example 31
7–23 Parameter Indication for Manual TVG Adjustment – Example 32
7–24 Echo Sounder Screen with HISTORY Window Opened – Examle 33
7–25 Soundings Data History Window – Example 34
7–26 Typical Echogram Screen with LOG Window Opened 35
7–27 Setting Alarm Depth – Example 37
7–28 Visual Indication of Active Depth Alarm – Example 37
7–29 Visual Indication of Active Bottom–Missing Alarm 38
7–30 Visual Indication of Active Power Failure Alarm – Example 39
8–1 MAIN MENU 40
8–2 Transducer Draft 41
8–3 Entering Transducer Draft 41
8–4 On–Screen Indication of Transducer Draft 41
8–5 Selecting Depth Reference Indications 42
8–6 Alarm Depth Setting Indication – Example 42
8–7 Adjusting Echo Threshold Level – Example 43
8–8 Effect of Echo Threshold on Echogram – Example 43
8–9 Selecting Noise Reduction Levels 44
8–10 Noise Reduction Level Indication – Example 44
8–11 Adjusting White Line Level – Example 45
8–12 Typical White Line Echogram 45
8–13 Selecting Time Scales 46
8–14 Soundings Data History Window – Example 46
8–15 Activating Echo Sounder Simulator 47
8–16 Indication of SIMULATION Mode – Example 47
8–17 Selecting Types of Echo Display 48
8–18 Accessing INSTALLATION SETTINGS Options 49
8–19 Initial Echo Colors Assignments 50
8–20 Accessing ECHO COLORS Submenu 50
8–21 Color Sample Scale 51
8–22 Accessing DEPTH UNIT Submenu 52
8–23 Initial Echo Dynamic Range 53

CVR-010
List of Figures and Tables
2
1. List of Figures and Tables (continued – 2/ 2)
Figure No. Description Page
8–24 DYNAMIC RANGE Submenu 53
8–25 Entering Time Offset 54
8–26 Setting Date and Time 55
8–27 Entering Current Date and Time – Example 55
8–28 Accessing TRANSDUCER SETTINGS Submenu 56
8–29 Indication of Relative Transducer Site 56
8–30 Registering Transducer Site and On–Screen Indication 56
8–31 Keel Offset – Example 57
8–32 Entering Keel Offset – Example 57
8–33 Indication of Depth Reference with Keel Offset Entered – Example 57
8–34 Accessing DATA OUTPUT PORT Submenu 58
8–35 Enabling Bottom–Missing Alarm 59
8–36 Selecting Depth Readout Response Times 60
8–37 Turning off Keypress Beep 61
9–1 SYSTEM MENU 62
9–2 Selecting Screen Background Colors 62
9–3 Initiating Self–Diagnostic Function – Example 63
9–4 Executing Stored Data Output Function 63
9–5 Selecting Stored Data Output Intervals 63
9–6 Selecting Menu Languages 64
9–7 Selecting AUTO TVG Characteristics – Example 64
10–1 Output Format of Stored Data 65
10–2 SYSTEM MENU 66
10–3 Selecting Data Output Intervals 66
10–4 Uploading Stored Data – Step (1) 67
10–5 Uploading Stored Data – Step (2) 67
12–1 Typical Echogram Screen with A–Scope Turned on 73
13–1 Installation Dimensions of Display Cabinet 75
13–2 Selecting AUTO TVG Characteristics for 50 kHz Transducer 77
13–3 TOKIN TGM Series Transducer Dimensions 78
13–4 Recommended Steel Housing Structure – Example 79
13–5 Rear Panel Connectors 180
13–6 POWER Receptacle Pin Assignments 181
13–7 Fuse Holder 181
13–8 Ground Terminal 82
13–9 Terminating Frequency Transducer Cable 82
13–10 TRANSDUCER Receptacle Pin Assignments 83
13–11 RS–422 Connector Pin Assignments 91
13–12 I/OData Connector Pin Assignments 92
13–13 ALARM ACK Connector Pin Assignments 93
13–14 ALARM ACK Connector Circuit 93
13–15 ALARM OUT Connector Pin Assignments 94
13–16 ALARM OUT Connector Circuit 94
Table No. Description Page
4–1 Standard Components and Parts Supplied 7
8–1 Last Readout Holding Periods 60
13–1 Installation Dimensions of TOKIN TGM Series Transducers 78
13–2 Equivalent Maximum Range Scales in Fathoms and Feet 87
14–1 Recommended Spare Parts 95

CVR-010
List of Abbreviations
(continued on next page)
3
2. List of Abbreviations
The abbreviations used in this manual and menus, on screen, control panel and rear panel
are listed below.
A: amperes
AIS: Automatic ship Identification System
ALM: Alarm, header of IEC 61162–1/NMEA0183 alarm output sentence
AUTO: Automatic control mode (automatic selection of range, gain and TVG)
BRT: Screen brightness control key
BS: Back space (shifts character highlight to left on data entry field)
BSH: Bundesamt für Seeschiffahrt und Hydrographie (Federal Maritime and Hydrographic Agency, Germany)
BV: Bureau Veritas (France), EU–notified body
CW: Clockwise
CCW: Counterclockwise
CLR: Clear
dB: decibels (unit of relative power strength, 0 dBμ=1μV)
D: Depth (part of cabinet dimensions)
DBK: Header of
IEC 61162–1/NMEA–0183 data sentence (depth below keel)
DBS: Header of
IEC 61162–1/NMEA–0183 data sentence (depth below surface)
DBT: Header of
IEC 61162–1/NMEA–0183 data sentence (depth below transducer)
DFT: Draft (transducer draft or depth from surface to transducer)
DIM: Dimmer, control panel backlighting key
DIN: Deutsches Institut für Normung (German Institute for Standardization)
DOS/V: Disk Operating System/V (PC operating system for IBM–compatibles)
DPT: Header of
IEC 61162–1/NMEA–0183 data sentence (depth)
EC: European Council
EN: Europäische Norm (European Standard)
ENT: Entry key
FM: fathoms (=6 feet)
FRQ,FREQ: Frequency (transducer frequency)
FT: feet
FWE: Flash–memory write enable (flash memory programming)
GGA: Header of IEC 61162–1/NMEA–0183 data sentence (GPS position fix)
GND: Ground
GPS: Global Positioning System, GPS receiver/sensor
hr: hours
H: Height (part of cabinet dimensions)
HIST: Soundings history
HH:MM:SS: Time display format (hours, minutes and seconds)
IEC: International Electrotechnical Commission
INS: Integrated Navigation System (INS port = RS–422 port in this manual)
IMO: International Maritime Organization
ISO: International Standardization Organization
I/O: Input/output, I/O data connector on rear panel
kg: kilograms
KL: Keel offset (depth from transducer to keel)
KT: knots
kW: kilowatts

CVR-010
List of Abbreviations
4
2. List of Abbreviations (continued – 2/2)
LAT/LON: Latitude/Longitude coordinates
LCD: Liquid crystal display
LED: Light–emitting diode
LST: Local standard time
m: meters
mA: milliamperes
min.: minutes, minimum
mm: millimeters
Max, max.: Maximum
MED: Marine Equipment Directive
MM/DD/YY: Month, day and year (date indication format)
NC: No connection (no internal connection)
NMEA: U.S. National Marine Electronics Association
NR: Noise reduction
para.: paragraph
P–P: peak–to–peak
PCB: Printed Circuit Board
PWR: Power
ref. refer to, reference is made to
rms: root mean square (definition of effective mean power in this manual)
RA: Device identifier assigned to radar in IEC 61162–1/NMEA–0183 sentence
RF: radio frequency
(50 and 200 kHz in this manual)
RGB: Red, green and blue (3 original colors of light)
RH: Relative humidity
RMC: Header of
IEC 61162–1/NMEA–0183 data sentence (position, speed, time)
RNG: Range (depth range)
RX: Receive, receiver
RXD: Receive data
Specs.: Specifications
SD: Device identifier assigned to echo sounder in IEC 61162–1/NMEA–0183 sentence
SPST: Single–pole–single–throw, on/off switch
STB: Starboard
STC: Sensitivity–Time Control
STD: Standard
SVDR: Simplified voyage data recorder
TFT: Thin–film transistor (technology of color LCD)
TRX: Transceiver
TVG: Time–varied gain control
TX: Transmit, transmitter
TXD: Transmit data (Send data)
UTC: Universal time coordinated (=GMT in common usage)
V: volts
VA: volt–amperes (AC equivalent of watts,AC power consumption)
VAC: Volts AC
VDC: Volts DC
VDR: Voyage data recorder
VGA: Video graphics array (screen resolution, 640×480 pixels)
VRM: Variable Range Marker
VTG: Header of
IEC 61162–1/NMEA–0183 data sentence (heading and speed)
W: Width (part of cabinet dimensions), watts (power consumption)
ZDA: Header of
IEC 61162–1/NMEA–0183 data sentence (UTC & date)

CVR-010
Password Protecting the Menu Settings
(continued on next page)
5
3. Password–Protecting the Menu Settings
3.1. Introduction
To prevent an unauthorized change in menu settings you have made, a 4–digit user–
definable password can be set. Once a password is set, every time you press
to check
or change some settings, a password entry window will pop up, asking you to enter the
password before you can open the MAIN MENU.
< WARNING >
BEFORE INITIALLY ENTERING THE DESIRED PASSWORD, BE SURE TO
TAKE A NOTE OF IT, AND, IF NECESSARY, ADVISE ONLY AUTHORIZED
USERS OF IT. FOR SECURITY REASONS, THE MANUFACTURER CANNOT
HELP BREAK A USER–ENTERED PASSWORD.
3.2. Setting a Password
It is assumed that a normal echogram screen is showing with no menu turned on.
Figure 3-1 Password Entry Window
①While holding down
until two
beeps are heard, press both
and
simultaneously. A
password entry window should
then show up, as illustrated at
right.
②Enter the desired password
consisting of four (4) numerals, by
pressing the appropriate numeric
keys. Each character entered will
be replaced by an asterisk (*)
for security reasons.
An entry mistake can be erased
by pressing
.
Figure 3-2 Entering Password
③Press
. The password entry
field should then change as
shown at right, asking you to
enter the same password again.
④Re–enter the same password in
the same manner.
⑤Press
. The window will then be turned off, allowing the echogram screen to return.
If an incorrect password was entered at step ③, the first password entry field (①) will
return.
[▲] = BS
PRESS I[PAGE]ITO EXIT ALL
MENU NEW1 PASSWORD
Enter 4–digit
p
asswor
d
starting here.
MENU NEW1 PASSWORD
*MENU NEW2 PASSWORD
MENU NEW1 PASSWORD
*MENU NEW2 PASSWORD
****

CVR-010
Password Protecting the Menu Settings
6
3. Password–Protecting the Menu Settings (continued – 2/2)
3.3. Changing or Removing the Password
If you wish to change the current password or remove the password to allow free access to
the menu system, execute the following steps:
Figure 3-3 Password Initialization Window
①Display a password initialization
window by pressing both
and
simultaneously while holding
down
.
Figure 3-4 Changing/Removing Password Step – (1)
②Enter the current (existing) pass–
word and then press
.
The password field will change as
shown at right.
Figure 3-5 Changing/Removing Password Step – (2)
③Enter a new password if you wish
to change the current one, or
simply press
to remove the
current password. The password
field will change as shown at right.
④Re–enter the new password and press
(orpress
one more time to remove the
password). The password entry window will then be turned off.
This completes the menu password change/removal procedure.
[▲] = BS
PRESS I[PAGE]ITO EXIT ALL
MENU OLD PASSWORD
Enter current password.
MENU NEW1 PASSWORD
*MENU NEW1 PASSWORD
MENU NEW1 PASSWORD
*MENU NEW2 PASSWORD

CVR-010
Standard Components and Parts Supplied
7
4. Standard Components and Parts Supplied
The following components and parts are initially supplied as standard for each CVR–010
echo sounder, unless otherwise prearranged under a separate agreement with your dealer
or the manufacturer: Upon receipt of the package, check your delivery against the list below
and notify your dealer or the manufacturer immediately if any part is found missing.
Table 4-1 List of Components and Parts Supplied as Standard
No. Name and Description Part No./Rating Q’ty
1 Echo sounder display unit CVR–010 1 pc
2 Mounting bracket SF–STD01 1 pc
3 Cabinet clamping knob 2 pcs
4 Power cable M402–PWR01/CW–272–3M 1 pc
5 Fuse (for 24V DC and up) 2A 2 pcs
6 Fuse (for 12V DC) 3A 2 pcs
7 2–pin plug (for ALARM ACK receptacle) CP111–2P 1 pc
8 6–pin plug (for ALARM OUT receptacle) CP111–6P 1 pc
9 8–pin plug (for I/O receptacle) CP111–8P 1 pc
10 3–pin plug (for TRANSDUCER receptacle) HS21P–3 1 pc
11 User’s manual (this manual) OPERATION MANUAL 1 copy

CVR-010
Product Description
(continued on next page)
8
5. Product Description
The Model CVR–010 is a single–channel navigation echo sounder designed to comply fully
with IMO Resolution MSC.74(69) Annex 4, and is type–approved by BSH on the basis of
compliance with the DIN EN ISO 9875 standards and pertinent IEC requirements for wheel
mark certification.
Featuring a 5.7–inch daylight–viewing, LED–backlit color TFT LCD screen, the equipment
displays the echogram using a total of seven user–definable ease–on–the–eye analog
strength–level colors that represent various layers of the bottom stratum. The display can be
set to show the bottom contour alone in a single color via a menu–guided procedure.
Digital depth readout is also available using easy–to–read large fonts with a clear on–screen
indication of the reference of measurement (from the waterline, the transducer or the keel),
and in meters, fathoms or feet. To comply with the IMO resolution, the depth reading must
be indicated in meters for navigational purposes.
With an optional GPS sensor plugged in or an onboard GPS data source connected, the
ship’s LAT/LON coordinates, speed and heading data will also be displayed at the same
time.
Abattery–backed realtime calendar clock is built in to indicate the date and time in UTC or in
the desired local time at all times. With an appropriate GPS sensor plugged in, the time is
automatically referenced to the atomic–precision GPS time.
Up to 12 hours of sounding data will be stored in non–volatile memory at approximately
two–second intervals, together with associated date and time, range in use plus position
coordinates (with an optional GPS sensor plugged in or a GPS source connected).
The user can review the stored data across any 15–minute segment at any point in time
over the past 12 hours through a specially designed window easily accessible with a
devoted key.
The depth sounding history can be graphically displayed to show how the depth varied over
the past hours. Detailed data is also available digitally via another window that can also be
accessed with a single keystroke.
The data can be output on demand in NMEA–0183 (IEC 61162–1)–compatible format via
rear panel interface connectors for use in shore–based applications, and is protected
against a system reset.
An easy–to–use menu system is incorporated to set the transducer draft, depth reference,
echo threshold level, echo display mode, etc. in addition to operating parameters to be
selected mainly at installation time.
Unauthorized access to the menu system can be prevented with password entry, if desired.
For use with the CVR–010, high quality TOKIN 50 and 200 kHz transducers are
BSH–approved. A desired frequency should be specified at the time of ordering so that a
matched transceiver board is installed before shipping.
Both the receiver gain and TVG (anti–clutter) levels are automatically controlled for hands–
free operation when the equipment is operating in the fully automatic mode (AUTO). Manual
override of both functions is also possible. Interference from other echo sounders operating
in the vicinity can be effectively eliminated or reduced with a 3–step noise reduction
function.
The acquired data will also be output via the rear panel RS–422 connectors simultaneously
for use in other onboard applications requiring depth, date/time and position information.
The built–in alarms include depth alarm, bottom–missing alarm, power failure (low voltage)
alarm and power removal/shutoff alarm.

CVR-010
Product Description
9
5. Product Description (continued – 2/2)
The depth alarm alerts the operator to decreasing depth (shallow alarm). A variable depth
marker can be turned on to set the alarm depth graphically as well as digitally.
The bottom–missing alarm warns against the bottom echo being lost, becoming too weak or
exceeding the current range limit.
The power failure (low voltage) alarm will be activated if the power line voltage drops below
the factory–specified predetermined level.
The power removal/shutoff alarm will be triggered in the event power is accidentally
removed or shut off at the ship’s power source with the equipment operating, emitting
continuously a repeating beep for several minutes.
The alarm activation status, except for the power removal/shutoff alarm, will be indicated
both audibly and visually, and the alarm on/off switched outputs will be separately available
for driving externally connected alarm indicating devices through a devoted connector.
For use with onboard INS applications, the equipment outputs the NMEA–0183 (IEC
61162–1)–formatted alarm sentence for each alarm via one of the rear panel RS–422 ports
at specified intervals. When any of the alarms becomes active, the output’s status and
intervals will be changed accordingly, and an active alarm can be remotely acknowledged
and reset with an appropriate software command from an INS terminal or with a suitable
hardware on/off switch mounted at a different location.
The display cabinet has a rugged DC power supply built in that assures reliable operation
against a wide range of voltage fluctuations. In an installation where an AC power source is
available, the equipment can be operated primarily from the AC source through an optional
Model AC–2000 AC adapter for an automatic changeover to the DC power source in the
event of AC power outage.

CVR-010
Specifications
(continued on next page)
10
6. Specifications
6.1. General Specifications
Display Screen: 5.7 inch 7–analog RGB-color LED–backlit TFT–LCD, QVGA
resolution, with backlighting level adjustable in 10 steps. LCD
module complies with IEC 62288 (Ed.1, 2008) standards.
Data Storage: Up to 12 hours of sounding data, depth range, associated
UTC date/time and *1LAT/LON readouts are automatically
retained in flash memory protected from power shutoff or
system reset.
Data Retrieval: Stored sounding data (IEC 61162–1/NMEA–0183 DPT format)
of past 15 minutes, 1/3/6/12hours can be retrieved from flash
memory and can be graphically displayed in a devoted
soundings data history window, together with associated UTC
date/time, and *1LAT/LON coordinates. All stored data can be
output in NMEA proprietary format on demand via
RS–422–A/B and I/Odata connectors simultaneously.
Keypad Backlighting: Adjustable in 7 steps by front panel dimmer key
Cabinet Size & Weight: 248/196(W)×216/196(H)×102(D) mm with/without mounting
bracket, 1.6 kg (cabinet) + 0.55 kg (mounting bracket)
Power Requirements: 11 – 40 VDC, 0.7A at 12V, 0.4A at 24V (typical)
Power consumption: approx. 10W
Ambient Temperature: –15 to +55゚
C, 95% RH (operating, without condensation)
–40゚
C (storage)
Compass Safe Distance: 1.00m (standard compass), 0.55m (steering compass)
*
1Optional GPS sensor or GPS data source (NMEA–0183) required.
*2 AC operation available with optional AC–2000 adapter connected
6.2. Echo Sounder Specifications
Modes of Operation:
・AUTO (default): Fully automatic selection and settings (depth range, gain, TVG)
・MANUAL: Manual selection and settings of above parameters
Depth Ranges (Maximum Range Limits):
A B C D E F G H
・Meters (m, default): 5 10 20 40 100 200 400 11800
・Fathoms (FM): 2.5 15 15 20 40 100 200 400
・Feet (FT): 20 40 100 200 400 1000 2000 4000
Transducer Draft: Adjustable in 0.1–meter steps for each transducer.

CVR-010
Specifications
(continued on next page)
11
6.2. Echo Sounder Specifications (continued – 2/4)
Keel Offset: Adjustable in 0.1–meter steps for each transducer.
Transducer Frequencies (and BSH–Approved Matched Transducers):
・50 kHz (TOKIN TGM60–50–20L)
・200 kHz (TOKIN TGM80–200–20L)
Transmit Power: Approx. 600W RMS max. to approved transducer
Transmit Pulse Lengths (in milliseconds):
A B C D E F G H
・Meters (m) : 0.14 0.3 0.6 1.1 2.7 5.4 5.4 5.4
・Fathoms (FM): 0.14 0.3 0.6 1.1 2.7 5.4 5.4 5.4
・Feet (FT): 0.14 0.3 0.6 1.1 2.7 5.4 5.4 5.4
Sounding Rates (per minute):
A B C D E F G H
・Meters (m) : 120 120 120 120 60 30 30 30
・Fathoms (FM): 120 120 120 120 120 60 30 30
・Feet (FT): 120 120 120 120 60 30 30 30
Velocity Standard: 1500.0 meters/second, fixed
Minimum Detectable Depth:
・50 kHz: 1 meter
・200 kHz: 50 centimeters
Accuracy of Measurement:
・20–meter range: Better than ±0.5 meters
・200–meter range: Better than ±5 meters
・Other ranges: Better than ±2.5 % of digital depth readout
Range Discrimination:
・20 meter range: 5 mm/m
・200 meter range: 0.5 mm/m
Echogram Presentation: The bottom echo is initially displayed in red only. It can be
displayed in up to 7 analog RGB colors through the menu
system, depending on strength, with red representing the
strongest echo level and blue, the weakest level (default
settings). Color–strength assignments can be user–defined.
Display Duration: The displayed echogram remains on screen for approximately
20 minutes.
Echogram Feed Rate: Once every 2 seconds, e.g. once every 4 soundings on range
below 40m, every 2 soundings on 100m range.

CVR-010
Specifications
(continued on next page)
12
6.2. Echo Sounder Specifications (continued – 3/4)
Echo Dynamic Range: Change in echo indication to next stronger/weaker color
normally represents a 3–dB change in strength. Other
selectable dynamic ranges include 4, 5 and 6 dB.
Noise Reduction: 3 steps (low, mid and high), selectable via menu
Receiver Gain: Automatically adjusted for depth range in use; manually
adjustable in a total of 41 steps (level 0 to level 40)
TVG (STC): Automatically adjusted for depth range in use; manually
adjustable in a total of 31 steps (level 0 to level 30)
Audible and Visual Alarms:
The following alarms are available and enabled at all times, except for the
bottom–missing alarm:
●Depth: Warns against decreasing depth, with alarm triggering depth
user–presettable in 0.1–meter steps. Local alarm # 001
・Audible: Beeps repeatedly at approximately 1–second intervals. The
sound can be muted by pressing
or with an appropriate
ACK command via one of the RS–422 ports.
・Visual: Blinks repeatedly alarm symbol
and on–screen preset
value on red background at approximately 1–second intervals.
●Bottom–Missing: Warns if bottom echo is lost or too weak to measure depth, or
if depth exceeds the range limit, for 4 seconds or more.
Local alarm # 002, initially disabled
NOTE: To enable this alarm, see paragraph 8.12 for instructions.
・Audible: Beeps repeatedly at approximately 1–second intervals;
automatically muted in 5 seconds.
・Visual: Blinks repeatedly on–screen depth readout unit (m, FM or
FT) at approximately 1–second intervals.
●Power Failure: Warns against drop of power supply voltage below
factory–specified level (11.0 VDC). Local alarm # 003
・Audible: Beeps repeatedly at approximately 1–second intervals. The
sound can be muted by pressing
or with an appropriate
ACK command via either of the RS–422 ports.
・Visual: Blinks repeatedly alarm symbol
and on–screen voltage
readout on red background at approximately 1–second
intervals.
● Power Removal/Shutoff: Warns against removal or shutoff of power source. (audible
indication only, in the form of a beep occurring at approx.
1–second intervals for at least 5 minutes). The sound can be
silenced by pressing
.
Other manuals for CVR-010
1
Table of contents
Other Koden Marine Equipment manuals

Koden
Koden CVS-FX2 User manual

Koden
Koden CVS-FX1 Assembly instructions

Koden
Koden CVG-200 User manual

Koden
Koden KDS-8000BB User manual

Koden
Koden CVS-126 User manual

Koden
Koden CVS-126 User manual

Koden
Koden CVS-FX2 User manual

Koden
Koden CVS-FX2BB Assembly instructions

Koden
Koden CVS-128 User manual

Koden
Koden CVS-FX1 Assembly instructions

Koden
Koden CVS-118Mk II User manual

Koden
Koden CVR-010 User manual

Koden
Koden CVS-875D User manual

Koden
Koden CVS-705D User manual

Koden
Koden CVS-833 User manual

Koden
Koden CVS-126 User manual

Koden
Koden CVS-128 User manual

Koden
Koden CVS-872D User manual

Koden
Koden CVS-841 User manual

Koden
Koden CVS-FX1 User manual