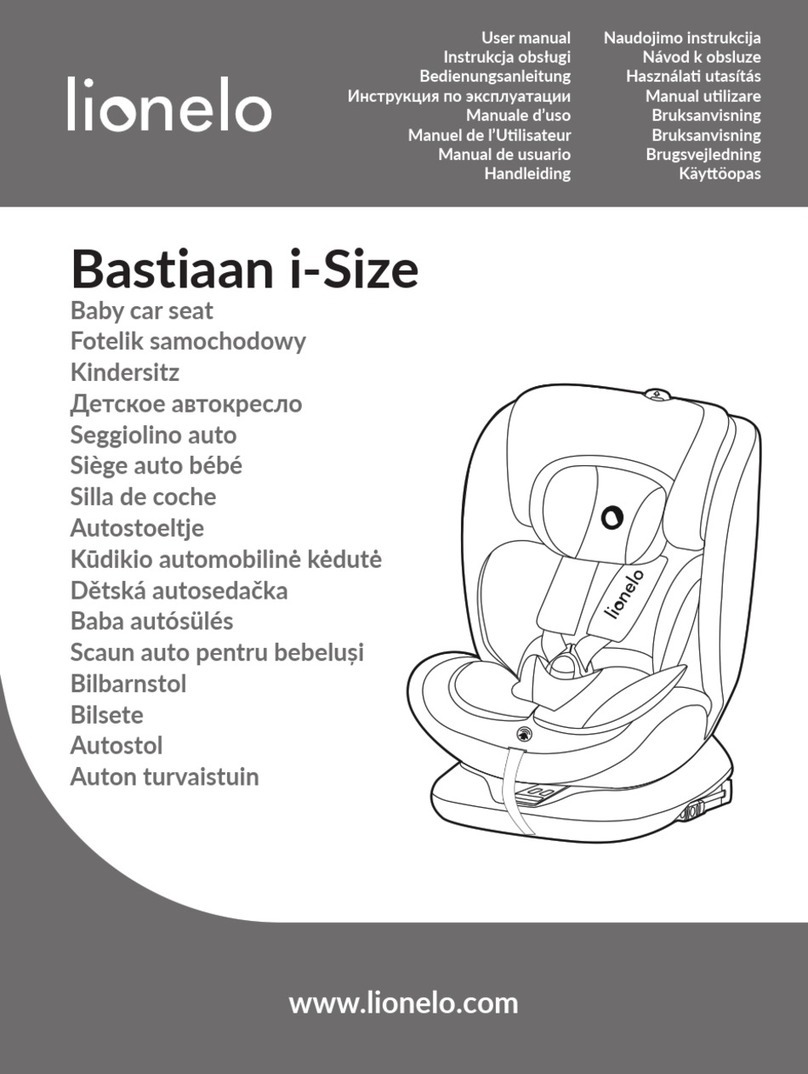
Lionelo Braam i-Size User manual

Braam i-Size
Baby car seat
Fotelik samochodowy
Kindersitz
Детское автокресло
Seggiolino auto
Siège auto bébé
Silla de coche
Autostoeltje
Kūdikio automobilinė kėdutė
Dětská autosedačka
Baba autósülés
Scaun auto pentru bebeluși
Bilbarnstol
Bilsete
Autostol
Auton turvaistuin
Naudojimo instrukcija
Návod k obsluze
Használa utasítás
Manual ulizare
Bruksanvisning
Bruksanvisning
Brugsvejledning
Käyöopas
User manual
Instrukcja obsługi
Bedienungsanleitung
Инструкция по эксплуатации
Manuale d’uso
Manuel de l’Ulisateur
Manual de usuario
Handleiding
www.lionelo.com

‑ 2 ‑
B
A
1
2
8
7
4
6
5
22
3
14
12
11
20
13
10
9
18
21
16
17
19
15

‑ 3 ‑
3
12
C
>61 cm40-60 cm

‑ 4 ‑
CLICK
CLICK
4
5 6a

‑ 5 ‑
6b
6c 7

‑ 6 ‑
B
A
CLICK
9
8
10

‑ 7 ‑
14
> 61cm
12
1311

‑ 8 ‑
Max.
1 cm
2019
1817
1615

‑ 9 ‑
x2
2625
2423
2221

‑ 10 ‑
C
B
CLICK
B
27 28
29a
29b

‑ 11 ‑
C
29c
1 2 3 4 5
30
31
BA

‑ 12 ‑
33
31
x2
C D
32

‑ 13 ‑ EN
EN
Dear customer!
Should you have any remarks or quesons concerning the product, please do not hesitate
to contact us: [email protected]
Producer:
BrandLine Group Sp. z o. o.
A. Kręglewskiego 1, 61-248 Poznań, Poland
The product meets the requirements of the standard: R129/03.
Informaon for the growth group from 40 to 105 cm (maximum weight of the child 18 kg)
NOTICE. This is an i-Size Enhanced Child Restraint System. It is approved according to UN
Regulaon No. 129, for use in i-Size compable vehicle seang posions as indicated by
vehicle manufacturers in the vehicle users’s manual. If in doubt, consult either the Enhanced
Child Restraint System manufacturer or the retailer.
Informaon for the growth group from 100 to 150 cm
NOTICE. This is a i-Size booster seat Enhanced Child Restraint System. It is approved according
to UN Regulaon No. 129, for use primarily in “i-Size seang posions” as indicated by vehicle
manufacturers in the vehicle user’s manual. If in doubt, consult either the Enhanced Child
Restraint System manufacturer or the retailer.
The product is only suitable for installaon on the locaons marked with the symbol in
g. A, marked i-Size.
The product is suitable for installaon in the posion marked by the symbol in g. A only
forward-facing and with the air bag deacvated. We recommend ng the seat only on
the rear seats of the car
WARNINGS:
1. The product is designed for children weighing up to 36 kg and between 40 and 150
cm in height.
2. If your child is less than 15 months old or less than 76 cm tall, do not use a forward-
facing seat.
3. The hard parts and plasc parts of the child restraint system should be posioned and
installed in such a manner that they cannot be trapped by a sliding seat or vehicle door
under normal vehicle operang condions.

‑ 14 ‑EN
4. For rear-facing installaon, do not use the seat where the front air bag is acve.
5.
Any seat belts holding the child must be well suited to the child’s size. Belts must
not be twisted.
6.
The straps securing the restraint to the vehicle must be ght, the stabilisaon leg must
be in contact with the ground of the car.
7. Make sure the lap belts run low to adequately secure the pelvis.
8.
If the product has been exposed to strong elements (such as impact), it should be
replaced.
9.
Do not make any changes to the seat or add any new components without the approval
of the approval authority. To ensure maximum safety for your child, the equipment
should be xed and used as recommended in the instrucons.
10. Protect your child and the seat from the sun (for example, by covering the seat with
a light-coloured item of clothing). If the seat is not covered, try not to expose it to the
sun. Otherwise the seat may be too hot for your child’s skin.
11. Never leave a child alone in a child seat in a vehicle.
12.
Luggage and other similar items should be secured so that they do not cause any
injury in a collision situaon.
13. Do not use the seat without its fabric cover.
14. The cover cannot be replaced with an item from another set. It is an integral part of
the set and aects the operaon of the restraint.
15. Always carry this instrucon manual with you.
16. Refer to the vehicle manufacturer’s instrucon manual.
LIST OF PARTS (FIG. B)
1. Backrest
2. Headrest
3. Shoulder belt guide
4. Reducon insert for the baby
5. Shoulder belt protecon pads
6. 5-point seat belts
7. Seat belt buckle
8. Buon for seat belt tension adjustment
9. Strap for seat belt tension adjustment
10. Seat lt adjustment lever
11. Stabilisaon leg extension indicator

‑ 15 ‑ EN
12. Stabilisaon leg
13. Stabilisaon leg adjustment buon
14. Extendible part of the stabilisaon leg
15. Headrest adjustment lever
16. Side protecon system
17. Lap belt guide
18. ISOFIX arms
19. Seat rotaon buon
20. ISOFIX sliding lever
21. An-rotaon frame
22. Inner belt retaining magnets
INSTALLATION IN THE CAR
Seat installaon Seat
orientaon
Seat posion Child's
dimensions
- Mounng via ISOFIX
and stabilisaon leg
Children less than 60 cm
tall – reclined posion
only
Rearward
facing
From 40 to
105 cm
Child’s
weight:
maximum
18 kg
- Mounng via ISOFIX
and stabilisaon leg
Forward
facing
From 76 to
105 cm
Child’s
weight:
maximum
18 kg

‑ 16 ‑EN
- Mounng via ISOFIX
and car belts – Mounng
via car belts only
Children less than 125
cm tall – upright posion
only
Forward
facing
From 100 to
150 cm
REARWARD FACING (40 – 105 CM)
Note! Children under 61 cm in height can only use the seat with a reducon insert (g. C).
1. Extend the stabilisaon leg (g. 1 and 2).
2. Place the seat on the sofa of the car.
3.
Press the sliding lever and extend the ISOFIX arms (g. 3). Anchor the ISOFIX arms
to the anchorages located in the car’s sofa (g. 4). The arms will interlock and you will
hear the characterisc click. The green indicator on the ISOFIX buon must be visible
on both sides of the seat.
4.
Ensure that the an-rotaon frame is pressed rmly against the backrest of the sofa
in the car (g. 5). Push the seat towards the backrest. Push the base using a le-right
movement towards the back of the vehicle seat unl it is completely aligned with the
back of the an-rotaon frame.
5.
Press the stabilisaon leg adjustment buon. Its retractable part should extend
automacally (g. 6a).
6. Adjust the leg height so that the foot meets resistance from the vehicle oor. Now you
can let go of the buon.
7.
Make sure that the stabilisaon leg extension indicator is green and that the leg touches
the ground of the car (g. 6b) and is not crooked (g. 6c).
NOTE! Never mount the foot from the support leg on the glove box in the oor of the car.
This poses the risk of the glove box being blown o during an accident. If in doubt, refer to
the vehicle’s instrucon manual.
NOTE! The support leg must never hang in the air and no objects may be placed under it.
8. Press the seat rotaon buon (19, g. B) and then move the seat to a lateral posion,
at an angle of 90° (g. 7).
9. Loosen the shoulder belts of the seat by pressing the belt adjustment buon (g. 8)
Use the belt retaining magnets for easy inseron of your child into the seat.

‑ 17 ‑ EN
10. Place the child in the seat.
11.
Connect the belt connectors and then insert them into the buckle (g. 10). You will
hear a characterisc click.
12. Pull the strap to ghten the belts (g. 14). To loosen the belts, press the belt adjustment
buon and pull on the shoulder belts (g. 8).
13. Adjust the headrest (see: Headrest adjustment).
14.
Using the rotaon buon (19, g. B), turn the seat so that it is posioned rearward
facing. The correct posioning will be signalled by a click.
15. To release the 5-point seat belts, press the red buon on the buckle (g. 9).
Note! The reducon insert must be removed when the seat is used by a child over 61 cm
tall (g. 11).
Note! Make sure that the seat belts are ght against the child’s body and that they are not
twisted (g. 14). Make sure the lap belts run low and protect the child’s pelvis. The belts should
be ght against the child’s body, but should not be too ght and cause discomfort (g. 15).
FORWARD FACING (76 – 105 CM)
1. Extend the stabilisaon leg (g. 1 and 2).
2. Place the seat on the sofa of the car.
3.
Press the sliding lever and extend the ISOFIX arms (g. 3). Anchor the ISOFIX arms
to the anchorages located in the car’s sofa (g. 4). The arms will interlock and you will
hear the characterisc click. The green indicator on the ISOFIX buon must be visible
on both sides of the seat.
4.
Ensure that the an-rotaon frame is pressed rmly against the backrest of the sofa
in the car (g. 5). Push the seat towards the backrest. Push the base using a le-right
movement towards the back of the vehicle seat unl it is completely aligned with the
back of the an-rotaon frame.
5.
Press the stabilisaon leg adjustment buon. Its retractable part should extend
automacally (g. 6a).
6.
Adjust the leg height so that the foot meets the resistance with the ground of the vehicle
now you can release the buon.
7.
Make sure that the stabilisaon leg extension indicator is green and that the leg touches
the ground of the car (g. 6b) and is not crooked (g. 6c).
NOTE! Never mount the foot from the support leg on the glove box in the oor of the car.
This poses the risk of the glove box being blown o during an accident. If in doubt, refer to
the vehicle’s instrucon manual.

‑ 18 ‑EN
NOTE! The support leg must never hang in the air and no objects may be placed under it.
8. Press the seat rotaon buon (19, g. B) and then move the seat to a lateral posion,
at an angle of 90° (g. 7).
9. Loosen the shoulder belts of the seat by pressing the belt adjustment buon (g. 8)
Use the belt retaining magnets for easy inseron of your child into the seat.
10. Place the child in the seat.
11.
Connect the belt connectors and then insert them into the buckle (g. 10). You will
hear a characterisc click.
12. Pull the strap to ghten the belts (g. 14). To loosen the belts, press the belt adjustment
buon and pull on the shoulder belts (g. 8).
13. Adjust the headrest (see: Headrest adjustment).
14. Press the seat rotaon buon (19, g. B) and then move the seat to the forward facing
posion. Use the lt adjustment buon to adjust the seat to the desired posion.
15. To release the 5-point seat belts, press the red buon on the buckle (g. 9).
FORWARD FACING (100 – 150 CM)
1. Fold the stabilisaon leg (see: Seat removal – stabilisaon leg).
2. Remove the seat belts (see: Seat belt removal).
3. Press the seat rotaon buon (19, g. B) and then move the seat to the forward facing
posion. The correct posioning will be signalled by a click.
4. Place the seat on the sofa of the car in the space provided for installaon.
Note! If installing without ISOFIX system, skip step number 5.
5.
Push in the ISOFIX sliding lever on both sides and extend the ISOFIX arms (g. 3).
Anchor the ISOFIX arms to the anchorages located in the car’s sofa (g. 4). The arms
will interlock and you will hear the characterisc click. The green indicator on the ISOFIX
buon must be visible on both sides of the seat (g. 4).
6. Ensure that the an-rotaon frame is pressed rmly against the backrest of the sofa in
the car (g. 5). Push the base using a le-right movement towards the back of the vehicle
seat unl it is completely aligned with the back of the an-rotaon frame.
7. Place the child in the seat (g. 28) and adjust the headrest (see: Headrest adjustment).
8. Pass the shoulder belt through the shoulder belt guide, which is located in the headrest
of the seat. Pass the lap belt through the lap belt guide (g. 29a).
9. Fasten the seat belts. Make sure the belts are not twisted (g. 29b).
10. Make sure that the belts are correctly posioned in the guides (g. 29c).

‑ 19 ‑ EN
SEAT REMOVAL – STABILISATION LEG
Press the stabilisaon leg adjustment buon (13, g. B) and then push in the extension part
of the leg. The stabilisaon leg latch indicator will turn red. Fold the stabilisaon leg (g. 27).
SEAT REMOVAL – ISOFIX
Push in the ISOFIX sliding lever (20, g. B) on both sides and disengage the ISOFIX arms. The
anchorages will be released and the colour of the ISOFIX indicators will change from green
to red. Retract the ISOFIX arms into the seat base by pressing the sliding lever (20, g. B).
SEAT BELT REMOVAL
1. Unbuckle the 5-point seat belts by pressing the red buon on the buckle (g. 16).
2. Remove the 5-point seat belt buckle from the crotch cover (g. 17). Pass the buckle
through the hole in the cover (g. 18) and place it in the storage compartment located
in the seat, under the cover.
3. Pull the headrest adjustment lever (A, g. 31) and li the headrest upwards (g. 19) so
that the holes in the backrest and headrest are at the same height (g. 20).
4. Unfasten the cushions of the 5-point seat belts (g. 21) and then put them through the
holes in the backrest (g. 22).
5. Press the belt adjustment buon and pull to loosen the shoulder belts. (g. 23)
6. Detach the cover (g. 24).
7.
Put the shoulder belts together with the buckle in the place indicated in the picture,
located in the seat backrest (g. 25).
8. Fasten back the cover you have just detached (g. 26).
HEADREST ADJUSTMENT
To change the height of the headrest:
1. While holding the buon to adjust the tension of the seat belts (8), loosen the belts,
this will allow you to adjust the height of the headrest more freely
2. pull the headrest adjustment lever (g. 12).
The headrest should be adjusted so that the shoulder belts are not too high, for example at
or above the ear line, nor too low, for example behind the child’s back (g. 13).
There are 14 headrest height levels available.
SEAT TILT ADJUSTMENT
To adjust the seat lt, push in the lt adjustment lever (g. 30) and move the seat to the

‑ 20 ‑EN
desired posion. Move the seat slightly unl you hear a disncve “click” sound – the seat
has been secured in the selected posion.
The seat has 5 levels of lt adjustment in rearward and forward facing posions.
Note! Children under 60 cm in height may only use the seat in the reclining posion.
Note! Children over 125 cm in height may only use the seat in the upright posion.
SEAT ROTATION
The rotaon mechanism is a feature that helps to comfortably posion or remove the child
from the seat.
Press the seat rotaon buon (19, g. B), rotate the seat 90 degrees. With this funcon you
can easily place and remove your child from the seat. Then rotate the seat to the rearward
or forward facing posion. The correct posioning will be signalled by a click.
COVER REMOVAL
To remove the seat cover, follow the steps below:
1. Pull the headrest adjustment lever (A, g. 31) and li the headrest upwards. (B, g. 31).
2.
Unfasten the 5-point seat belt covers (C, g. 31) and then put the shoulder belts through
the holes in the backrest (D, g. 31).
3.
Unfasten the snaps in the fabric and then remove the cover located on the headrest
(g. 32).
4.
Remove the rubber clips and then remove the cover from the lower part of the seat
(g. 33).
To reaach the cover to the seat, follow the above steps in reverse order.
CLEANING AND MAINTENANCE
Minor dirt should be cleaned with a damp sponge and a mild detergent.
The cover can be washed at a maximum temperature of 30°C. To do this, the cover must be
unzipped and completely removed from the body of the seat (see: Cover removal).
When drying, do not use dryers. The cover should not be exposed to sunlight for drying. The
plasc parts can be cleaned with a damp cloth and mild detergent.
Note! Do not use strong detergents or bleaching agents.
The photos are for illustrave purposes only, the actual appearance of the products may dier from those
shown in the images.
Table of contents
Languages:
Other Lionelo Car Seat manuals

Lionelo
Lionelo Bastiaan User manual

Lionelo
Lionelo Aart User manual

Lionelo
Lionelo Lavender i-Size User manual

Lionelo
Lionelo Luuk FIX User manual

Lionelo
Lionelo jasper User manual

Lionelo
Lionelo Nico User manual

Lionelo
Lionelo Nico User manual

Lionelo
Lionelo Levi One User manual

Lionelo
Lionelo Hugo User manual

Lionelo
Lionelo sander User manual
Lionelo
Lionelo Hugo User manual

Lionelo
Lionelo Bastiaan RWF i-Size User manual

Lionelo
Lionelo LEVI PLUS User manual

Lionelo
Lionelo Levi Simple User manual

Lionelo
Lionelo Astrid i-Size User manual

Lionelo
Lionelo Bastiaan User manual
Lionelo
Lionelo SEM User manual

Lionelo
Lionelo Braam User manual
Lionelo
Lionelo NOA User manual

Lionelo
Lionelo Lars User manual