manuals.online logo
Brands
  1. Home
  2. •
  3. Brands
  4. •
  5. Mazda
  6. •
  7. Automobile Accessories
  8. •
  9. Mazda 0000-8G-N03 User manual

Mazda 0000-8G-N03 User manual

AS 090-M11415cma1209
Page 1 of 4
Genuine Accessories
Installation Instructions
Part Number
0000-8G-N03
Applicable Models:
2010 CX-9
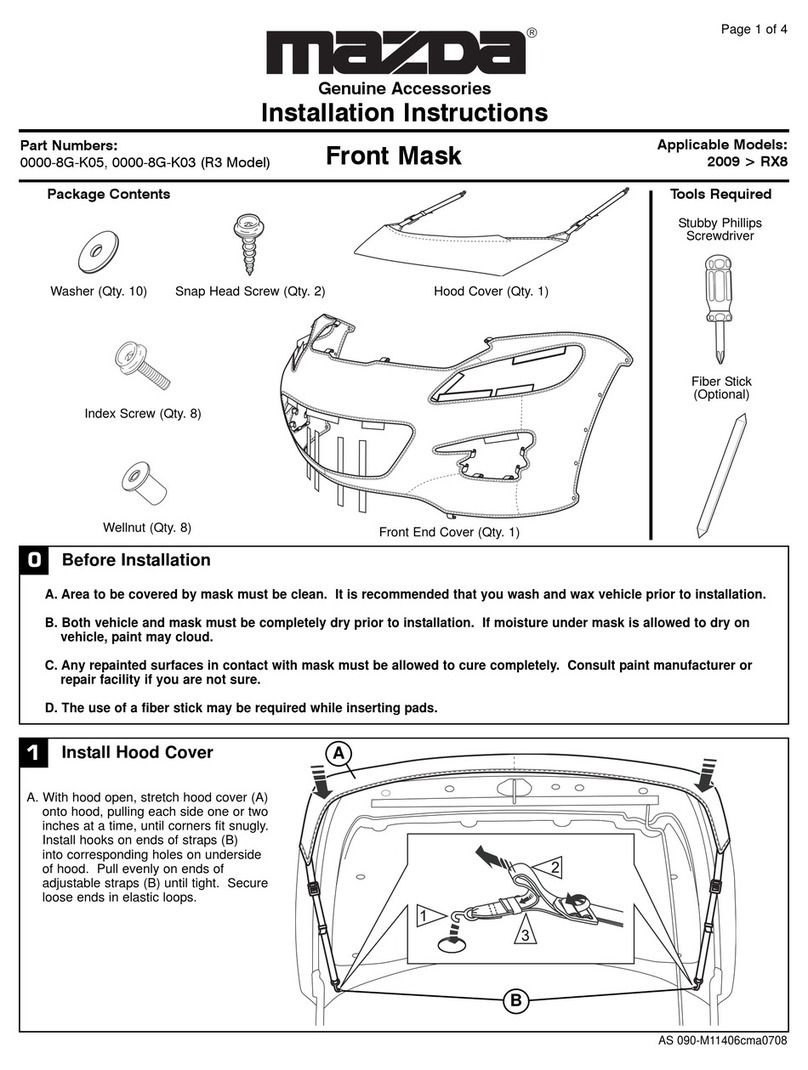
Package Contents
Front Mask
Tools Required
Stubby Phillips
Screwdriver
Snap Head Screw (Qty. 4)
Front End Cover (Qty. 1)
0Before Installation
A. Area to be covered by mask must be clean. It is recommended that you wash and wax vehicle prior to installation.
B. Both vehicle and mask must be completely dry prior to installation. If moisture under mask is allowed to dry on
vehicle, paint may cloud.
C. Any repainted surfaces in contact with mask must be allowed to cure completely. Consult paint manufacturer or
repair facility if you are not sure.
1Install Hood Cover
A. With hood open, stretch hood cover (A)
onto hood, pulling each side one or two
inches at a time, until corners fit snugly.
Install hooks on ends of straps (B,C)
into corresponding holes on underside
of hood. Pull evenly on ends of
adjustable straps (B) until tight. Secure
loose ends in elastic loops.
2
13
A
Hood Cover (Qty. 1)
B
Plastic Washer (Qty. 4)
U-Nut (Qty. 4)
C
Scissors
Page 2 of 4
AS 090-M11415cma1209
2Remove wheel well fasteners
A. Using stubby phillips screwdriver, remove upper and
lower plastic fasteners along front edge of both front
wheel wells corresponding to snaps on mask. A. In both front wheel wells, lift wheel well liner to reveal
holes.
B. Slip u-nuts (D) over holes in metal edge that correspond
to the front mask. Make sure that the holes are aligned
properly.
C. Release liner to its original position. Using a stubby
phillips screwdriver, install washer (E) and snap head
screws (F) into holes with newly installed u-nuts.
3Install wheel well hardware
D
E
F
Cut outs on front end cover
A. If your vehicle has fog lights, remove
cut outs in area shown using the
following method:
a) Using a pair of scissors and
working from the back side of
the mask, cut the stitching
(thread) along all sides that
are holding the cut outs (G) to
mask.
Note: Be careful not to cut the felt
or thread under the cut outs.
Improper removal will result in
damage to the mask.
4
G
G
D
E
F
Page 3 of 4
AS 090-M11415cma1209
8
6Install upper attachments
A. On driver’s side, insert small pads (J) into space at
center below headlight. Slide fully inserted pads towards
wheel well. Repeat on opposite side.
5Install upper attachments
A. On driver’s side of vehicle, attach clips (H) to back edge
of air intake grille. Repeat on opposite side.
B. On driver’s side of vehicle, attach attach elastic with hook
(I) to back edge of upper grille support. Repeat on
opposite side.
Install wheel well attachments
A. Press snaps (L) onto snap head screws (F) in both front
wheel wells.
B. Attach clips (M) to edge of both front wheel wells.
H
H
H
J
L
I
J
F
M
L
F
7Install upper attachments
A. On driver’s side, insert large pads (K) in slots around
inside edge of headlight. Repeat on opposite side.
K
K
Page 4 of 4
AS 090-M11415cma1209
12 Care and Cleaning
A. Always remove mask before washing vehicle.
B. Hand clean mask using mild soap, rinse thoroughly with
clean water and line dry completely. Do not machine dry!
C. Use Mazda Vinyl/Leather Protectant (or equivalent) to
preserve color and finish.
D. WARNING: Running up on curb will damage this product.
Manufacturer will not be responsible for damage to product
due to accident or misuse.
11 Post Installation Inspection
A. Close hood and check alignment between hood cover
and front end cover along seam (between fender and
hood). If adjustment is necessary, adjust the hood cover
by adjusting the hood cover straps. Refer to step 1.
B. If mask should flap due to high speed or wind conditions,
adjust or remove mask completely.
10 Install bottom attachments
A. Attach clips (P) to back edge of
bottom vent.
B. Attach elastics with hooks (Q) to
edge of lower fascia.
QQ
P
P
P
Q
Install lower vent attachments
A. Attach elastics with hooks (N) to rear edge of
lower vent.
B. Attach plastic clip (O) to rear edge of lower
vent.
9
N
O
O
N
N
N

Other Mazda Automobile Accessories manuals
Mazda 0000-8G-L12 User manual

Mazda

Mazda 0000-8G-L12 User manual

Mazda GS2A -V1-132 User manual

Mazda

Mazda GS2A -V1-132 User manual

Mazda PROTEGE 5 User manual

Mazda

Mazda PROTEGE 5 User manual

Mazda CX-9 User manual

Mazda

Mazda CX-9 User manual

Mazda DC3L-V1-370A User manual

Mazda

Mazda DC3L-V1-370A User manual

Mazda GENUINE SIDE UNDER SPOILER User manual

Mazda

Mazda GENUINE SIDE UNDER SPOILER User manual

Mazda 6 GJ 2.2 D 2012 User manual

Mazda

Mazda 6 GJ 2.2 D 2012 User manual

Mazda Connect User manual

Mazda

Mazda Connect User manual

Mazda 0000-8E-R10 User manual

Mazda

Mazda 0000-8E-R10 User manual

Mazda 0000-89-N01 User manual

Mazda

Mazda 0000-89-N01 User manual

Mazda 0000 8C Z01 User manual

Mazda

Mazda 0000 8C Z01 User manual

Mazda GENUINE ACCESSORIES User manual

Mazda

Mazda GENUINE ACCESSORIES User manual

Mazda 2005 Miata MX-5 User manual

Mazda

Mazda 2005 Miata MX-5 User manual

Mazda 0000-8L-K01 User manual

Mazda

Mazda 0000-8L-K01 User manual

Mazda CX-9 User manual

Mazda

Mazda CX-9 User manual

Mazda 0000-8G-K05 User manual

Mazda

Mazda 0000-8G-K05 User manual

Mazda Connect User manual

Mazda

Mazda Connect User manual

Mazda KMV6V7210 User manual

Mazda

Mazda KMV6V7210 User manual

Mazda C830-V7-050A User manual

Mazda

Mazda C830-V7-050A User manual

Mazda CX-5 User manual

Mazda

Mazda CX-5 User manual

Mazda DF71-V4-085 User manual

Mazda

Mazda DF71-V4-085 User manual

Mazda TD11 V3 460F Guide

Mazda

Mazda TD11 V3 460F Guide

Mazda 0000-8E-G01 User manual

Mazda

Mazda 0000-8E-G01 User manual

Mazda KPF1 V3 460 Guide

Mazda

Mazda KPF1 V3 460 Guide

Popular Automobile Accessories manuals by other brands

Kellfri 20-BG2000 manual

Kellfri

Kellfri 20-BG2000 manual

BRANDRUP ISO-TOP MK VI manual

BRANDRUP

BRANDRUP ISO-TOP MK VI manual

Aries S224054 installation manual

Aries

Aries S224054 installation manual

Boyo VTC461 R user manual

Boyo

Boyo VTC461 R user manual

Camcar 40126 AL Mounting instructions

Camcar

Camcar 40126 AL Mounting instructions

Rockford Fosgate CPC05 Installation and application manual

Rockford Fosgate

Rockford Fosgate CPC05 Installation and application manual

DV8 OFFROAD SPEC Series installation manual

DV8 OFFROAD

DV8 OFFROAD SPEC Series installation manual

RHINO VSDS-RVM4.3 Installation & operation manual

RHINO

RHINO VSDS-RVM4.3 Installation & operation manual

v.link VL2-DVD900 manual

v.link

v.link VL2-DVD900 manual

Prorack Kayak Carrier manual

Prorack

Prorack Kayak Carrier manual

Thule 1271 instructions

Thule

Thule 1271 instructions

Conceptronic CUSBCAR1A quick guide

Conceptronic

Conceptronic CUSBCAR1A quick guide

Command Light Traffic Flow Board manual

Command Light

Command Light Traffic Flow Board manual

Percon Phoenix 104 installation manual

Percon

Percon Phoenix 104 installation manual

DriveRight DriveRight 156VSS installation guide

DriveRight

DriveRight DriveRight 156VSS installation guide

Winplus TypeS BT56883 Care & use instructions

Winplus

Winplus TypeS BT56883 Care & use instructions

Thule 2041 parts list

Thule

Thule 2041 parts list

Jaeger 21020523 Fitting instructions

Jaeger

Jaeger 21020523 Fitting instructions

manuals.online logo
manuals.online logoBrands
  • About & Mission
  • Contact us
  • Privacy Policy
  • Terms and Conditions

Copyright 2025 Manuals.Online. All Rights Reserved.