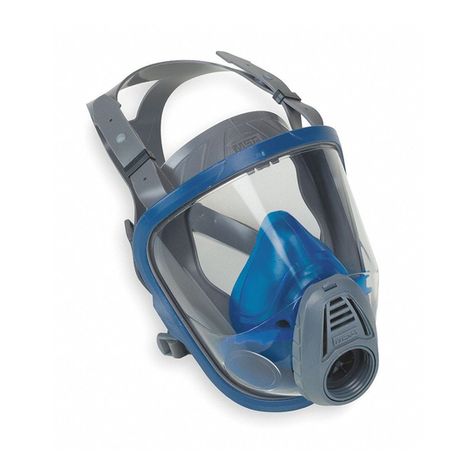
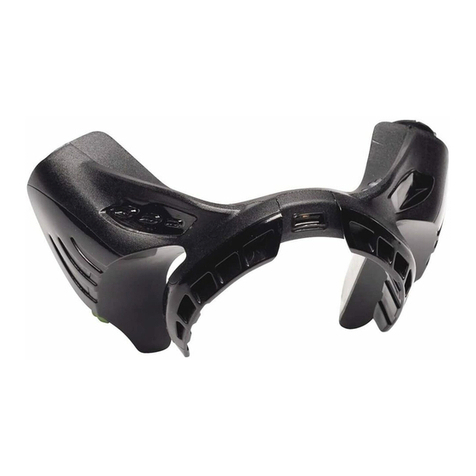
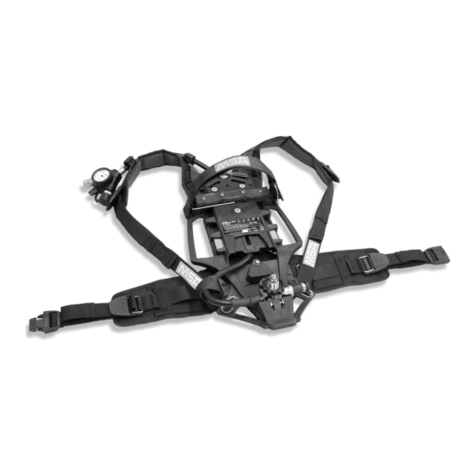
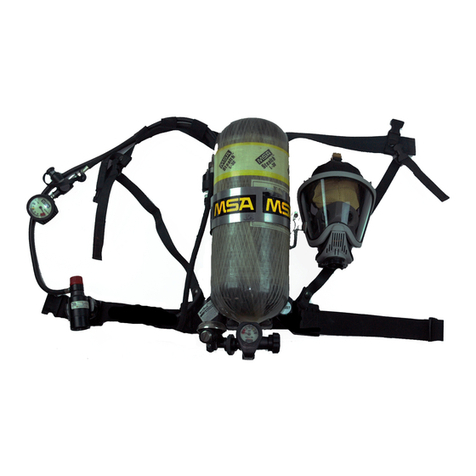
MSA OptimAir MM 2K User manual

OptimAir®MM 2K
Mask-Mounted
Powered Air-Purifying Respirator
USER’S INSTRUCTIONS
The warranties made by MSA with respect to the product are
voided if the product is not installed, used, and serviced in
accordance with the instructions in this manual. We encourage our
customers to write or call for a demonstration of this equipment
prior to use or for any additional information relative to use or
repairs. Call 1-800-MSA-2222 during regular working hours.
See Approval Matrix Part No. 81810 for NIOSH Approvals and
Limitations.
THIS MANUAL, INCLUDING THE WARNINGS AND CAUTIONS
INSIDE, MUST BE READ AND FOLLOWED CAREFULLY BY ALL PER-
SONS WHO USE OR MAINTAIN THIS PRODUCT, INCLUDING THOSE
WHO HAVE ANY RESPONSIBILITY INVOLVING ITS SELECTION,
APPLICATION, SERVICE, OR REPAIR. THIS RESPIRATOR WILL PER-
FORM AS DESIGNED ONLY IF USED AND MAINTAINED ACCORD-
ING TO THE INSTRUCTIONS. OTHERWISE IT COULD FAIL TO PER-
FORM AS DESIGNED AND PERSONS WHO RELY ON THIS PRODUCT
COULD SUSTAIN SERIOUS PERSONAL INJURY OR DEATH.
TAL 0110 (L) Rev. 8 MSA 2010 Prnt. Spec. 10000005389(F) Mat. 10020949
Doc. 10000007610

TAL 0110 (L) Rev. 8 - 10020949
INTRODUCTION
CAUTIONS AND LIMITATIONS
A- Not for use in atmospheres contain-
ing less than 19.5 percent oxygen.
B- Not for use in atmospheres immedi-
ately dangerous to life or health.
C- Do not exceed maximum use con-
centrations established by regulato-
ry standards.
F- Do not use powered air-purifying
respirators if airflow is less than four
cfm (115 lpm) for tight fitting face-
pieces or six cfm (170 lpm) for
hoods and/or helmets.
I- Contains electrical parts which have
not been evaluated as an ignition
source in flammable or explosive
atmospheres by MSHA/NIOSH.
J- Failure to properly use and maintain
this product could result in injury or
death.
L- Follow the manufacturer’s User’s
Instructions for changing cartridges,
canisters, and/or filters.
M- All approved respirators shall be
selected, fitted, used, and main-
tained in accordance with MSHA,
OSHA, and other applicable regula-
tions.
N- Never substitute, modify, add, or
omit parts. Use only exact replace-
ment parts in the configuration
specified by the manufacturer.
O- Refer to User’s Instructions, and/or
maintenance manuals for informa-
tion on use and maintenance of
these respirators.
P- NIOSH does not evaluate respira-
tors for use as surgical masks.
IMPORTANT NOTICE FOR RESPIRA-
TORY PROTECTION PROGRAM
ADMINISTRATORS
1. An adequate respirator protection
program must include knowledge of
hazards, hazard assessment, selec-
tion of proper respiratory protective
equipment, instruction and training
in the use of equipment, inspection
and maintenance of equipment, and
2
TABLE OF CONTENTS
Introduction...........................................................2
Description ...........................................................7
ChargingtheBatteryPack ...............................................9
RespiratorAssembly...................................................11
UsingtheRespirator ...................................................13
MaintainingtheRespirator ..............................................19
TestMethodforOptimAirMM2K.........................................23
Chart ...............................................................26
Accessories..........................................................27
Ultravue.............................................................29
UltraElite ............................................................30
Advantage3000 ......................................................31

TAL 0110 (L) Rev. 8 - 10020949
INTRODUCTION
medical surveillance. (See OSHA
regulations, Title 29 CFR, Part
1910.134, Sub-part I par. 1910.134
(b) (1)).
2. This respirator will perform as
designed only if used and main-
tained according to the manufactur-
er’s instructions. The Program
Administrator and the users must
read and understand these instruc-
tions before trying to use or service
this product. We encourage our
customers to write or call for infor-
mation on this product before using
it.
3. This respirator may be used only
after proper instruction and training
in its use as specified in OSHA reg-
ulations (Title 29 CFR, Part
1910.134, Sub-part I, par. 1910.134
(b) (3)).
4. This respirator may not be worn in
an atmosphere which is immediate-
ly dangerous to life or health (from
which the wearer cannot escape
without the aid of a respirator).
Under no circumstances should the
respirator be used as an underwater
device.
5. Users must wear suitable protective
clothing and precautions must be
taken so that the respirator is not
worn in atmospheres that may be
harmful to the device.
6. Do not alter, modify, or substitute
any components without the
approval of the manufacturer. Such
alterations will void the NIOSH
approval.
7. Inspect the respirator regularly and
maintain it according to the manu-
facturer’s instructions. Repairs must
only be made by properly trained
personnel.
LIMITATIONS
The OptimAir MM 2K with OptiFilter
Type HE filter cartridge, or Type HE par-
ticulate filter, are approved as high effi-
ciency particulate air filter for powered
air-purifying respirators. Filter does not
remove gases or vapors from the air
supply. No filter is designed for all sub-
stances, Therefore, you must know
what the contaminant is, as well as its
concentration, before selecting a respi-
rator. This respirator does not supply
oxygen. Do not use this respirator
unless the surrounding air contains a
minimum of 19.5 percent oxygen. The
respirator may be used at temperatures
between 0°F and 120°F, and may be
worn under flame-retardant garments. If
used below 40°F, a fully-charged bat-
tery may not operate the motor-blower
for an entire shift.
RESPIRATOR USE LIMITATION
The wearer must comply with the fol-
lowing MSA respirator use limitations:
1. Maximum Use Concentration – Do
not exceed any of the following:
a. 1000 times the exposure limit for
the contaminants present.
b. Immediately dangerous to life or
health (IDLH) concentration for
any contaminant present.
2. The limitations outlined in the appli-
cable NIOSH approval.
3. Any applicable limitation contained
in a standard established by a regu-
latory agency (such as OSHA) with
jurisdiction over the wearer.
4. NIOSH allows this respirator to be
used for protection against a mix-
3

TAL 0110 (L) Rev. 8 - 10020949
INTRODUCTION
ture of particulates that are present
simultaneously or alternately
against one particulate then anoth-
er (using the same filter) if the mix-
ture meets the following condi-
tions:
a. The filter must be approved for
all particulate.
b. Particulates (dusts, mists,
fumes, asbestos, radionuclides)
can be mixed with any other
particulate for which the filter is
approved.
c. Contaminants present simulta-
neously must be below IDLH
levels for the specific contami-
nants. If any one contaminant in
the mixture exceeds the IDLH
concentration then the entire
mixture must be treated as IDLH
and the respirator cannot be
used (except for escape).
1. This device does NOT supply
oxygen. Use only in adequately
ventilated areas containing at
least 19.5 percent oxygen.
2. This respirator must be used in
conjunction with proper chemi-
cal or particulate cartridges for
protection against specific con-
taminants.
3. Do not use when concentrations
of contaminants are unknown or
immediately dangerous to life or
health (IDLH). (See the respirator
NIOSH approval plate P/N
818105 to determine if this
device can be used for escape
from those concentrations.)
4. Do not use when appropriate
exposure limit (OSHA, PEL,
NIOSH REL, ACGIH TLV, etc.) is
not known or when it is below
the odor threshold or any other
established warning level for the
contaminant.
5. Leave area immediately if
A.Breathing becomes difficult.
B.Dizziness or other distress
occurs.
C. You taste or smell contami-
nant.
D. You experience eye, nose or
throat irritation.
6. Use strictly in accordance with
instructions, labels and limita-
tions pertaining to this device.
7. This respirator may not provide
a satisfactory seal with certain
facial characteristics, such as
beards or large sideburns, that
prevent direct contact between
the skin and the sealing surface
of the facepiece. Do not use this
respirator if such conditions
exist.
8. Never alter or modify this device.
9. This respirator is for use by
trained and qualified personnel
only.
FAILURE TO FOLLOW THE ABOVE
WARNINGS CAN RESULT IN SERI-
OUS PERSONAL INJURY OR
DEATH.
• This respirator/filter provides
LIMITED protection. It may help
reduce exposure to airborne bio-
logical agents, including H1N1
(swine) flu virus, avian (bird) flu
virus, other types of influenza,
SARS, or other bacterial or viral
4

TAL 0110 (L) Rev. 8 - 10020949
INTRODUCTION
biological agents and help reduce
the risk for influenza infection
during a pandemic, but will NOT
eliminate the risk of exposure,
infection, illness, or death.
• This respirator/filter is certified by
NIOSH to comply with the
requirements specified for the
designated filter efficiency level;
however, appropriate authorities
have NOT established a safe level
of exposure to biological agents.
Therefore, the respirator may
NOT prevent transmission of
influenza virus.
• Refer to the Centers for Disease
Control and Prevention (CDC) at
www.cdc.gov for guidance on the
use of respirators to help
decrease exposure to H1N1 virus
or other airborne biological
agents in community, home, and
occupational settings. The CDC
recommends fit testing, medical
evaluations, and training for opti-
mal effectiveness when a respira-
tor is used in a non-occupational
setting. Neglecting these
preparatory measures may cause
an unsafe condition. Respirators
used in an occupational setting
MUST be used in accordance
with a complete respiratory pro-
tection program as required by
OSHA, which includes proper
selection, training, fit-testing, and
fit-checking. Detailed information
on a respiratory protection pro-
gram is available by contacting
OSHA or visiting www.osha.gov.
• Do NOT remove respirator in con-
taminated areas. The outer sur-
face of the respirator MUST be
treated as if it is contaminated at
all times. Tight-fitting safety gog-
gles, or a full-facepiece respira-
tor, may further help prevent
transmission of influenza virus.
• The CDC recommends frequent
hand washing and wearing gloves
to help prevent transmission of
disease due to exposure to sur-
faces where contaminants may
be present, and also immediately
following removal of the respira-
tor.
• Do NOT reuse or share mainte-
nance-free respirators. ALWAYS
clean cartridge-style respirators
before reuse in accordance with
the instructions provided.
• This respirator/filter is NOT for
use by (a) children, or (b) people
with a medical condition that may
be adversely affected by using it.
Failure to follow all warnings and
instructions can result in serious per-
sonal injury or death.
5

TAL 0110 (L) Rev. 8 - 10020949
NOTES
6

TAL 0110 (L) Rev. 8 - 10020949
DESCRIPTION
DESCRIPTION
The OptimAir MM 2K Mask-Mounted
Powered Air-Purifying Respirator
(PAPR) from MSA is certified by the
National Institute for Occupational
Safety and Health (NIOSH) as an air-
purifying device designed only for use
in atmospheres NOT immediately dan-
gerous to life or health (IDLH).
The OptimAir MM 2K is used with the
Facepiece, which is available in small,
medium or large sizes. If needed,
Advantage®4100, Ultravue®and Ultra
Elite®facepieces may be equipped with
an integral welder’s lens or clip-on
welder’s adapter (only used with
Ultravue facepieces). See
Accessories/Spare Parts.
The motor-blower and replaceable
high-efficiency filter are worn as an
assembly attached to the facepiece.
The rechargeable battery pack is worn
on the support belt. A power cable
connects the belt-mounted battery
pack to the motor-blower on the face-
piece. A battery charger is supplied
with the respirator.
PRINCIPLE OF OPERATION
The motor-blower draws surrounding
air through the filter which captures the
particulate contaminant. Filtered air
passes through to the facepiece and
creates higher pressure than the sur-
rounding atmosphere. Therefore, if a
leak occurs, air will flow from inside the
facepiece to the outside air. This is
referred to as positive pressure. Air flow
also provides wearer comfort.
The rechargeable NiMH battery pack
supplies 4.8 volts (nominal) to the
motor-blower. The battery pack is
replaceable. A fully charged battery is
designed to operate in excess of 8
hours. Then the battery pack can be re-
charged in 3 hours using the standard
charger.
The replaceable filter cartridge which
traps the particulate contaminant is at
least 99.97% efficient against 0.3
micron DOP aerosol.
RESPIRATOR FIT TEST
A qualitative or quantitative respirator fit
test should be carried out for each
wearer of this respirator to determine
the amount of protection it will provide.
Respirator fit tests are explained fully in
the American National Standard for
Respiratory Protection, ANSI Z88.2,
which is published by the American
National Standards Institute, 11 West
42nd Street, New York, New York
10036.
Quantitative Test — If a quantitative fit
test is used, a fit factor that is at least
100 shall be obtained before that respi-
rator is assigned to an individual.
Qualitative Test — If a qualitative fit
test is used, only validated protocols
are acceptable. The individual must
pass a test designed to assess a fit fac-
tor of at least 100.
Powered Air-Purifying Respirators must
be qualitatively or quantitatively fit test-
7

TAL 0110 (L) Rev. 8 - 10020949
DESCRIPTION
ed in a negative-pressure mode (with
blower off). This will cover use of the
respirator in the powered air-purifying
mode operation.
EXPOSURE LIMITS
A listing of acceptable exposure limits
from the following sources:
• American Conference of
Governmental Industrial Hygienists
(ACGIH)
• Occupational Safety and Health
Administration (OSHA)
• National Institute for Occupational
Safety and Health (NIOSH)
• American Industrial Hygiene
Association (AIHA)
Contact MSA at 1-800-MSA-2222 for
information.
Exposure Limits for Mixtures
The American Conference of Govern-
mental Industrial Hygienists (ACGIH)
publishes the following information to
determine the TLV of a mixture.
First determine the total concentration
of the chemical mixture (CMixture) from
the individual contaminant concentra-
tions (C1, C2, C3,…) using the following
formula:
CMixture = C1+ C2+ C3+ …
The TLV of the mixture is found by
using the following formula where T1,
T2, T3,… are the individual contaminant
TLVs and C1, C2, C3,… are the individ-
ual contaminant concentrations:
Only use these equations if the contam-
inants present are actually mixed. Some
substances do not mix and may be
present separately, for example, in
pockets or at different levels. In that
case, the lowest TLV of the substances
present must be used to determine the
appropriate respirator category for pro-
tection against all contaminants pres-
ent.
8
TMixture=
CMixture
+ + + . . .
T1T2T3
C1C2C3

TAL 0110 (L) Rev. 8 - 10020949
CHARGING THE BATTERY PACK
UNPACKING & INSPECTION
The OptimAir MM 2K consists of the
following components:
motor-blower
battery pack
support belt
charger
cable
facepiece
storage plug
filter
Thoroughly inspect all components
of the respirator before the device is
used. Read and observe all NIOSH
approval limitations as they apply to
using the OptimAir MM 2K.
Do not drop the OptimAir MM 2K.
The battery pack can be damaged by
impact. The case can be cracked and
could allow water into the pack. If
the unit is dropped, inspect the case
for cracks. If the motor blower no
longer operates from the compro-
mised battery pack, the battery pack
must be replaced.
The motor-blower housing can be
damaged by impact. The blower
impeller can be loosened or the
motor shaft can be bent. If the unit is
dropped, check the case for cracks.
Listen closely to the sound of the
motor. If the impeller binds or rattles,
or if air output is reduced, the entire
motor-blower must be replaced.
CHARGING THE BATTERY PACK
The battery pack must be fully charged
before the respirator is first used. Use
only the P/N 10023483 battery charger
from MSA. Other chargers can damage
the battery due to internal wiring differ-
ences or incorrect charging rates.
The battery pack should be stored at a
temperature range of 50°F to 85°F. If
the battery pack has been stored in a
“fully charged” condition for more than
one week, the battery pack should be
charged until a full charge is indicated.
Do not charge the battery pack
where there are explosive concentra-
tions of combustible gases, vapors,
or mists. An explosion or fire can
result. Replace the charger if the
cord is damaged or worn, or if the
case is cracked or distorted. Do not
use a damaged charger. Doing so can
result in serious personal injury or
death, or create a fire hazard.
1. Line up the key in
the charger cable
plug with the slot
in the female con-
nector on the bat-
tery pack.
9

TAL 0110 (L) Rev. 8 - 10020949
CHARGING THE BATTERY PACK
2. Push the plug into the female con-
nector and turn the ring _ turn to
secure it.
3. Plug the charger into a 115-120 V,
50, 60 Hz (standard AC) outlet. The
charger can be used internationally
with the appropriate adapter.
Voltages lower than 115V are not rec-
ommended. Voltages greater than
120V will damage the battery charger
and battery pack.
4. Charge the battery pack until a full
charge is indicated.
The charger uses one LED. When the
battery is charging, the LED will be
Red. When the LED is Green the bat-
tery is fully charged. The battery can
stay connected to the charger until it is
needed. If the LED is Amber, the bat-
tery is not at the proper temperature.
The charging will start when the battery
pack reaches the optimum charging
temperature of 35°F to 100°F. If the
LED is flashing Red, there is a failure.
Disconnect battery pack, and unplug
charger. Plug charger back into outlet
and reconnect battery pack to reset
charger. If LED flashes Red during any
part of the charge, after it has been
reset, remove the battery from service.
10
LED Signaling
Condition LED Indication
Rapid Charge Red
Charge Complete Green
Charge Pending Amber
Charge Failure Red Flash
No AC or No Battery OFF

TAL 0110 (L) Rev. 8 - 10020949
RESPIRATOR ASSEMBLY
ASSEMBLING THE MASK-
MOUNTED RESPIRATOR
1. If necessary,
remove the cou-
pling nut from the
facepiece inhala-
tion housing. The
coupling nut may
be used if the
facepiece is used on MSA respira-
tors. Check that the inhalation check
valve and spider gasket are in the
facepiece inhalation housing. The
gasket is needed so that the face-
piece and motor-blower will seal.
2. Thread the motor-
blower coupling
nut into the face-
piece until resist-
ance is encoun-
tered. Continue
tightening the
coupling nut an additional 60
degrees (the distance of two notch-
es on the coupling nut) into the
facepiece.
3. If attached, unthread the filter from
the motor-blower assembly.
4. Check that there
is a gasket in the
motor-blower
housing. The gas-
ket is necessary
so that the filter
and motor-blower
will seal.
Do not use the respirator if the spi-
der gasket in the facepiece inhala-
tion housing or the gasket in the
motor-blower housing is missing or
appears damaged. Failure to follow
this warning will permit the contami-
nant to be drawn into the respirator
and inhaled, resulting in serious res-
piratory injury or death.
5. Thread the filter
into the motor
blower and hand-
tighten.
6. Line up the key on
the battery cable
plug with the slot
in the female con-
nector on motor-
blower.
7. Push the plug into female connector
and turn to secure.
11

TAL 0110 (L) Rev. 8 - 10020949
NOTES
12

TAL 0110 (L) Rev. 8 - 10020949
USING THE RESPIRATOR
Do not wear this respirator unless
you have received training in its use
and have read all of the instructions.
Do not use this respirator in an area
that has less than 19.5% oxygen. The
PAPR does not supply oxygen. Do
not use the respirator as an under-
water device.
Do not use the respirator in an
atmosphere containing gas or vapor
contaminants. Do not use the respi-
rator if the air contaminant is
unknown or immediately dangerous
to life or health (IDLH).
The respirator filter is designed to
provide limited protection from spe-
cific contaminants. See the filter
label for specific information.
If you are working with a contami-
nant which can be absorbed by your
skin, wear protective clothing that
will not allow the contaminant to
contact your skin.
FAILURE TO FOLLOW THE ABOVE
WARNINGS CAN RESULT IN SERI-
OUS PERSONAL INJURY OR DEATH.
DONNING THE SUPPORT BELT AND
BATTERY PACK
1. Thread the belt through the belt
loops on the battery pack.
2. Don the support belt. The battery
pack may be worn on either side.
Adjust the battery pack to a com-
fortable position.
DONNING THE FACEPIECE
Cover lenses are installed on the out-
side of the facepiece lens to protect
the plastic surface. Do not use a
cover lens in a high heat environ-
ment. High heat can cause the cover
lens to distort.
ADJUSTABLE RUBBER HARNESS
1. Adjust the face-
piece headstraps
so the end tabs
are at the buckles.
2. Grip the headstraps between the
thumb and fingers with both hands.
Insert your chin into the chin cup.
3. Pull the facepiece headstraps over
your head. Smooth the straps flat
against your head.
4. To tighten the lower (neck) straps,
pull the straps straight back not out.
5. Tighten the side
(temple) straps.
6. Adjust the forehead strap if needed
to position the lens for best vision.
13

TAL 210 (L) Rev. 1 - 10022513
USING THE RESPIRATOR
DONNING THE ADVANTAGE 3000
MODEL 3100 SINGLE PORT OR
ADVANTAGE 4000 MODEL 4100
SINGLLE PORT WITH RUBBER
HARNESS
When using the Advantage 4000,
ensure the inhalation valve disc is
laying flat against the adapter orifice.
Failure to follow this warning can
result in serious personal injury or
death.
1. Loosen the two bottom harness
straps. Grip the straps by inserting
thumbs through the straps. Insert
chin well into lower part of face-
piece and pull harness back over
head.
2. Push the back of the harness
downward toward the neck until it is
centered at the back of the head.
3. If necessary hold the Mask compo-
nent housing with one hand and
position the harness with the other
hand, until obtaining a firm and
comfortable fit against the face at
all points.
4. Tighten the two bottom straps so
that the mask is snug against face.
The top two harness straps should
be flat against the top of the head.
5. If the mask does not feel snug
against the face, remove the mask
and adjust the length of the two top
straps. To adjust the top straps:
a. Remove the strap from the fas-
tener button, by pulling the loose
end of the strap away from the
fastener button.
b. Move the slide away from the
lens ring to allow the strap to
slide through the lens ring con-
nection. Adjust the length of the
strap. Pull the straps to the next
hole. Secure the strap in position
by pulling the strap onto the but-
ton.
c. Smooth the straps so that they
are flat. Move the slide so that it
is located at the lens ring con-
nection.
DONNING THE RESPIRATOR WITH
PLASTIC ADVANTAGE 3000 (MODEL
3100 SINGLE PORT) HARNESS
Instructions to Don the Mask
Note There are two recommended
donning procedures.
Donning Procedure A
1. Completely loosen the two bottom
straps. Spread the straps of the
head harness with both hands and
place chin into the mask. Pull har-
ness over head all the way, until
plastic cradle lies flat on back of
head.
2. Tighten neck straps evenly so that
the mask is snug against the face.
3. If necessary, adjust the mask and
tighten harness by pulling loop on
the back of harness.
Donning Procedure B
1. Completely loosen the two bottom
straps, insert fingers and hold the
loop on the back of the harness.
2. Place chin into the mask.
14

TAL 0110 (L) Rev. 8 - 10020949
USING THE RESPIRATOR
3. Pull the harness over head with
loop, pull harness down to the back
of the head until plastic cradle lies
flat on back of head.
4. Tighten neck straps evenly so that
the mask is snug against your face.
DONNING THE FACEPIECE WITH
THE CLOTH HEAD HARNESS
1. Place neck strap, if present, around
your neck so that the facepiece lens
is against the body.
2. Loosen all the
harness straps.
Grip the bottom
straps.
3. Insert chin well
into the lower part
of facepiece, then
pull the harness
back over head.
4. Pull the back of
harness down-
ward until cen-
tered at the back
of the head.
5. Tighten the two
lower straps first
by pulling them
straight back, not
out. Tighten the
facepiece until the
mask is snug
against the face.
6. Tighten the two
side temple
straps in the
same manner as
described above.
Ensure that the
facepiece tabs
are not tucked under the face seal.
7. The top strap is not adjustable on
some models. Make sure the back
of the harness is centered on the
back of the head and the face seal
is providing uniform pressure on the
face at all points. Readjust straps if
needed.
FACEPIECE FIT CHECK
(Face-to-Facepiece Seal)
To test facepieces for leakage using a
negative pressure method:
1. Block the filter
opening.
15

TAL 0110 (L) Rev. 8 - 10020949
USING THE RESPIRATOR
2. Inhale so that the
facepiece collaps-
es against your
face. Hold your
breath for 10 sec-
onds. The face-
piece should
remain collapsed.
3. If the facepiece does not remain
collapsed, readjust the headstraps
and repeat steps 1 and 2.
4. If you cannot get a seal by adjusting
the headstraps, check the facepiece
for leaks. See Maintaining the
Respirator. Locate the problem and
correct it before using the respirator.
Leave the area immediately if any of
the following symptoms occur
• breathing becomes difficult
• dizziness or other distress occurs
• you taste or smell the contaminant
• you experience eye, nose or throat
irritation.
If you bump or impact the cartridges,
leave area immediately and check
the security of the cartridge. Perform
an Air Tightness Test before re-entry.
This device may not seal properly
with your face if you have a mous-
tache, beard, gross sideburns or
other physical characteristics that
interfere with the face-to-facepiece
seal (see ANSI Z88.2). If the face-
piece does not seal against your
face, non-respirable air can leak into
the facepiece, reducing or eliminat-
ing the protection. The face-to-face-
piece seal must be tested before
each use. DO NOT USE A FACE-
PIECE THAT DOES NOT SEAL.
CONNECTING THE BATTERY PACK
1. Line up the key on battery cable
plug with the slot in female connec-
tor on battery pack.
2. Push the plug into female connector
and turn _ turn to secure.
3. Turn the switch located on the bat-
tery pack on.
4. Attach the retaining clip to your shirt
or belt to secure the power cable.
Return to a safe atmosphere and dis-
card the respirator immediately if the
facepiece becomes discolored,
crazed, blistered or cracked, or if
other signs of deterioration of the
facepiece, motor-blower, filter or bat-
tery pack are observed.
You can breathe through the respi-
rator with the motor-blower off, but
breathing resistance may be
noticed, as with a negative-pressure
respirator.
16

TAL 0110 (L) Rev. 8 - 10020949
USING THE RESPIRATOR
DECONTAMINATION
The OptimAir MM 2K may be used in
some applications which may require
decontamination of personal and respi-
ratory equipment before the respirator
may be removed. One such application
is asbestos-exposure decontamination.
Turn the motor-blower off before enter-
ing a decontamination shower. The
OptimAir MM 2K still provides respira-
tory protection with the motor-blower
off, because all air is still drawn through
the filter. However, breathing resistance
will be greater than when the motor-
blower is supplying air to the facepiece.
REMOVING THE RESPIRATOR
1. Return to fresh air and clean the
outer surfaces of the respirator
before removing the facepiece.
2. Turn the power switch off.
3. Place your fingertips behind the
headstraps. Place your thumbs on
the buckles.
4. Pull the top of the buckles away
from your head. Repeat as needed
to loosen the headstraps.
5. Grip the facepiece by the inhalation
housing.
6. Pull the facepiece
out, then up over
your head.
Do not pull the Ultravue facepiece by
the exhalation valve assembly. The
facepiece rubber or the valve assem-
bly can be damaged.
7. Remove the retaining clip from your
shirt or belt.
8. Remove the support belt. Be careful
that you do not drop the battery
pack.
17

TAL 0110 (L) Rev. 8 - 10020949
NOTES
18

TAL 0110 (L) Rev. 8 - 10020949
MAINTAINING THE RESPIRATOR
A maintenance program must be estab-
lished. This program must include
cleaning and sanitizing, component
inspection and replacement of worn or
damaged parts. See the appropriate
parts lists for correct replacement part
numbers.
Only trained personnel are to main-
tain the respirator. Use only genuine
MSA parts. Do not make repairs or
design modifications other than as
recommended by MSA or NIOSH cer-
tification will be voided.
FILTER AND BATTERY PACK
Service Times
Filter and battery pack (P/N 10022696)
are designed to supply a minimum of
four cubic feet per minute (cfm) of res-
pirable air to the facepiece for a shift.
Actual service time may vary; however,
air flow must not drop below 4 cfm.
Factors which will affect how long the
filter can be used include the type and
concentration of the contaminant. If
breathing resistance is noticeable,
replace the filter.
1. Replacing the filter:
The filter is not designed to be
cleaned and reused. Do not try to
clean the filter. You may damage the
inside of the filter and eliminate res-
piratory protection, resulting in seri-
ous respiratory injury or death.
Do not remove the filter in a contami-
nated area. Return to a safe atmos-
phere and remove any contaminant
from the surface. Do not remove the
filter while the motor-blower is run-
ning.
With the filter removed, contamina-
tion from the surfaces of the respira-
tor can be drawn into the facepiece.
Failure to follow this warning can
result in serious respiratory injury or
death.
a. Turn the motor-blower off.
b. Clean the surface of the filter.
c. Turn the filter counter-clockwise
(left) and unthread it from the
motor-blower.
d. Ensure the gas-
ket located in
the air intake
hole on the side
of the motor-
blower is in
place.
Do not install the filter or use the res-
pirator if the gasket is missing or
appears damaged. Failure to follow
this warning can cause the contami-
nant to be drawn into the respirator
and can result in serious respiratory
injury or death.
19

TAL 0110 (L) Rev. 8 - 10020949
MAINTAINING THE RESPIRATOR
e. Thread the new filter into the
motor-blower air intake and
hand-tighten against the gasket.
2. Replacing the battery pack:
a. Remove the pack from the sup-
port belt.
b. Loosen the ring and pull the two
connectors apart.
c. To re-install the battery pack, clip
the battery pack on the support
belt.
d. Line up the key on the battery
cable plug with the slot in the
female connector on the battery
pack.
e. Push the plug
into the female
connector and
turn the ring _
turn to secure it.
Inspect the respirator after it has
been cleaned and sanitized. Failure
to observe this warning can cause
you to be exposed to the contami-
nant, resulting in serious personal
injury or death.
CLEANING AND DISINFECTING
Confidence Plus™ Germicidal Cleaner
(P/N 10009971) from MSA is recom-
mended. Refer to the label for use
instructions. A solution as effective as
Confidence Plus Cleaning Solution and
compatible with MSA respirator compo-
nents may be substituted.
Be careful that you do not breathe or
touch the contaminant in handling
the respirator or its parts. Use equip-
ment designed to protect you from
the specific contaminant. Failure to
follow this warning can result in
serous personal injury or death.
1. Preparing the cleaner:
a. Follow the instructions with the
Confidence Plus Cleaning
Solution.
b. If the Confidence Plus Cleaning
Solution is not used, prepare in
accordance with the instructions
provided with cleaning products.
2. Remove excess contaminant from
the respirator. A vacuum cleaner
equipped with high-efficiency filters
to prevent recirculation of contami-
nant may be used.
3. Unthread the motor-blower thread-
ed insert from the facepiece inhala-
tion housing.
4. Clean and disinfect the facepiece:
a. Remove filters, cartridges, or
canisters from the facepiece.
b. Remove any protective cover
lens. This will prevent water from
becoming trapped between the
primary respirator lens and the
cover lens (the trapped water will
obscure vision).
c. Remove the nosecup (if used).
This will facilitate cleaning the
inside of the facepiece.
d. Remove the exhalation valve
cover. This will allow access to
the rubber exhalation valve.
e. Thoroughly wash the facepiece
and components in the cleaning
solution. A soft bristle (not wire)
20
Table of contents
Other MSA Respiratory Product manuals

MSA
MSA FireHawk M7 I-HUD User manual

MSA
MSA AirXpress One Fire User manual

MSA
MSA 3S-H/F1 User manual

MSA
MSA SSR 30/100 User manual

MSA
MSA Advantage 400 Series User manual

MSA
MSA SSR 30/100 User manual

MSA
MSA Advantage 900 User manual

MSA
MSA FireHawk M7 Responder APR User manual

MSA
MSA G1 SCBA User manual

MSA
MSA G1 PAPR User manual

MSA
MSA 3S small User manual

MSA
MSA S-Cap User manual

MSA
MSA FireHawk Ultra Elite 10048814 Setup guide

MSA
MSA PremAire Mask-Hood User manual

MSA
MSA FSR W65 User manual

MSA
MSA C420 User manual

MSA
MSA Duo-Flo User manual

MSA
MSA PremAire Cadet Escape G1 User manual

MSA
MSA Abrasi-Blast Series User manual

MSA
MSA FIREHAWK M7 ULTRA ELITE 10084690 Setup guide