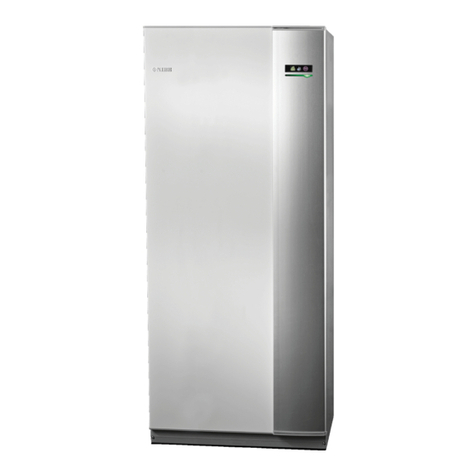
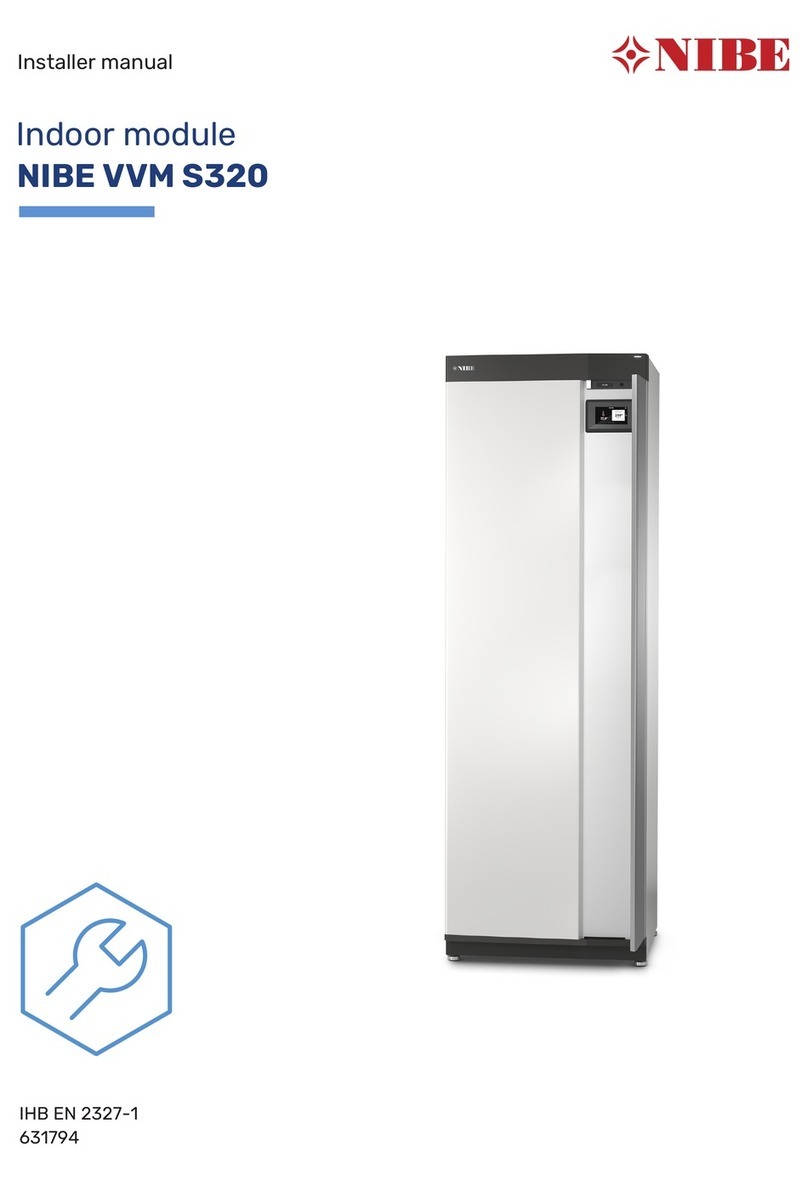
Nibe VVM 320 User guide

IHB EN 1834-8
231342
INSTALLER MANUAL
Indoor module
NIBE VVM 320 UK 1x230V

Quick guide
Navigation
Ok button (confirm/select)
Back button (back/undo/exit)
Control knob (move/increase/reduce)
A detailed explanation of the button functions can be found on page 46.
How to scroll through menus and make different settings is described on page 48.
Set the indoor climate
2X
MY INSTALLATION
INDOOR CLIMATE HOT WATER
INFO
The mode for setting the indoor temperature is accessed by pressing the OK button twice, when in the start
mode in the main menu.
Increase hot water volume
2X
1X INDOOR CLIMATE HOT WATER
MY INSTALLATION INFO
To temporarily increase the amount of hot water, first turn the control knob to mark menu 2 (water droplet)
and then press the OK button twice.

41 Important information
4Safety information
4Symbols
4Marking
5Serial number
5Recovery
5Country specific information
6Inspection of the installation
7Outdoor modules
82 Delivery and handling
8Transport
8Assembly
9Supplied components
10Removing the covers
123 Indoor module's design
13Component location, rear
13List of components
144 Pipe connections
14General pipe connections
17Dimensions and pipe connections
18Installation alternative
265 Electrical connections
26General
29Connections
32Settings
34Optional connections
37Connecting accessories
396 Commissioning and adjusting
39Preparations
39Filling and venting
40Start-up and inspection
42Setting the cooling/heating curve
44Setting hot water circulation
44Pool
45SG Ready
467 Control - Introduction
46Display unit
47Menu system
508 Control - Menus
50Menu 1 - INDOOR CLIMATE
51Menu 2 - HOT WATER
51Menu 3 - INFO
52Menu 4 - MY SYSTEM
53Menu 5 - SERVICE
639 Service
63Service actions
6710 Disturbances in comfort
67Info-menu
67Troubleshooting
6911 Accessories
7112 Technical data
71Dimensions and setting-out coordinates
72Technical specifications
74Electrical wiring diagram, 1x230 V
79Item register
3Table of ContentsNIBE VVM 320
Table of Contents

Safety information
This manual describes installation and service proced-
ures for implementation by specialists.
The manual must be left with the customer.
This appliance can be used by children
aged from 8 years and above and persons
with reduced physical, sensory or mental
capabilities or lack of experience and
knowledge if they have been given super-
vision or instruction concerning use of the
appliance in a safe way and understand
the hazards involved. Children shall not
play with the appliance. Cleaning and user
maintenance shall not be made by children
without supervision.
Rights to make any design or technical
modifications are reserved.
©NIBE 2018.
MinMaxSystem pres-
sure
0.05 MPa
(0.5 bar)
0.3 MPa
(3 bar)
Heating medium
0.01 MPa
(0.1 bar)
1.0 MPa
(10 bar)
Domestic water
Water may drip from the safety valve's
overflow pipe, so this pipe must be inclined
along its entire length to prevent water
pockets. It must also be frost-proof. The
overflow pipe must be visible and its outlet
must be open.
VVM 320 must be installed with a disconnec-
tion option on the supply cable. Minimum
cable area must be sized according to the
fuse rating used. All installations must be
carried out in accordance with current norms
and directives.
Symbols
NOTE
This symbol indicates danger to person or ma-
chine .
Caution
This symbol indicates important information
about what you should consider when installing
or servicing the installation.
TIP
This symbol indicates tips on how to facilitate
using the product.
Marking
The CE mark is obligatory for most products sold in
the EU, regardless of where they are made.
CE
Classification of enclosure of electro-technical equip-
ment.
IP21
Danger to person or machine.
!
Read the User Manual.
NIBE VVM 320Chapter 1 | Important information4
1 Important information

Serial number
You can find the serial number in the middle of the top
panel, on the bottom right of the front cover, as well as
in menu 3.1.
Serial number
Caution
You need the product's (14 digit) serial number
for servicing and support.
Recovery
Leave the disposal of the packaging to the in-
staller who installed the product or to special
waste stations.
Do not dispose of used products with normal
household waste. It must be disposed of at a
special waste station or dealer who provides this type
of service.
Improper disposal of the product by the user results in
administrative penalties in accordance with current le-
gislation.
Country specific
information
UNITED KINGDOM
This installation is subject to building regulation approval,
notify the local Authority of intention to install.
Use only manufacturer’s recommended replacement
parts.
Benchmark places responsibilities on both manufactur-
ers and installers. The purpose is to ensure that custom-
ers are provided with the correct equipment for their
needs, that it is installed, commissioned and serviced
in accordance with the manufacturers instructions by
competent persons and that it meets the requirements
of the appropriate Building Regulations. The Benchmark
Checklist can be used to demonstrate compliance with
Building Regulations and should be provided to the
customer for future reference.
Installers are required to carry out the installation, com-
missioning and servicing work in accordance with the
Benchmark Code of practice which is available from the
Heating and Hotwater Industry Council who manage
and promote the Scheme. Visit www.centralheat-
ing.co.uk for information.
Warranty and insurance information
Thank you for installing a new NIBE heat pump in your
home.
NIBE heat pumps are manufactured in Sweden to the
very highest standard so we are pleased to offer our
customers a comprehensive guarantee.
The product is guaranteed for 24 months for parts and
labour from the date of installation or 33 months from
the date of manufacture, whichever is the shorter.
The NIBE guarantee is based on the unit being installed
and commissioned by a NIBE accredited installer, ser-
viced every year and the Benchmark documents com-
pleted. Where this condition is not met, any chargeable
spare parts or components issued within the applicable
guarantee period still benefit from a 12 month warranty
from the date of issue by the manufacturer.
We recommend the installer completes and returns as
soon as possible, your guarantee registration card or
completes the guarantee form on the NIBE website
www.nibe.co.uk.
5Chapter 1 | Important informationNIBE VVM 320
Inspection of the installation
Current regulations require the heating installation to be inspected before it is commissioned. The inspection must
be carried out by a suitably qualified person. Fill in the page for information about installation data in the User
manual.
DateSignatureNotesDescription
✔
Heating medium (page 21)
System flushed
System vented
Expansion vessel
Particle filter
Safety valve
Shut off valves
Boiler pressure
Connected according to outline diagram
Hot water (page 21)
Shut off valves
Mixing valve
Safety valve
Pressure reduction valve
Tundish
Expansion vessel
Electricity (page 26)
Connected communication
Circuit fuses
Fuses, indoor module
Fuses property
Outside sensor
Room sensor
Current sensor
Safety breaker
Earth circuit-breaker
Setting of emergency mode thermostat
Miscellaneous
Warranty
Benchmark checklist
Docked to
NIBE VVM 320Chapter 1 | Important information6

Outdoor modules
COMPATIBLE AIR/WATER HEAT PUMPS
NIBE SPLIT HBS 05
HBS 05-6
Part no. 067 578
AMS 10-6
Part no. 064 205
HBS 05-12
Part no. 067 480
AMS 10-8
Part no. 064 033
HBS 05-12
Part no. 067 480
AMS 10-12
Part no. 064 110
F2040
F2040-8
Part no. 064 109
F2040-6
Part no. 064 206
F2040-16
Part no. 064 108
F2040-12
Part no. 064 092
F2120
F2120-8 3x400V
Part no. 064 135
F2120-8 1x230V
Part no. 064 134
F2120-12 3x400V
Part no. 064 137
F2120-12 1x230V
Part no. 064 136
F2120-16 3x400V
Part no. 064 139
Check the software version of compatible older NIBE
air/water heat pumps, see page 18.
7Chapter 1 | Important informationNIBE VVM 320

Transport
VVM 320 should be transported and stored vertically in
a dry place. However, the VVM 320 may be carefully
laid on its back when being moved into a building.
R
0
R
0
R
0
R
0
Assembly
• Position VVM 320 on a firm base that can take the
weight. Use the product's adjustable feet to obtain a
horizontal and stable set-up.
Position VVM 320 on a fixed foundation that can take
the weight of the heat pump. Use the product's ad-
justable feet to obtain a horizontal and stable set-up.
30 - 50 mm
30 - 50 mm
15 - 40 mm
20-55 mm
• Because water can emerge from the safety valve for
hot water in VVM 320, the area where VVM 320 is
located must be provided with floor drainage.
INSTALLATION AREA
Leave a free space of 800 mm in front of the product.
All service on VVM 320 can be carried out from the front.
800
NOTE
Leave 10 – 25 mm free space between the in-
door module and the wall behind for routing of
cables and pipes.
NIBE VVM 320Chapter 2 | Delivery and handling8
2 Delivery and handling

Supplied components
Room sensorOutside sensor
LEK
Tundish
LEK
Pressure reduction valve
LEK
LEK
LEK
Connector with cable
LEK
Armoured hose
(expansion vessel)
LEK
Expansion vessel with
holder
LEK
LEK
LEK
Shut off valve
LOCATION
The kit of supplied items is placed on top of the product.
9Chapter 2 | Delivery and handlingNIBE VVM 320

Removing the covers
Front cover
1
2
LEK
LEK
LEK
LEK
LEK
1. Remove the screws from the lower edge of the
front panel.
2. Lift the panel out at the bottom edge and up.
Side covers
The side covers can be removed to facilitate the install-
ation.
Caution
50 mm space required to remove the side
panels.
1. Remove the screws from the upper and lower
edges.
2. Twist the cover slightly outward.
3. Move the hatch backwards and slightly to the side.
4. Pull the cover to one side.
5. Pull the hatch forwards.
NIBE VVM 320Chapter 2 | Delivery and handling10

LEK
LEK
LEK
11Chapter 2 | Delivery and handlingNIBE VVM 320

Wilo
VVM320
Wilo
VVM320
PZ3
XL4 XL3 XL9 XL8 XL1 XL2
BT63
GP6
EB1
PF1
GP1
AA4
AA4-XF4
AA4-XF3
SF1
FL1
QM20
BT30
FQ11
AA1
AA1-S2
FC1
AA2
W130
QM11
BT6
QN10
BT7
BP5
QM22
FQ10
VVM320 front
UA1
PZ1
AA3
NIBE VVM 320Chapter 3 | Indoor module's design12
3 Indoor module's design

Component location,
rear
FL5
XL5
XL29
VVM320 rear side
BT2
BT3
CM1
UB1
UB2
WM1
QQ1
List of components
PIPE CONNECTIONS
Connection, heating medium supply line Ø22 mmXL1
Connection, heating medium return line Ø22 mmXL2
Connection, cold water Ø22 mmXL3
Connection, hot water Ø22 mmXL4
Connection, hot water circulation Ø15 mmXL5
Connection, docking from heat pump Ø22 mmXL8
Connection, docking to heat pump Ø22 mmXL9
Connection, T&P valve Ø15 mmXL29
HVAC COMPONENTS
Expansion vessel, closed, heating mediumCM1
Safety valve, hot water heater Ø15 mmFL1
Safety valve, heating medium Ø22 mmFL2
Circulation pumpGP1
Circulation pump, heating mediumGP6
T&P valve Ø15 mmFL5
Venting, climate systemQM20
Venting valve, coilQM22
Reversing valve, climate system/water heating, flow
line
QN10
Filler valve, heating mediumQM11
Submerged tube, temperature limiter, compressorUA1
TundishWM1
SENSORS ETC.
Manometer, heating systemBP5
Temperature sensors, heating medium flowBT2
Temperature sensors, heating medium returnBT3
Temperature sensor, hot water, chargingBT6
Temperature sensor, hot water, topBT7
Thermostat, standby modeBT30
Temperature sensor, heating medium supply after
immersion heater
BT63
ELECTRICAL COMPONENTS
Immersion heater cardAA1
AA1-S2 Switch (DIP switch) on circuit board
Base cardAA2
Input circuit boardAA3
Display unitAA4
AA4-XF3 USB socket
AA4-XF4 Service socket
Immersion heaterEB1
Miniature circuit-breakerFC1
Temperature limiterFQ10
Temperature limiter, compressorFQ11
SwitchSF1
Network cable for NIBE UplinkTM
W130
MISCELLANEOUS
Rating platePZ1
Serial number platePZ3
Cable glandUB1
Cable glandUB2
Inspection hole, vessel, Ø80 mmQQ1
Designations in component locations according to
standard IEC 81346-2.
13Chapter 3 | Indoor module's designNIBE VVM 320

General pipe
connections
Pipe installation must be carried out in accordance with
current norms and directives.
VVM 320 together with a compatible air/water heat
pump (See page 18) constitutes a complete installation
for heating and hot water.
The system requires the radiator circuit to be designed
for a low temperature heating medium. At lowest dimen-
sioned outdoor temperature, the highest recommended
temperatures are 55 °C on the supply line and 45 °C on
the return line, but VVM 320 can handle up to 65 °C.
Overflow water from the safety valve goes via an over-
flow cup to a drain so that hot water splashes cannot
cause injury. The entire length of the overflow water
pipe must be inclined to prevent water pockets, and
must also be frost-proof. The mouth of the overflow
water pipe must be visible and not located close to
electrical components.
NIBE recommends installing VVM 320 as close to the
heat pump as possible for optimum comfort. For further
information about the location of different components,
see section "Installation alternatives" in this manual.
Caution
Ensure that incoming water is clean. When
using a private well, it may be necessary to
supplement with an extra water filter.
NOTE
Any high points in the climate system, must
be equipped with air vents.
NOTE
The pipe systems need to be flushed out be-
fore the indoor module is connected so that
any debris cannot damage component parts.
NOTE
Switch (SF1) must not be moved to "" or " "
until VVM 320 has been filled with water.
Otherwise the temperature limiter, thermostat
and the immersion heater etc can be damaged.
NOTE
This installation is subject to building regulation
approval, notify the local Authority of intention
to install.
NOTE
Use only manufacturer’s recommended replace-
ment parts.
Waste water from the collection tray and from the safety
valves is led by a non-pressurised overflow pipe to the
drain so that hot water cannot cause damage. The
mouth of the overflow pipe must be visible and not
placed close to electrical components. In addition, the
opening of the overflow pipe (tundish), drain valves and
motorised valves should also be positioned away from
all electrical components. This is the only thing the non-
pressurised overflow pipe may be used for. Even over-
flow pipes from tundish connected to the expansion
relief valve must be connected to the drain in the same
way.
Please note that the connection of the T&P-valve should
not be used for any other purpose.
Valves may not be positioned between the expansion
valve and the vessel.
Overflow pipes from tundish must be routed with a fall
of at least 300 mm, before bends or angles in the pipe-
work (see image).
NIBE VVM 320Chapter 4 | Pipe connections14
4 Pipe connections

Matal discharge pipe
from tundish, with
continous fall.
Min. 300 mm
Tundish
Safety device
(e.g. temperature
relief valve)
Metal discharge pipe
from temperature relief
valve to tundish
Possible
wall
Discharge
below fixed
grating
Fixed
grating
Trapped
gulley
Max 600 mm
Resistance created by
each elbow or bend
Maximum resistance
allowed, expressed as
a lenght of straight pipe
(i.e. no elbows or
bends)
Minimum size of dis-
charge pipe from tun-
dish
Minimum size of dis-
charge pipe
Valve outlet size
0.8 mmup to 9 m22 mm15 mmG1/2
1.0 mmup to 18 m28 mm15 mmG1/2
1.4 mmup to 27 m35 mm15 mmG1/2
1.0 mmup to 9 m28 mm22 mm<G3>/4
1.4 mmup to 18 m35 mm22 mm<G3>/4
1.7 mmup to 27 m42 mm22 mm<G3>/4
1.4 mmup to 9 m35 mm28 mmG1
1.7 mmup to 18 m42 mm28 mmG1
2.3 mmup to 27 m54 mm28 mmG1
HARD WATER AREAS
Usually, there should not be a problem in installing
VVM 320 in areas of hard water as the operating tem-
perature is 50–60 °C.
CLEANING THE CLIMATE SYSTEM
When the water heater and the climate system have
been filled with water, VVM 320 must operate at max-
imum normal temperature for at least one hour. There-
after the system must be drained of water and refilled.
Before installing the heat pump in an existing system,
it is important that the system is properly flushed
through.
Even if the heat pump is to be installed in a new system,
the heat pump and system should be flushed.
NOTE
Ensure that cleaning agent has been removed
from the entire system before adding inhibitor.
After flushing an inhibitor should be used for long-term
anti-corrosion protection.
NIBE Energy Systems Limited recommends water
treatments (supplied by e.g. Fernox and Sentinel) spe-
cifically designed for heat pumps.
BOILER AND RADIATOR VOLUMES
H
VVM 320 is equipped with a
pressure expansion vessel of
10 litres.
The pre-pressure of the pres-
sure expansion vessel must be
dimensioned according to the
maximum height (H) between
the vessel and the highest posi-
tioned radiator, see figure. A
pre-pressure of 0.5 bar (5 mvp)
means a maximum permitted
height difference of 5 m.
The maximum system volume
excluding the boiler is 220 litres at the above pre-pres-
sure.
15Chapter 4 | Pipe connectionsNIBE VVM 320

SYSTEM DIAGRAM
VVM 320 consists of water heater with charge coil, ex-
pansion vessel, safety valve, filler valve, immersion
heater, circulation pumps, buffer vessel and control
system. VVM 320 is connected to the climate system.
VVM 320 is directly adapted for connection and commu-
nication with a compatible NIBE air/water heat pump,
see page 18, and together they constitute a complete
heating installation.
When it is cold outdoors, the air/water heat pump works
with VVM 320, and if the outdoor air temperature falls
below the heat pump’s stop temperature, all heating is
carried out by VVM 320.
Requisite safety equipment connected to F2040-
8/F2040-12/F2120-8/F2120-12/HBS 05 and VVM 320,
see section, docking.
-EB101
-XL2
-XL1
-QM1
-QZ2
-QM40
-FL10
-EB15
-FL5
-EB15
-FL7
-WM3
-FL1
-RM1
-WM4
-QN17
-CM4
SYMBOL KEY
MeaningSymbol
Venting valve
Shut-off valve
Tapping valve
Non-return valve
Filterball
Trim valve
Shunt / shuttle valve
Safety valve
Filterball
Thermometer
T
Tundish
Temperature sensor
Expansion vessel
Pressure gauge
P
Circulation pump
Particle filter
Particle filter
Fan
Compressor
Heat exchanger
Radiator system
Domestic hot water
Under floor heating systems
NIBE VVM 320Chapter 4 | Pipe connections16

Dimensions and pipe
connections
70
1775
560
30-50
600
7575 757560 60
610
25
Wilo
VVM320
XL3XL4 XL8XL9 XL1 XL2
QM20
XL29
70
1775
560
30-50
600
7575 757560 60
610
25
PIPE CONNECTIONS
Connection, heating medium supply line Ø22 mmXL1
Connection, heating medium return line Ø22 mmXL2
Connection, cold water Ø22 mmXL3
Connection, hot water Ø22 mmXL4
Connection, hot water circulation Ø15 mm (does
not apply to copper)
XL5
Connection, docking from heat pump Ø22 mmXL8
Connection, docking to heat pump Ø22 mmXL9
Connection, T&P valve Ø15 mmXL29
17Chapter 4 | Pipe connectionsNIBE VVM 320

Installation alternative
COMPATIBLE NIBE AIR/WATER HEAT PUMPS
Compatible NIBE air/water heat pump must be equipped
with a control board with display that has a software
version indicated in the following list as a minimum. The
control board version is displayed in the heat pump’s
display at start-up.
Software versionProduct
all versionsF2040-6
all versionsF2040-8
all versionsF2040-12
all versionsF2120-8
all versionsF2120-12
all versionsF2120-16
all versionsNIBE SPLIT HBS 05:
AMS 10-6 + HBS 05-6
AMS 10-8 + HBS 05-12
AMS 10-12 + HBS 05-12
VVM 320 can be connected to extra water heater.
Further option information is available at www.nibe.co.uk
and in the relevant assembly instructions for the ac-
cessories used. See page 69 for the list of the accessor-
ies that can be used with VVM 320.
The indoor module can be supplemented with an extra
water heater, if a large bath tub or other significant
consumer of hot water is installed. A mixer valve is then
installed on outgoing hot water from the water heater.
Water heater with immersion heater
If it is possible to use a water heater with an immersion
heater, connect it as illustrated below.
HW from VVM320
NIBE VVM 320Chapter 4 | Pipe connections18

EXPLANATION
Exhaust air heat pump F135AZ10
Pool packageCL11
Unit box with accessory cardAA25
Temperature sensor, poolBT51
Exchanger, poolEP5
Pool, pumpGP9
Charge pumpGP12
Particle filterHQ4
Three way valve, poolQN19
VVM 320EB15
Temperature sensor, heating medium, external
supply
BT25
Safety valve, T&PFL5
Shut-off valve (Solenoid valve)FL7
Pressure reduction valve with integrated check valveQN17
Connection, heating medium, flow 1XL1
Connection, heating medium, return 1XL2
Connection, cold waterXL3
Connection, hot waterXL4
Connection, docking, from heat pumpXL8
Connection, docking, to heat pumpXL9
Heat pumpEB101
Safety valveFL10
Tapping valveQM1
Shut-off valveQM40
FilterballQZ2
External heat source (Oil, gas, pellet or wood boiler
with shunt)
EM1
Unit box with accessory cardAA25
Temperature sensor, boilerBT52
Expansion vessel, closedCM1
Safety valve, heating mediumFL2
Auxiliary relayKA1
Shunt valveQN11
Climate system 2EP21
Unit box with accessory cardAA25
Temperature sensor, heating medium, flowBT2
Temperature sensor, heating medium, returnBT3
Circulation pump, heating medium, lower shuntGP20
Shunt valveQN25
Active cooling module ACS 310EQ1
Unit box with accessory cardAA25
Temperature sensor, cooling, supply lineBT64
Single jacket accumulator tank, coolingCP10
Charge pumpGP12
Circulation pump, coolingGP13
Three way valve cooling/heatingQN12
Hot water circulation
Temperature sensor, hot water circulation returnBT82
Water heaterEB2
Safety valve, hot waterFL1
Circulation pump, hot waterGP11
Trim valveRN1
Non-return valveRM1
Non-return valveRM3
Miscel-
laneous
EMK 300BF1
Expansion vessel closed, hot waterCM4
External electrical additional heatEB1
Tundish, incoming cold waterWM3
Tundish, T&PWM4
1) Energy meter (BF1) is included in VVM 320 R, VVM 320 3x230V R
and VVM 320 E EM. Available as accessory EMK 300 for other mar-
kets.
19Chapter 4 | Pipe connectionsNIBE VVM 320

OUTLINE DIAGRAM
-GP9 -BT51 -HQ4
-EP5
-AA25
-CL11
-CL11
-QN19
-CL11
-GP12
POOL
-BT3
-BT2
-EP21
-GP20
-QN25
-AA25
-EB101
-XL2
-XL1
-QM1
-FL10
-QM40
-QZ2
-EB15
-EB15
-FL7
-WM3
-FL1
-RM1
-WM4
-QN17
-CM4
-FL5
NIBE VVM 320Chapter 4 | Pipe connections20
Other manuals for VVM 320
6
Table of contents
Other Nibe Control Unit manuals
Popular Control Unit manuals by other brands

ITRON
ITRON EquaScan hMIURFV2 Assembly instruction

Hydac
Hydac FCU 8000 Series Operating and maintenance instructions

Domestia
Domestia DMA-004-004 user manual

Lucent Technologies
Lucent Technologies Stinger Guide

Allen-Bradley
Allen-Bradley 1794-OA8K installation instructions

Neat
Neat INKA Technical handbook

Linear Technology
Linear Technology DC1573A Demo Manual

System Sensor
System Sensor M210EA-CZR installation instructions

Sonel
Sonel OR-1 operating manual

Sandpiper
Sandpiper HDF4-A Service & operating manual

Allen-Bradley
Allen-Bradley ControlLogix ControlNet Scanner Module Installation instructions manual

UTICOR
UTICOR TOUGH UT3 Series manual