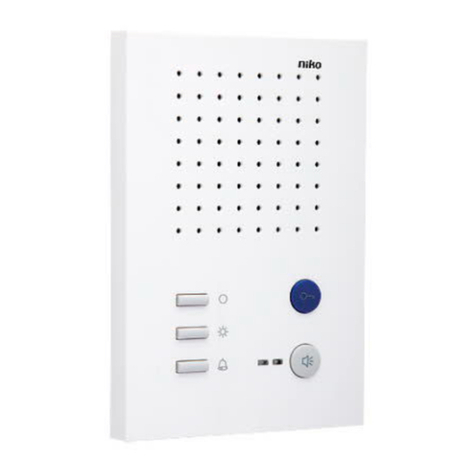
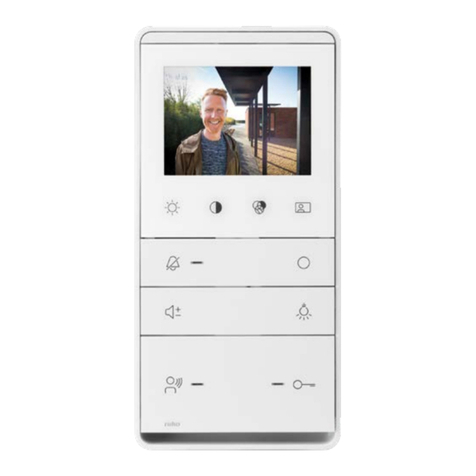
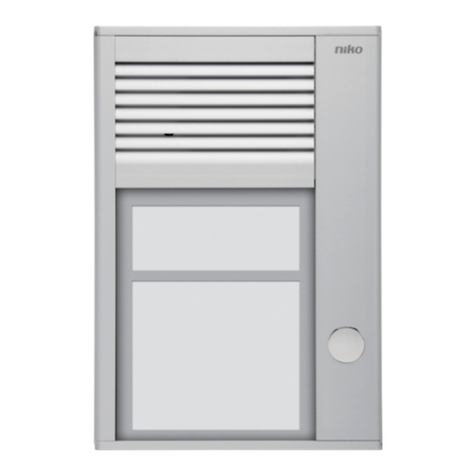
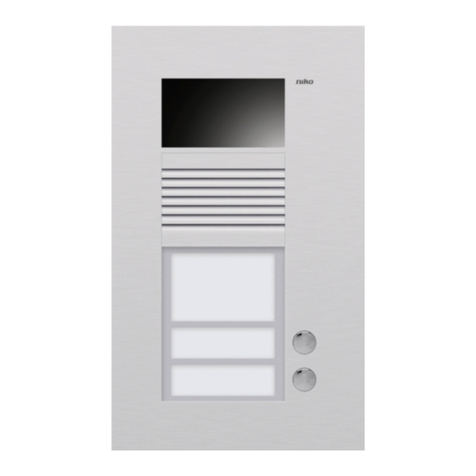
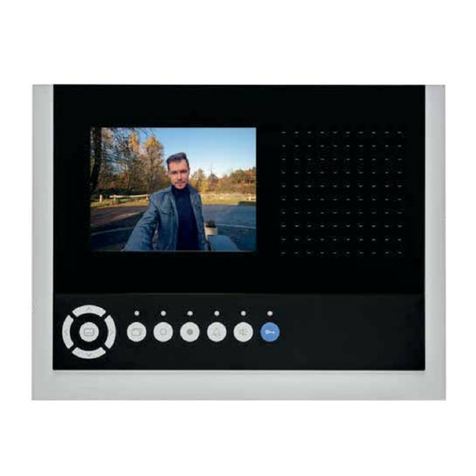
Niko 10-06 Series User manual

10-06x / 10-07x
PRODUCTINFORMATIE
INFORMATION PRODUIT
PRODUKTINFORMATION
PRODUCT INFORMATION
INFORMÁCIE O PRODUKTE
Voorgeprogrammeerde videokits
Kits vidéo préprogrammés
Vorprogrammierte Videosprechanlagen
Pre-programmed video kits
Predprogramované video sady
10-060 10-065
10-070 10-075

10-06x / 10-07x
NL2
1. INHOUD
1. Inhoud ................................................................................................................................................................................................................ 2
2. Overzicht............................................................................................................................................................................................................. 2
3. Gebruik............................................................................................................................................................................................................... 2
4. Omschrijving ....................................................................................................................................................................................................... 2
5. Technische gegevens........................................................................................................................................................................................... 2
6. Systeemvoorbeeld ............................................................................................................................................................................................... 3
7. Installatie ............................................................................................................................................................................................................ 3
8. Bekabeling:......................................................................................................................................................................................................... 3
8.1. Welk type kabel gebruik ik?.................................................................................................................................................................................. 3
8.2. Kies ik voor een vijf- of zesdraadsbekabeling?....................................................................................................................................................... 3
9. Inbedrijfstelling.................................................................................................................................................................................................... 4
10. Instellingen.......................................................................................................................................................................................................... 4
10.1. Configuratiemogelijkheden ................................................................................................................................................................................... 4
10.2. Buitenposten labelen + volume instellingen........................................................................................................................................................... 4
11. Onderhoud.......................................................................................................................................................................................................... 4
12. Waarschuwingen voor installatie........................................................................................................................................................................... 4
13. Niko support........................................................................................................................................................................................................ 4
14. Garantiebepalingen.............................................................................................................................................................................................. 4
2. OVERZICHT
Overzicht van de verschillende videokits:
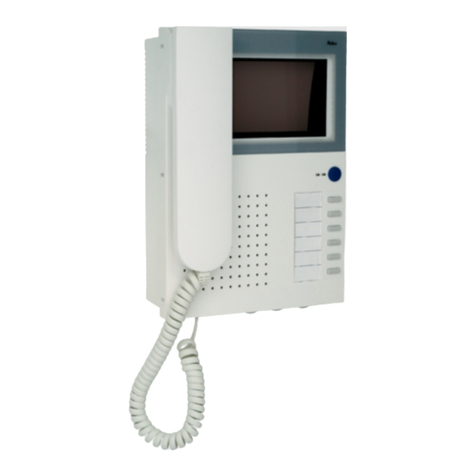
10-060 • 1 handenvrije videobinnenpost met kleurenscherm voor opbouw (10-570).
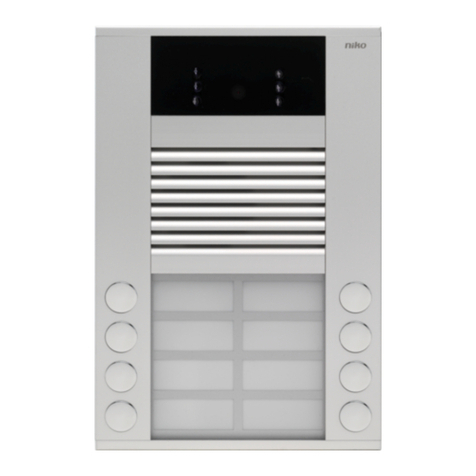
• 1 compacte opbouwbuitenpost 16 mm met 1 beldrukknop en kleurencamera (10-161).
• 1 voeding (10-806)
10-065 • 1 videobinnenpost met kleurenscherm en hoorn voor opbouw (10-575).
• 1 compacte opbouwbuitenpost 16 mm met 1 beldrukknop en kleurencamera (10-161).
• 1 voeding (10-806)
10-070 • 2 handenvrije videobinnenposten met kleurenscherm voor opbouw (10-570).
• 1 compacte opbouwbuitenpost 16 mm met 2 beldrukknoppen en kleurencamera (10-162).
• 1 voeding (10-806)
10-075 • 2 videobinnenposten met kleurenscherm en hoorn voor opbouw (10-575).
• 1 compacte opbouwbuitenpost 16 mm met 2 beldrukknoppen en kleurencamera (10-162).
• 1 voeding (10-806)
3. GEBRUIK
De kits zijn geschikt voor één- en tweegezinswoningen. De videokits zijn voorgeprogrammeerd. Voor een correcte werking volstaat het om de toestellen aan te
sluiten zoals voorgeschreven. In de handleiding van elk toestel vind je een gedetailleerde beschrijving van zijn werking. De kits kunnen achteraf nog uitgebreid
worden met extra functionaliteiten (één of meer videobinnenposten,drie audiobinnenposten,één audiobuitenpost en één relais om een poort of hek aan te sluiten).
4. OMSCHRIJVING
• De kits bestaan uit 3 onderdelen:
- een voeding (10-806)
- een buitenpost met 1 beldrukknop (10-161) of 2 beldrukknoppen (10-162)
- één of twee handenvrije videobinnenposten (10-570) of videobinnenposten met hoorn (10-575) die beide voorzien zijn van een kleurenscherm.
• De eigenschappen van de onderdelen zijn terug te vinden in de handleidingen van de respectievelijke toestellen.
5. TECHNISCHE GEGEVENS
Je vindt de technische gegevens van elk toestel terug in de bijgeleverde handleiding.

10-06x / 10-07x
3NL
6. SYSTEEMVOORBEELD
Binnenpost 10-570
10-575
8-24 V
>6Ω
abEPM
abEPM
aGbRPM
V1 V2
V1 V2
19 20 ab P
V2V1
V1 V2
21 22
13
230V~
OFF ON
OFF ON
12V 1A max
12V 1A max
1
2
2
1* lamp verwijderen
Voeding 10-806
Buitenpost 10-161
10-162
Zet de afsluitweerstand in de juiste positie.
!
•
De afsluitweerstand voor het videosignaal mag enkel aan staan op het laatste toestel op de kabel. Gebruik een videosplitter (10-824-01) bij
sterbekabeling.
• Zorg ervoor dat de binnenposten in lijn staan zoals in bovenstaand schema (lijn in, lijn uit).
7. INSTALLATIE
!• In de kits met twee binnenposten (10-070 en 10-075) werden de verpakkingen van de binnenposten voorzien van een genummerde sticker (met
nummer 1 of 2). Deze nummer geeft aan welke binnenpost toegewezen is aan welke knop op de buitenpost.
8. BEKABELING:
!• Gebruik bij voorkeur de bijgeleverde kleineschroevendraaier om schade aan de toestellen te voorkomen.
8.1. Welk type kabel gebruik ik?
Sluit de kits aan volgens het bedradingsvoorbeeld. De videokits worden zes- of vijfdraads bekabeld (bv. UTP, TPVF, SVV, TVVF, JYSTF) met een getwiste kabel
voor een optimale beeldkwaliteit. De diameter van de aders bepaalt de maximumafstand die behaald kan worden tussen de voeding en de videobinnenpost. Voor
meer informatie kan je de handleiding van elk toestel raadplegen.
8.2. Kies ik voor een zes- of vijfdraadsbekabeling?
Bij systemen met een beperkte omvang kun je kiezen voor een vijfdraadsbekabeling. In dit geval hoef je de M-klem niet te bekabelen
maar moet je er wel voor zorgen dat de schuifschakelaar ingesteld is op de vijfdraadsbekabeling.

10-06x / 10-07x
NL4
9. INBEDRIJFSTELLING
!• Installeer de videobuitenpost niet onder spanning. Sluit het toestel pas na volledige installatie aan op de voedingsspanning.
10. INSTELLINGEN
10.1. Configuratiemogelijkheden
Raadpleeg de handleiding van het (optionele) servicetoestel 10-870. Dit toestel wordt gebruikt voor de programmatie van de handenvrije videobinnenpost met
kleurenscherm voor opbouw (10-570) en de videobinnenpost met kleurenscherm en hoorn voor opbouw (10-575).
10.2. Buitenposten labelen + volume instellingen
Raadpleeg de handleidingen van de compacte opbouwbuitenpost met één beldrukknop en kleurencamera (10-161) of van de compacte opbouwbuitenpost met
twee beldrukknoppen en kleurencamera (10-162).
11. ONDERHOUD
Om te voorkomen dat het oppervlak van het product beschadigd raakt door een verkeerde behandeling, neem je onderstaande onderhoudstips in acht:
• Reinig het product met wat zeep en een vochtige doek.
• Gebruik nooit schurende sponzen of agressieve reinigingsmiddelen.
• Gebruik nooit onderhoudsmiddelen die een oplosmiddel of zuur bevatten.
• Gebruik nooit reinigingsmiddelen met azijnzuur.
12. WAARSCHUWINGEN VOOR INSTALLATIE
• De installatie moet worden uitgevoerd door een erkend installateur en volgens de geldende voorschriften.
• Deze handleiding moet aan de gebruiker worden overhandigd. Het moet bij het dossier van de elektrische installatie worden gevoegd en worden overgedragen
aan eventuele nieuwe eigenaars. Bijkomende exemplaren zijn verkrijgbaar via de website of supportdienst van Niko. Op de Niko website is altijd de meest
recente handleiding van het product terug te vinden.
• Tijdens de installatie moet rekening gehouden worden met (niet-limitatieve lijst):
- de geldende wetten, normen en reglementen.
- de stand van de techniek op het moment van de installatie.
- deze handleiding die alleen algemene bepalingen vermeldt en moet worden gelezen in het kader van elke specifieke installatie.
- de regels van goed vakmanschap.
Dit product voldoet aan alle toepasselijke Europese richtlijnen en verordeningen. Indien van toepassing, vind je de EG-verklaring van overeenstemming met
betrekking tot dit product op www.niko.eu.
13. NIKO SUPPORT
Heb je twijfel? Of wil je het product omruilen in geval van een eventueel defect? Neem dan contact op met je groothandel of de Niko supportdienst:
• België: +32 3 778 90 80
• Nederland: +31 183 64 06 60
Contactgegevens en meer informatie vind je op www.niko.eu onder de rubriek “Hulp en advies”.
14. GARANTIEBEPALINGEN
• De garantietermijn bedraagt vier jaar vanaf leveringsdatum. Als leveringsdatum geldt de factuurdatum van aankoop van het product door de consument. Als
er geen factuur voorhanden is, geldt de productiedatum.
• De consument is verplicht Niko schriftelijk te informeren over het gebrek aan overeenstemming, en dit uiterlijk binnen de twee maanden na vaststelling.
• In geval van een gebrek aan overeenstemming heeft de consument enkel recht op een kosteloze herstelling of vervanging van het product, wat door Niko
bepaald wordt.
• Niko is niet verantwoordelijk voor een defect of schade als gevolg van een foutieve installatie, oneigenlijk of onachtzaam gebruik, een verkeerde bediening,
transformatie van het product, onderhoud in strijd met de onderhoudsvoorschriften of een externe oorzaak zoals vochtschade of schade door overspanning.
• De dwingende bepalingen in de nationale wetgeving over de verkoop van consumptiegoederen en de bescherming van consumenten in landen waar Niko
rechtstreeks of via zuster- of dochtervennootschappen, filialen, distributeurs, agenten of vaste vertegenwoordigers verkoopt, hebben voorrang op bovenstaande
bepalingen.
Dit product mag u niet bij het ongesorteerd afval gooien. Breng uw afgedankt product naar een containerpark of een erkend verzamelpunt. Net als producenten en importeurs
speelt ook u een belangrijke rol in de bevordering van sortering, recycling en hergebruik van afgedankte elektrische en elektronische apparatuur. Om de ophaling en verwerking
te kunnen financieren, heft de overheid in bepaalde gevallen een recyclingbijdrage (inbegrepen in de aankoopprijs van dit product). Sommaire

10-06x / 10-07x
5FR
1. SOMMAIRE
1. Sommaire ........................................................................................................................................................................................................... 5
2. Aperçu................................................................................................................................................................................................................ 5
3. Utilisation............................................................................................................................................................................................................ 5
4. Description.......................................................................................................................................................................................................... 5
5. Données techniques ............................................................................................................................................................................................ 5
6. Exemple de système............................................................................................................................................................................................ 6
7. Installation........................................................................................................................................................................................................... 6
8. Câblage : ............................................................................................................................................................................................................ 6
8.1. Quel type de câble dois-je utiliser ? ...................................................................................................................................................................... 6
8.2. Dois-je opter pour un câblage à cinq ou six fils ?................................................................................................................................................... 6
9. Mise en service ................................................................................................................................................................................................... 7
10. Réglages............................................................................................................................................................................................................. 7
10.1. Possibilités de configuration................................................................................................................................................................................. 7
10.2. Étiquettes des postes extérieurs + réglages du volume.......................................................................................................................................... 7
11. Entretien ............................................................................................................................................................................................................. 7
12. Mises en garde concernant l’installation................................................................................................................................................................ 7
13. Support de Niko................................................................................................................................................................................................... 7
14. Dispositions de garantie....................................................................................................................................................................................... 7
2. APERÇU
Aperçu des différents kits vidéo :
10-060 • 1 poste intérieur vidéo mains libres avec écran couleur (10-570).
• 1 poste extérieur en saillie compact de 16 mm avec 1 bouton-poussoir de sonnerie et une caméra couleur (10-161).
• 1 alimentation (10-806).
10-065 • 1 poste intérieur vidéo avec écran couleur et combiné, pour montage en saillie (10-575).
• 1 poste extérieur en saillie compact de 16 mm avec 1 bouton-poussoir de sonnerie et une caméra couleur (10-161).
• 1 alimentation (10-806).
10-070 • 2 postes intérieurs vidéo mains libres avec écran couleur (10-570).
• 1 poste extérieur en saillie compact de 16 mm avec 2 boutons-poussoirs de sonnerie et une caméra couleur (10-162).
• 1 alimentation (10-806).
10-075 • 2 postes intérieurs vidéo avec écran couleur et combiné, pour montage en saillie (10-575).
• 1 poste extérieur en saillie compact de 16 mm avec 2 boutons-poussoirs de sonnerie et une caméra couleur (10-162).
• 1 alimentation (10-806).
3. UTILISATION
Les kits sont adaptés aux maisons uni- et bifamiliales. Les kits audio sont préprogrammés.Pour qu’ils fonctionnent correctement, les appareils doivent simplement
être raccordés comme indiqué (voir exemple système). Le manuel de chaque appareil comporte une description de son fonctionnement. Les kits peuvent encore
être complétés ultérieurement avec des fonctionnalités supplémentaires (un ou plusieurs postes intérieurs vidéo, trois postes intérieurs audio, un poste extérieur
audio et un relais afin de commander une porte ou grille).
4. DESCRIPTION
• Ces kits se composent de 3 éléments :
- une alimentation (10-806)
- un poste extérieur équipé d'1 bouton-poussoir de sonnerie (10-161) ou 2 boutons-poussoirs de sonnerie (10-162)
- un poste intérieur vidéo mains libres (10-570) ou un poste intérieur vidéo avec parlophone (10-575) tous deux équipés d'un écran couleur.
• Les caractéristiques des éléments se retrouvent dans les manuels des appareils respectifs.
5. DONNÉES TECHNIQUES
Vous pouvez retrouver les données techniques de chaque appareil dans le manuel fourni.

10-06x / 10-07x
FR6
6. EXEMPLE DE SYSTÈME
Poste intérieur 10-570
10-575
8-24 V
>6Ω
abEPM
abEPM
aGbRPM
V1 V2
V1 V2
19 20 ab P
V2V1
V1 V2
21 22
13
230V~
OFF ON
OFF ON
12V 1A max
12V 1A max
1
2
2
1* retirez la lampe
Alimentation 10-806
Poste extérieur 10-161
10-162
!
• La résistance terminale pour le signal vidéo doit être mise sur ON au dernier appareil sur le câble. En cas de câblage en étoile, utilisez un répartiteur
vidéo (10-824-01).
• Veillez à ce que les postes intérieurs soient en ligne comme l'indique le schéma ci-dessus (ligne entrante, ligne sortante.)
7. INSTALLATION
!• Les emballages des kits équipés de deux postes intérieurs (10-070 en 10-075) sont munis d’une étiquette numérotée (numéro 1 ou 2). Ce numéro
indique quel poste intérieur est attribué à quel bouton sur le poste extérieur.
8. CÂBLAGE
!• Utilisez de préférence le tournevis fourni afin d'éviter d'endommager les appareils.
8.1. Quel type de câble dois-je utiliser ?
Raccordez les kits selon l’exemple de câblage. Les kits audio disposent d’un câblage à trois ou deux fils, avec un câble torsadé (p.ex. UTP, TPVF, SVV, TVVF,
JYSTF). Le diamètre des câbles détermine la distance maximale qui peut être atteinte entre l’alimentation et le poste intérieur audio. Pour en savoir plus, vous
pouvez consulter le manuel de chaque appareil.
8.2. Dois-je opter pour un câblage à cinq ou six fils ?
Si la taille du système est limitée, vous pouvez opter pour un câblage à cinq fils. Dans ce cas, vous ne devez pas câbler la borne M,
mais vous devez toutefois veiller à ce que tous les interrupteurs coulissants soient prévus sur le câblage à cinq fils.

10-06x / 10-07x
7FR
9. MISE EN SERVICE
!• N’installez pas le poste extérieur vidéo sous tension. Ne raccordez l’appareil à la tension d'alimentation que lorsque l’installation est terminée.
10. RÉGLAGES
10.1. Possibilités de configuration
Consultez le manuel de l’appareil de service (en option) 10-870. Cet appareil est utilisé pour la programmation du poste intérieur vidéo mains libres avec écran
couleur pour un montage en saillie (10-570) et du poste intérieur vidéo avec écran couleur et parlophone pour un montage en saillie (10-575).
10.2. Étiquettes des postes extérieurs + réglages du volume
Consultez les manuels du poste extérieur en saillie compact muni d’un seul bouton-poussoir de sonnerie et d’une caméra couleur (10-161) ou du poste extérieur
en saillie compact muni de deux boutons-poussoirs de sonnerie et d’une caméra couleur (10-162).
11. ENTRETIEN
Afin d’éviter qu’un traitement erroné provoque des dégâts à la surface du produit, respectez les conseils d’entretien suivants:
• Nettoyez le produit avec un peu de savon et un chiffon humide.
• N’utilisez jamais d’éponges abrasives ni de détergents agressifs.
• N’utilisez jamais de produits d’entretien contenant un solvant ou un acide.
• N’utilisez jamais de détergents contenant de l’acide acétique.
12. MISES EN GARDE CONCERNANT L‘INSTALLATION
• L’installation doit être effectuée par un installateur agréé et dans le respect des prescriptions en vigueur.
• Ce mode d’emploi doit être remis à l’utilisateur. Il doit être joint au dossier de l’installation électrique et être remis aux nouveaux propriétaires éventuels. Des
exemplaires supplémentaires peuvent être obtenus sur le site web ou auprès du service support de Niko.
• Il y a lieu de tenir compte des points suivants pendant l’installation (liste non limitative):
- les lois, les normes et les réglementations en vigueur.
- l’état de la technique au moment de l’installation.
- ce mode d’emploi qui stipule uniquement des dispositions générales et doit être lu dans le cadre de toute installation spécifique.
- les règles de l’art.
Ce produit est conforme à l’ensemble des directives et règlements européens applicables. Le cas échéant, vous trouverez la déclaration CE de conformité
relative à ce produit sur le site www.niko.eu.
13. SUPPORT DE NIKO
En cas de doute ou si vous voulez échanger le produit en cas de défaut éventuel, veuillez prendre contact avec votre grossiste ou avec le service support de Niko:
• Belgique: +32 3 778 90 80
• France: +33 820 20 66 25
Vous trouverez les coordonnées et de plus amples informations sur le site www.niko.eu, sous la rubrique “Aide et conseils”.
14. DISPOSITIONS DE GARANTIE
• Le délai de garantie est de quatre ans à partir de la date de livraison. La date de la facture d’achat par le consommateur est considérée comme la date de
livraison. En l’absence de facture, la date de fabrication est valable.
• Le consommateur est tenu de prévenir Niko par écrit de tout défaut de conformité, dans un délai maximum de deux mois après constatation.
• En cas de défaut de conformité, le consommateur peut uniquement prétendre à la réparation gratuite ou au remplacement gratuit du produit,selon l’avis de Niko.
• Niko ne peut être tenu pour responsable d’un défaut ou de dégâts résultant d’une installation fautive, d’une utilisation impropre ou négligente,d’une commande
erronée, d’une transformation du produit, d’un entretien contraire aux consignes d’entretien ou d’une cause externe telle que de l’humidité ou une surtension.
• Les dispositions contraignantes de la législation nationale ayant trait à la vente de biens de consommation et à la protection des consommateurs des différents
pays où Niko procède à la vente directe ou par l’intermédiaire d’entreprises sœurs, de filiales, de succursales, de distributeurs, d’agents ou de représentants
fixes, prévalent sur les dispositions susmentionnées.
Ce produit ne peut pas être jeté avec les déchets non triés. Apportez vos équipements obsolètes électriques et électroniques à un point de collecte agréé. Tout comme les
producteurs et importateurs, vous jouez un rôle important dans le triage, le recyclage et la réutilisation des appareils électriques et électroniques. Afin de pouvoir financer la
collecte et le traitement écologique, les autorités imposent dans certains cas une cotisation de recyclage (comprise dans le prix d’achat de ce produit).
EMBALLAGES
CARTONS ET PAPIER
À TRIER

10-06x / 10-07x
DE8
1. INHALT
1. Inhalt .................................................................................................................................................................................................................. 8
2. Übersich ............................................................................................................................................................................................................. 8
3. Bedienung........................................................................................................................................................................................................... 8
4. Beschreibung...................................................................................................................................................................................................... 8
5. Technische Daten ................................................................................................................................................................................................ 8
6. Systembeispiel .................................................................................................................................................................................................... 9
7. Installation........................................................................................................................................................................................................... 9
8. Verkabelung:....................................................................................................................................................................................................... 9
8.1. Welchen Kabeltyp benötige ich? ........................................................................................................................................................................... 9
8.2. Wählen Sie eine 6- oder 5-Draht-Verkabelung? .................................................................................................................................................... 9
9. Inbetriebnahme ................................................................................................................................................................................................. 10
10. Einstellungen..................................................................................................................................................................................................... 10
10.1. Konfigurationsmöglichkeiten............................................................................................................................................................................... 10
10.2. Außensprechstelle bekleben + Lautstärkeeinstellung........................................................................................................................................... 10
11. Pflege............................................................................................................................................................................................................... 11
12. Warnhinweise für die Installation......................................................................................................................................................................... 11
13. Niko Unterstützung ............................................................................................................................................................................................ 11
14. Garantiebedingungen......................................................................................................................................................................................... 11
2. ÜBERSICHT
Übersicht über die verschiedenen Videosprechanlagen:
10 – 060 • 1 Video-Freisprechinnensprechstelle (Aufputz) mit Farbbildschirm (10-570).
• 1 kompakte Außensprechstelle (Aufputz) 16 mm mit 1 Klingeltaster und Farbkamera (10-161).
• 1 Netzteil (10-801).
10 – 065 • 1 Video-Innensprechstelle (Aufputz) mit Farbbildschirm und Hörer (10-575)
• 1 kompakte Außensprechstelle (Aufputz) 16 mm mit 1 Klingeltaster und Farbkamera (10-161).
• 1 Netzteil (10-801).
10 – 070 • 2 Video-Freisprechinnensprechstelle (Aufputz) mit Farbbildschirm (10-570).
• 1 kompakte Außensprechstelle (Aufputz) 16 mm mit 2 Klingeltastern und Farbkamera (10-162).
• 1 Netzteil (10-801).
10 – 075 • 2 Video-Innensprechstellen (Aufputz) mit Farbbildschirm und Hörer (10-575)
• 1 kompakte Außensprechstelle (Aufputz) 16 mm mit 2 Klingeltastern und Farbkamera (10-162).
• 1 Netzteil (10-801).
3. BEDIENUNG
Die Videosprechanlagen sind für Ein- und Zweifamilienhäuser geeignet. Die Videosprechanlage ist vorprogrammiert. Für eine korrekte Funktion ist es völlig
ausreichend, die Geräte wie vorgeschrieben anzuschließen. Im Handbuch zu jedem Gerät finden Sie eine detaillierte Beschreibung der Gerätefunktion. Die
Anlagen können nachträglich mit weiteren Funktionalitäten erweitert werden (ein oder mehr Video-Innensprechstellen, drei Audio-Innensprechstellen, ein
Audio-Außensprechstelle und ein Relais).
4. BESCHREIBUNG
• Die Anlagen bestehen aus drei Elementen:
- ein Netzteil (10-801)
- eine Außensprechstelle (Aufputz/Unterputz) mit 1 Klingeltaster (10-201, 10-151) oder 2 Klingeltastern (10-202, 10-152)
- eine Video-Freisprechinnensprechstelle (10-570) oder eine Video-Innensprechstelle mit Hörer (10-575), die beide über einen Farbbildschirm verfügen.
• Die Funktionalitäten der verschiedenen Elemente sind im Handbuch der jeweiligen Geräte beschrieben.
5. TECHNISCHE DATEN
Sie finden die technischen Daten zu jedem Gerät im mitgelieferten Handbuch.

10-06x / 10-07x
9DE
6. SYSTEMBEISPIEL
Innensprechstelle 10-570
10-575
8-24 V
>6Ω
abEPM
abEPM
aGbRPM
V1 V2
V1 V2
19 20 ab P
V2V1
V1 V2
21 22
13
230V~
OFF ON
OFF ON
12V 1A max
12V 1A max
1
2
2
1
* lamp verwijderen
Netzteil 10-806
Außensprechstelle 10-161
10-162
!
• Der Abschlusswiderstand für das Videosignal darf nur auf dem letzten Gerät des Kabelstrangs angeschlossen sein. Bei sternförmiger Verkabelung
verwenden Sie einen Videosplitter (10-824-01).
•
AchtenSiedarauf,dassdieInnensprechstelleninReihegeschaltetsind, wie in der vorstehenden Abbildung dargestellt (Eingangsleitung, Ausgangsleitung).
7. INSTALLATION
Bei Anlagen mit zwei Innensprechstellen (10-070 und 10-075) sind die Verpackungen der Innensprechstellen mit einem Nummernaufkleber versehen (Nummer
1 oder 2). Diese Nummer gibt an, welche Innensprechstelle welchem Klingeltaster der Außensprechstelle zugewiesen ist.
8. VERKABELUNG
!• Verwenden Sie vorzugsweise den mitgelieferten Schraubendreher, um Schäden an den Geräten zu vermeiden.
8.1. Welchen Kabeltyp benötige ich?
Schließen Sie die Anlagen gemäß dem Verkabelungsschema an. Die Video-Anlagen werden sechs- oder fünfdrahtig mit einem getwisteten Kabel verkabelt (z. B.
UTP, TPVF, SVV, TVVF, JYSTF), um eine optimale Bildqualität zu erhalten. Der Leitungsadern-Durchmesser bestimmt den maximal zulässigen Abstand zwischen
Netzteil und Video-Innensprechstelle. Weitere Informationen entnehmen Sie bitte dem Handbuch zum jeweiligen Gerät.
8.2. Wählen Sie eine 6- oder 5-Draht-Verkabelung?
Bei kleineren Systemen können Sie eine fünfdrahtigeVerkabelung wählen. In diesem Fall brauchen Sie die M-Klemme nicht zu verkabeln.
Sie müssen allerdings darauf achten, dass alle Schiebeschalter auf die 5-Draht-Verkabelung eingestellt sind.

10-06x / 10-07x
DE10
9. INBETRIEBNAHME
!•
Die Video-Außensprechstelle niemals unter Spannung installieren. Schließen Sie das Gerät erst nach abgeschlossener Installation an Netzspannung an.
10. EINSTELLUNGEN
10.1. Konfigurationsmöglichkeiten
Ziehen Sie das Handbuch des (optionalen) Servicegeräts 10-870 zurate. Dieses Gerät wird für die Programmierung der Video-Freisprechinnensprechstelle
(Aufputz) mit Farbbildschirm (10-570) und der Video-Innensprechstelle (Aufputz) mit Hörer (10-575) verwendet.
10.2. Außensprechstelle bekleben + Lautstärkeeinstellung
Ziehen Sie die Handbücher der kompakten Außensprechstelle (Aufputz) mit einem Klingeltaster und Farbkamera (10-161) oder der kompakten Außensprechstelle
(Aufputz) mit zwei Klingeltastern und Farbkamera (10-162) zurate.
11. PFLEGE
Damit Sie die Geräteoberfläche nicht durch falsche Pflege beschädigen, müssen Sie untenstehende Pflegetipps beachten:
• Reinigen Sie das Gerät mit etwas Seife und einem feuchten Tuch.
• Verwenden Sie niemals Scheuerschwämme oder aggressive Reinigungsmittel.
• Niemals Wartungsmittel benutzen, die Lösungsmittel oder Säure enthalten.
• Niemals Pflegungsmittel benutzen, die Essigsäure enthalten.
12. WARNHINWEISE FÜR DIE INSTALLATION
• Die Installation darf ausschließlich von einer Elektrofachkraft unter Berücksichtigung der geltenden Vorschriften ausgeführt werden.
• Diese Gebrauchsanleitung muss dem Benutzer ausgehändigt werden.Die Gebrauchsanleitung ist den Unterlagen der elektrischen Anlage beizufügen und muss
auch eventuellen neuen Besitzern ausgehändigt werden.Zusätzliche Exemplare erhalten Sie über die Internetseiten von Niko oder über den Kundendienst von Niko.
• Beachten und berücksichtigen Sie bei der Installation unter anderem folgende Punkte:
- die gültigen Gesetze, Normen und Richtlinien.
- den Stand der Technik zum Zeitpunkt der Installation.
- die in dieser Gebrauchsanleitung aufgeführten Anweisungen, wobei diese Gebrauchsanleitung nur allgemein gültige Bestimmungen enthält, die für jede
Anlage spezifisch angewendet werden müssen.
- die allgemein anerkannten Regeln fachmännischer Arbeit.
Dieses Produkt erfüllt alle anwendbaren europäischen Richtlinien und Verordnungen. Die für dieses Produkt zutreffende EG-Konformitätserklärung erhalten Sie
gegebenenfalls unter www.niko.eu.
13. NIKO UNTERSTÜTZUNG
Bei Zweifel oder falls Sie bei einem eventuellen Defekt des Produkts noch Fragen bezüglich des Umtausches haben, dann nehmen Sie bitte Kontakt auf mit dem
Kundendienst von Niko (Belgien: +32 3 778 90 80) oder wenden Sie sich an Ihren Großhändler. Kontaktdaten und weitere Informationen erhalten Sie im Internet
unter www.niko.eu in der Rubrik “Unterstützung und Beratung”.
14. GARANTIEBEDINGUNGEN
• Der Garantiezeitraum beträgt vier Jahre ab Lieferdatum. Als Lieferdatum gilt das Rechnungsdatum zum Zeitpunkt des Kaufs durch den Endverbraucher. Falls
keine Rechnung mehr vorhanden ist, gilt das Produktionsdatum.
• Der Endverbraucher ist verpflichtet, Niko schriftlich über einen Produktmangel innerhalb von zwei Monaten nach dessen Feststellung zu informieren.
• Im Falle eines Mangels hat der Endverbraucher nur Recht auf kostenlose Reparatur oder Ersatz des Produkts. Eine Entscheidung darüber obliegt allein Niko.
• Niko ist nicht für Mängel oder Schäden verantwortlich, die durch fehlerhafte Installation, nicht bestimmungsgemäßen oder unsachgemäßen Gebrauch, durch
falsche Bedienung, Anpassen/Ändern des Produktes, infolge von unsachgemäßer Wartung entgegen den Wartungsvorschriften oder die sich aus äußeren
Umständen, wie beispielsweise infolge Feuchtigkeit oder Überspannung, ergeben.
•
ZwingendeVorschriften der nationalen Gesetzgebung bezüglich des Verkaufs von Konsumgütern und zumVerbraucherschutz haben vor den obigen Bestimmungen
Vorrangin denLändern,in denen Niko direkt oder über seine Neben- oderTochtergesellschaften,Filialen,Vertriebsstellen,Agenten oder über festeVertreter verkauft.
Dieses Produkt darf nicht mit dem normalen Haus- bzw. Restmüll entsorgt werden. Das zu entsorgende Gerät muss zu einer Mülldeponie oder einer Sondermüllsammelstelle
gebracht werden. Neben den Herstellern und Importeuren haben auch Sie als Verbraucher eine Verantwortung bei der Mülltrennung, dem Recycling und der Wiederverwertung
von elektrischen und elektronischen Geräten die entsorgt werden sollen. Um die Entsorgung und Verarbeitung finanzieren zu können, hat die Regierung in bestimmten Fällen
einen Recycling-Beitrag festgelegt, der im Kaufpreis dieses Produktes enthalten ist.

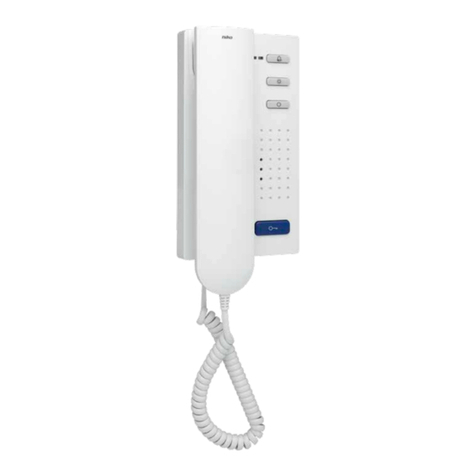
10-06x / 10-07x
11EN
1. CONTENTS
1. Contents ........................................................................................................................................................................................................... 11
2. Overview........................................................................................................................................................................................................... 11
3. Use................................................................................................................................................................................................................... 11
4. Description........................................................................................................................................................................................................ 11
5. Technical data ................................................................................................................................................................................................... 11
6. System diagram ................................................................................................................................................................................................ 12
7. Installation......................................................................................................................................................................................................... 12
8. Cabling ............................................................................................................................................................................................................. 12
8.1. Which type of cable should I use?....................................................................................................................................................................... 12
8.2. Should I opt for six- or five-wire cabling?............................................................................................................................................................. 12
9. Starting the device............................................................................................................................................................................................. 13
10. Settings ............................................................................................................................................................................................................ 13
10.1. Configuration options......................................................................................................................................................................................... 13
10.2. Labelling external units + volume settings........................................................................................................................................................... 13
11. Maintainance..................................................................................................................................................................................................... 13
12. Warnings regarding installation........................................................................................................................................................................... 13
13. Niko support...................................................................................................................................................................................................... 13
14. Guarantee provisions ......................................................................................................................................................................................... 13
2. OVERVIEW
Overview of the different video kits:
10 – 060 • 1 hands-free internal video unit with colour screen for surface-mounting (10-570)
• 1 compact surface-mounting external unit 16 mm with 1 bell push button and colour camera (10-161).
• 1 power supply (10-806)
10 – 065 • 1 internal video unit with colour screen and receiver for surface mounting (10-575).
• 1 compact surface-mounting external unit 16 mm with 1 bell push button and colour camera (10-161).
• 1 power supply (10-806)
10 – 070 • 2 hands-free internal video units with colour screen for surface-mounting (10-570).
• 1 compact surface-mounting external unit 16 mm with 2 bell push buttons and colour camera (10-162).
• 1 power supply (10-806)
10 – 075 • 2 internal video units with colour screen and receiver for surface mounting (10-575).
• 1 compact surface-mounting external unit 16 mm with 2 bell push buttons and colour camera (10-162).
• 1 power supply (10-806)
3. USE
The kits are suitable for single-family and two-family homes. The video kits have been pre-programmed. To ensure proper functioning, the devices simply have
to be connected as indicated. The manual of each device provides a detailed description of how it works. It is possible to upgrade the kits at a later date with
extra functionalities (one or more internal video unites, three internal audio units, one external audio unit and one relay for controlling an extra gate or enclosure).
4. DESCRIPTION
• The kits consist of 3 parts:
- a power supply (10-806)
- an external unit with 1 bell push button (10-161) or 2 bell push buttons (10-162)
- a hands-free internal video unit (10-570) or an internal video unit with receiver (10-575), both equipped with a colour screen.
• The properties of the parts can be found in the manuals of the respective devices.
5. TECHNICAL DATA
The technical data of each device can be found in the manual supplied.

10-06x / 10-07x
EN12
6. SYSTEM DIAGRAM
Internal unit 10-570
10-575
8-24 V
>6Ω
abEPM
abEPM
aGbRPM
V1 V2
V1 V2
19 20 ab P
V2V1
V1 V2
21 22
13
230V~
OFF ON
OFF ON
12V 1A max
12V 1A max
1
2
2
1
* remove lamp
Power supply 10-806
External unit 10-161
10-162
!• The terminal resistor for the video signal should be on 'ON' on the last device on the cable. Use a video splitter (10-824-01) for star cabling.
• Ensure that the internal units are connected according to the diagram above (line in, line out).
7. INSTALLATION
!• In the kits containing two internal units (10-070 en 10-075), a numbered sticker (with number 1 or 2) has been applied to the packaging of the
internal units. This number indicates which internal unit has been assigned to which button on the external unit.
8. CABLING
!• You should preferably use the screwdriver supplied in order to avoid damage to the devices.
8.1. Which type of cable should I use?
To connect the kits, follow the wiring diagram. The audio kits are wired with three- or two-wire cable, with a twisted cable (e.g. UTP, TPVF, SVV, TVVF, JYSTF).The
diameter of the conductors determines the maximum distance that can be bridged between the power supply and the internal audio unit. For more information,
please refer to the manual of each device.
8.2. Should I opt for six- or five-wire cabling?
For limited-size systems you can opt for five-wire cabling. In this case there is no need to wire the M terminal, but you do have to
ensure that all slide switches are set to the five-wire cabling.

10-06x / 10-07x
13EN
9. STARTING THE DEVICE
!•
Disconnect all power before installing the internal video unit. Do not connect the device to the power supply voltage until installation has been completed.
10. SETTINGS
10.1. Configuration options
Refer to the manual of the (optional) service unit 10-870.This device is used to program the hands-free internal video unit with colour screen for surface mounting
(10-570) and the internal video unit with colour screen and receiver for surface mounting (10-575).
10.2. Labelling external units + volume settings
Refer to the manuals of either the compact surface-mounting external unit with 1 bell push button and colour camera (10-161), or the compact surface-mounting
external unit with 2 bell push buttons and colour camera (10-162).
11. MAINTENANCE
To prevent the surface of the product from becoming damaged by incorrect handling, consider the following maintenance tips:
• Clean the product with a small quantity of soap and a damp cloth.
• Never use abrasive sponges or aggressive cleaning agents.
• Never use maintenance products that contain a solvent or an acid.
• Never use cleaning products that contain acetic acid.
12. WARNINGS REGARDING INSTALLATION
• The installation should be carried out by a registered installer and in compliance with the statutory regulations.
• This user manual should be presented to the user. It should be included in the electrical installation file,and it should be passed on to any new owners.Additional
copies are available on the Niko website or via the Niko support service.
• During installation, the following should be taken into account (non-exhaustive list):
- the statutory laws, standards and regulations.
- the technology currently available at the time of installation.
- this user manual, which only states general regulations and should therefore be read within the scope of each specific installation.
- the rules of proper workmanship.
This product complies with all of the relevant European guidelines and regulations. If applicable, you can find the EC declaration of conformity regarding this
product at www.niko.eu.
13. NIKO SUPPORT
In case of doubt or for the specific exchange procedure in case of a possible defect, contact the Niko support service in Belgium at +32 3 778 90 80 or your
wholesaler/installer. Contact details and more information can be found at www.niko.eu under the “Help and advice” section.
14. GUARANTEE PROVISIONS
• The period of guarantee is four years from the date of delivery. The delivery date is the invoice date of purchase of the product by the consumer. If there is
no invoice, the date of production applies.
• The consumer is obliged to inform Niko in writing about the non-conformity, within two months after stating the defect.
• In case of a non-conformity, the consumer only has the right to a product repair or replacement free of charge, which shall be decided by Niko.
• Niko shall not be held liable for a defect or damage resulting from incorrect installation, improper or careless use, incorrect operation, transformation of the
product, maintenance that does not adhere to the maintenance instructions or an external cause, such as damage due to moisture or overvoltage.
• The compulsory regulations of the national legislation concerning the sale of consumer goods and the protection of the consumer in the countries where Niko
sells, directly or via sister companies, subsidiaries,chain stores, distributors,agents or permanent sales representatives, take priority over the above-mentioned
rules and regulations.
Do not dump this product with the unsorted waste. Bring it to a recognised waste collection point.Together with producers and importers, you have an important role to play in
the advancement of sorting, recycling and reusing discarded electrical and electronic appliances. In order to finance the waste collection and processing, the government levies
a recycling contribution in some cases (included in the purchase price of this product).

10-06x / 10-07x
SK14
1. OBSAH
1. Obsah............................................................................................................................................................................................................... 14
2. Prehľad............................................................................................................................................................................................................. 14
3. Použitie............................................................................................................................................................................................................. 14
4. Opis.................................................................................................................................................................................................................. 14
5. Technické údaje................................................................................................................................................................................................. 14
6. Schéma systému............................................................................................................................................................................................... 15
7. Montáž.............................................................................................................................................................................................................. 15
8. Kabeláž............................................................................................................................................................................................................. 15
8.1. Aký typ kábla použiť?......................................................................................................................................................................................... 15
8.2. Mám použiť 6- alebo 5-vodičové zapojenie? ....................................................................................................................................................... 15
9. Spustenie zariadenia.......................................................................................................................................................................................... 16
10. Nastavenia........................................................................................................................................................................................................ 16
10.1. Možnosti konfigurácie ........................................................................................................................................................................................ 16
10.2. Označenie vonkajších jednotiek + nastavenie hlasitosti ........................................................................................................................................ 16
11. Právne upozoenenia........................................................................................................................................................................................... 16
12. Niko technická podpora...................................................................................................................................................................................... 16
13. Záručné podmienky ........................................................................................................................................................................................... 16
2. PREHĽAD
Prehľad rôznych audio sád:
10 – 060 • 1 hands-free vnútorná video jednotka s farebným displejom pre povrchovú montáž (10-570)
• 1 kompaktná vonkajšia jednotka na povrchovú montáž 16 mm s 1 tlačidlom zvončeka a farebnou kamerou (10-161).
• 1 napájací zdroj (10-806)
10 – 065 • 1 vnútorná video jednotka s farebným displejom a slúchadlom pre povrchovú montáž (10-575).
• 1 kompaktná vonkajšia jednotka na povrchovú montáž 16 mm s 1 tlačidlom zvončeka a farebnou kamerou (10-161).
• 1 napájací zdroj (10-806)
10 – 070 • 2 hands-free vnútorné video jednotky s farebným displejom pre povrchovú montáž (10-570).
• 1 kompaktná vonkajšia jednotka na povrchovú montáž 16 mm s 2 tlačidlami zvončeka a farebnou kamerou (10-162).
• 1 napájací zdroj (10-806)
10 – 075 • 2 vnútorné video jednotky s farebným displejom a slúchadlom pre povrchovú montáž (10-575).
• 1 kompaktná vonkajšia jednotka na povrchovú montáž 16 mm s 2 tlačidlami zvončeka a farebnou kamerou (10-162).
• 1 napájací zdroj (10-806)
3. POUŽITIE
Tieto sady sú vhodné do domov pre jednu alebo dve rodiny. Video sady sú predprogramované. Pre zabezpečenie správneho fungovania stačí zariadenia pripojiť
tak, ako je uvedené. V návode každého zariadenia je uvedený podrobný opis fungovania. Sady je možné doplniť aj neskôr o ďalšie funkcie (jedna alebo viac
vnútorné video jednotky, 3 vnútorné audio jednotky, jedna vonkajšia audio jednotka a relé na ovládanie ďalšej brány).
4. OPIS
• Sady sa skladajú z 3 častí:
- z napájacieho zdroja (10-806)
- vonkajšej jednotky s 1 tlačidlom zvončeka (10-161) alebo 2 tlačidlami zvončeka (10-162)
- hands-free vnútornej video jednotky (10-570) alebo vnútorné video jednotky so slúchadlom (10-575) pričom sú obe vybavené farebným displejom.
• Vlastnosti jednotlivých dielov nájdete v návodoch príslušných zariadení.
5. TECHNICKÉ ÚDAJE
Technické údaje o každom zariadení nájdete v priloženom návode.

10-06x / 10-07x
15SK
6. SCHÉMA SYSTÉMU
Vnútorná jednotka 10-570
10-575
8-24 V
>6Ω
abEPM
abEPM
aGbRPM
V1 V2
V1 V2
19 20 ab P
V2V1
V1 V2
21 22
13
230V~
OFF ON
OFF ON
12V 1A max
12V 1A max
1
2
2
1
* odobrať lampu
Napájanie 10-806
Vonkajšia jednotka 10-161
10-162
!• Prepínací kontakt pre v poslednej video jednotke má byť na: „ON“. Pre hviezdicovú topológiu použite rozdeľovač video signálu (10-824-01).
• Uistite sa, že vnútorné jednotky sú zapojené podľa vyššie uvedenej schémy (vstupy, výstupy).
7. MONTÁŽ
!• Balenia vnútorných jednotiek, ktoré patria k sadám obsahujúcim dve vnútorné jednotky (10-070 a 10-075) majú očíslovanú nálepku (s číslom 1
alebo 2). Toto číslo naznačuje, ktorá vnútorná jednotka bola priradená ku ktorému tlačidlo na vonkajšej jednotke.
8. KABELÁŽ
!• Pokiaľ je to možné, mali by ste používať priložený skrutkovač, aby ste nepoškodili zariadenie.
8.1. Aký typ kábla použiť?
Pre pripojenie sád sa riaďte schémou zapojenia. Audio sady používajú 3- alebo 2-vodičové pripojenie s krúteným káblom (napr UTP, TPVF, SVV, TVVF, JYSTF).
Priemer vodičov určuje maximálnu vzdialenosť medzi napájacím zdrojom a vnútornou audio jednotkou, ktorú je možné premostiť. Ďalšie informácie nájdete v
návode každého zariadenia.
8.2. Mám použiť 6- alebo 5-vodičové zapojenie?
Pri systémoch, kde sú obmedzené rozmery,môžete použiť 5-vodičové zapojenie. V tomto prípade nie je potrebné zapojiť M svorku, ale
musíte sa uistiť, že všetky posuvné spínače sú nastavené na 5-vodičové zapojenie.

10-06x / 10-07x
9. SPUSTENIE ZARIADENIA
!•
Predinštaláciou vnútornej video jednotky odpojte všetky zdroje energie. Nepripájajte zariadenie k napájaciemu zdroju, pokiaľ nebola inštaláciaukončená.
10. NASTAVENIA
10.1. Možnosti konfigurácie
Pozrite si návod (voliteľného) servisného zariadenia 10-870.Toto zariadenie sa používa na programovanie hands-free vnútornej video jednotky s farebným displejom
pre povrchovú montáž (10-570) a vnútornej video jednotky s farebným displejom a slúchadlom pre povrchovú montáž (10-575).
10.2. Označenie vonkajších jednotiek + nastavenie hlasitosti
Pozrite si návod pre kompaktnú vonkajšiu jednotku s jedným tlačidlom zvončeka a farebnou kamerou na povrchovú montáž (10-161) alebo kompaktnú vonkajšiu
jednotku s 2 tlačidlami zvončeka a farebnou kamerou na povrchovú montáž (10-162).
11. PRÁVNE UPOZORNENIA
• Inštaláciu musí vykonať kvalifikovaný odborník v súlade s platnými predpismi.
• Tento návod musí byť odovzdaný užívateľovi. Musí byť súčasťou dokumentácie o elektrickej inštalácii a musí byť odovzdaný každému novému užívateľovi.
Ďalšie kópie návodu sú dostupné na web stránke Niko alebo cez služby zákazníkom. Najnovší návod na inštaláciu tohto výrobku je k dispozícii na internetových
stránkach Niko.
• Počas inštalácie je potrebné brať do úvahy nasledovné (neobmedzuje sa iba na nasledovný zoznam):
- aktuálne zákony, normy a vyhlášky.
- aktuálny stav technológie v čase inštalácie.
- tento návod, ktorý obsahuje iba všeobecné pravidlá, je potrebné použiť s ohľadom na špecifiká každej inštalácie.
- pravidlá správnej inštalácie.
Tento výrobok spĺňa všetky relevantné Európske predpisy a nariadenia. V prípade potreby nájdete príslušné ES vyhlásenie o zhode na www.niko.eu.
12. NIKO TECHNICKÁ PODPORA
Ak máte otázky, obráťte sa na zastúpenie firmy Niko (Slovenská republika: +421 2 63 825 155) alebo váš veľkoobchod. Ďalšie informácie a kontakty nájdete
na stránke www.niko.eu v sekcii “Pomoc a podpora”.
13. ZÁRUČNÉ PODMIENKY
• Záručná doba je štyri roky od dátumu dodávky. Za dátum dodávky sa považuje dátum fakturácie alebo vydania iného daňového dokladu zákazníkovi. Ak takýto
doklad nie je k dispozícii, platí dátum výroby.
• Zákazník je povinný písomnou formou informovať Niko o poruche do dvoch mesiacov od jej objavenia.
• V prípade poruchy výrobku má zákazník nárok na bezplatnú opravu alebo výmenu (na základe posúdenia firmy Niko).
•
Niko nenesie zodpovednosť za poruchu alebo poškodenie spôsobené nesprávnou inštaláciou, nesprávnym alebo nedbalým použitím, prepravou výrobku,
nesprávnou údržbou, alebo vonkajšími vplyvmi ako sú zvýšená vlhkosť či prepätie.
• Záväzné zákony národnej legislatívy, týkajúce sa predaja tovaru a ochrany zákazníka platné v krajinách, kde sa predávajú výrobky Niko, priamo alebo cez
sesterské či dcérske spoločnosti, reťazce, distribútorov, agentov alebo stálych predajných zástupcov,sú nadriadené vyššie uvedeným pravidlám a nariadeniam.
Vyradený výrobok nevhadzujte do netriedeného odpadu. Prineste ho do oficiálnej zberne odpadu. Spoločne s výrobcami a importérmi máte dôležitú úlohu v rozvoji triedenia,
recyklácie a opätovného použitia vyradených elektrických a elektronických prístrojov.
nv Niko sa Industriepark West 40, BE-9100 Sint-Niklaas, Belgium
tel. +32 3 778 90 00 — fax +32 3 777 71 20 — e-mail: [email protected] — www.niko.eu PM010-06000R16063
This manual suits for next models
5
Table of contents
Languages:
Other Niko Intercom System manuals

Niko
Niko 10-15 Series User manual

Niko
Niko 10-570 User manual

Niko
Niko 10-577 User manual

Niko
Niko 10-10 Series User manual

Niko
Niko 10-571 User manual

Niko
Niko 10-576 User manual

Niko
Niko Access Control Standard 10-520 User manual

Niko
Niko 10-571 User manual

Niko
Niko 10-571 User manual

Niko
Niko 10-20 Series User manual