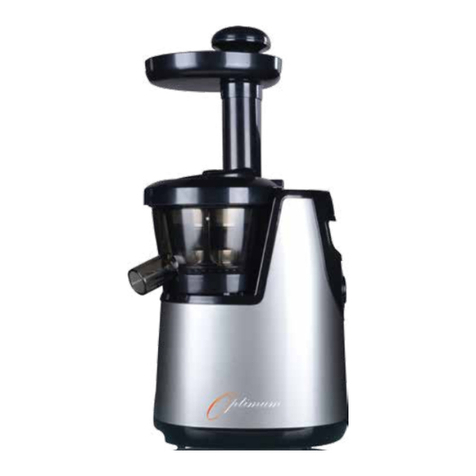
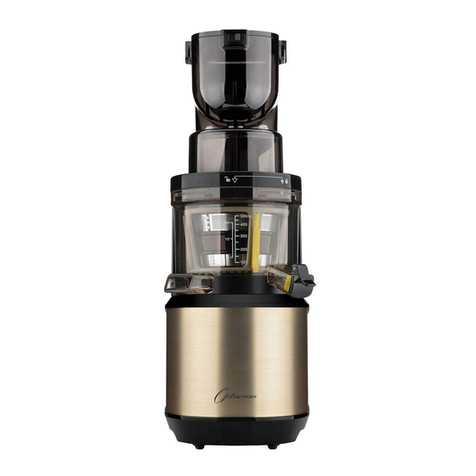
Optimum 600M User manual

600M
COLD
PRESS JUICER
USER MANUAL

CONTENTS
WELCOME TO YOUR NEW KITCHEN ASSISTANT 1
SAFETY FIRST 1
GETTING TO KNOW YOUR 600 MINI COLD PRESS JUICER 3
ASSEMBLY INSTRUCTION 4
OPERATION INSTRUCTION 6
DISASSEMBLY OF THE DEVICE 7
PREPARING ALL-NATURAL JUICES 8
CLEANING & STORAGE 9
TROUBLESHOOTING 10
PRODUCT SPECIFICATIONS 11
WARRANTY TERMS & CONDITIONS (INTERNATIONAL) 12
CONTACT US 13

OPTIMUM 600M // 1
WELCOME TO YOUR NEW KITCHEN ASSISTANT
Congratulations on purchasing your professional quality Optimum 600M Cold Press Juicer.
The 600M Cold Press Juicer can be used to create your favorite juices, smoothies, and purées using
fruits and vegetables.
TO ENSURE YOUR SAFETY AND TO GET THE BEST PERFORMANCE FROM YOUR OPTIMUM
600 MINI COLD PRESS JUICER, PLEASE READ THESE INSTRUCTIONS CAREFULLY.
SAFETY FIRST
WHEN USING ELECTRICAL APPLIANCES, YOU SHOULD ALWAYS BE AWARE OF
AND FOLLOW BASIC SAFETY PRECAUTIONS INCLUDING:
1. Read and follow all instructions and warnings in this manual carefully.
2. To protect against the risk of injury due to electric shock, do not immerse the Optimum 600M Cold
Press Juicer in water or any other liquid.
3. Only connect the appliance to a grounded power outlet. Always make sure the power plug is
inserted into the power outlet properly.
4. The input voltage of this appliance is between 220-240V, at 50-60Hz. Ensure the power source is
compatible with the appliance before connecting it, to avoid damage.
5. This appliance is not intended for use by persons (including children) with reduced physical, sensory
or mental capabilities, or lack of experience and knowledge, unless they are supervised or have
been given instruction concerning the use of the appliance by a person responsible for their safety.
6. Children should be supervised to ensure that they do not play with the appliance.
7. Do not operate the juicer if the power cord or plug are damaged, or if it malfunctions or is damaged
in any way. Return the appliance to the nearest authorized service facility for inspection or repair. Do
not attempt to repair the appliance yourself, to avoid the risk of injury.
8. Do not operate the appliance with wet hands.
9. If you have any issues operating the juicer, first refer to the Troubleshooting section. If the problems
persist, contact the distributor and return the appliance for inspection or repair. Do not disassemble
the juicer yourself.
10. To avoid injury, unplug the power cord from the power outlet before assembling, disassembling,
cleaning or putting your hands near any moving parts of the appliance.
11. Ensure the detachable parts of the appliance are installed properly before use. The pulp extractor
and feeding chute should be in the ‘lock’ position to prevent leakage, spillage, or parts from
becoming loose during juicing.
12. Place the appliance on a flat, stable and level surface, away from any water or heat sources. Do not
use the appliance on carpets, towels, plastic, paper, or flammable surfaces.

2 // OPTIMUM 600M
SAFETY FIRST
13. Do not squeeze lemon juice directly into the appliance.
14. Always ensure the appliance conforms to food safety and hygiene standards by following the
cleaning and maintenance instructions in this manual.
15. After every use, use water to clean the appliance and all detachable parts that come in direct contact
with ingredients.
16. Exercise extra care when handling parts of the appliance with sharp edges, emptying the cups of
their contents, and during the cleaning of the appliance.
17. Switch o and unplug the appliance during long periods of inactivity.
18. Never use any objects (e.g. chopsticks) to remove blockages in the outlets. Follow proper cleaning
procedures instead.
19. The appliance is intended to be used in household and similar applications such as:
⊲ sta kitchen areas in shops, oces and working environments;
⊲ farm houses;
⊲ by clients in hotels, motels and other residential type environments;
⊲ bed and breakfast type environments.
20. Before connecting the device to power, please confirm that the local voltage is in conformity with the
voltage instruction at the bottom part of the device.
21. Please do not use the appliance longer than 10 minutes, excessive use can cause overheating which
can lead to motor failure.
22. It is forbidden to use several plugs in one socket. Abnormal heating may cause fire.
23. When there is dust or water in the power plug pin, clean with a duster. Failure to do so presents the
risk of electric shock and fire.
24. Do not use with or keep the device near gas appliances. This may cause deformation or color
change.
25. Do not disassemble, repair, or reform. Danger of abnormal phenomena, fire and injury.
26. It is forbidden to clean the device with chemical or volatile substance. This action presents the risk of
color change, discoloration, and dangerous events such as fire.
27. Never spray flammable liquids or water onto the device. This action can create hazardous conditions
that may lead to fire, electric shock, and/or explosion.
FAILURE TO FOLLOW SAFETY INSTRUCTIONS AND WARNINGS COULD
RESULT IN SERIOUS INJURY. MISUSE OF YOUR COLD PRESS
JUICER MAY DAMAGE YOUR APPLIANCE AND VOID YOUR
WARRANTY.

OPTIMUM 600M // 3
GETTING TO KNOW YOUR 600M COLD PRESS JUICER
PUSHER
HOPPER ASSY/
FEEDING TUBE ASSY
AUGER
FINE STRAINER/
BLANK STRAINER
JUICING BOWL
PULP OUTLET
JUICE OUTLET
PULP CUP
JUICE CUP
MAIN BODY
INCLUDES A BLANK
STRAINER

4 // OPTIMUM 600M
ASSEMBLY INSTRUCTION
1.
Open the product package, take out the
product and accessories, and dispose of the
packing material.
2.
Clean the product surface and wash the
accessories with water. Do not wash the main
body.
5.
Insert the silicone brush into the auger base,
then install the auger into the juice auger.
3.
Before assembling the juicing bowl on the main body, make sure the pulp stopper and Shaft seal on
the bottom is inserted properly. If the pulp stopper and shaft seal is not inserted properly, the sealing
will not be eective, and juice will spill outside of the device.
4.
Put the juicing bowl on the main body and use
align the mark points on both pieces. When
the mark points are aligned, rotate the bowl
clockwise. See Figure for example.
REVERSE THE STEPS CAREFULLY WHEN DISASSEMBLING.
SHAFT SEAL
PULP STOPPER

OPTIMUM 600M // 5
ASSEMBLY INSTRUCTION
6.
Install the assembled Auger and strainer into
the juicing bowl upright; connect the Auger
axle with the motor rotating shaft.
8.
Place the pusher into the feeding hole, then
position the juice cup and pulp cup below the
juice outlet and pulp outlet.
7.
Install the hopper assy on the juicing bowl. Use
the mark points found on the drum cap and the
cup to properly align both pieces, then rotate
the drum cap clockwise until secure.

6 // OPTIMUM 600M
OPERATION INSTRUCTION
1. Insert the plug into the socket (make sure the socket has reliable grounding), turn on the control
button.
ON
OFF
REV
ON: Activates the motor and starts making
juice.
OFF: Stops the operation. Center the button to
turn o the product.
REV: Activates the reverse operation. Flip
the button to REV to dislodge ingredients if
something gets stuck in the device.
2. Wash all fruits and vegetables
3. After washing and cutting, slowly add prepared ingredients into the machine. If necessary, use the
pusher to ensure all ingredients are fully inserted in the device. Remember to remove any hard
seeds from ingredients before juicing.
Note:
A) The ingredients should be put into the device one by one. When you’ve successfully inserted
one ingredient, you may proceed with adding the next. It is recommended to size all ingredients
to approximately 10x3x2cm.
B) Hard-fiber ingredients (such as celery) should be cut into properly sized portions. It is
recommended to size such ingredients to approximately 5-10cm in length.
C) Fiber-poor ingredients (such as carrots) are preferred to be extracted alongside fiber-rich
ingredients like celery. Simply cut the carrots into four equal parts. Due to dierences in the
moisture content of your ingredients, you will notice variations in the extracted juice amounts.
D) Stale ingredients will produce the least amount of juice. Ingredients that have been refrigerated
for extended periods of time should be soaked in pure water to rehydrate before extraction.
E) Ingredients will respond dierently to the juicing process. For the best results, do not exceed the
outlined maximum levels in the juicing bowl. If the bowl becomes overfilled, your juice and pulp
will have diculty exiting the device. As a result, the device may begin to leak from the mouth of
the bowl or through shaft seal, creating spillage. This is especially true when juicing ingredients
such as cucumber, cherries, or tomatoes.
F) Notice: Do not attempt to dislodge or insert ingredients using foreign objects such as chopsticks
or spoons. If necessary, you may use the pushing bar to guide ingredients into the juicer.
4. If the machine suddenly stops, first, turn the power button to the OFF position. Then, shift the power
button to the REV position, to dislodge jammed ingredients. When the ingredients have shifted back
between the strainer/auger and bowl, you may return the power button to the ON position.
Note: If the above operation does not correct the issue, follow the instructions in this guide to
disassemble the device. Then, follow the instructions for cleaning the bowl before attempting to reuse
the juicer.
Note: Always place the power button in the OFF position before applying the REV function. Wait until the
machine has fully stopped, then switch the power button to REV.
5. Turn o the machine after juicing.

OPTIMUM 600M // 7
OPERATION INSTRUCTION
DISASSEMBLY OF THE DEVICE
REMARKS:
Your device is equipped with built-in overload protection and overheat protection functions. If the device
is ever overfilled, or if its operation exceeds the suggested 10-minute limit, these preventative protection
features will be triggered. In the event of overheating, the device is designed to cease functioning to
allow the motor to cool down. To resume juicing, switch the power button to the OFF position and unplug
the device from the outlet. Wait approximately 30-40 minutes, to allow the juicer’s protection features to
recover and reset. When the device has cooled down, plug it into the socket again. Switch the power
button to the ON position to test the device. If it has recovered, the motor will run. If not, please unplug
the device again and continue to wait for the motor to cool. When the functions have reset, you will be
allowed to resume juicing.
1. When the device has stopped, rotate the
hopper assy, following the arrow direction in
the figure to the right. Then, pull the hopper
assy upward.
2. Pull the auger (it comes out with the strainer)
upward.
3. Follow the direction of the arrow in the figure
and rotate the bowl. When it is dislodged, pull
it upward to remove it from the device.
Note: Disassembling the components of the
device follows the sequence of assembly in
reverse.
1
2
3
6. Clean the machine after juicing.

8 // OPTIMUM 600M
PREPARING ALL-NATURAL JUICES
SPECIAL NOTICE*
Before juicing, always remove any hard seeds/stones from fruits like peaches, plums, mangos, apricots,
jujubes, haws etc. These may damage the device. It is also recommended to avoid using sti ingredients
such as sugar cane when juicing. Do not overfill with ingredients. This presents the risk of jamming the
juicer and/or stopping the engine. When attempting to extract juice from ingredients that are high in fiber,
expect minimal amounts of juice. To increase the eciency of the extraction, remember to cut high fiber
ingredients as small as possible, then slowly insert each piece into the inlet orifice.
* For leafy or fibrous vegetables (e.g. spinach or celery), separate the leaves from the stems, and
remove any tough, fibrous outer stems before juicing the inner parts. For frozen fruits and berries,
ensure your ingredients are completely thawed – before juicing.
TOMATO JUICE
Tomato juice is a common form of vegetable juice appreciated for its cool, refreshing taste. It contains
lycopene haematochrome, known as an all-natural anti-ager. Be mindful of when, and how much, tomato
juice you consume. Due to a high concentratin of citric acid, it may irritate certain bodily functions. For the
best results, enjoy one cup of tomato juice in the morning. You may also wish to explore the taste and
eects of dierent types of tomatoes. Grape tomatoes are known to be sweet, while yellow and green
tomatoes also oer a unique taste. Not only will you end up with juices with varying taste, they’ll have
dierent colors and consistencies as well.
1. It is simple to clean organic tomatoes, just wipe them with a mild detergent then wash well with warm
water.
2. Slice into appropriately sized pieces, then slowly add the tomatoes into the feeding tray of the juicer.
HEALTHY PRESCRIPTION
Tomato is helpful in preventing and curing cancer, cerebral thrombosis, heart disease and other
diseases. Tomato contains rich vitamin A & C. Its particular sourness may allay tiredness and relieve
nausea. It provides reliefs from the eects of alcoholism, and its refreshing taste is enjoyed by most.
(When searching for the perfect tomato for your juice recipe, look for smaller varieties. These are known
to be more nutrient rich and provide a higher concentration of energizing benefits. Smaller tomatoes are
also more suitable for juice extraction since they are thicker and appear to hold more water.).
TIP: For best results, store common ingredients at the following temperatures
Apple: 5˚C (41°F), Tomato: 12-13˚C (54°F), Grape: 4-5˚C(39°F)
Orange: 1-5˚C (34-41°F), Carrot: 1-5˚C (34-41°F), Peach: 8-13˚C (46-55°F)
CARROT JUICE
Carrots are the king of the vegetable kingdom, which makes it easy to understand why they’re so
favored in all-natural juice recipes. They’re juicy, delicious, and highly nutritious, and its sweet taste
is always appreciated. Usually, carrots are extracted in combination with acidic fruits or vegetables.
Containing rich amounts of Vitamin A and renieratene, just two carrots a day can satisfy 400% of your
body’s daily Vitamin A requirements.
OPTIMUM 600M // 9
PREPARING ALL-NATURAL JUICES
1. It’s simple to clean organic carrots. Just wipe the root down with a mild detergent, then rinse with
clean, warm water.
2. Cut the carrot into long, slender slices, so it will easily fit into the device.
3. Slowly insert the sliced pieces into the inlet orifice, only adding one at a time. Return the extracted
juice into the device, to filter through the pulp a second time. This will reduce the amount of remains
left in the screen holder and produce a finer liquid product.
HEALTHY PRESCRIPTION
Carrots are rich in Vitamin A, which may prevent aging in the skin, improve eyesight, and strengthen
immunity. They also contain a considerable amount of dietary fiber, which can help with weight loss and
regulation. By drinking a cup of carrot juice each day, you may help strengthen your digestive system and
potentially reduce your risk for developing cancer.
SOYBEAN CURD
1. Soak 400g of dried soybeans in water for approximately 6 hours (in the sumer) or 10 hours (during
winter). This will become about 1kg, once it has expanded.
2. Place the soaked soybeans into a basin filled with 2000ml of water, then start the “corotation”
process. Simply feed the soybeans into the juicer by spooning them into the orifice one by one.
3. Cook the filtered soybean milk on medium temperature for approximately 10 minutes, or just as it
begins to boil. Turn o the heat and let the warmed milk rest, while you proceed with the next step.
4. Place a coagulator (ex. Bittern) in another basin with at least 3L of capacity.
5. Pour the boiled soybean milk into the basin holding the coagulator while it is still hot.
6. Stir the mixture 2-3 times, then let it rest for about 5 minutes to firm.
7. Line a frame with cheesecloth or fibered gauze, then pour the soybean milk into the mold.
Wrap the soybean milk with gauze, put on the frame cover, and press for 15 to 20 minutes
with a 1-2kg subject, the soybean curb is ready.
CLEANING & STORAGE
1. Turn the power button to the OFF position, then remove the power plug from the outlet.
Note: Only turn the device OFF after the squeezing cup is completely cleared of all ingredients.
2. When all functions have stopped, hold the juice nozzle, then twist the hopper assy toward the
opening of the device. Now, it is safe to proceed with disassembly. (Remember, always disassemble
the components of the device in the opposite sequence of assembly.)
Note: Promptly clean the juicer after each use. Delayed cleanings can result in dried ingredients
crusting to the components, making it dicult to disassemble or clean. This action may also result in
diminishing the device’s performance.
3. Clean the bowl, strainer, auger, hopper and pusher with a soft brush and neutral detergent. Dry all
components thoroughly.
4. Wipe the main base of the device with a dry, soft cloth.
Note: After extracting pigment rich ingredients such as carrot, spinach, etc., wipe the container
surface with oil, and then wash with neutral detergent.

10 // OPTIMUM 600M
TROUBLESHOOTING
1. The device is making noise.
Stop the device. When all components are still, carefully inspect the assembly of each part of the
juicer. If all parts are assembled correctly, confirm that all ingredients are properly sized, sliced, and
portioned. Do not overfill the device and do not juice ingredients with large seeds/stones.
2. The motor doesn’t work.
a. Make sure the power button is fully positioned to ON
b. Confirm that all components are properly assembled
c. Let the device rest for approximately 1 hour before resuming juicing
d. If the device abruptly stopped while running, please verify that it is not overfilled with ingredients
or that the motor has not overheated due to prolonged usage. In this event, you must allow the
motor to cool before resuming.
3. The machine suddenly stopped during operation.
If the device suddenly stops while juicing, return the power button to the OFF position. When all
components have ceased, switch the power button to the REV position, to begin reverse operation.
This should dislodge jammed ingredients from the juicing bowl, auger or strainer. When all
ingredients have shifted, return the power button to the ON position.
4. Authorized Repairs:
PROBLEM SOLUTION
The motor
suddenly
stopped while
the juicer was
running
• Check to ensure the plug is fully inserted in the outlet
• Verify that the device is not overloaded and that the motor has not
overheated. If the device has been in use for longer than 10 minutes, you
may need to allow the motor to cool before resuming.
• Try to adjust the power button to the OFF position, then switch the device
to REV. This should start reverse operation, which should dislodge any
jammed ingredients.
The device is
not producing
enough juice
• Dierent ingredients yield dierent amounts of moisture, which can
aect juice levels.
• The freshness of your ingredients can also impact moisture content. Stale
fruit and vegetables typicially yield minimal amounts of juice.
• Ingredients that have been refrigerated for extended periods should be
rehydrated in pure water before juicing.
• Blend ingredients with low fiber content (such as carrots) with fiber rich
ingredients (such as cabbage, celery, and pine needles). Alternate the
carrots after juicing the high fiber ingredient, to increase the level of juice
extracted.
• Verify that the pulp stopper is properly positioned, to secure all juice and
ingredients.
OPTIMUM 600M // 11
PRODUCT SPECIFICATIONS
1 Model MJ1000
2 Voltage 220 - 240V
3 Power 200W
4 Frequency 50/60Hz
5 Speed 40 - 46RPM
6 Noise 62 db
7 Product weight 3.56 kg
8 Product dimensions 34 x 17 x 36.5 cm (LxHxP)
Only for EU countries. Do not dispose of electric appliances together with household
waste material! In observance of European Directive 2002/96/EC on waste electrical
and electronic equipment and its implantation in accordance with national law, electric
appliances that have reached the end of their life must be collected separately and
returned to an environmentally compatible recycling facility.
PROBLEM SOLUTION
Imbalance in the
liquid to pulp
ratio of my juice
Please check whether the pulp stopper is assembled properly.
Juice is shooting
from the upper
component of
the main engine
When the pulp stopper is not properly assembled, juice will leak from the
device. Ensure proper sealing, to prevent this from happening.
TROUBLESHOOTING

12 // OPTIMUM 600M
WARRANTY TERMS & CONDITIONS (INTERNATIONAL)
This warranty as outlined below solely covers distributors of the Optimum range of products. Please
contact your distributor for full product warranty.
Eective as of 1st January 2014
1. Optimum® warranties this product against defects in materials and workmanship for a period of 1
year from the original date of purchase, when used in accordance with the accompanying instruction
manual.
2. Any warranties exceeding this standard period are oered as extended terms by the selling
distributor and claimable only though that provider.
3. Defects that occur within this manufacturer’s warranty period under normal use and care will be
repaired or replaced at our discretion only if the selling distributor is unable to do so. This is done
solely at our option with no charge for parts. This warranty does not extend to accessories included
or purchased separately. Replacements can be oered for major faults, as determined by your
distributor and at their own discretion.
4. In the event that the goods requiring repair are under warranty, and this distributor is unable to
provide the repairs; the customer is responsible for any freight charges to or from Optimum® (or their
approved service provider).
5. Whilst in transit, the goods are at the owner’s risk and any further damage during this transportation is
not covered under warranty.
6. Customers should ensure that the product being returned is properly packaged, so as to ensure that
no damage occurs to the product during transit. To be able to process the warranty claim, ensure
you have included an explanation of any problem. Optimum® will not fault-find and will only repair
described faults as covered under warranty.
7. This full warranty is void if this product has been subject to abuse, negligence, accident, alteration,
failure to follow operating instructions, or if the product has been exposed to abnormal or extreme
conditions.
8. Cosmetic changes that do not aect performance, such as discoloration of parts of the product in the
hands of the user or the eects of the use of abrasive cleaners will not be warranted or considered
defects. The cleaning or removal of food products along with any damage caused by allowing them
to build up is not covered by this full warranty.
9. This warranty does not cover normal wear and tear of the product or parts.
10. This warranty does not cover any defect caused by an accident, misuse, abuse, improper installation
or operation, lack of reasonable care, unauthorized medication, loss of parts, tampering or attempted
repair by a person not authorized by Optimum®.
11. The warranty will not apply if damage, malfunction or failure resulting from alterations, accident,
misuse, abuse, fire, liquid spillage, maladjustment of customer controls, use on an incorrect voltage,
power surges and dips, thunderstorm activity, acts of God, voltage supply problems, tampering or
unauthorized repairs by any persons, use of defective or incompatible accessories, exposure to
abnormally corrosive conditions or entry by any insect, vermin or foreign object in the product.
12. This warranty does not cover damage resulting from the use of an alternate power source (e.g. solar,
inverter, generator) and the use of these devices to power your appliance is not recommended.

OPTIMUM 600M // 13
13. You must keep your purchase receipt as proof of purchase and as proof of the date on which the
purchase was made. The purchase receipt must be presented when making a claim under this
warranty.
14. In the event the receipt of purchase is not presented, then this warranty is invalid. Consumer Law
allows us to request reasonable proof of purchase to service a warranty claim.
15. This warranty does not imply, intend to or detract from any consumer rights listed in and able to
be enforced from Regulated Consumer Law, any condition which is found to be in breach of the
consumer law, the single condition shall be void only and all other conditions remain in place.
CONTACT US
Please contact the distributor located in the country where you made your original purchase for all
Support, Servicing and Warranty.

Optimum 600 -Mini-Coldpress-Juicer-User-Manual-v6
Table of contents
Other Optimum Juicer manuals

Optimum
Optimum RKS-3015 User manual

Optimum
Optimum RK-0655 User manual

Optimum
Optimum RK-0012 User manual

Optimum
Optimum 700 ADVANCED User manual

Optimum
Optimum RK-0670 User manual

Optimum
Optimum H3000 User manual

Optimum
Optimum 600 User manual

Optimum
Optimum RK-0900 User manual

Optimum
Optimum H3000 User manual

Optimum
Optimum 600XL User manual

Optimum
Optimum RK-1220 User manual

Optimum
Optimum optima RK-0850 User manual

Optimum
Optimum RK-0660 User manual

Optimum
Optimum RK-0010 User manual

Optimum
Optimum RK-0650 User manual

Optimum
Optimum 600 User manual

Optimum
Optimum OPT 500 User manual

Optimum
Optimum RKS-2100 User manual

Optimum
Optimum RKS-2100 User manual

Optimum
Optimum RK-0610 "FRUTIA" User manual