manuals.online logo
Brands
  1. Home
  2. •
  3. Brands
  4. •
  5. ParaBody
  6. •
  7. Fitness Equipment
  8. •
  9. ParaBody Leg Press Factor 625 Installation guide

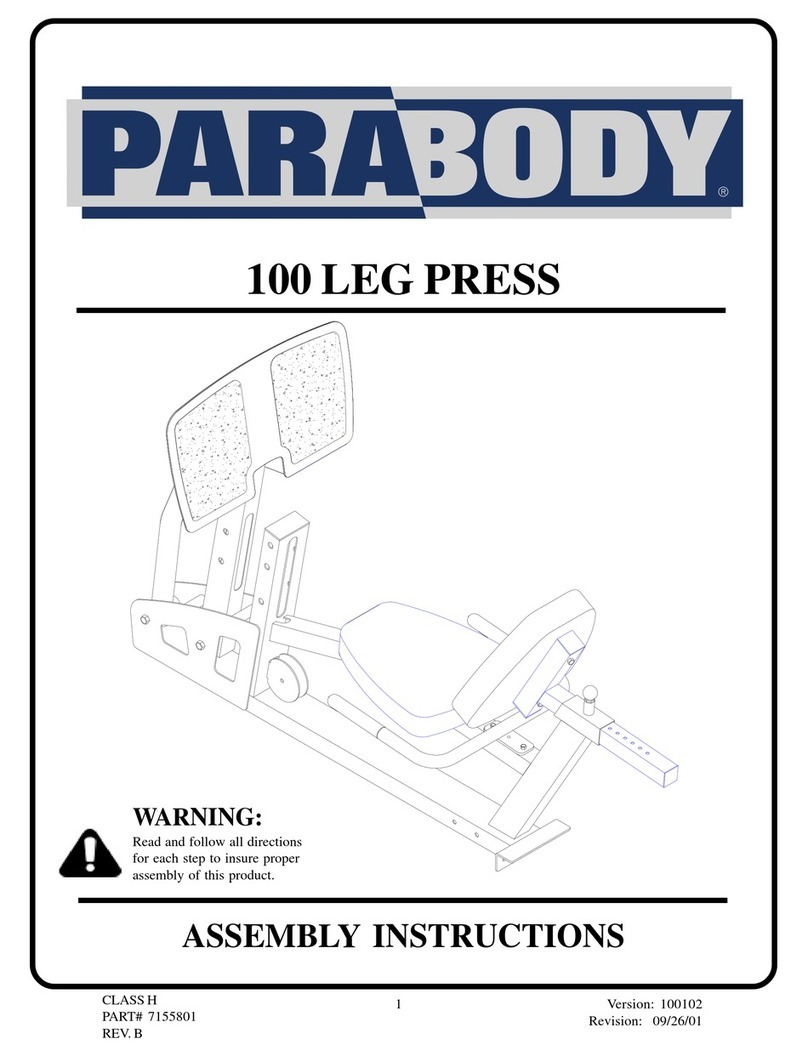
ParaBody Leg Press Factor 625 Installation guide

9/t~inchwrench ~odiustablewrench
inchwrench ¯ hammerorrubbermallet
inchwrench ¯ s~2allenwrench
¯ THEPARABODYFACTOR625BASEUNITMUSTBEASSEMBLEDONAFLAT,LEVELSURFACETOASSUREITSPROPERFUNC1
¯ PARABODYSTRONGLYRECOMMENDSTHATTHISPRODUCTBEASSEMBLEDBYTWOPERSONSTOAVOIDPOSSIBLEINJURY.
,, KEEPALLFRAMEBOLTCONNECTIONSLOOSEUNTILINSTRUCTEDINTHEASSEMBLYSTEPSEQUENCESTOSECURELYTIGHTi
MAKESURESNAPHOOKSAREFASTENEDBEFOREDOINGEXERCISES.
NOTE:Werecommendcleaningyourprodud(padsandtheframemembers
PoraBodyCustomerServiceRepresentativeat1-800-328-9714.
onaregularbasis,usingwormsoapywater.Also,touch-uppaintcanbepurchnsedfromyour
BOLTLENGTH
NOTE:Boltlengthismensuredfromtheundersideoftheheadofthebolt.
BOLTLENGTHRULER:
TTS/PARTS: OTY.
NAME/DESCRIPTION
~~(P~78-011 1
BackPod ~--~B0-01) 1
LegPressFrame ~PB3170-01) 1
TelescopingTubePlated~"-’~43-01) l
~~- -- (PB3047-01) 1
PivotAxle __ [PB3OBI-01) 1
(PB3236-01) l
LegPressCable17
’~
~634-01) 4
Non-SkidStrip4"x
countall partsbeforebeginningassembly.
’ARE: NAME/DESCRIPTION QTY.
-’Gr---’-~pII/4
"
xS" 2
~/4"xI"OiliteBushing -- I
~Compressi.___~onSpr~ l
Co~e~Pin l
P~unger
Spacer
Knob
~"SquareE.nd_Cop(I0-I4ga)~
WeightStockBumper
3/B"xllh
’’Bol~’t
-~e"Washer
~osher
~ Washer
~Pulley
3/~"x4~/~
"Bol~
1
l
l
5
7
2
2
4
1
3
Ifyouhaveinstalledasecondweightstack,goto
Figure5.
If youhavenotpurchasedthesecondweight
stack,pleasecamp]erethefolJowingstepsbefore
proceedingtoF~gure5.
1.Removetheblankshroudfromtherearofthe
Factor625.
2.Removetherotarycablefromtheunitand
alsotheassadatedshockcord.
3.LoadtheLegPressCableintothe
D-RinginthepositiontheRotaryCablewas
removedfrom.Removetheelasticshockcord
fromtheRotaryCableandattachtotheLeg
PressCableasshown(sameroutingofelastic
cordasonRotaryCable).
ELASTICSHOCKCORD
LEGPRESSCABLE
(PB3236-01)
-- D:RING
1.Attachtwo(2)4V2w/lClev;sPulleystothe t’~ ’--:~ ~ --~’-
BaseFrameandone{I)marelongcable
retainingclipwithexistinghardwareafter
removingone(1)41/2"w/2"ClevisPulley
previouslyinstalled.(SeeDetail"A").Route ~
cableasshown.Thepulleyattherightside(as~k~. LEGPRESSC.ABLE
youfacethebackoftheunit)hasLegPress FRO,~D-RING
cablefromD-ringroutedunderandbackupto
pulleyshowninFigure2.
PULLEY-2PL
LONG
R~AININGCUP-2PL
. PULL~-2 PL
SIDE VIEW
~tinuetorouteLegPresscableasshown.
,. ,~emavethebollusedtoholdthela~boom1o
~’hetubeantherearof"lheMainFrameand
~aihoneI1)4~.,~"w/l"ClevisPulleyand
one(1)cableretainingclipusingone(t)
~-~"x4(.’~’"boltandtheexisting34"Locknu~
and34"Washersupplied.Raulecableas
shown.Locme~ableretainingclip
approxim~etyasshown.
CA.BL~RETAININGCLIP
LEGPRESSCA,BLE
(PB3626-01)
,4: 2" w/1" CLL-VIS
PULLEY-2PL
.. Removetheboltusedtoholdthepulleyinthe
!mboom(pulleytorearofD-Ring}andattach
one(1)4!.~"w/l"ClevisPulleyandone(1)
cableretainingclipusingone(I) 3/if’x4V~"
Ba]tandexisting:ks"Lockwasher.
~"antinuetoroutethecabledawnandunder
eleftpulleyshowninFigure1.
iO~Positionbothcableretainingclipsasshown.
Makesurecabledoeshalruboncable
retainingclipsaftercableiscompletely
routed.
LEGPRESSCABLE’ !
(PB3236-01) L
LATBOOM
CABLERETAININGCLIP
D-RING
)TL SeePBF604OptionalShroudKitforoptional
shroud~sembly.
SecurelegpressShroudasshowninFigure4.
~GPRESSSHROUD
1.AHachtheLegPressFrametotheMainFrame
onlopusingtwo{2)l~"x41~"Bolts,
two(2)1/2"Washers,two(2)I/2"Lockwashers
andtwo(2)1,~,,nuts.
2.Attachfour(4)4"x17"Non-SkidStripstothe
angledfootpl~eontheLegPressFrameas
shown.
3.Installtwo(2)2"SquareEndCaps{10-14ga)
intotheangledtubesontheLegPressFrame
andtwo(2)2"SquareEndCaps
(10-14ga)intothebasetubesofthe
LegPressFrame.
4.Slideone(1)WeightStockCushionoverthe
PinStopofthebaseoftheLegPressFrame.
---~ V:’x4V2"BOLT-2 ~
b"2
~ WASHER- 2 PL
b~" LOCKWASHER- 2 PL
~,,’2"NUT- 2PL
2" SQ.ENDCAP- 2 PL
jNON-SKID,~" X 17"- 4 PL
WEIGHTSTACKCUSHION
2" SQ.ENDCAP-2~"~
1.AttachtheLegPressFrametotheMainFrame
allhebaseusingtwo(2)~’8"x41~"Bolts,
two(2}~"~kwasher~andtwo(2)
~hers.
~" LOCKWASHER- 2 PL
SPACER
".--~~blethespringpinassemblTtothe SPR~NG
~autumFrameusingone(1)knob,one(I) co~P~N
plunger,one(1)spring,one(1)spacer,and ~kUNG~
(1)co~e~pin,usingthefolJowingsteps:
~~sembletheknobtothep~ungsr
B.In~dtheplungerthroughthefi~housing
andthroughthefir~holeofthesecond
housing.
CSlip~eSpringandthespacerovertheend ~~
oftheplunger(inthatorder). ~os
D.Insedtheplungerthroughthesecondholeof G~~~"x5
~-2~k
thehousing.
EPulJbackthespacerontheplungerand
inse~theco~erpinthroughthehole.
E(See0etailB)
~Slide~(2}1~/4"x5"gripsoverthehandles
of~e~ndulumflame.(NOTE:If a~ubricantis
requred,rubbingalcoholthoroughlycoating
~ei~deofthegrip,~~eb~materialtou~). 2"SQ.END~P- 2PL
3.In~lJ~(2)2"SquareEndCaps(10-14
topendulumasshown.
SPRING~ PLUNGER
KNOB
C
7
If]
Fig
If’
1.
nser~theseatadjustmenttubeIntothefrontend
ofthePendulumflame.Pullbackthespringpin
a~mb/y,andadvancetheseatadjustmenttube
al1thewayin.(Makesuretabaithefrontendof
theseatadiustmenttubeisup.Seefigure]I).
2..Securelyfastenonefl) 3~,’x1]/4"Bobone(1) ~’~"~1,4BOLT
3/e"Lockwasher,andone(1}3,~,,Nutto~hehole s,,~-LOCKWASHE~
in~erearoftheseatadju~menttube,onthe W ~
unde~ideofthePendulumFramebe~eenthe
sbt.~SeeDetai~C}.
SLOT
3z~
~ LOCKWASHER
NOTE:
SLOTIS ONBOTTOM
OFPENDULUMFRAME
] Installt~a(2)~DFlangeBearingsIntoeach ""
endofthepivottubeonthelopofthePendulum
Frame.~isstepmaybepre-assembbd). 3,,~,, I.D. F~NGEB~R~,
2PL
PENDULUMFRAME
. _~.nchthePendulumFrametothelegpress
ebyslidingthepivotaxlethrnughthecol!ars
onthepivottabsofthelegpressflameand
throughthepivottubeatthetopofthependulum
flame.Threadtwo(2)sA6"xI/4"Ig.set
screwsintobothcollarsandtighten.{This~ep
maybepre-nssembled)
PENDULUMFRAME
5/16"x 1/4~LGSETSCR.~v’
-2 PL
PIVOTAXLE
LEGPRESSFI
1.Atlachthecableassemblytothetelescopingtubewith
theClevispinandwireclipsuppliedoncable.
LEGPRESSCABLE
(PB3236-01)
CLEVISPiN
TELESCOPINGTUBE
9
ockres~tubeonthePendulumFrameusingtwo(2).~/8"x11/~’~Bohs
’ two(2)~,~"Lockwashe~,
ana~o~2)~8’Washe~.
NOTE:HOL~IN ~EBACKOFTHES~TBACKPAD
AND~ES~TPAD.
2. Iflse~on~( ~) 2"~quare~ndcap( ~0-14g~;)in
thetopot~hebackre~tuoeandone(1)
squareendcopintheendofthependulumframe
under~hebackresttube.
2"SQ.ENDCAP- 2 PL 3/e"x11/,,-BOLT-- 2PL
3/e"LOCKWASHE~S_ 2 PL
3,,~WASHER.- 2 PL
lureFrame,uu,,gtwo{’2)3~x] i ,, " ....... ~-=
two " 8 74 Bolt~, "
f2) ~Lockwasher%andtwo121~"
Washers.
10
// /
SEATPLATES .SEATPAD PENDULUMFRAME 3/~x1~,,’~"BOLT- 2PL
~’e"LOCKWASHER_ 2 PL
3/e"WASHER- 2P.
~r
tenanylooseconnedionsatthistime.
FACTOR625shouldbeassembledas
11

This manual suits for next models

1

Other ParaBody Fitness Equipment manuals
ParaBody 441101 440 User manual

ParaBody

ParaBody 441101 440 User manual

ParaBody 824101 Mounting instructions

ParaBody

ParaBody 824101 Mounting instructions

ParaBody 838 User manual

ParaBody

ParaBody 838 User manual

ParaBody 705102 User manual

ParaBody

ParaBody 705102 User manual

ParaBody 807 BODYSYSTEM User manual

ParaBody

ParaBody 807 BODYSYSTEM User manual

ParaBody 880 User manual

ParaBody

ParaBody 880 User manual

ParaBody Serious Steel 359101 User manual

ParaBody

ParaBody Serious Steel 359101 User manual

ParaBody 874104 Mounting instructions

ParaBody

ParaBody 874104 Mounting instructions

ParaBody 888101 User manual

ParaBody

ParaBody 888101 User manual

ParaBody Serious Steel 877102 User manual

ParaBody

ParaBody Serious Steel 877102 User manual

ParaBody 858 Mounting instructions

ParaBody

ParaBody 858 Mounting instructions

ParaBody 854 Mounting instructions

ParaBody

ParaBody 854 Mounting instructions

ParaBody 827 Mounting instructions

ParaBody

ParaBody 827 Mounting instructions

ParaBody GS2 User manual

ParaBody

ParaBody GS2 User manual

ParaBody 821104 User manual

ParaBody

ParaBody 821104 User manual

ParaBody 861 Mounting instructions

ParaBody

ParaBody 861 Mounting instructions

ParaBody 375101 User manual

ParaBody

ParaBody 375101 User manual

ParaBody PBF 472 User manual

ParaBody

ParaBody PBF 472 User manual

ParaBody 914101 User manual

ParaBody

ParaBody 914101 User manual

ParaBody Serious Steel 835102 User manual

ParaBody

ParaBody Serious Steel 835102 User manual

ParaBody 824 User manual

ParaBody

ParaBody 824 User manual

ParaBody 777 User manual

ParaBody

ParaBody 777 User manual

ParaBody 827101 Mounting instructions

ParaBody

ParaBody 827101 Mounting instructions

ParaBody 801101 Mounting instructions

ParaBody

ParaBody 801101 Mounting instructions
Popular Fitness Equipment manuals by other brands

Thinkrider X7 owner's manual

Thinkrider

Thinkrider X7 owner's manual

Bowflex BodyTower owner's manual

Bowflex

Bowflex BodyTower owner's manual

Domyos VE 460 operating instructions

Domyos

Domyos VE 460 operating instructions

SPIETH Gymnastics Bern user manual

SPIETH Gymnastics

SPIETH Gymnastics Bern user manual

REP PR-5700 Assembly instructions

REP

REP PR-5700 Assembly instructions

BluMill KMS005M manual

BluMill

BluMill KMS005M manual

TOORX TRX 9000 EVO TFT instructions

TOORX

TOORX TRX 9000 EVO TFT instructions

Matrix G3-S75 owner's manual

Matrix

Matrix G3-S75 owner's manual

Hang ups Teeter Inversion Table owner's manual

Hang ups Teeter

Hang ups Teeter Inversion Table owner's manual

Kentro KTR-101 product manual

Kentro

Kentro KTR-101 product manual

DKN technology Studio 8000 manual

DKN technology

DKN technology Studio 8000 manual

TOORX BRXOffice Compact manual

TOORX

TOORX BRXOffice Compact manual

Nautilus F2SM owner's manual

Nautilus

Nautilus F2SM owner's manual

Body Craft SPR CT owner's manual

Body Craft

Body Craft SPR CT owner's manual

Concept2 BikeERG Assembly instructions

Concept2

Concept2 BikeERG Assembly instructions

Life Fitness Elevation Series Flexstrider Assembly instructions

Life Fitness

Life Fitness Elevation Series Flexstrider Assembly instructions

SCIFIT PRO2 Assembly manual

SCIFIT

SCIFIT PRO2 Assembly manual

Lifepro WAVER user manual
Lifepro

Lifepro WAVER user manual

manuals.online logo
manuals.online logoBrands
  • About & Mission
  • Contact us
  • Privacy Policy
  • Terms and Conditions

Copyright 2025 Manuals.Online. All Rights Reserved.