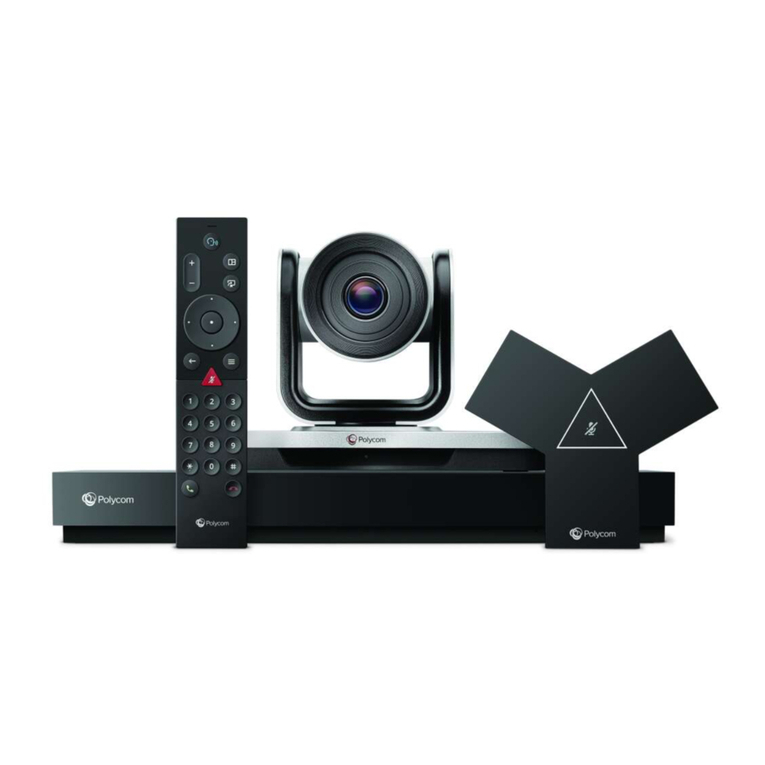
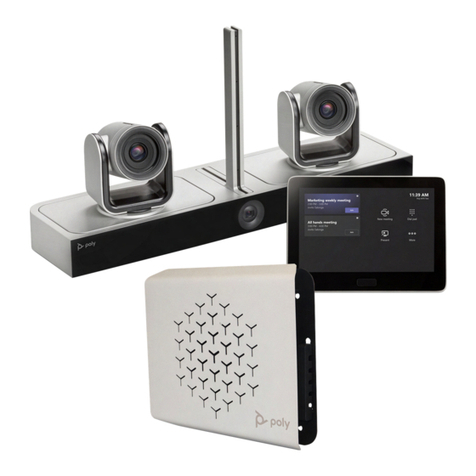
Poly Polycom RealPresence Group Series User manual

USER GUIDE 6.2.2 | June 2020 | 3725-63715-013A
Polycom RealPresence Group Series
Getting Help
For more information about installing, configuring, and
administering Poly/Polycom products or services, go to
Polycom Support.
Plantronics, Inc. (Poly — formerly Plantronics and Polycom)
345 Encinal Street
Santa Cruz, California
95060
© 2020 Plantronics, Inc. All rights reserved. Poly, the propeller
design, and the Poly logo are trademarks of Plantronics, Inc.
All other trademarks are the property of their respective
owners.

Contents
Before You Begin................................................................................................4
Related Poly and Partner Resources..................................................................................4
Getting Started with Polycom RealPresence Group Series........................... 5
RealPresence Group System Power.................................................................................. 5
Power On the System.............................................................................................. 5
System Health Check...............................................................................................6
Power Off a RealPresence Group System...............................................................6
Using a Polycom RealPresence Group Series Remote Control.................... 7
Remote Control Buttons and Descriptions.......................................................................... 8
Recharge the Remote Control Battery................................................................................ 9
Wake the System................................................................................................................ 9
Contacts............................................................................................................ 10
Contact Presence States.................................................................................................. 10
Browse the Directory.........................................................................................................10
Search for Directory Contacts........................................................................................... 11
Calling............................................................................................................... 12
Call by Entering a Name or Number................................................................................. 12
Call Frequently Used Numbers......................................................................................... 13
Call from the Contacts Screen.......................................................................................... 13
Call from the Recent Calls List..........................................................................................14
Call a Speed Dial ............................................................................................................. 14
Place an Audio-only Call................................................................................................... 14
Answer a Call.................................................................................................................... 14
Accept a Call during a Call................................................................................................15
Ignore a Call......................................................................................................................15
Hold a Call.........................................................................................................................15
Hold a Call and Place a Call............................................................................................. 15
Switch Between Point-to-Point Calls.................................................................................16
Resume a Call...................................................................................................................16
End a Call..........................................................................................................................16
Conference Calls...............................................................................................................16
Place a Conference Call.........................................................................................16
1

Place a Call during a Conference Call................................................................... 17
Answer a Call during a Conference Call................................................................ 17
Switch Between Calls in a Conference Call........................................................... 17
Resume a Held Call in a Conference Call..............................................................17
Hang Up an Individual Call in a Conference Call................................................... 17
Hang Up a Held Call and Accept a Call................................................................. 18
Hang Up All Calls................................................................................................... 18
Passwords for Conference Calls.......................................................................................18
Set Up a Meeting Password...................................................................................18
Enter a Meeting Password..................................................................................... 19
Joining Meetings from the Calendar with the Remote Control..........................................19
View Scheduled Meetings...................................................................................... 19
Join a Scheduled Meeting from the Home Screen.................................................19
Join a Scheduled Meeting from the Calendar........................................................ 19
Sharing Content............................................................................................... 20
Content Connections on RealPresence Group Systems.................................................. 21
Share Content from an HDMI or VGA Source........................................................22
Supported Content Resolutions and Refresh Rates......................................................... 22
Polycom People+Content IP............................................................................................. 22
Download and Install Polycom People+Content Technology................................. 23
Share Content using People+Content IP............................................................... 23
Stop Sharing Content with People+Content IP...................................................... 23
Managing Content from Microsoft Clients......................................................................... 23
Scroll and Zoom Skype for Business Content........................................................24
Control Skype for Business Content...................................................................... 24
Return Control of Skype for Business Content.......................................................24
Recording Calls................................................................................................ 25
RealPresence Media Suite Recording Methods............................................................... 25
RealPresence Media Suite Connection Methods...................................................26
Recording Calls with RealPresence Media Suite using Touch Tones.................... 26
Recording Calls with RealPresence Media Suite using Onscreen Controls.......... 28
Record Calls on a DVD or DVR........................................................................................ 28
Record Calls with a Laptop or Tablet................................................................................ 29
Settings............................................................................................................. 30
Video Adjustments............................................................................................................ 30
Switch Between Full-Screen Video and the Home Screen.................................... 30
Configure Automatic Self View Control.................................................................. 30
Contents
2

Adjust for Room Lighting........................................................................................ 30
Stop Video..............................................................................................................31
Start Video..............................................................................................................31
Turn Self View On.................................................................................................. 31
Turn Self View Off...................................................................................................31
Allow Video Display on the Web.............................................................................32
Multipoint Viewing Modes.......................................................................................32
Multipoint Viewing Layouts.....................................................................................32
Audio Adjustments............................................................................................................ 33
Adjust the Volume.................................................................................................. 33
Mute the Microphone..............................................................................................33
Unmute the Microphone......................................................................................... 34
Connecting a USB Headset................................................................................... 34
Cameras............................................................................................................................35
Select Cameras......................................................................................................35
Adjust Cameras......................................................................................................35
Switch Between Cameras...................................................................................... 35
Allow the Far-End System to Control Your Camera............................................... 35
Pin an Active Speaker............................................................................................ 36
Enable Camera Tracking During a Call..................................................................36
Disable Camera Tracking in a Call.........................................................................36
Camera Presets in Single Camera Mode...............................................................37
Call Answering Settings.................................................................................................... 38
Temporarily Refuse Calls....................................................................................... 38
Enable Answering Video Calls Automatically.........................................................38
Mute Automatically Answered Video Calls.............................................................38
Encryption and Security.................................................................................................... 39
Verify Encryption Check Code................................................................................39
Change the Call Security Level.............................................................................. 40
Contents
3

Before You Begin
Topics:
▪Related Poly and Partner Resources
This guide is for users who want to perform basic to intermediate tasks on the Polycom® RealPresence®
Group Series system.
Please read the RealPresence Group Series documentation before you operate the system. The
following related documents for RealPresence Group Series systems are available at Polycom Support:
▪ Setup sheets—includes steps on setting up the system and connecting peripherals
▪ Release notes—lists new features, any system limitations, and additional product information
▪ Regulatory Notices—describes safety and legal considerations for using the system
Polycom recommends that you record the serial number and option key of your RealPresence Group
Series system here for future reference. The serial number for the system is printed on the unit.
System Serial Number: ____________________________________________
Option Key: ____________________________________________________
Related Poly and Partner Resources
See the following sites for information related to this product.
▪ The Poly Online Support Center is the entry point to online product, service, and solution support
information including Video Tutorials, Documents & Software, Knowledge Base, Community
Discussions, Poly University, and additional services.
▪ The Polycom Document Library provides support documentation for active products, services, and
solutions. The documentation displays in responsive HTML5 format so that you can easily access
and view installation, configuration, or administration content from any online device.
▪ The Polycom Community provides access to the latest developer and support information. Create
an account to access Poly support personnel and participate in developer and support forums. You
can find the latest information on hardware, software, and partner solutions topics, share ideas, and
solve problems with your colleagues.
▪ The Polycom Partner Network are industry leaders who natively integrate the Poly standards-based
RealPresence Platform with their customers’ current UC infrastructures, making it easy for you to
communicate face-to-face with the applications and devices you use every day.
▪ The Polycom Collaboration Services help your business succeed and get the most out of your
investment through the benefits of collaboration.
4

Getting Started with Polycom
RealPresence Group Series
Topics:
▪RealPresence Group System Power
This user guide is intended for beginner users, as well as intermediate and advanced users who want to
learn about video conferencing and the Polycom® RealPresence® Group Series system.
For detailed information on the available systems and bundles, as well as the most recent feature
descriptions, refer to the Polycom RealPresence Group Series Release Notes available at
support.polycom.com.
Note: Your system administrator can configure RealPresence Group Series systems and RealPresence
Touch devices to show only those options used in your organization. Therefore, this guide might
cover options that you cannot access on your system. Check with your system administrator to
find out more about the options set for your system.
RealPresence Group System Power
RealPresence Group Series systems have a power proximity sensor instead of a physical power button.
Instead of pressing an actual button that moves to power on the system, you can touch the proximity
sensor , or touch near it, on the front of the system.
Power On the System
Before powering on your system, make sure you connect any essential wired devices or accessories to
the system first. After you have connected the related equipment, power on the system.
Procedure
»Do one of the following:
▪ On RealPresence Group 300, 310, 500, and 700 systems, touch and hold the power
sensor on the front of the system. Because the power sensor is touch sensitive, you can
place your finger on or close to the sensor.
▪ Press and hold on the remote control.
When the system is powered on successfully, the LED on the front panel turns blue and the
Polycom splash screen displays.
5

System Health Check
After the system is powered on, the system automatically performs a system health check, which is
known as a power on self test (POST).
The status of the POST sequence is shown using the LED indicator light on the front of the device, or in
the text field display on the front of the system. For more information about what the colors of the
indicator lights mean, contact your administrator.
All test results are logged in the system memory. When the test sequence completes with no severe
errors, the system starts normally.
Power Off a RealPresence Group System
Before changing any connected accessories, you need to power off the RealPresence Group system.
Procedure
»Do one of the following:
▪ Touch and hold the power sensor on the front of the system.
▪ Press and hold on the remote control.
The indicator light changes color and blinks when the system is shutting down.
Getting Started with Polycom RealPresence Group Series
6

Using a Polycom RealPresence Group
Series Remote Control
Topics:
▪Remote Control Buttons and Descriptions
▪Recharge the Remote Control Battery
▪Wake the System
The infrared RealPresence Group Series remote control enables you to operate a RealPresence Group
Series system. This includes placing calls, adjusting the volume, controlling the camera, navigating
screens, and more. RealPresence Group Series systems and Polycom® EagleEye™ cameras and camera
systems have infrared receivers that enable you to control the system by pointing the remote control
toward the system or a connected EagleEye camera or camera system.
Note: If you have an SDI camera, you might need a special cable to connect the camera to the system
to receive infrared signals from the remote control. For more information about the cable, contact
Polycom support.
7

Remote Control Buttons and Descriptions
The following table shows the parts of the remote control and includes descriptions for each part.
Remote Control Button Descriptions Parts of the Remote Control
Number Description
1 LED IR emitter
2 Decrease speaker volume.
3 Increase speaker volume.
4 Zoom camera out.
5 Zoom camera in.
6 Press center Select button to select highlighted
menu item.
7 Navigate through menu items using the Up,
Down, Left, and Right buttons; pan/tilt the
camera.
8 Delete letters or numbers or go back to a
previous screen.
9 Display the Menu screen.
10 Return to the Home screen.
11 Place or answer a call or power on the system.
12 End and reject a call or power off the system.
13 Enter letters or numbers.
14 In camera control mode, move the camera to a
stored preset or press and hold a number to
store a preset.
15 Generates an asterisk if the cursor is in a text
field or a period if the cursor is in a numeric
field.
16 Generates dual-tone multi-frequency (DTMF)
touch tones. Press #, followed by DTMF keys
to send.
17 Mute or unmute a microphone.
Using a Polycom RealPresence Group Series Remote Control
8

Recharge the Remote Control Battery
When the remote control battery power is at 10% or less, a notification displays on the RealPresence
Group system Home screen.
You can charge the remote control battery using the system's USB port or any other device with a USB
port. The RealPresence Group 300, 310, and 500 systems have two USB 2.0 ports on the back of each
system, while the RealPresence Group 700 system has one USB 2.0 port on the front of the system and
two USB 3.0 ports on the back of the system.
Procedure
1. Pull the battery out of the end of the remote control.
2. Insert the USB plug of the battery into a USB 2.0 port on your system.
3. Wait until the status light on the battery turns green before removing it from the port.
Recharging the battery can take from 20 minutes up to multiple hours.
4. Insert the charged battery into the remote control.
Figure 1: Recharge the Battery: RealPresence Group 300, 310, 500 and 700 Systems
Wake the System
After a certain amount of time with no activity, the RealPresence Group Series system goes into sleep
mode.
Procedure
»Press any button on the remote control or just pick up the remote.
Using a Polycom RealPresence Group Series Remote Control
9

Contacts
Topics:
▪Contact Presence States
▪Browse the Directory
▪Search for Directory Contacts
The directory on your system stores contact information that you can use to quickly call contacts. Any
contacts that you add to the directory are accessible to everyone at your site who uses the system. Users
at other sites cannot access the contacts on your system.
When a contact is listed in the directory of your system, the system displays the name on the screen
when receiving an incoming call. If a contact that is not listed in the directory calls, the dialing information
for that contact displays, and you can choose to save the information in the directory when the call ends.
Your system supports up to 2,000 contacts, or an unlimited number of contacts when the system is
registered with Microsoft Lync Server 2013 or Skype for Business Server 2015. If your system is
registered with one of the supported Microsoft servers, you can search the directory, view a list of
contacts, view contact presence states, and call contacts from the directory.
For more information about this and other Microsoft and Polycom interoperability considerations, refer to
the Polycom Unified Communications for Microsoft Environments Deployment Guide.
Contact Presence States
If your system is automatically provisioned and registered to a global directory server, your directory can
include default LDAP group members and up to 200 global contacts stored by the presence service.
Polycom systems registered to Microsoft Lync 2013 or Skype for Business Server 2015 in an integrated
environment use the following colors to indicate presence states.
Color Presence
Green Available
Red Busy or Do Not Disturb
Black Offline or Unknown
Yellow Away
Browse the Directory
If your system is registered with a Global Directory Server, you can search for information about other
active sites that are registered with the same Global Directory Server.
The global directory contains address book entries downloaded from an enabled global directory server.
You can select the global directory to view a list of all global directory entries, scroll through the global
10

directory, and select contacts in the global directory to call. Global directory entries are stored on the
Global Directory Server, and you cannot edit the entries from the room system. The global directory also
displays as a default Favorites group entitled Global Entry.
Procedure
1. On your remote control, press , then select .
2. Scroll through the directory entries to locate the desired contact.
Search for Directory Contacts
You can perform a directory search to find contacts to call who are not in your Favorites or Contacts list.
Procedure
1. With your remote control, press , then select .
2. In the search field, enter your contact's last name using one of the following methods:
▪ Enter your contact's name using the onscreen keyboard.
▪ Enter the numbers on the remote control that correspond with the letters of your contact's
name.
3. Select Search to search for an entry in the directory.
Contacts
11

Calling
Topics:
▪Call by Entering a Name or Number
▪Call Frequently Used Numbers
▪Call from the Contacts Screen
▪Call from the Recent Calls List
▪Call a Speed Dial
▪Place an Audio-only Call
▪Answer a Call
•Accept a Call during a Call
▪Ignore a Call
▪Hold a Call
▪Hold a Call and Place a Call
▪Switch Between Point-to-Point Calls
▪Resume a Call
▪End a Call
▪Conference Calls
▪Passwords for Conference Calls
▪Joining Meetings from the Calendar with the Remote Control
There are several ways to initiate calls on the system. You can place a call by entering your contact’s
name or number, choosing a contact in the directory, or calling a speed dial or recent contact.
You can perform all of the functions that are available when making audio, video, or conference calls.
Call by Entering a Name or Number
You can place a call to contacts by entering a contact's name or number using a touch device or the
remote control.
Another way you can enter a contact's information is to use an USB keyboard attached to one of the
system's USB ports. When a USB keyboard is connected to the system, you can enter only numbers with
the remote control on the Keypad or Contacts screens. To enter letters, you need to unplug the keyboard
from the USB port and use the onscreen keyboard.
Note: The onscreen keyboard icon does not display on screen if a USB keyboard is connected to the
system. After you unplug the USB keyboard, the Keyboard icon displays.
Depending on your system’s capabilities and the ones you’re calling, the dialing information you enter
could be similar to one of the following examples:
12

▪ IPv4 address: 192.0.2.0
▪ Host name: room.company.com
▪ SIP address: [email protected]
▪ H.323 or SIP extension: 2555
▪ ISDN or phone number: 9782992285
Procedure
1. Press on the remote control.
2. In the dialing field, enter your contact's information using the remote or onscreen keypad or select
the onscreen keyboard to enter your contact's information.
3. Enter any additional information needed for the call.
The available settings depend on the type of call and your system's configuration.
4. Press to place the call.
Call Frequently Used Numbers
You can select a number to call from the Frequently Used list, which include the list of most frequently
used incoming and outgoing calls.
Procedure
1. From the Home screen, select Place a Call.
2. Do one of the following:
▪ Select a contact from the Frequently Used list.
▪ Using the keypad, enter your contact name or number in the search box and select your
contact in the search results.
Call from the Contacts Screen
If your system administrator has added a directory and contacts, you can view your favorites and search
for contacts registered to the same Global Directory Server.
Procedure
1. Using your remote control, select and navigate to on your system screen.
2. Highlight an entry in the Contacts list, and press .
Calling
13

Call from the Recent Calls List
You can choose a number to call from the Recent Calls list, which includes the most recent incoming and
outgoing calls.
Procedure
1. Using the remote control, press and select .
2. Highlight the entry you want to call.
3. Press .
Call a Speed Dial
Your administrator can save a list of contacts as speed dials, which enables you to quickly call and start a
meeting with a contact.
Procedure
1. At the top of the Home screen, select the Speed Dial tab and select a Speed Dial entry.
2. Select Call or press .
Place an Audio-only Call
If enabled by your system administrator, you can place an audio-only call from the system.
Procedure
1. From the Home screen, select Place a Call.
2. From the Place a Call screen Keypad, use the remote to navigate to the video/audio slider.
3. Press the Select button to switch from video to audio .
4. Enter a telephone number then press on the remote.
Answer a Call
The way a RealPresence Group Series handles incoming calls depends on how the system is set up. The
system either answers the call automatically, rejects the call automatically, or prompts you to answer the
call manually.
If the system is not set up to answer incoming calls automatically, you are prompted to answer the call
manually.
Procedure
»Using your remote control, select Answer or press .
Calling
14

Accept a Call during a Call
When you receive an incoming call during a call, you can choose to place the current call on hold or hang
up the current call and answer the incoming call.
Procedure
»Do one of the following:
• Select Hold + Accept.
• Select Hang Up + Accept.
Ignore a Call
If the Polycom RealPresence Group Series system does not answer incoming calls automatically, you can
choose to ignore the call rather than answer it.
Procedure
»Using your remote control, select Ignore or press .
Hold a Call
In a point-to-point call, you can place a call on hold, and then answer an incoming call, make an outgoing
call, or switch between two calls.
Procedure
»Press Home on the remote control, then select Active Call > Hold.
When a call is on hold, On hold displays on the screen for 5 seconds. After 5 seconds, the hold
icon displays and remains on the screen until all calls are resumed or disconnected.
Hold a Call and Place a Call
You can place your current call on hold and place a call to another contact.
Procedure
1. Press on the remote control.
2. Place the call using your preferred method.
Calling
15

Switch Between Point-to-Point Calls
When you have a call on hold, you can switch between the held and active calls.
Procedure
1. Press Home.
2. Select Manage > Switch To.
Resume a Call
When you no longer want to keep a call on hold, you can resume the held call.
Procedure
»Use your remote control to select Resume Call.
End a Call
When your call is complete, hang up the call.
Procedure
»On the remote control, press .
Conference Calls
Conference, or multipoint, calls involve at least three different endpoints or sites. All endpoints or sites
can participate in conference calls when using a bridge, such as the RealPresence® Collaboration Server
800s, to host the conference call. The number of sites allowed in the call is determined by the capabilities
of the bridge hosting the call. Check with your system administrator to find out how many sites are
allowed in a bridged conference call.
Place a Conference Call
To start a new conference call, you need to start with the first participant or site and then add additional
participants and sites.
Procedure
1. Call the first site.
2. After the call connects, press on the remote control to open the dialing keypad.
3. Place a call to the next site.
4. Repeat the above steps until all sites are connected.
Calling
16

Place a Call during a Conference Call
You can hold a call and place a new call in a video conference.
Procedure
1. Press and then on the remote control.
2. Place the call using your preferred method.
Answer a Call during a Conference Call
While in a conference call, you can hold the conference call and answer an incoming call.
Procedure
»Use your remote control to select Hold + Accept to hold the current call and answer the incoming
call.
Note: Depending on the call type, you can resume the conference while an individual participant
in the meeting is on hold.
Switch Between Calls in a Conference Call
When you have a call on hold, you can switch between the held and active calls.
Procedure
1. Use your remote control to press .
2. Choose the call you want to make active.
Resume a Held Call in a Conference Call
When there is a call on hold, you can resume the held call.
Procedure
1. Press .
2. Select Resume Call.
Hang Up an Individual Call in a Conference Call
During a conference call, you can hang up an individual call within the conference call.
Procedure
1. Using your remote control, press .
2. Navigate to the call you want to end.
3. Select Hang Up.
Calling
17

Hang Up a Held Call and Accept a Call
Depending on how your system is set up, you can end the call that was on hold the longest and add an
incoming call to the conference.
Procedure
»Select Hang Up + Accept.
The oldest held call is ended and the incoming call is added to the conference.
Hang Up All Calls
When you are in a conference call, you can hang up one call at a time or hang up all calls at once.
Procedure
1. Press .
2. Select Leave Conference.
Passwords for Conference Calls
Depending on how a conference call is set up, you might be required to enter a meeting password to join
the call. You can also require far-end systems to enter a meeting password to prevent unauthorized
participants from joining conference calls hosted by your system.
Keep the following points in mind regarding meeting passwords:
▪ Audio-only endpoints are unable to participate in password-protected calls.
▪ Microsoft Office Communicator clients are unable to join password-protected conference calls.
▪ SIP endpoints are unable to dial in to password-protected conference calls.
Set Up a Meeting Password
You can set up a meeting password to ensure only authorized participants can join the meeting.
Procedure
1. From the Home screen, press .
2. Navigate to Settings > User Settings > Meetings.
3. Enter a password in the Meeting Password field in one of these ways:
▪ Press the remote control number buttons.
▪ Use the on-screen keypad.
4. Press to save your changes and return to the Home screen.
Calling
18

Enter a Meeting Password
If a conference call is password protected, you might be prompted to enter a meeting password before
you can join the call.
Procedure
1. If a prompt displays on the screen, use the remote control or on-screen keypad to enter the
password.
2. If you hear an audio prompt, use the remote control to generate DTMF tones. Press the # key on
your remote control, then use the number keys to enter numbers.
Joining Meetings from the Calendar with the Remote
Control
The system can connect to the Microsoft Exchange Server 2013 and retrieve calendar information
associated with a Microsoft Outlook or Microsoft Office 365 account. When the system is connected to the
Exchange Server, you can join scheduled meetings from the calendar and initiate Lync 2013 or Skype for
Business 2015 conference calls.
View Scheduled Meetings
If your RealPresence Group Series is configured to connect to the Microsoft Exchange Server, you can
view scheduled meetings on the Home screen.
To view more information about a meeting on the calendar, select the meeting. Depending on how the
system is configured, private meeting details might not be visible.
Procedure
»In the local interface, access the Home screen.
Scheduled meetings are listed for the current day and for the next 6 days.
Join a Scheduled Meeting from the Home Screen
If the calendar is configured to display on the Home screen, you can select and join a scheduled meeting
from the Home screen.
Procedure
1. Using the remote control, select a meeting on the Home screen.
2. Select Join.
Join a Scheduled Meeting from the Calendar
You can join a scheduled meeting from the calendar.
Procedure
1. On the remote control, press .
2. Select Calendar.
3. Navigate to the meeting you want to join, and select Join.
Calling
19
Table of contents
Other Poly Conference System manuals
Popular Conference System manuals by other brands

T-Comfort
T-Comfort Comfort Pro S Mounting and commissioning manual

Polycom
Polycom QSX 3725-22370-001/B Administrator's guide

Crestron
Crestron UC-2 quick start guide

Grandstream Networks
Grandstream Networks GVC3212 Quick installation guide

Cisco
Cisco TelePresence SX20 reference guide

Shure
Shure DDS 5900 user manual